G DATA Security Awareness Trainings
Create learners
This section explains how you can add users afterward for self-managed learning plans.
1 |
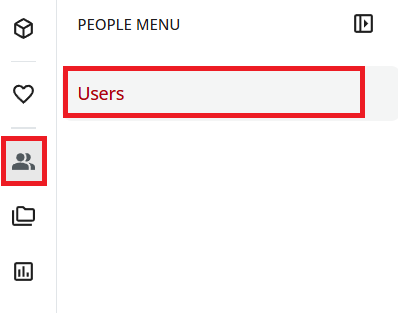
Open user management: In the menu on the left, select the person icon and select Users. |
|
2 |
On the left, select your main branch or the branch in which the user is to be created. |
|
3 |
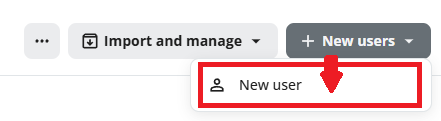
In the upper-right corner, click the New users icon and select New user. |
|
4 |
Complete the fields in the form. You can have a password generated automatically for the user. To do this, first click in the field and then click Automatic generation. |
|
5 |
Enable the toggle Prompt users to change their password after the first login. At the first login, the learner is prompted to create their own password. An expiration date does not need to be set. |
|
6 |
In the lower-right corner, click Next. |
|
7 |
In the next window, verify that the user is being created in the correct branch (if not, select the desired branch) and click Next in the lower-right corner. |
|
8 |
No settings need to be configured in the next step. Click Next in the lower-right corner. |
|
9 |
No settings need to be configured in the next step. Click Next in the lower-right corner. |
|
10 |
In the final step, you can review your entries. Then click Create user in the lower-right corner. |
|
The user will now receive their login credentials.