G DATA 365 | Mail Protection
Create connectors and a rule
This article describes how to create an outbound connector and an inbound connector and use a rule to route your email traffic via G DATA 365 | Mail Protection.
The required steps can be performed either via Exchange PowerShell commands or via the Microsoft Exchange Admin Center interface:
Extend Windows PowerShell for connecting to Microsoft 365 (Exchange Online PowerShell)
1. |
Open PowerShell. Enter the following command to install the Exchange Management module: Respond to the prompts with J. |
2. |
Start the connection with the following command: Replace the user MaxMustermann@x-company.cloud with your user account. Show screenshot.
|
3. |
A sign-in window opens. Enter your password here. Show screenshot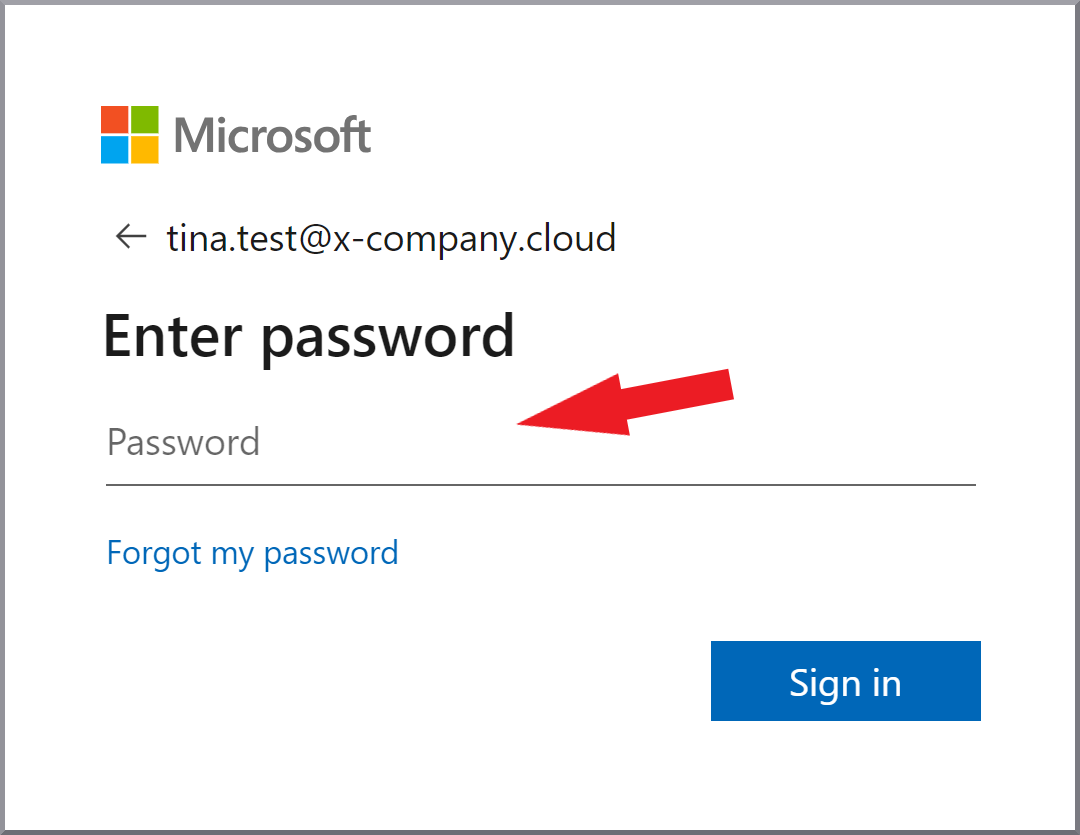
|
4. |
Continue with the section |
Create connectors and a rule using Exchange Online PowerShell
1. |
Open Exchange PowerShell and sign in to Office 365.
(Support for this is available in the section |
||
2. |
Create a new outbound connector with the following command: |
||
3. |
Create a rule with the following command: Replace the domains x-company.cloud and x-company.onmicrosoft.com with your domain names. |
||
4. |
Create a new inbound connector with the following command:
|
Create connectors and a rule via the Microsoft Exchange Admin Center
1. |
Open Exchange Admin Center and sign in. |
||
2. |
Select Mail flow and Connectors. Click Weiter. Show screenshot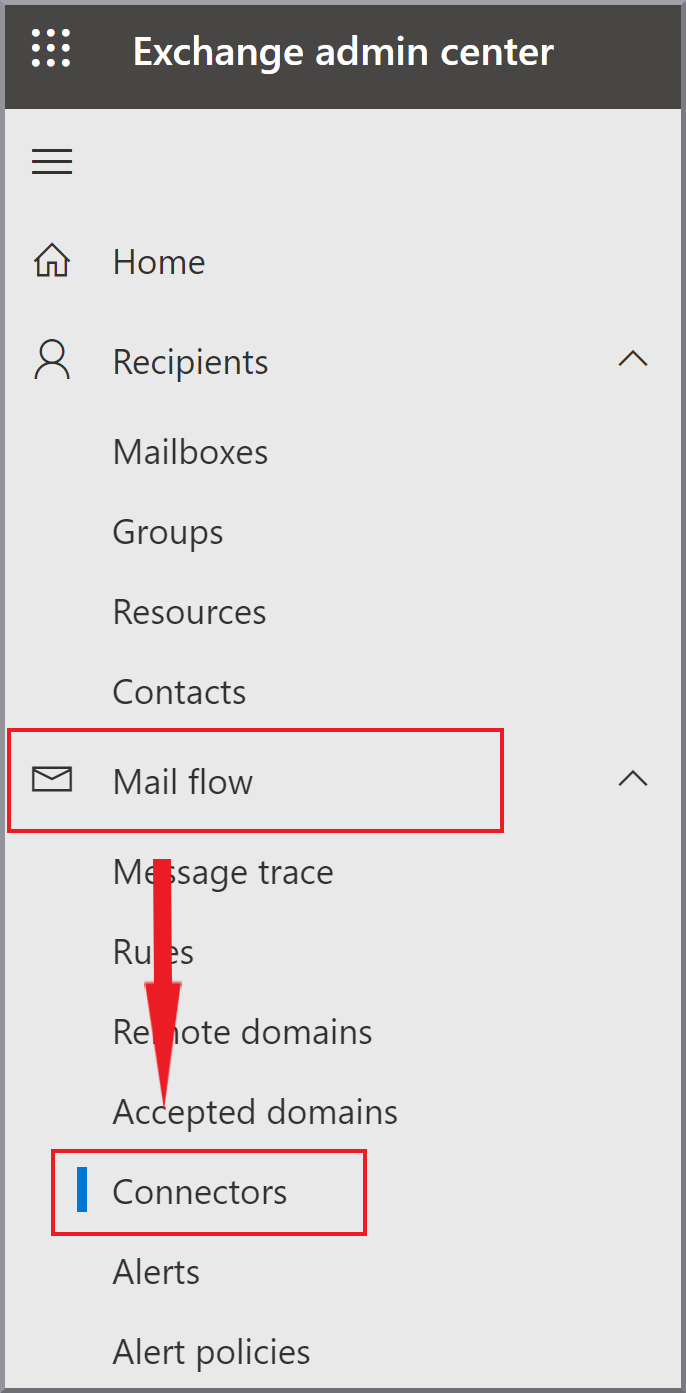
|
||
3. |
Click |
||
4. |
Select:
Click Weiter. Show screenshot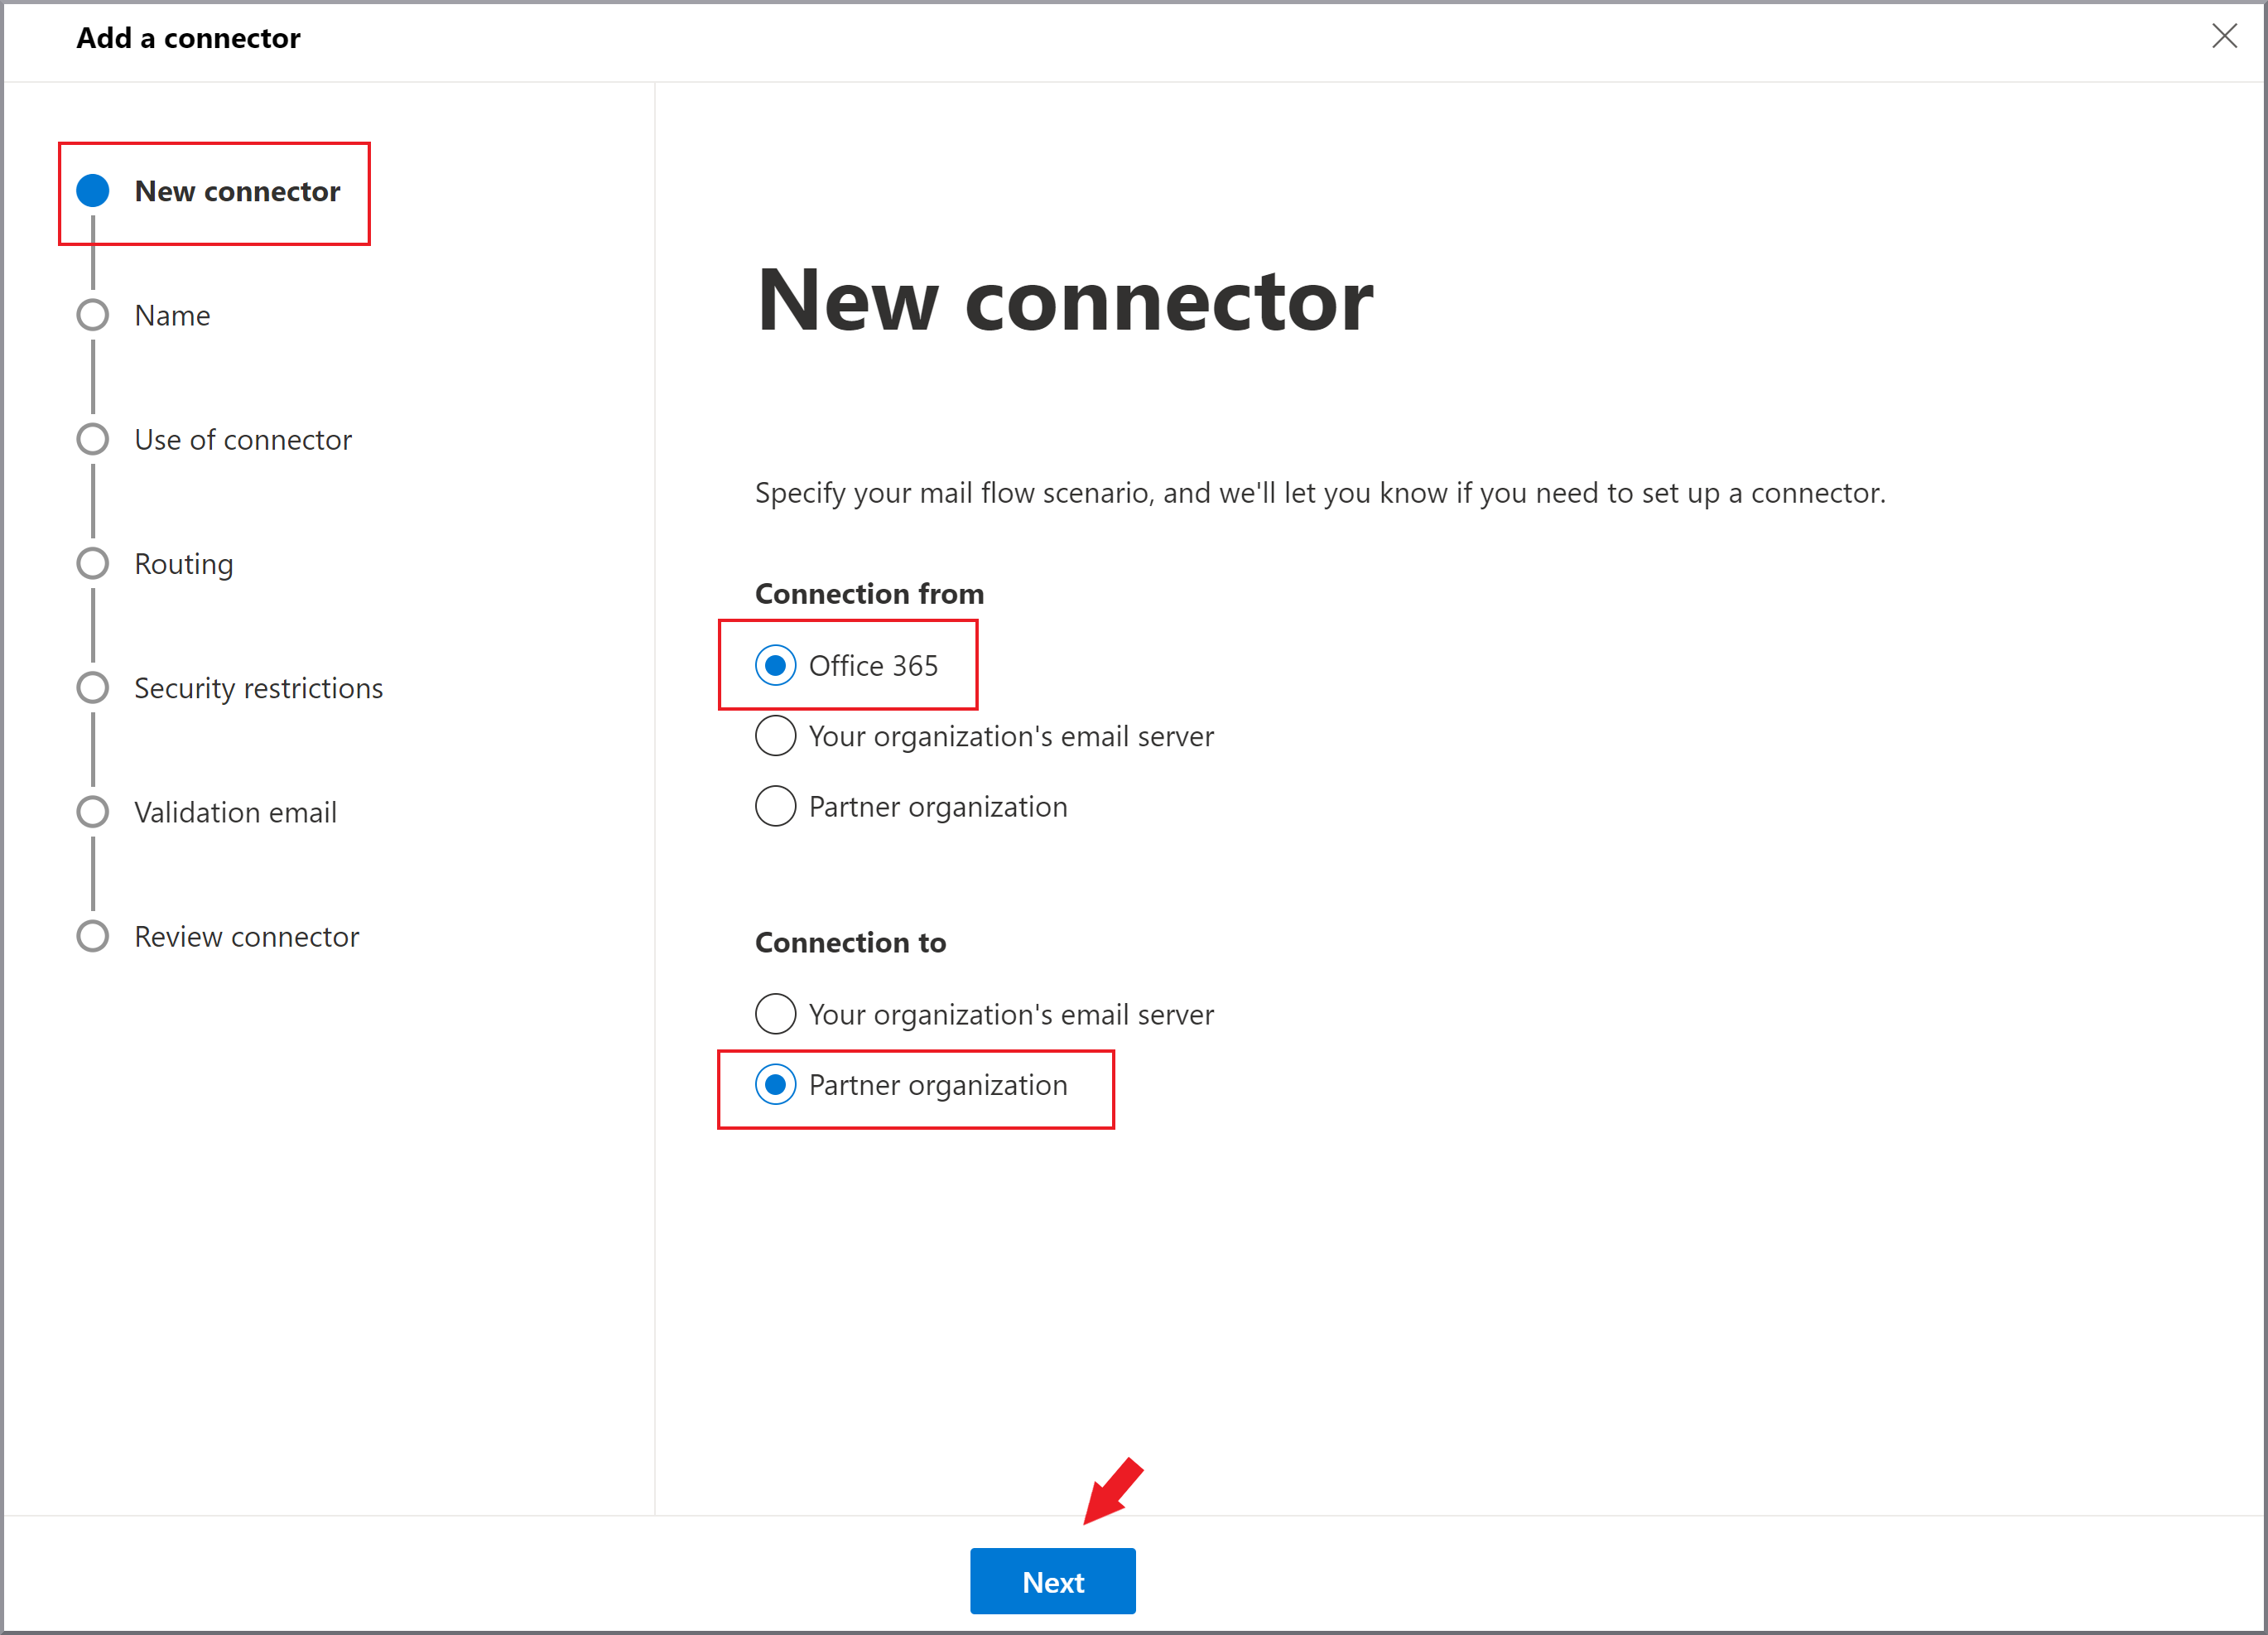
|
||
5. |
Enter the name G DATA 365 Mail Protection and, optionally, a description. Select the Aktivieren checkbox. Click Weiter. Show screenshot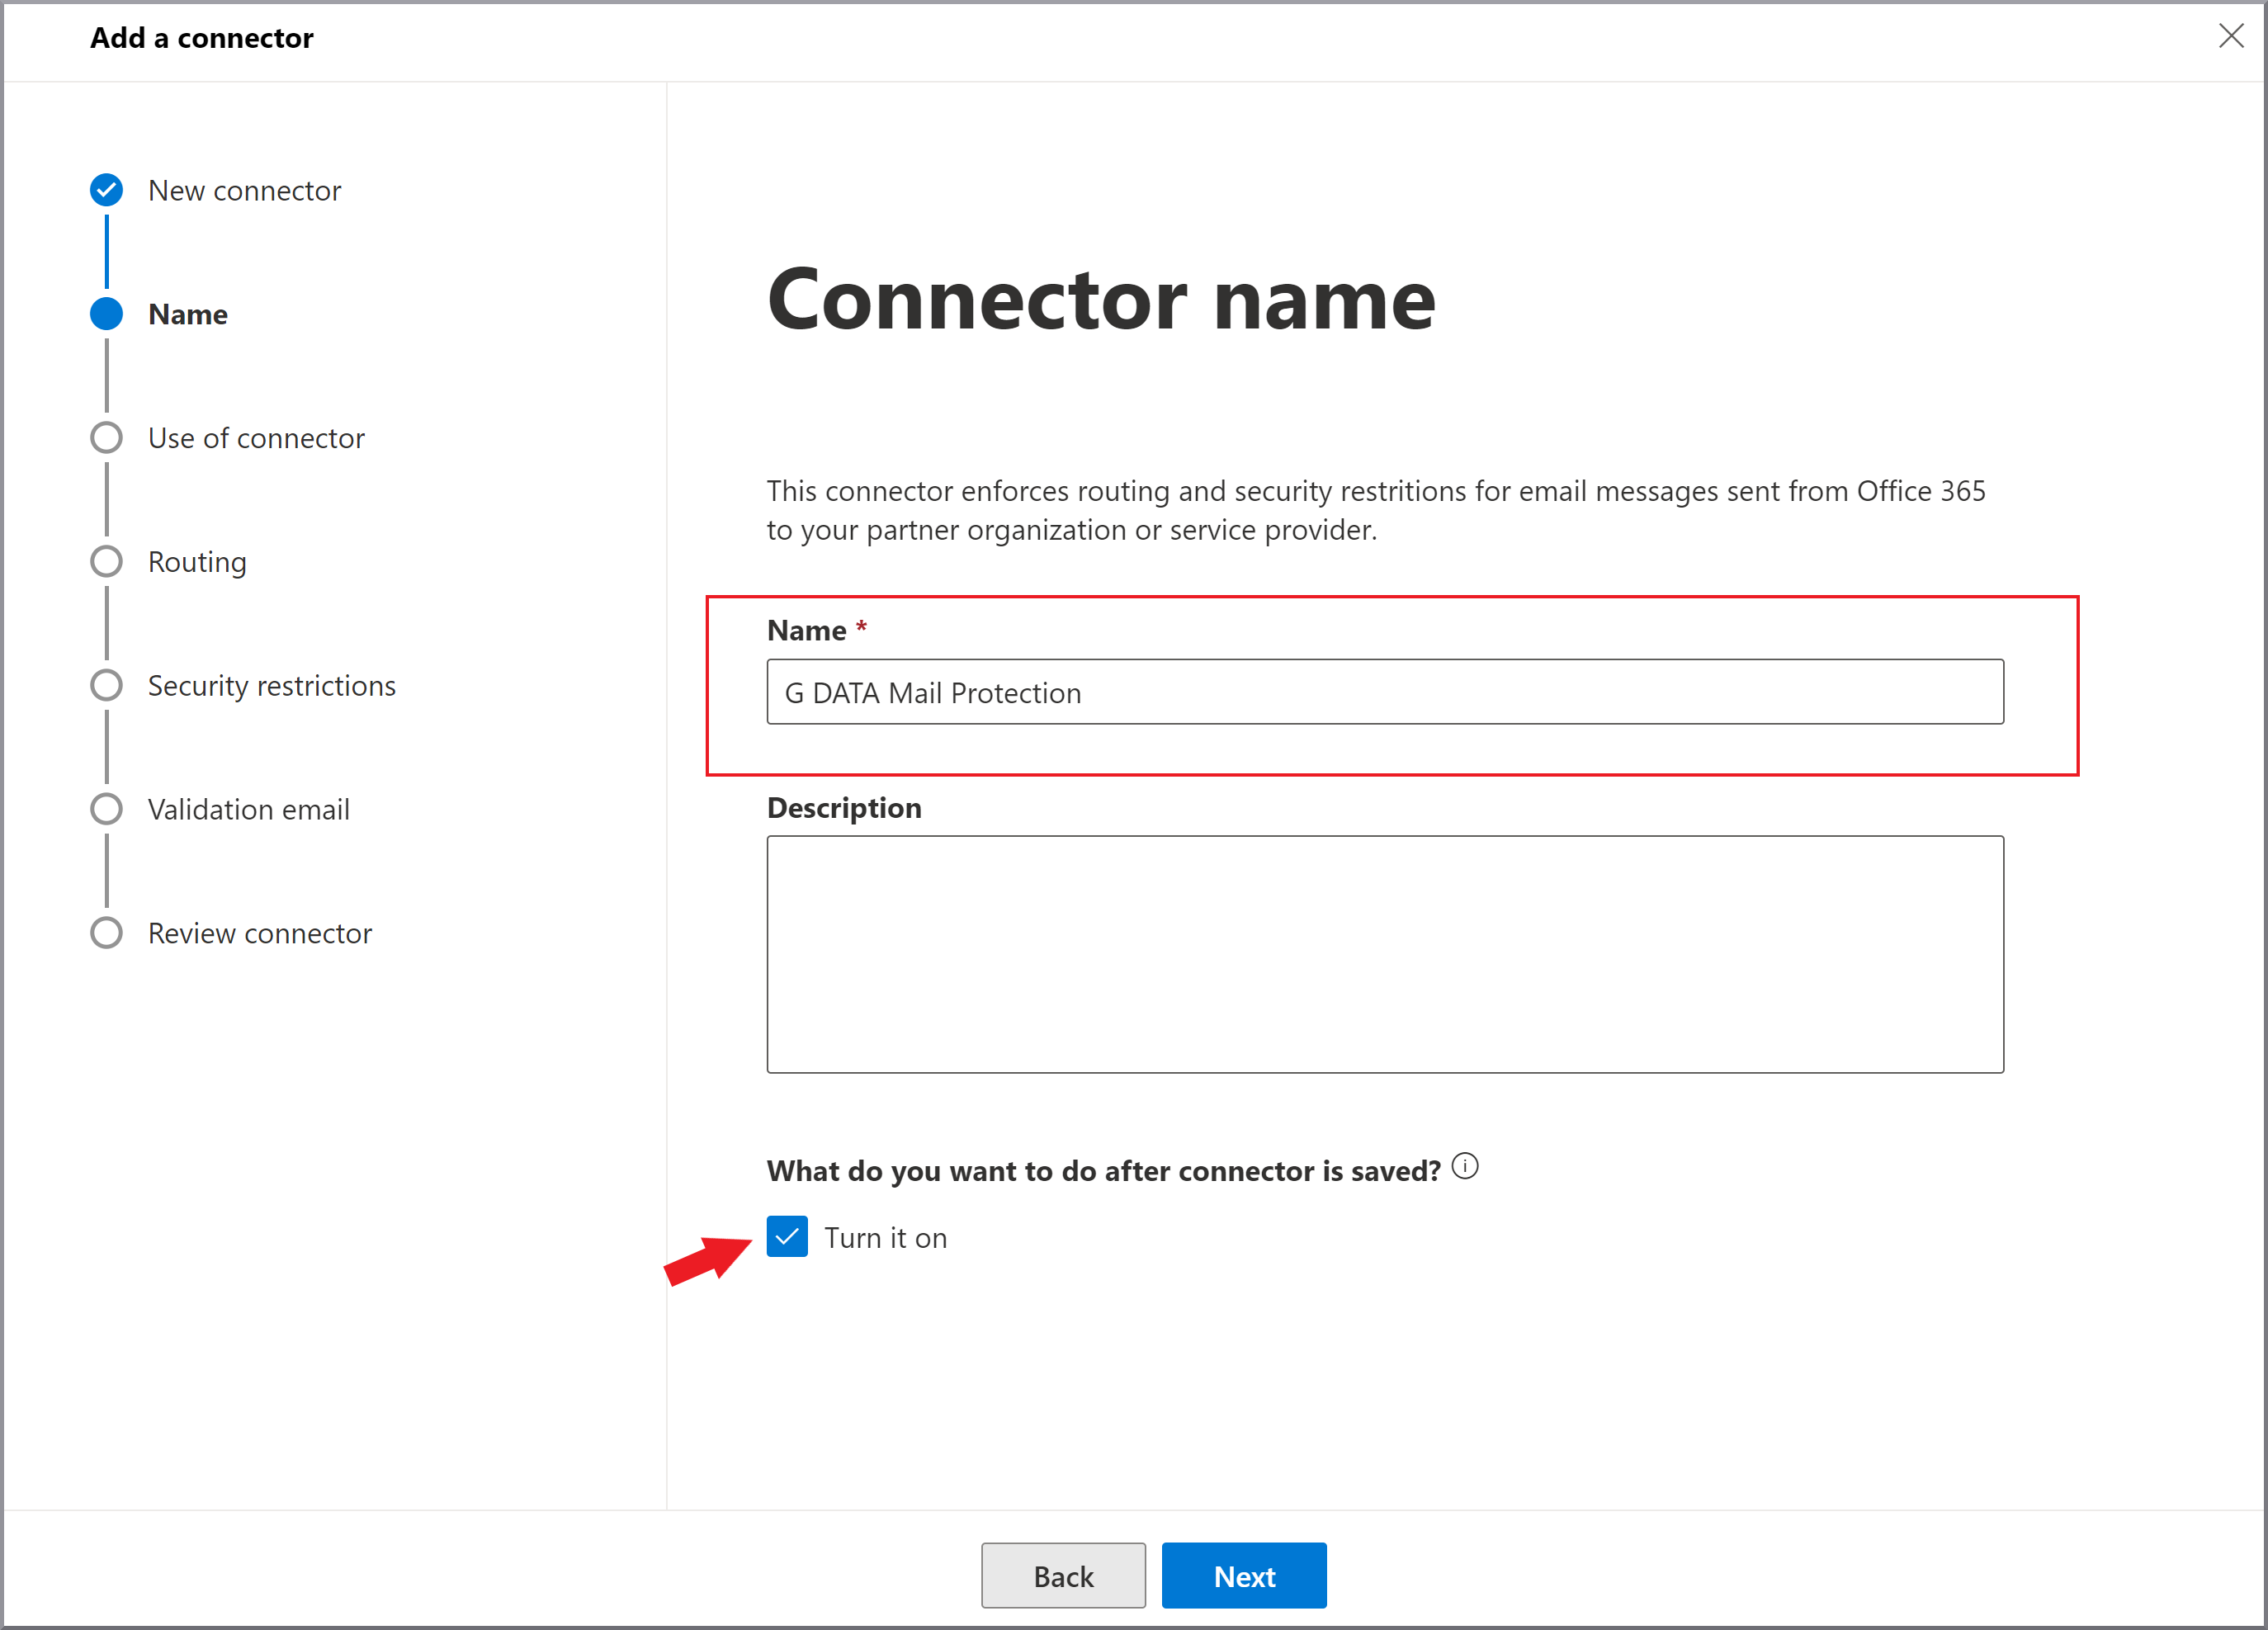
|
||
6. |
Select: Nur, wenn ich eine Transportregel eingerichtet habe, die Nachrichten an diesen Connector umleitet. Click Weiter. Show screenshot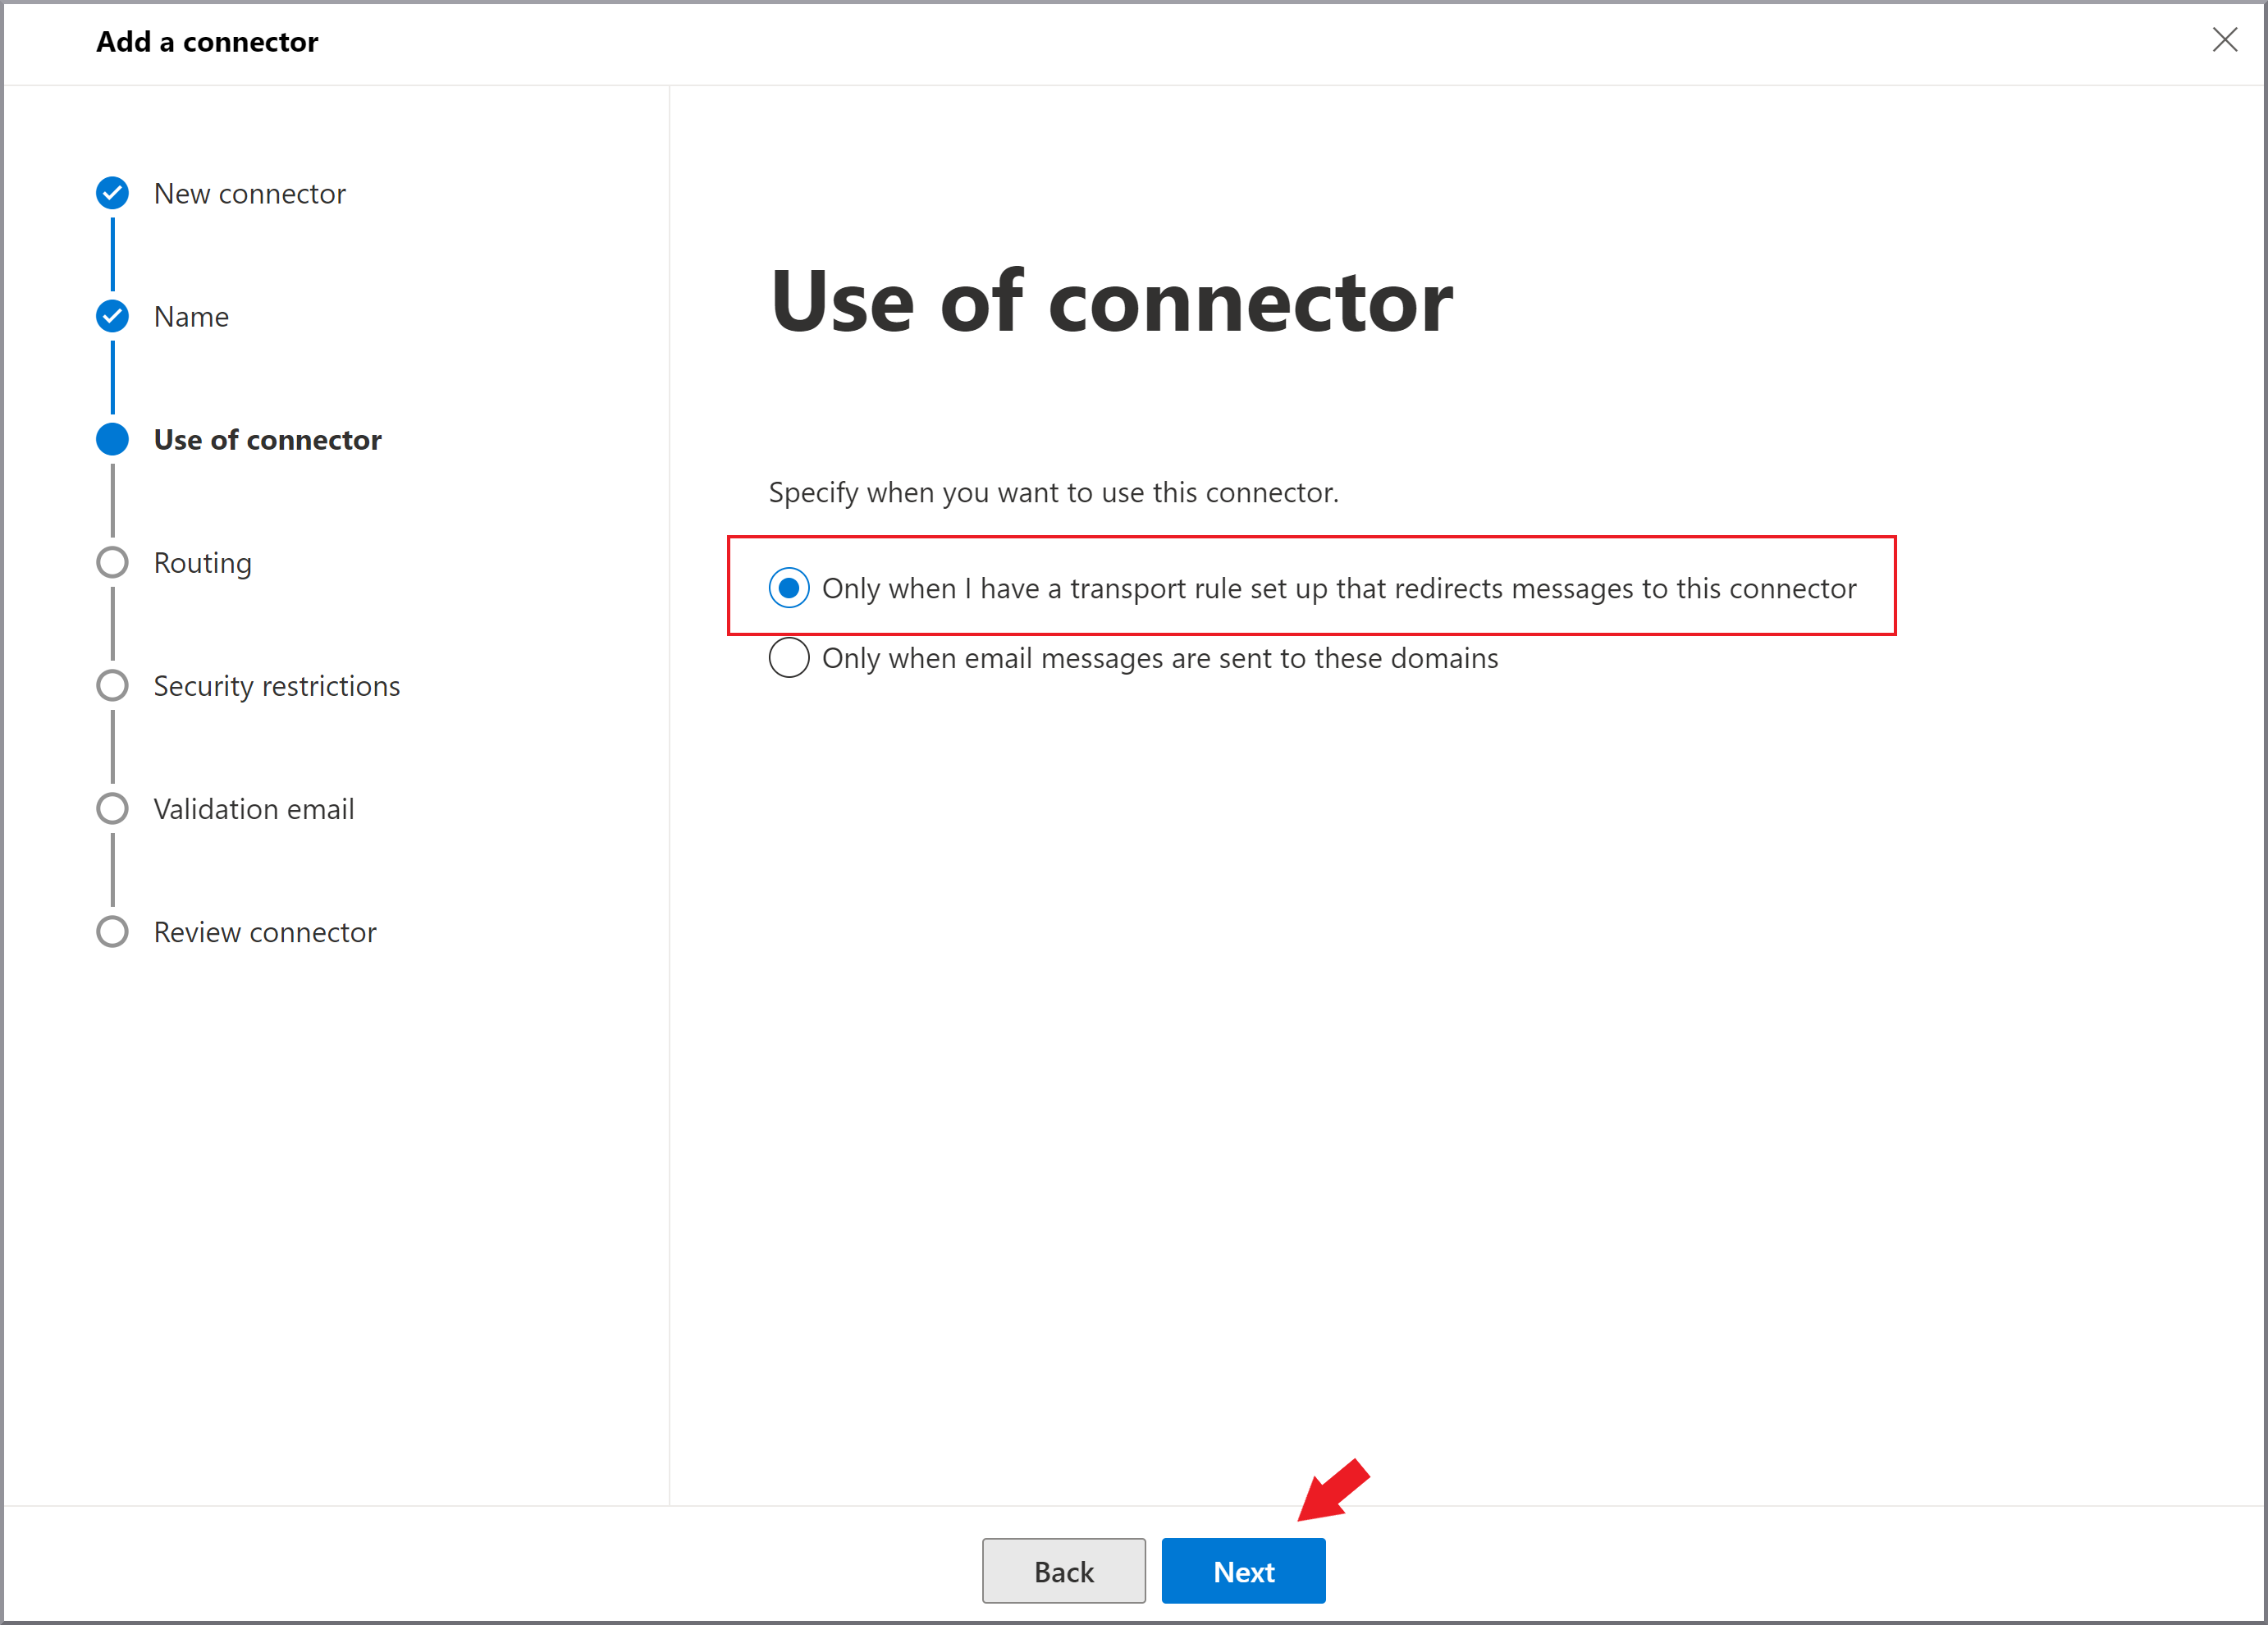
|
||
7. |
Select: E-Mails über diese Smarthosts weiterleiten and enter mailprotection.gdata.de as the smart host. Add it to the smart host list via +. Click Weiter. Show screenshot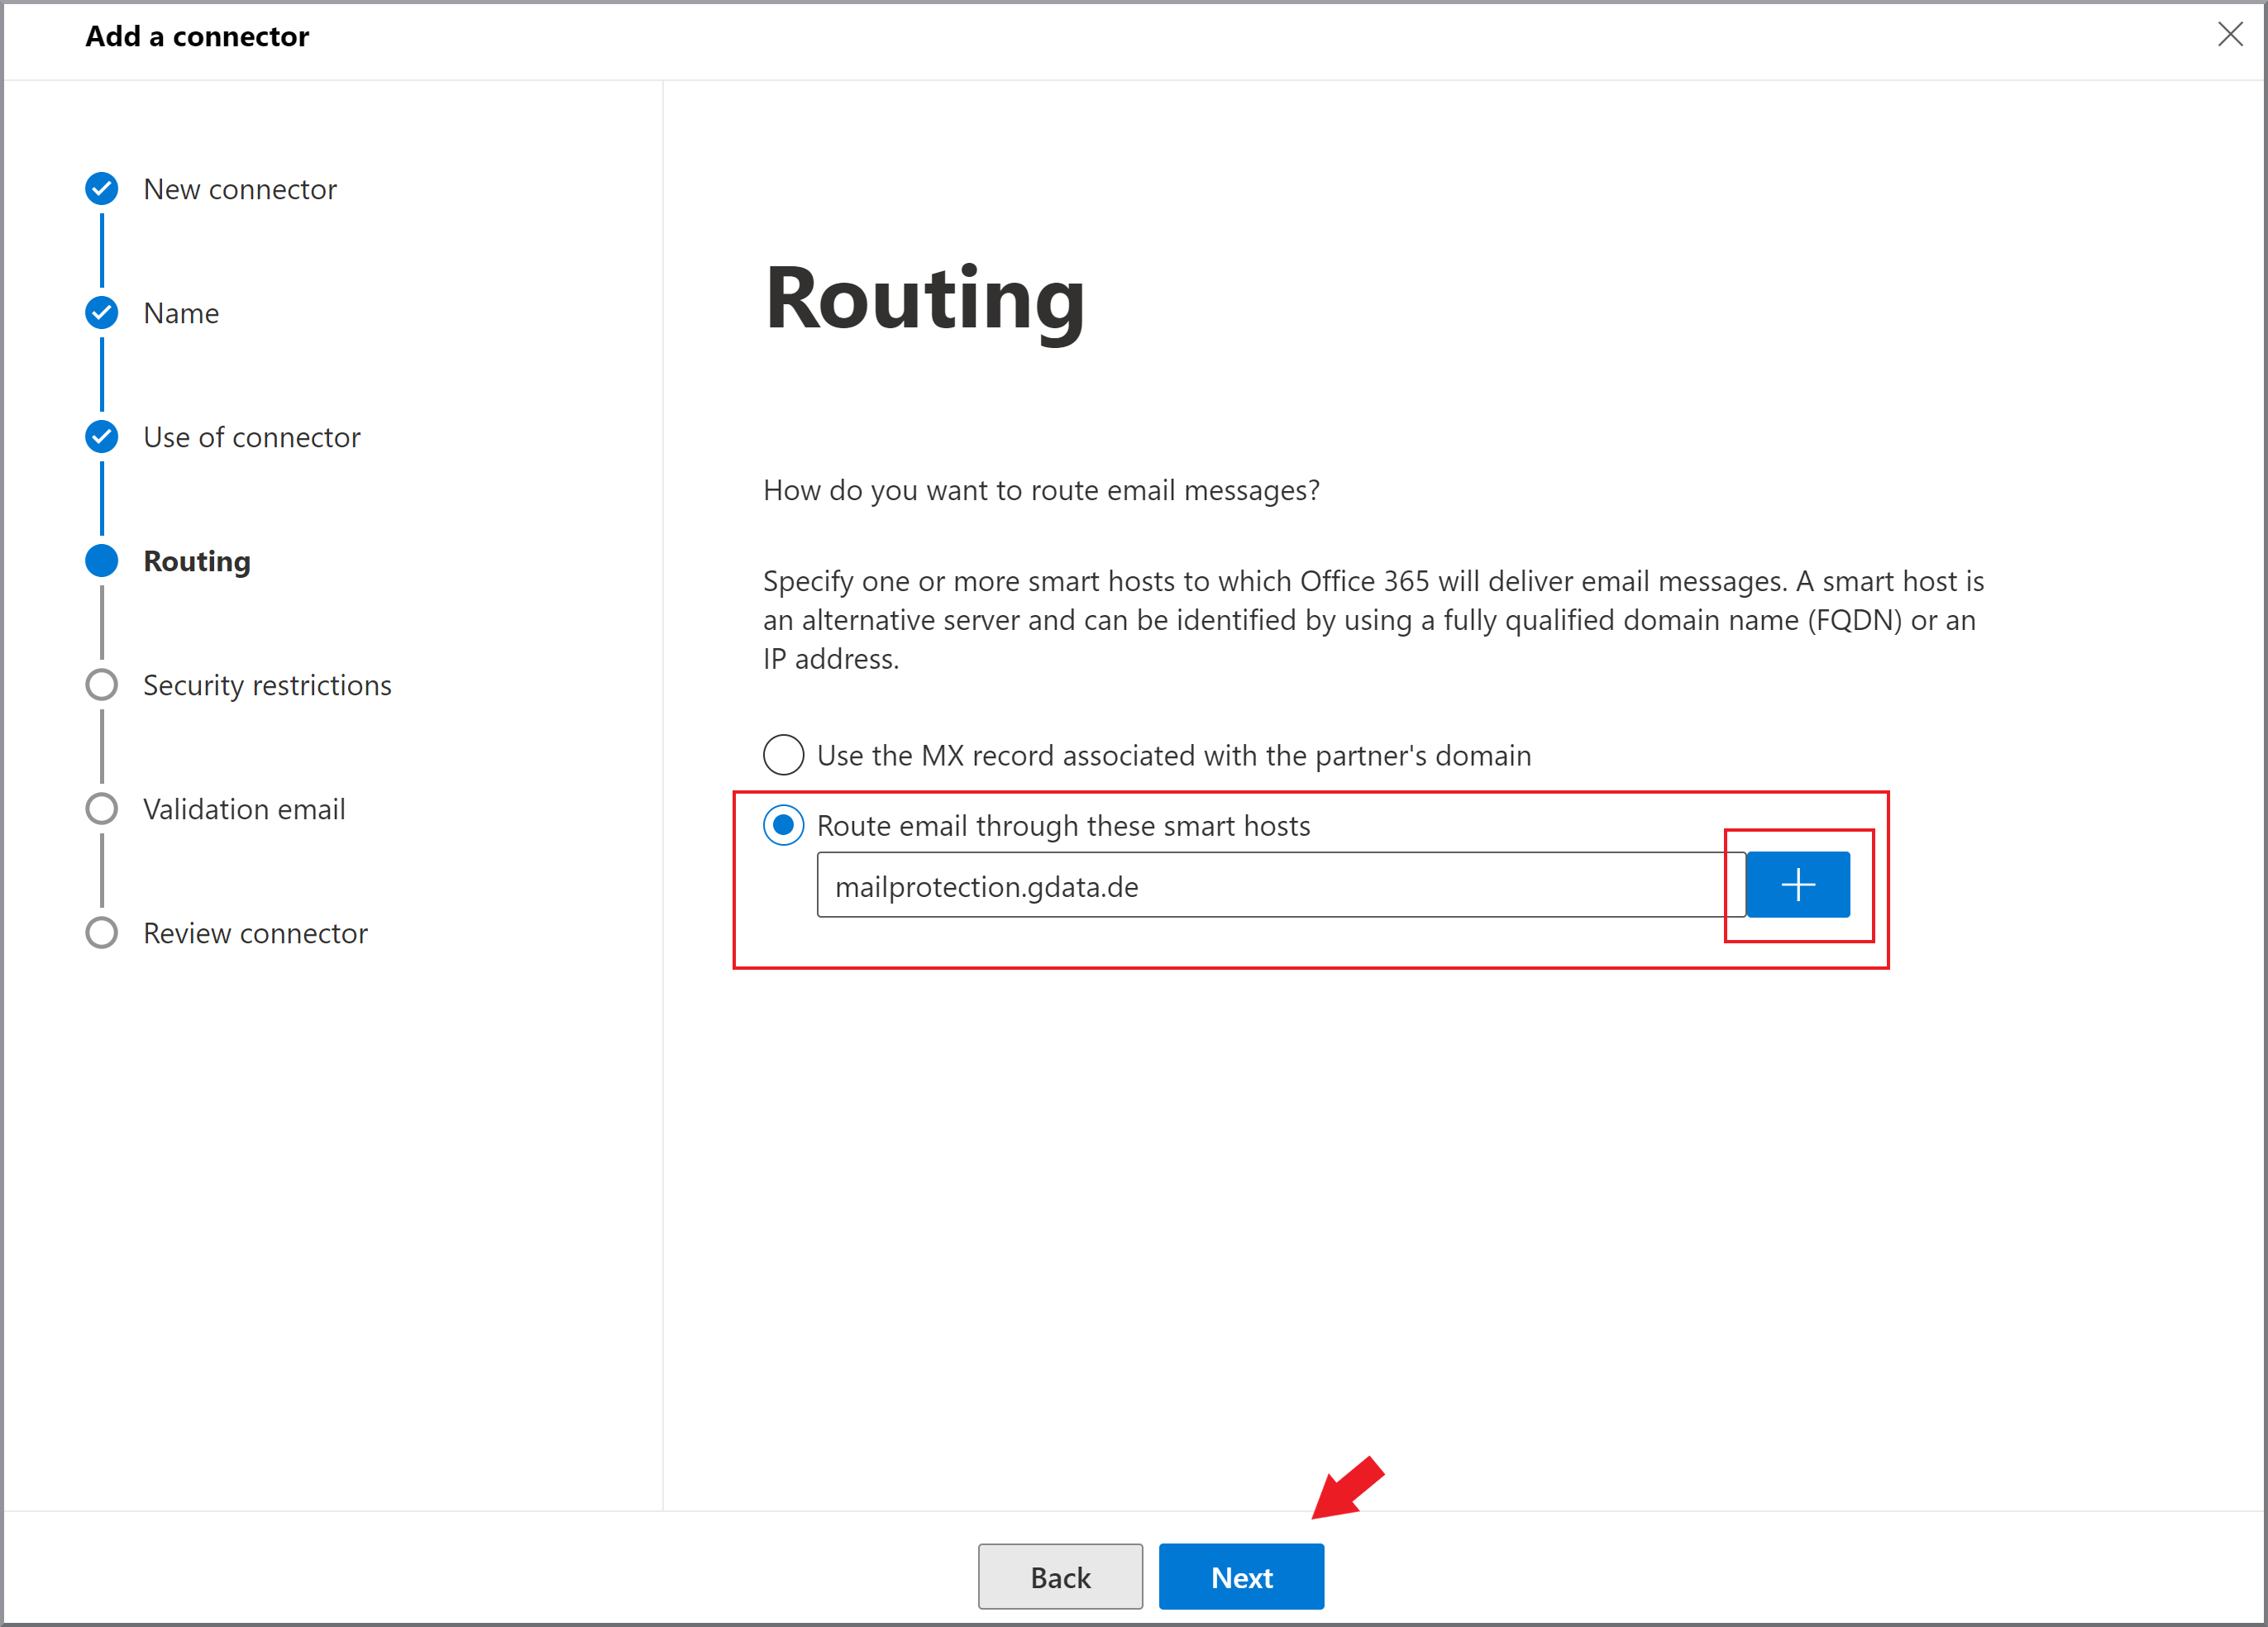
|
||
8. |
Select: Immer TLS (Transport Layer Security) zum Sichern der Verbindung verwenden (empfohlen) and Von einer vertrauenswürdigen Zertifizierungsstelle (CA) ausgestellt. Click Weiter. Show screenshot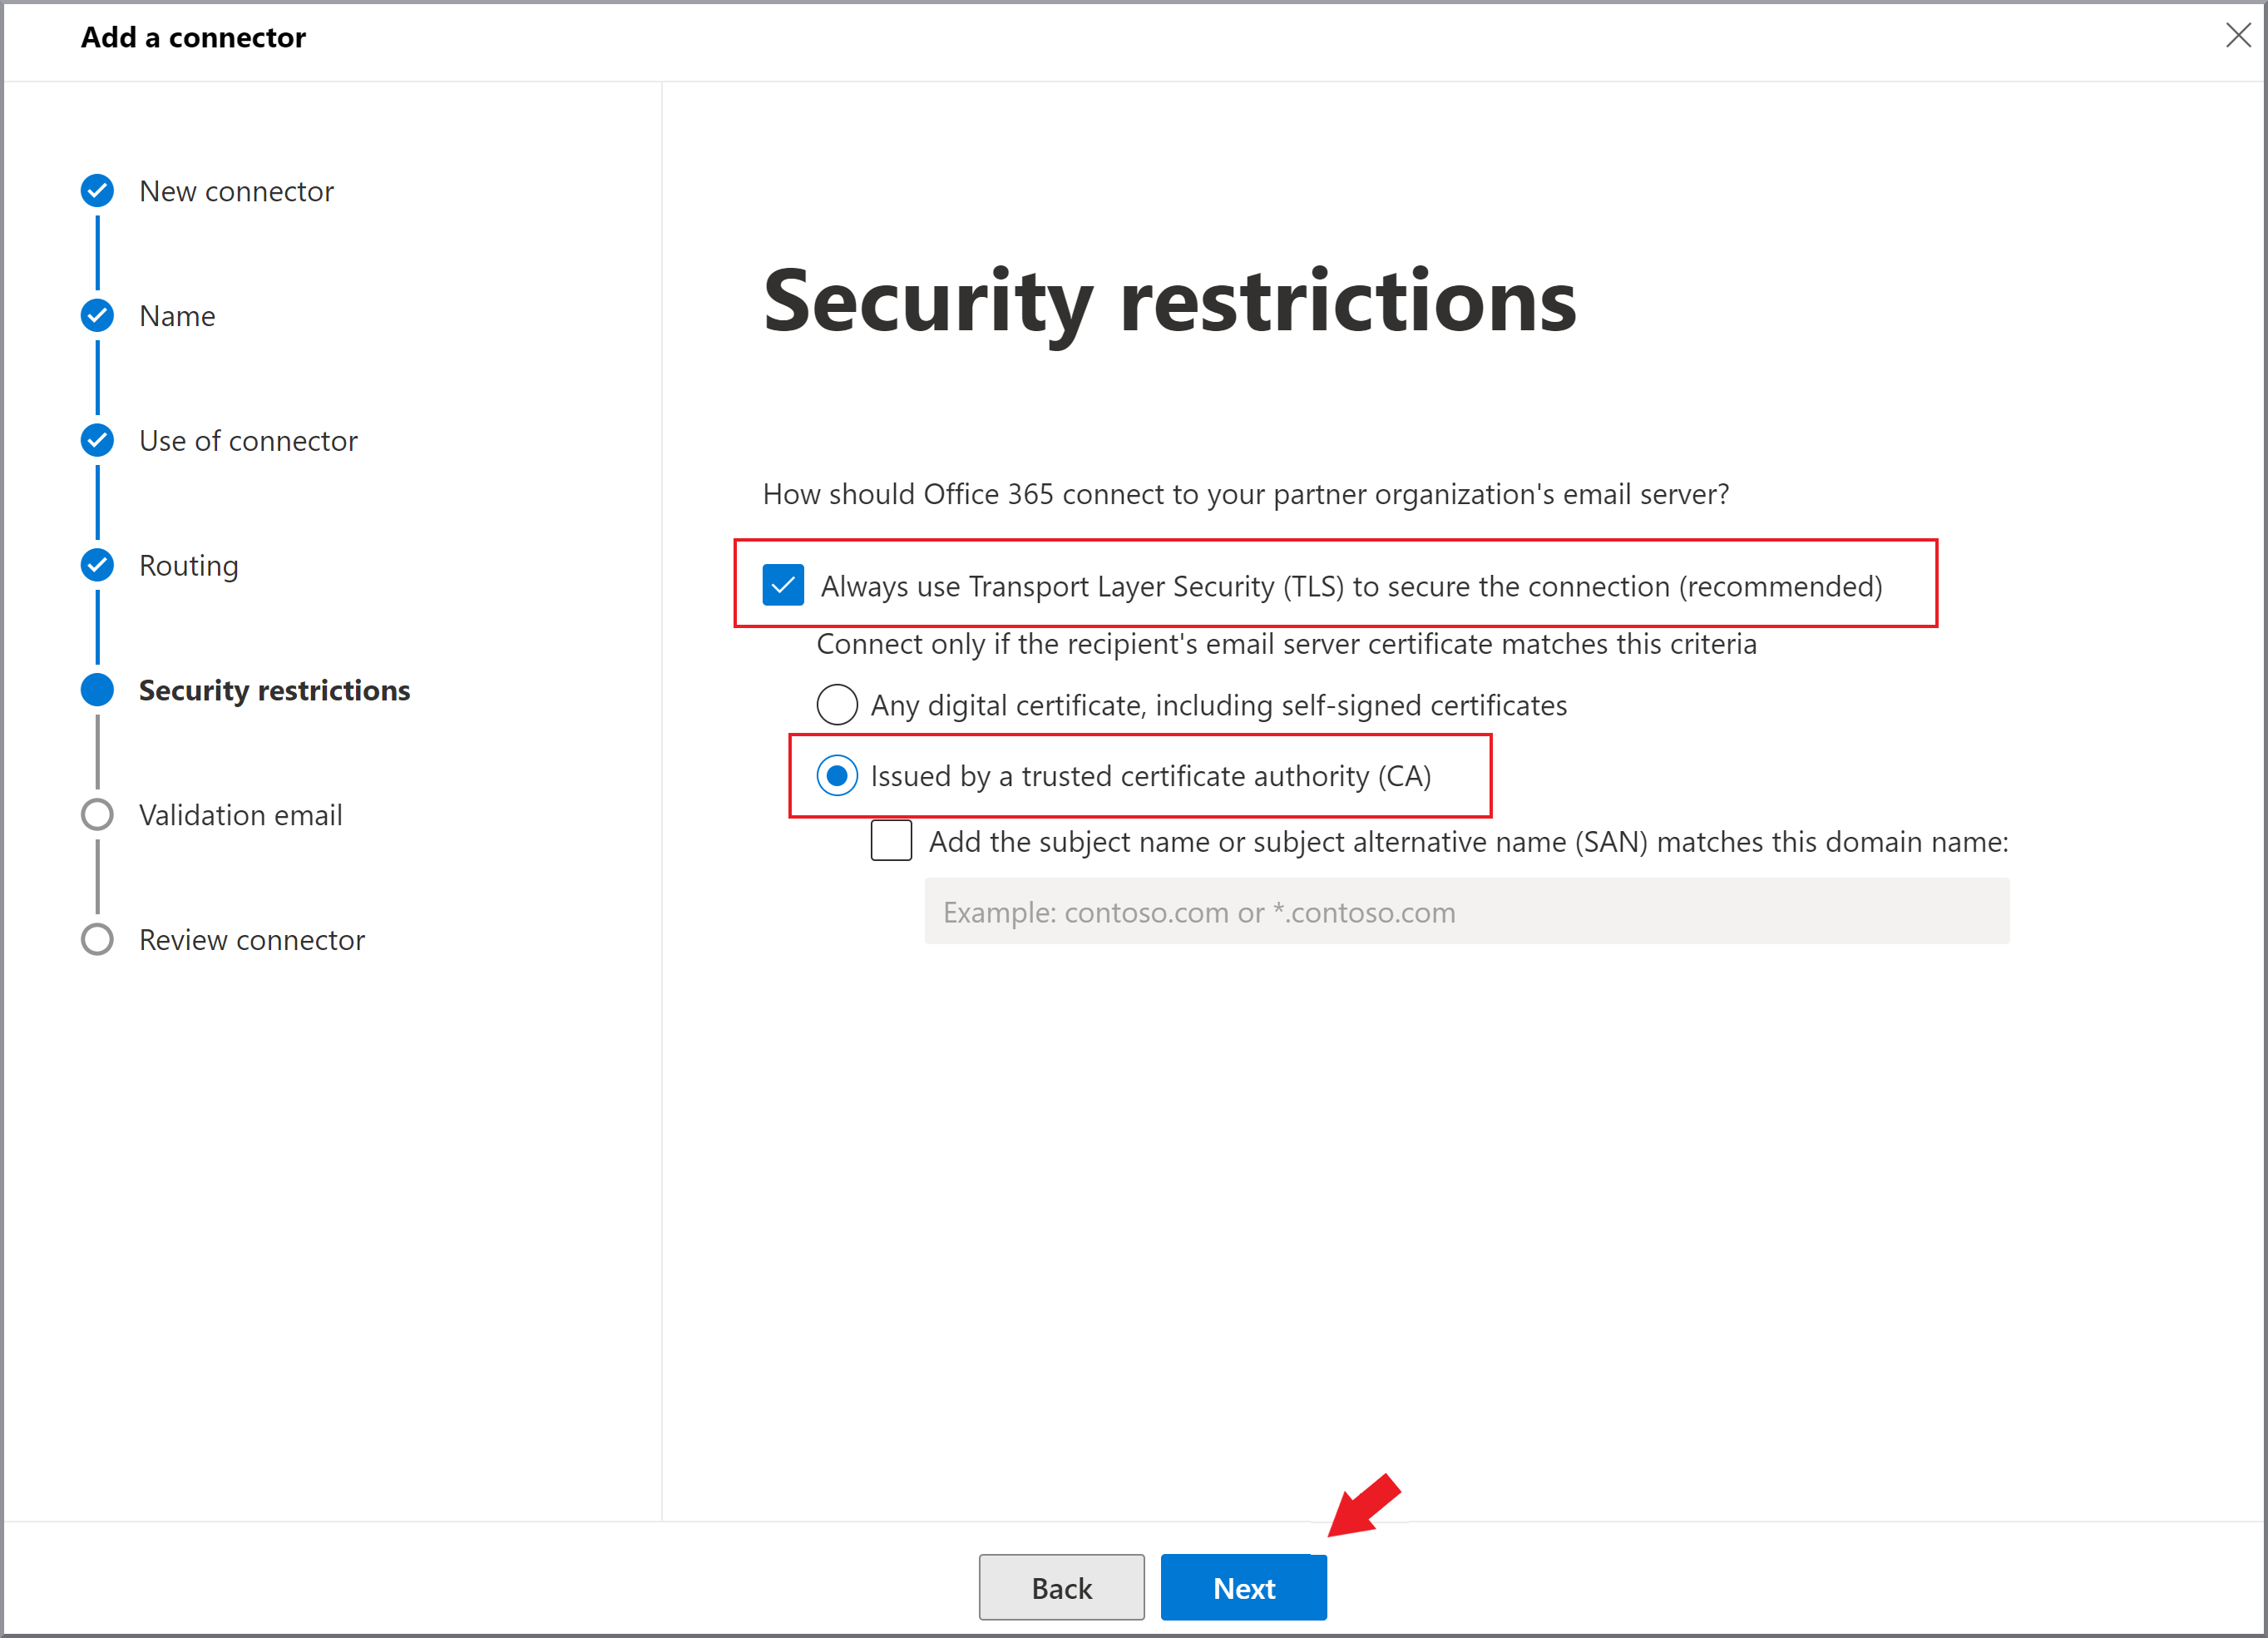
|
||
9. |
Create a list with at least one of your email addresses per domain (add via +) and start a validation of the connector for these email addresses by clicking Überprüfen. This test should complete without errors. If problems occur, also refer to, among other things, Hinweise zur Einrichtung des Connectors. Click Weiter. Show screenshot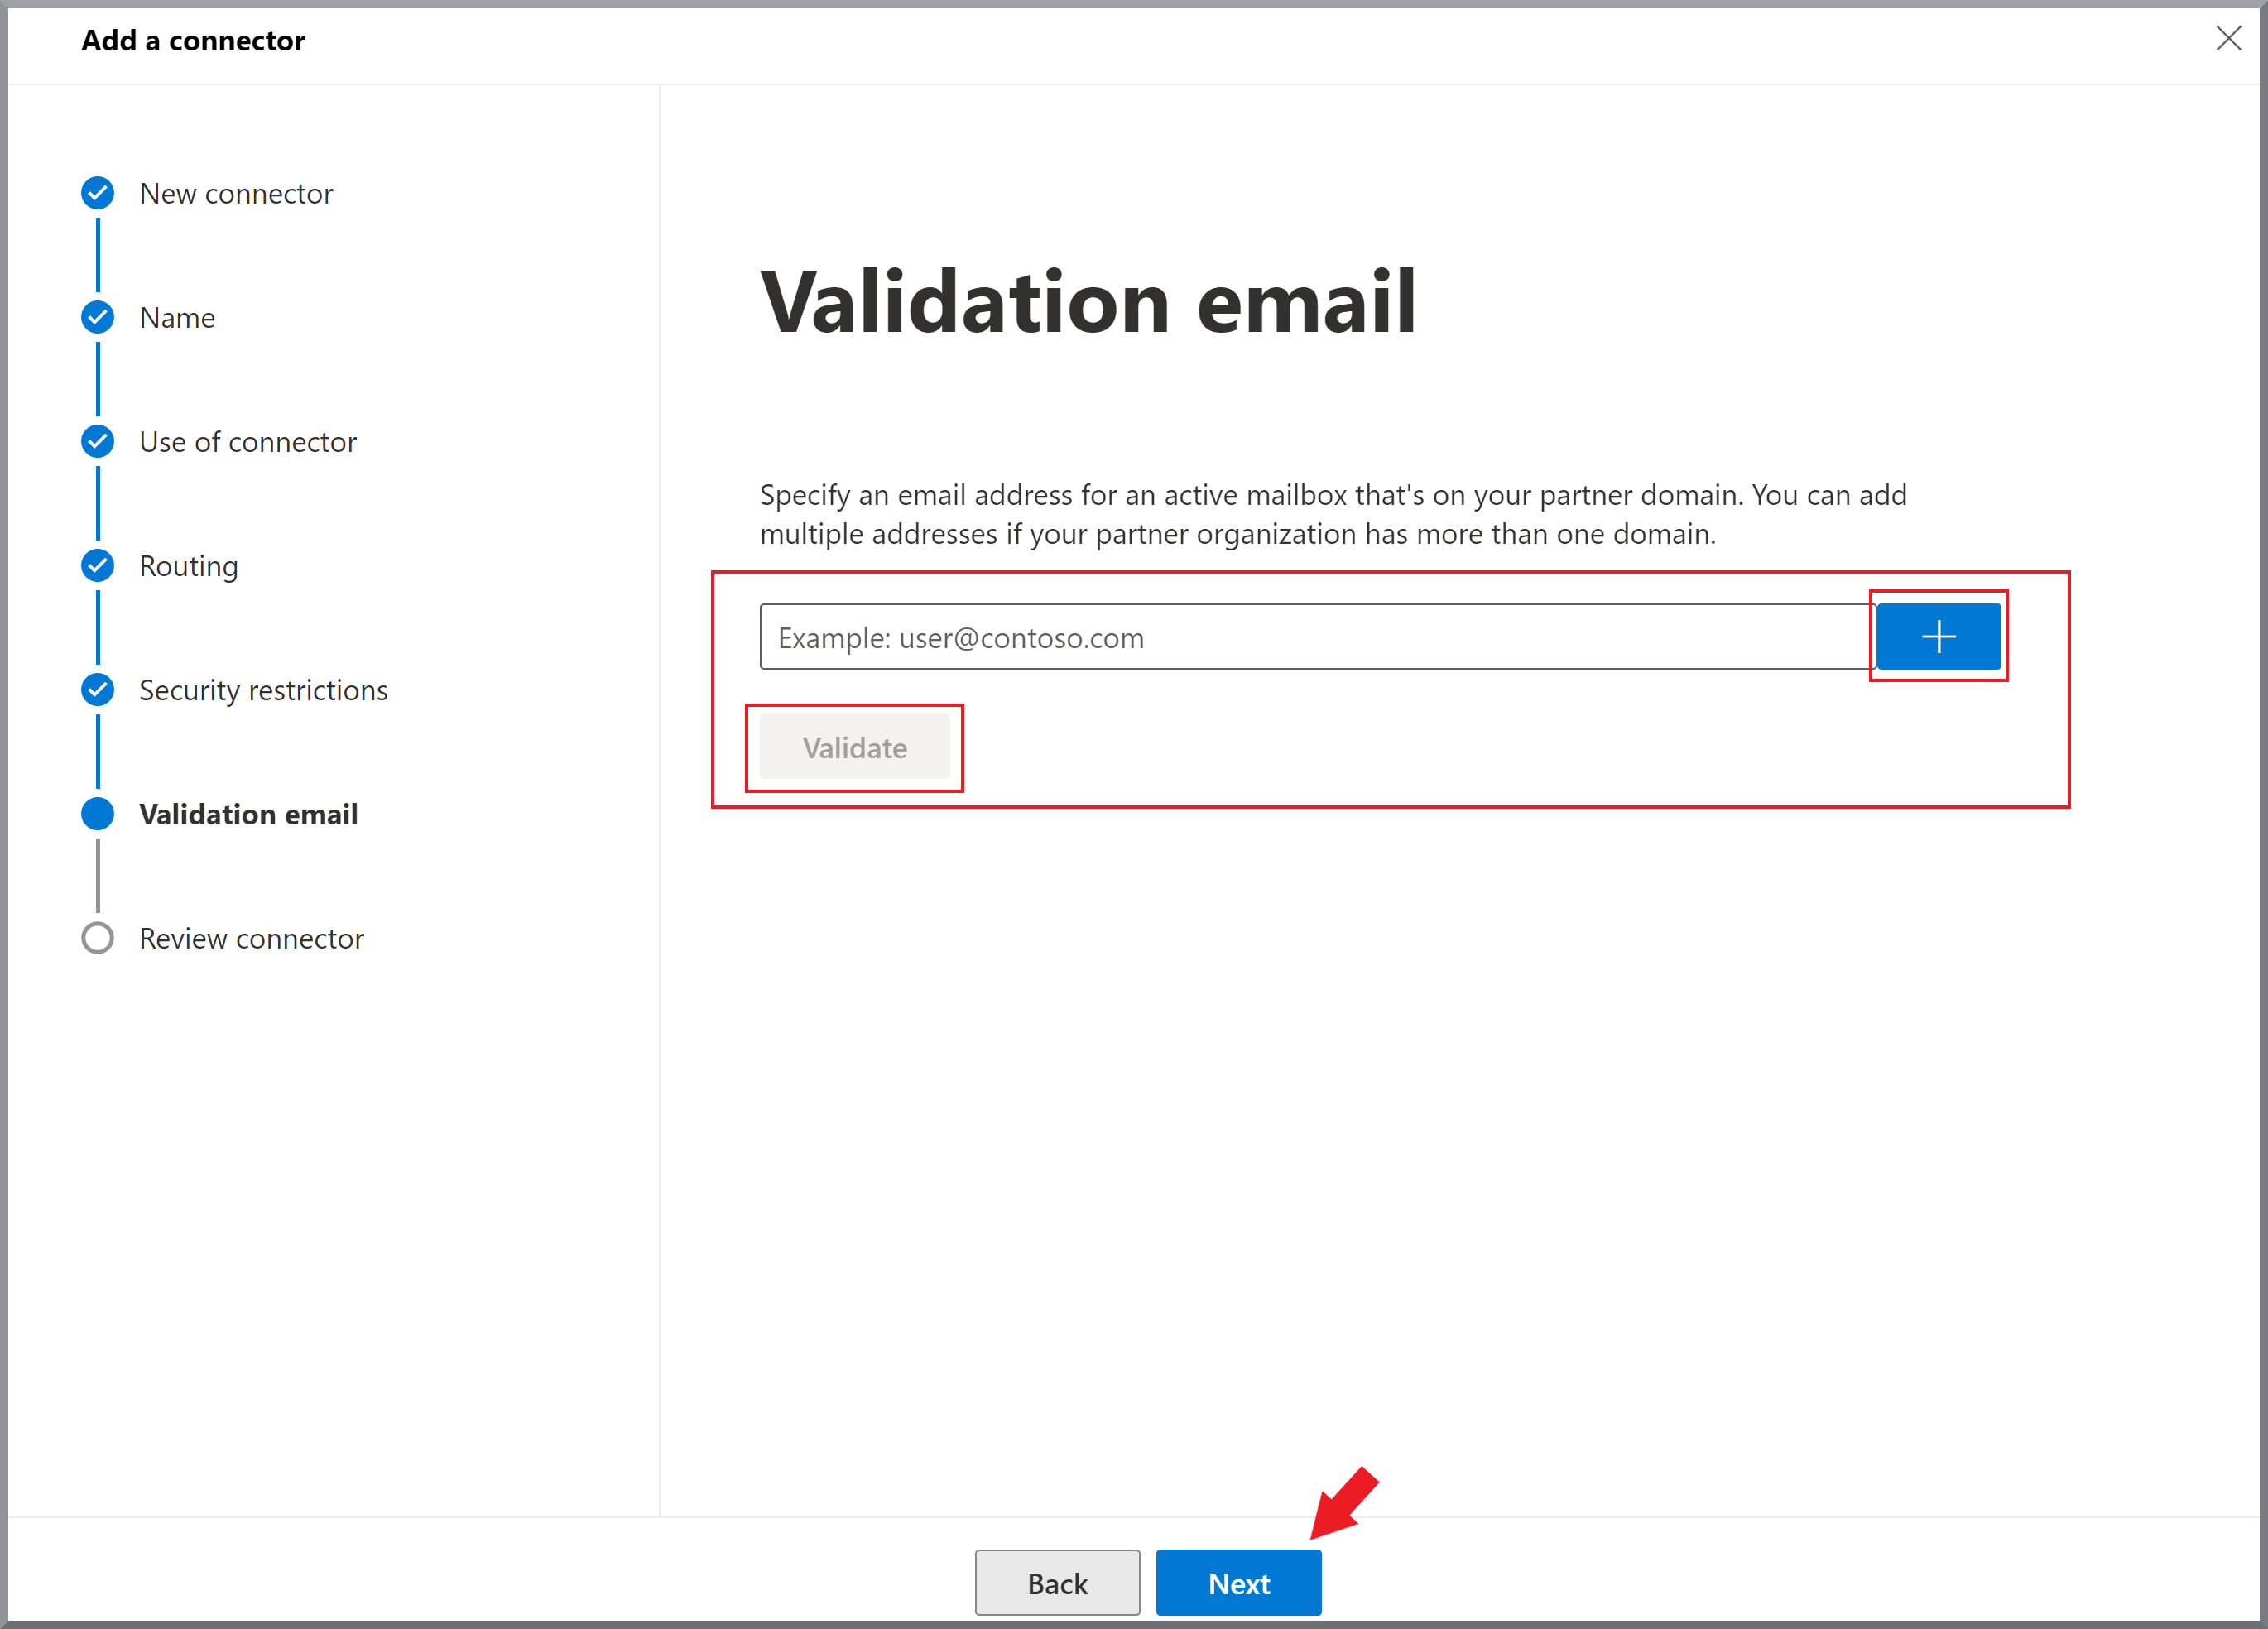
|
||
10. |
Review the setting in the summary and click Connector erstellen. Click Fertig. Show screenshot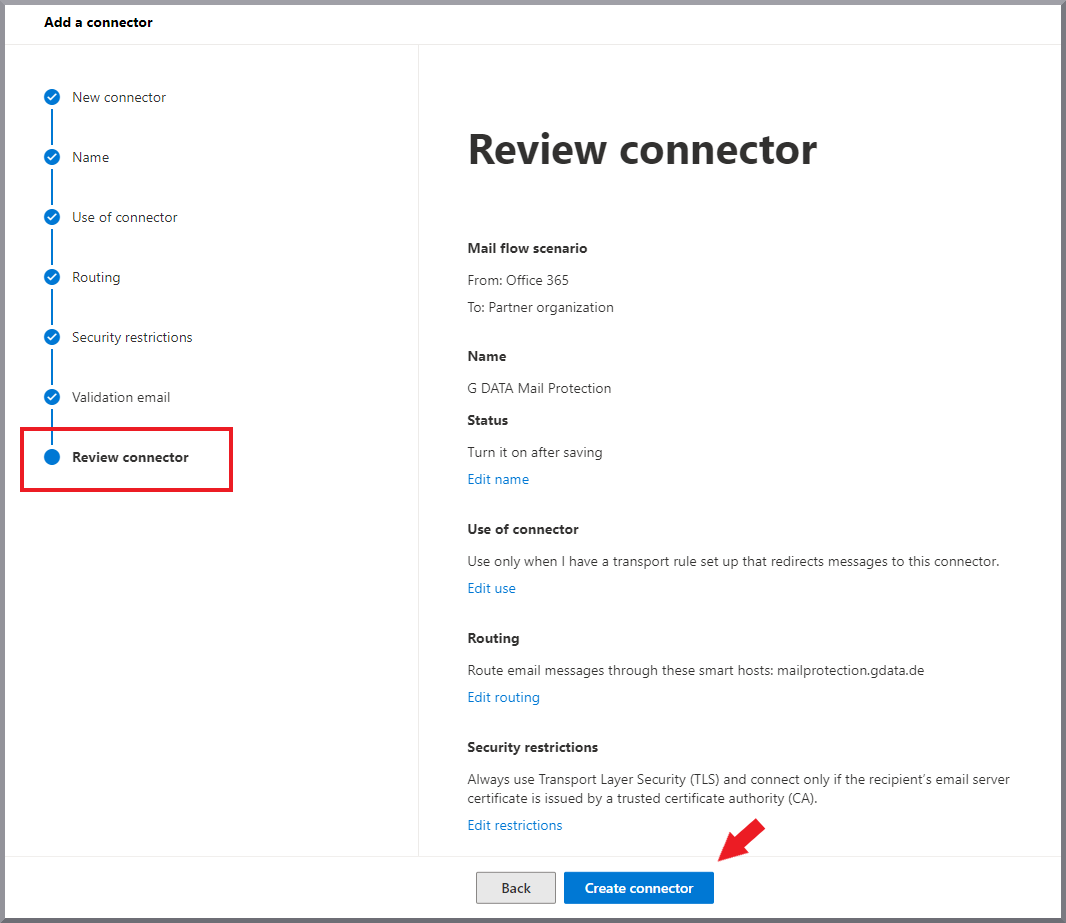
|
||
11. |
Click |
||
12. |
Select: Click Weiter. Show screenshot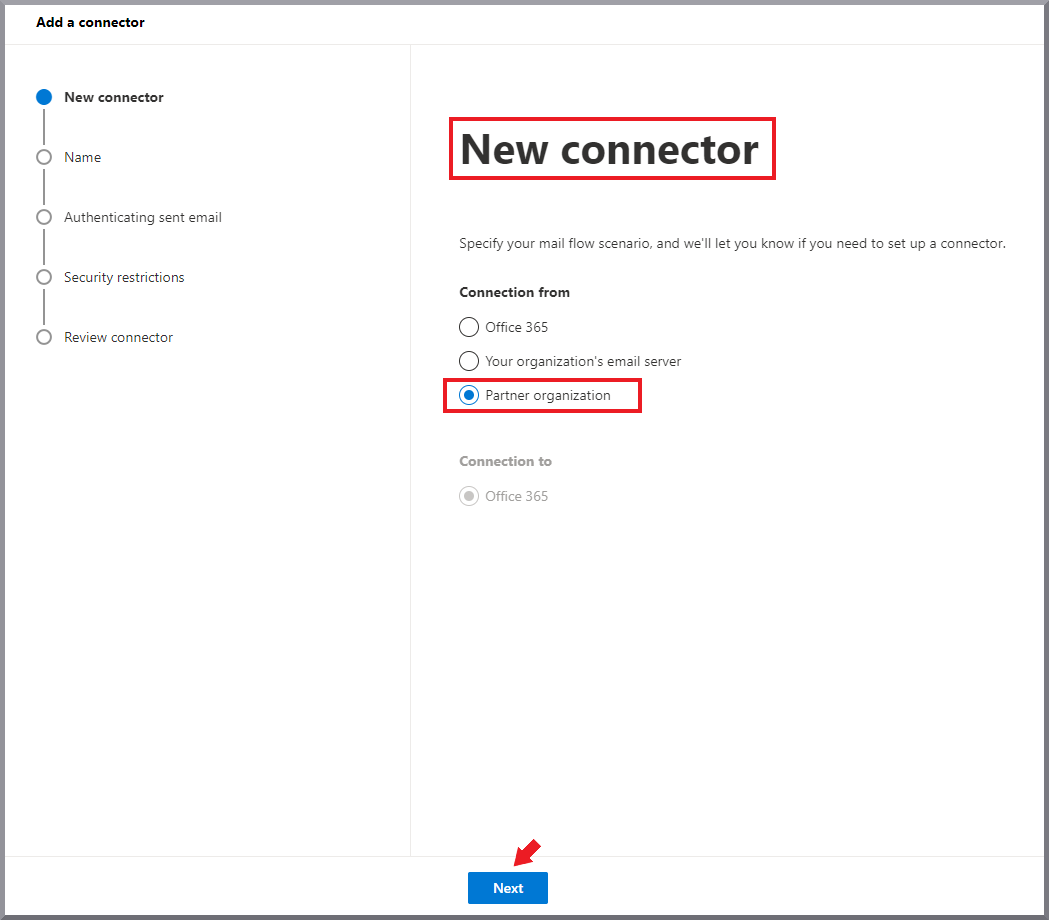
|
||
13. |
Enter the name G DATA Mailprotection Inbound Secure Connector and, optionally, a description. Select the Aktivieren checkbox. Click Weiter. Show screenshot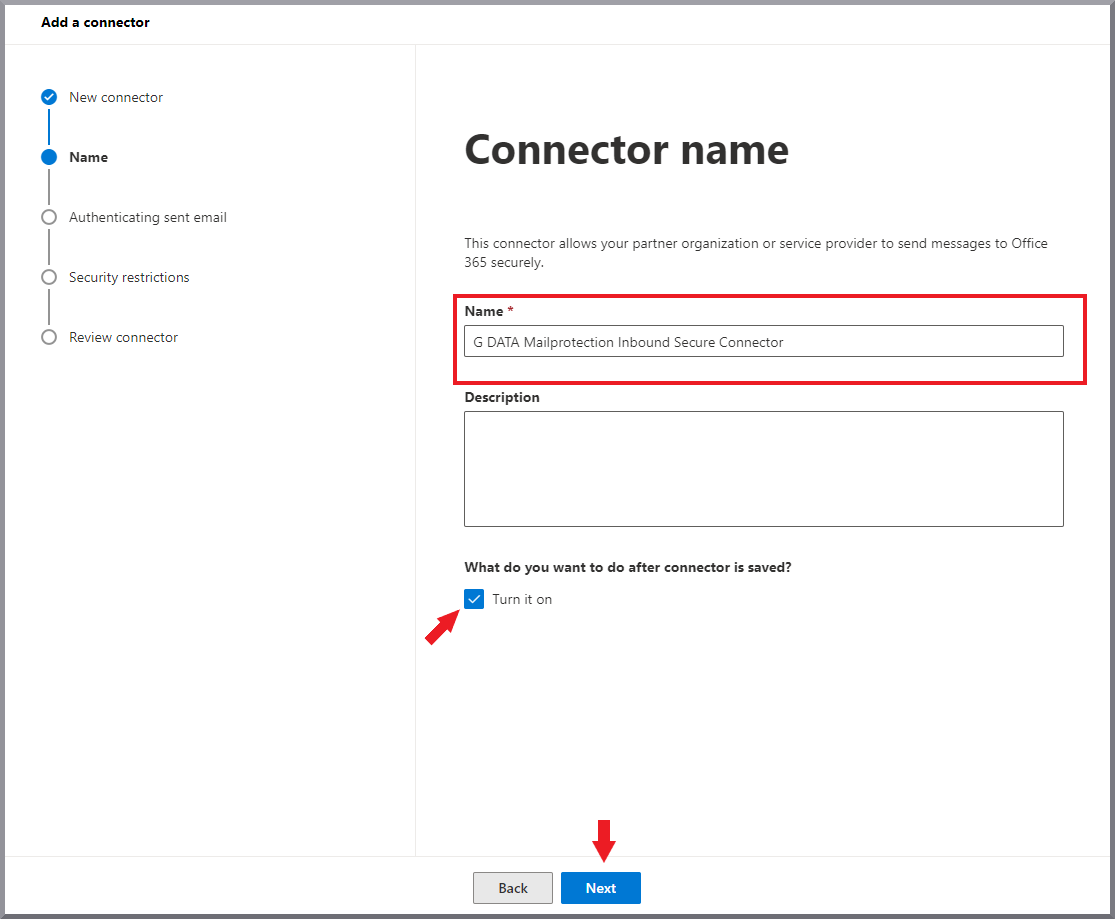
|
||
14. |
Select Durch Überprüfen, ob die IP-Adresse des sendenden Servers mit einer der folgenden IP-Adressen übereinstimmt, die zu Ihrer Partnerorganisation gehören. Enter the IP 194.156.84.32/28 and add it to the list via +. Click Weiter. Show screenshot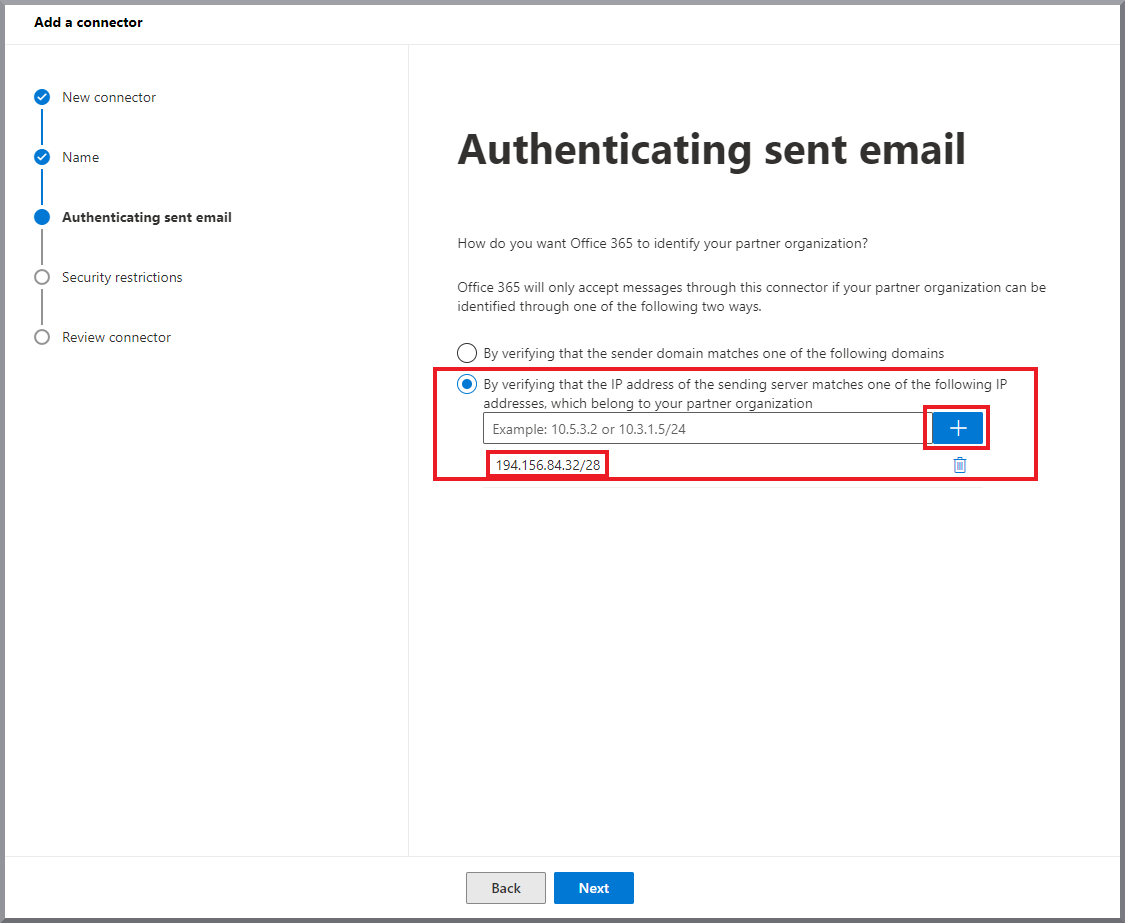
|
||
15. |
Select the checkbox to reject emails if they are not sent via TLS. Click Weiter. Show screenshot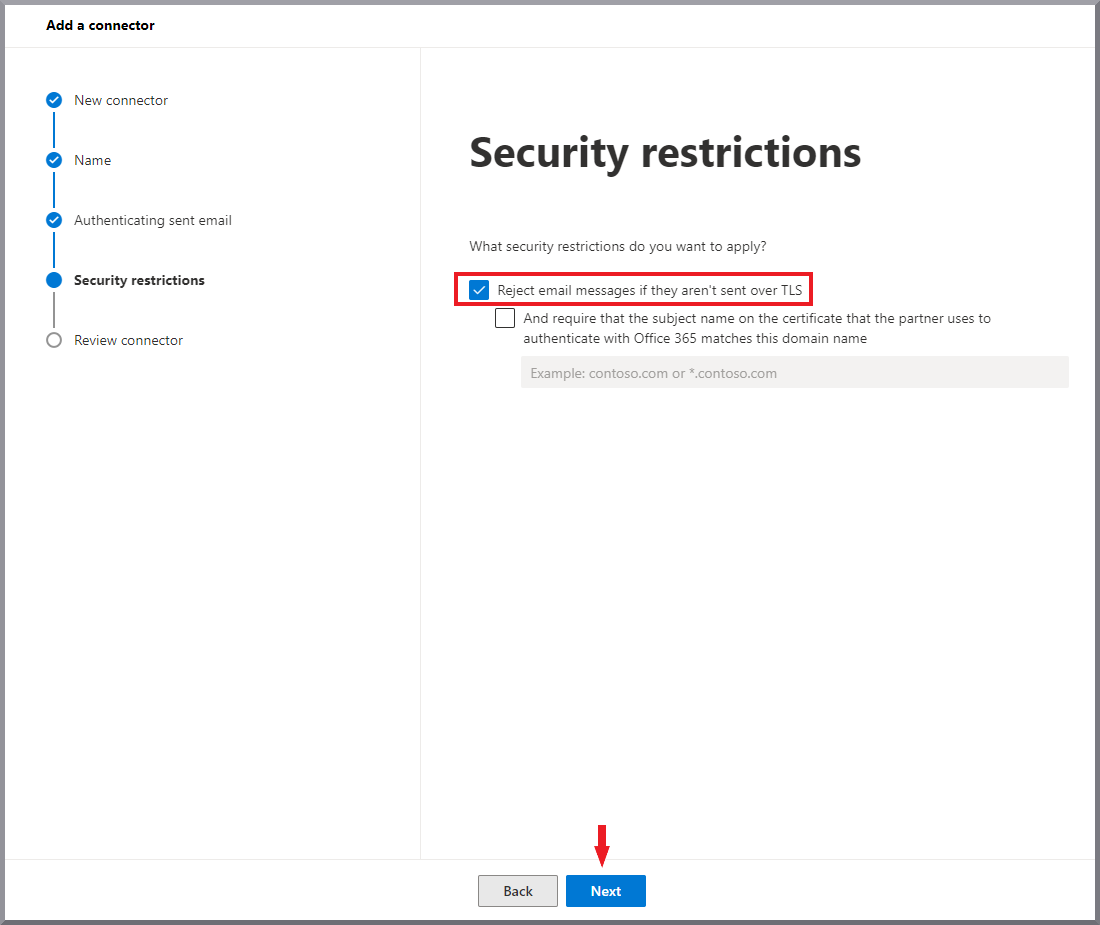
|
||
16. |
Review the setting in the summary and click Connector erstellen. Click Fertig. |
||
17. |
Open the page Enhanced Filtering. |
||
18. |
Here you will find the inbound connector you just created with Enhanced Filtering disabled. Click the connector row G DATA Mailprotection Inbound Secure Connector. An editing pane opens on the right side of the screen. Select Diese IP-Adressen überspringen, die dem Connector zugeordnet sind:. Enter the IP range 194.156.84.32/28. Select Auf gesamte Organisation anwenden and click Speichern. Show screenshot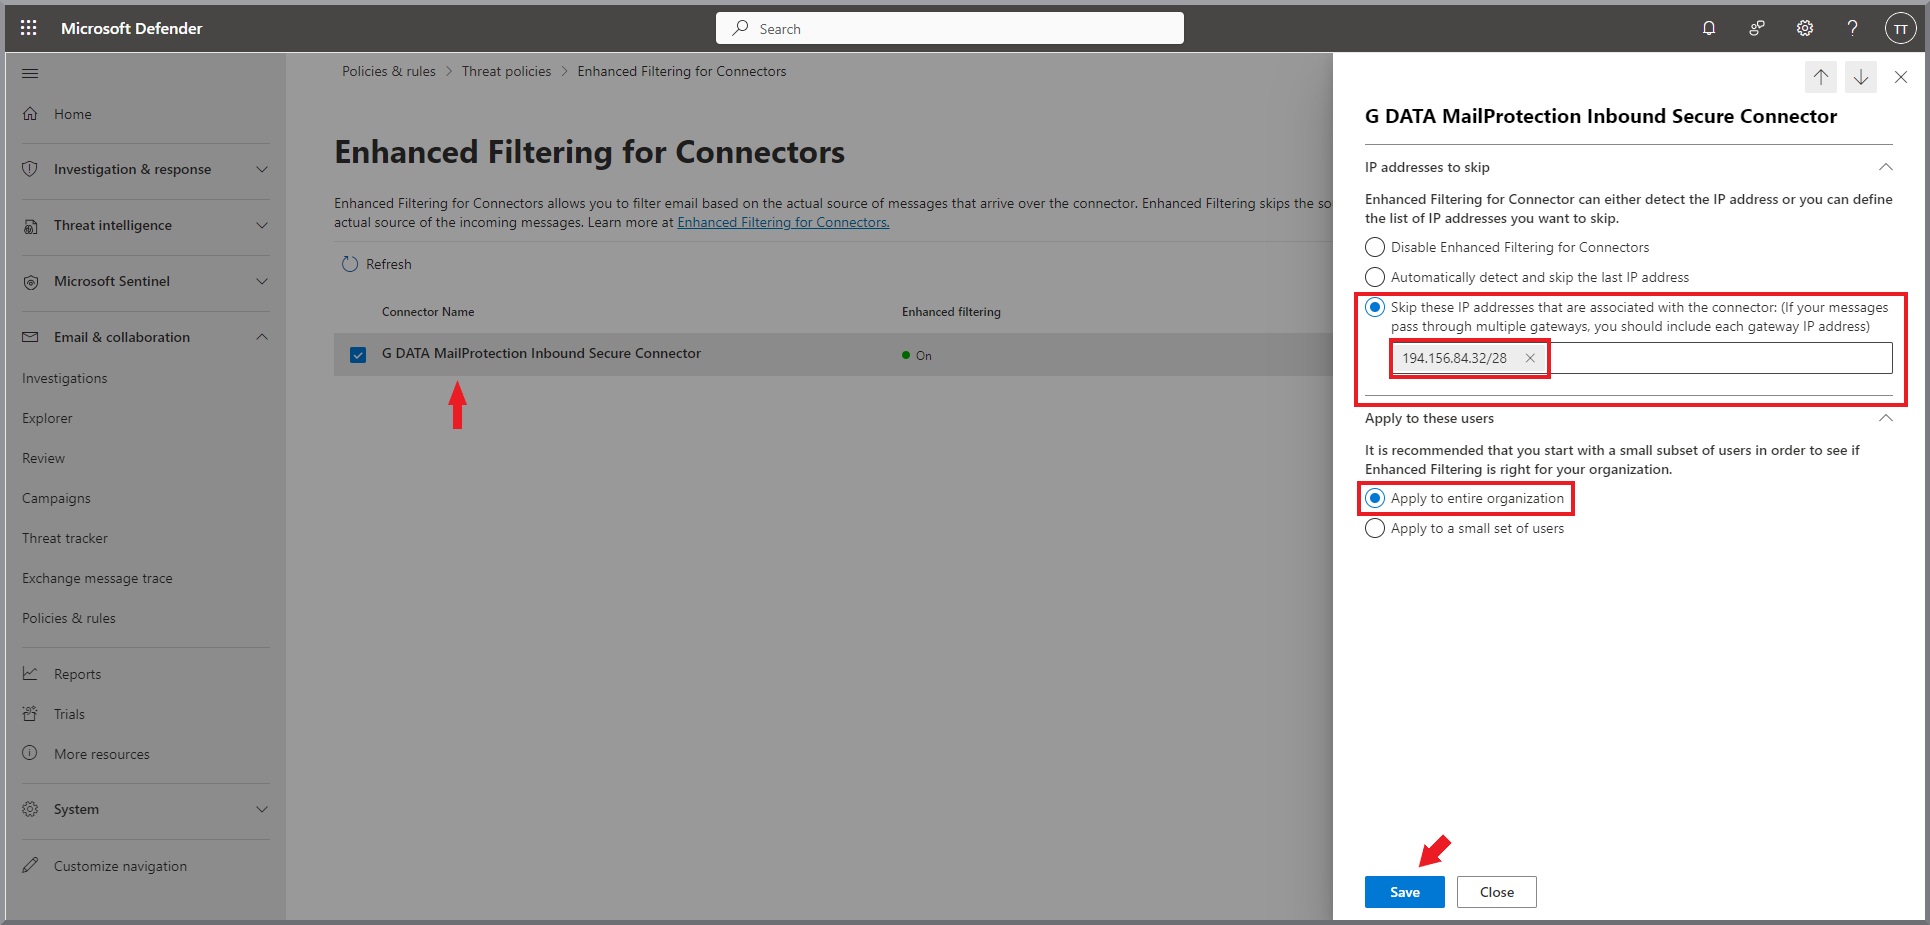
|
||
19. |
Filtering for the connector is now displayed as Ein. Show screenshot
|
||
20. |
Show screenshot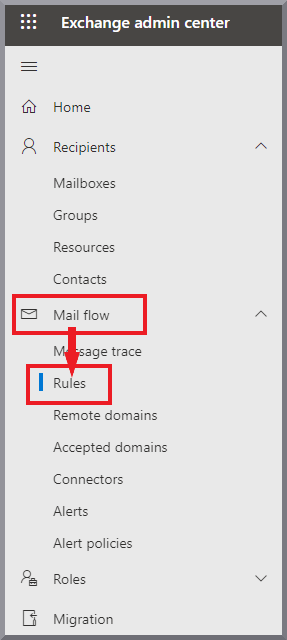
|
||
21. |
Click Show screenshot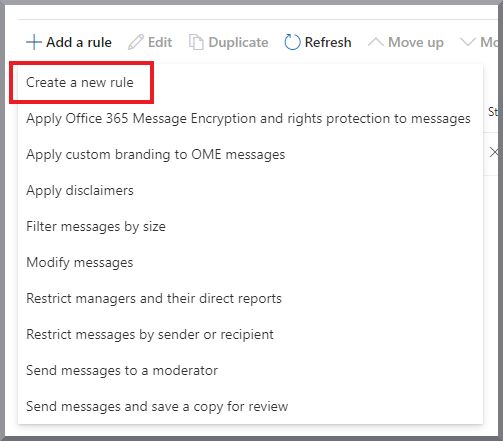
|
||
22. |
Enter Redirect to mailprotection.gdata.de as the rule name. For Diese Regel anwenden, wenn, select the following values from the drop-down menus: Der Absender and ist extern/intern Show screenshot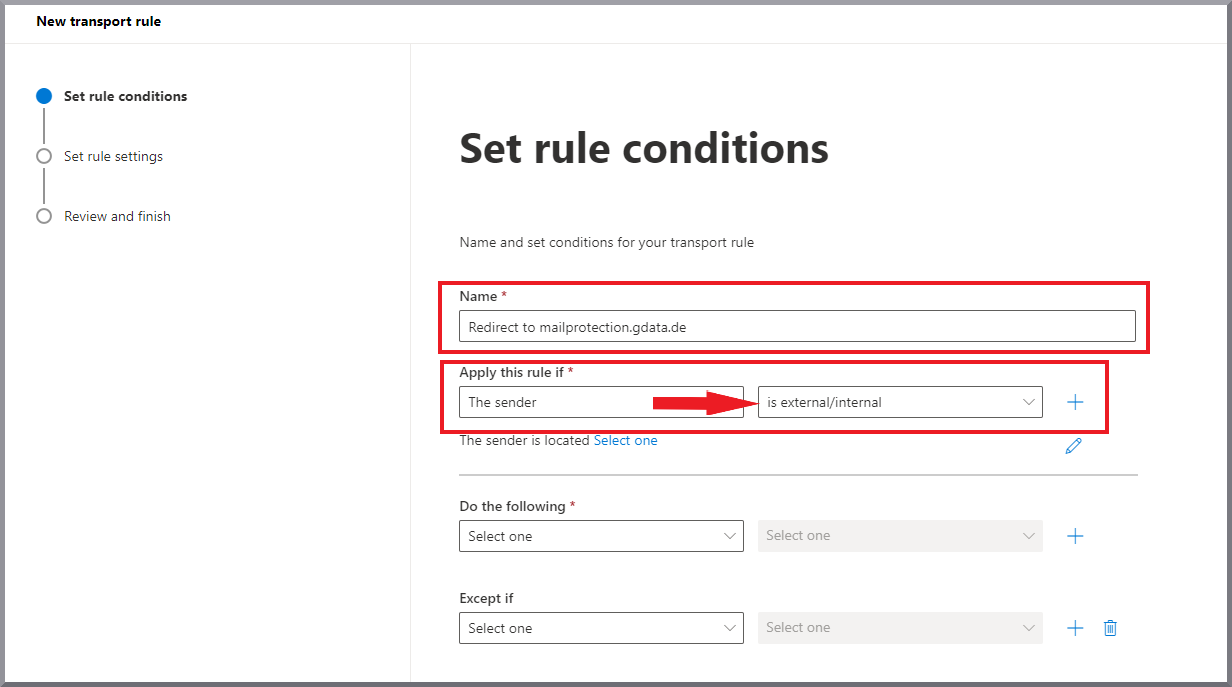
|
||
23. |
A side pane opens on the right edge of the screen. Select the option Outside the organization and click Speichern. Show screenshot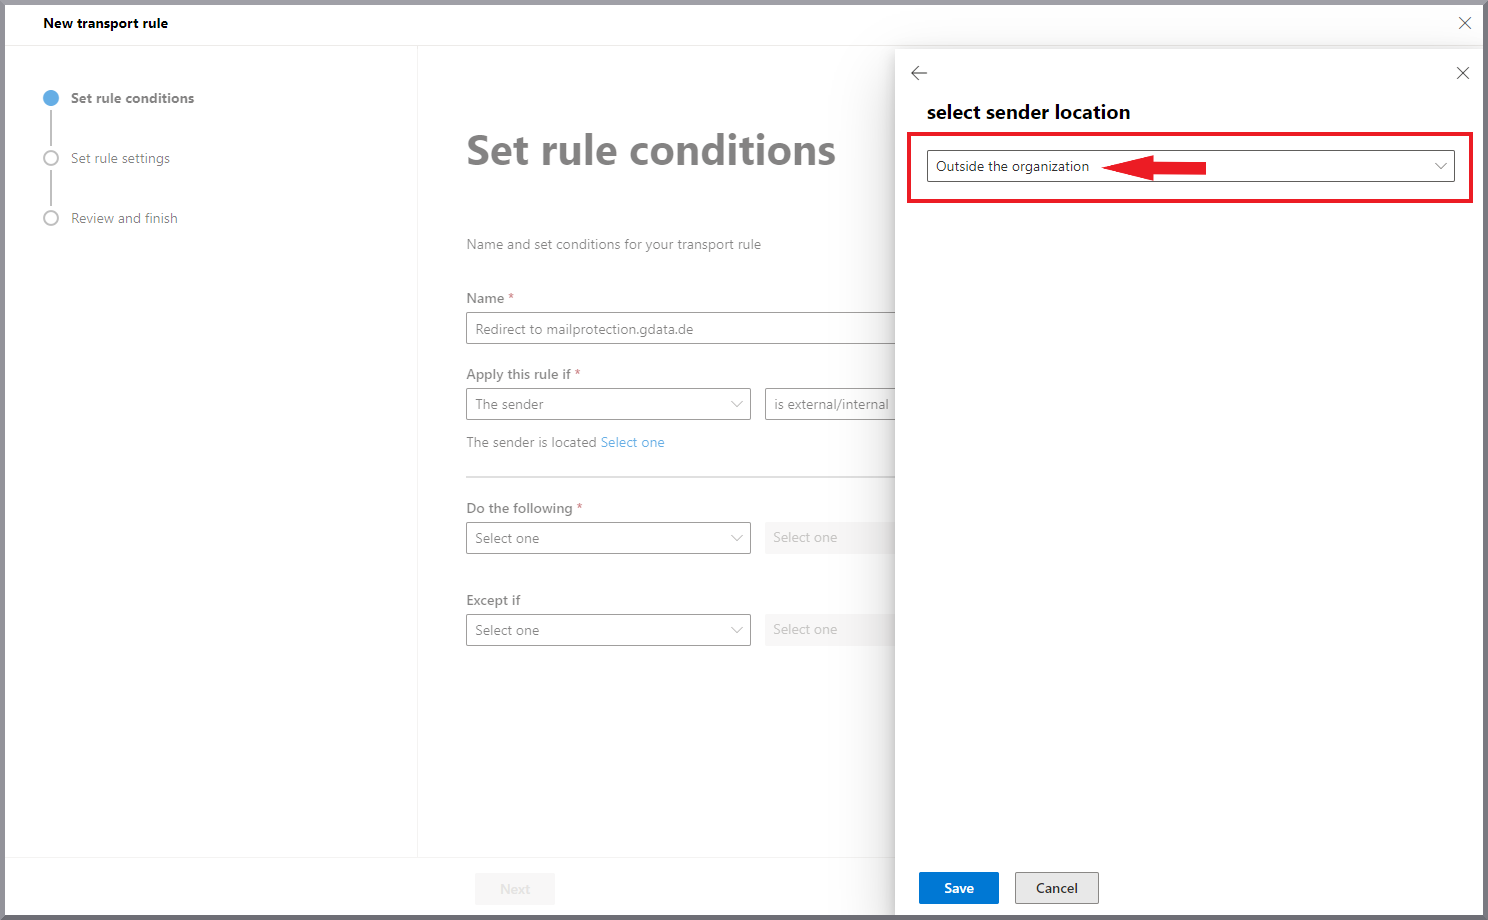
|
||
24. |
Use + to add a new AND condition and, from the drop-down menus, select Der Empfänger and Domäne ist. Show screenshot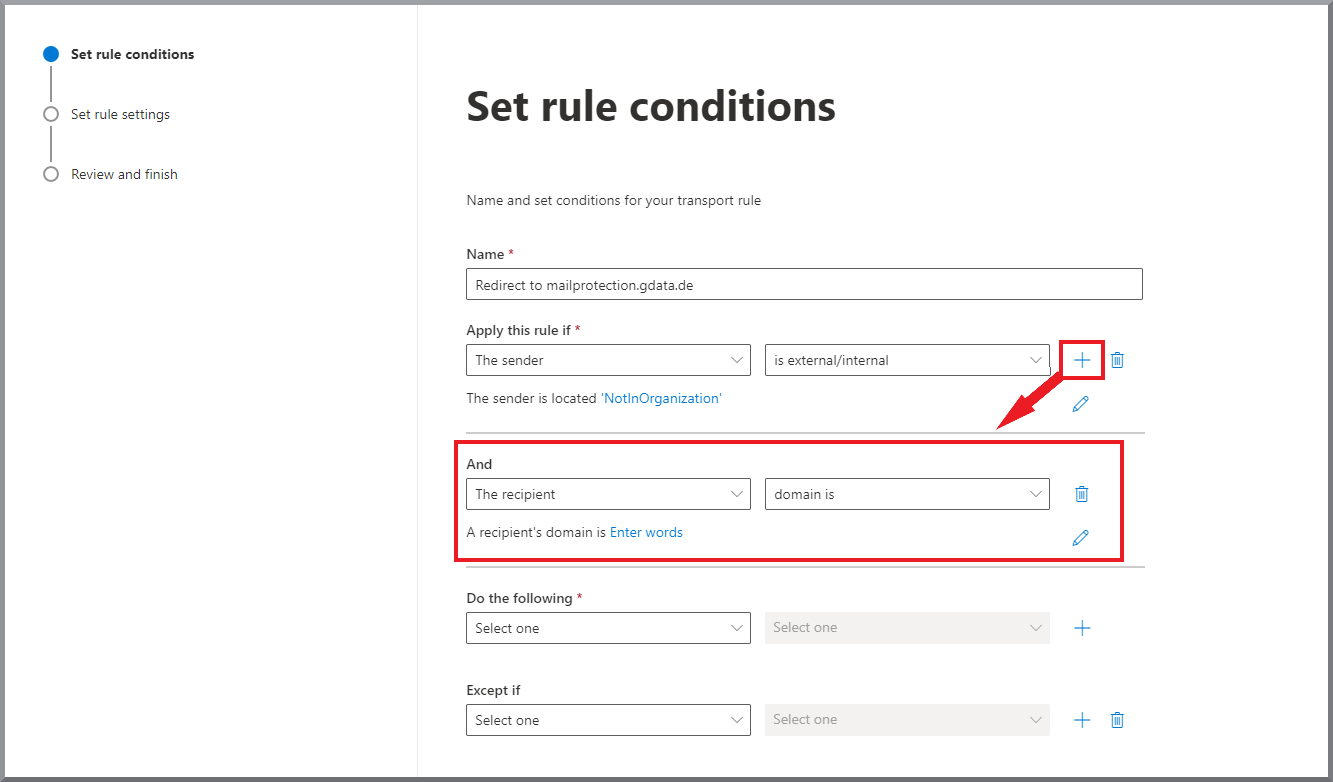
|
||
25. |
Create a list of all domains that are to be checked by G DATA 365 | Mail Protection. If multiple domains are used, each domain must be entered separately and added to the list via the Hinzufügen button.
Then click Speichern. Show screenshot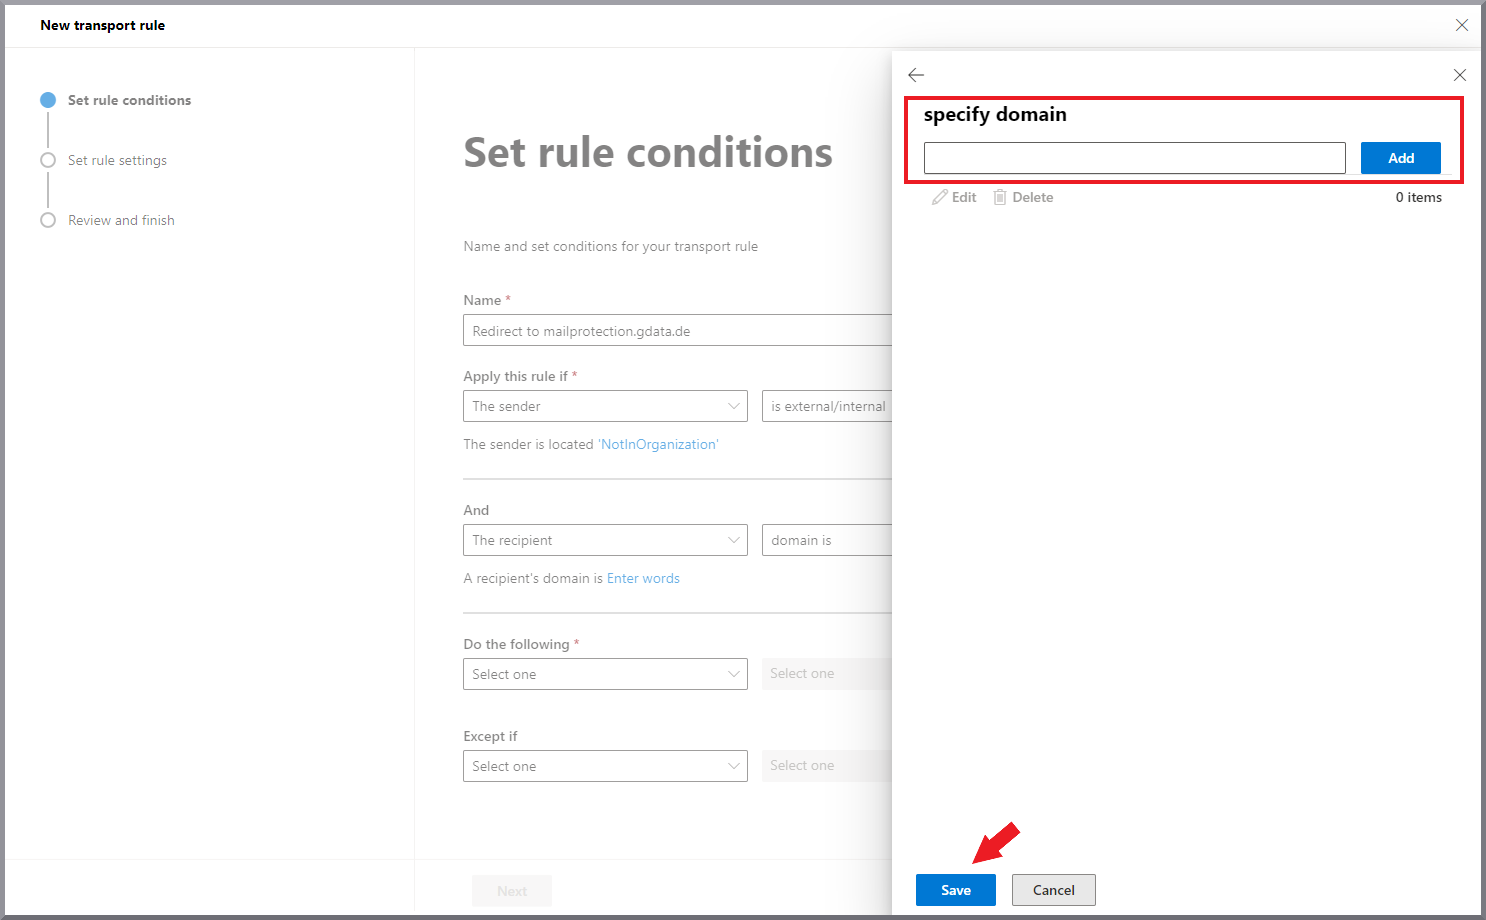
|
||
26. |
For Gehen Sie wie folgt vor, select the following values from the drop-down menus:
Show screenshot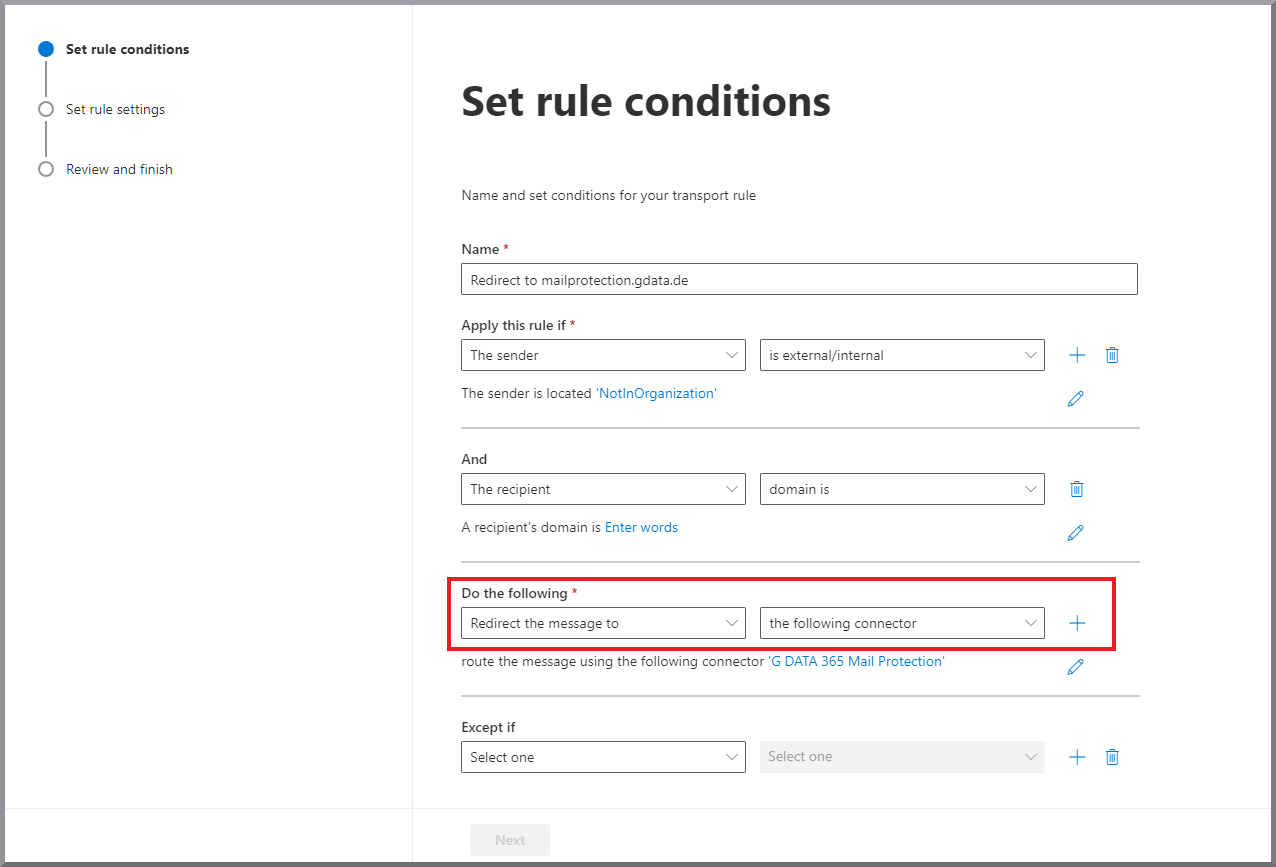
|
||
27. |
A side pane opens on the right edge of the screen. Select the connector G DATA 365 Mail Protection and click Speichern. Show screenshot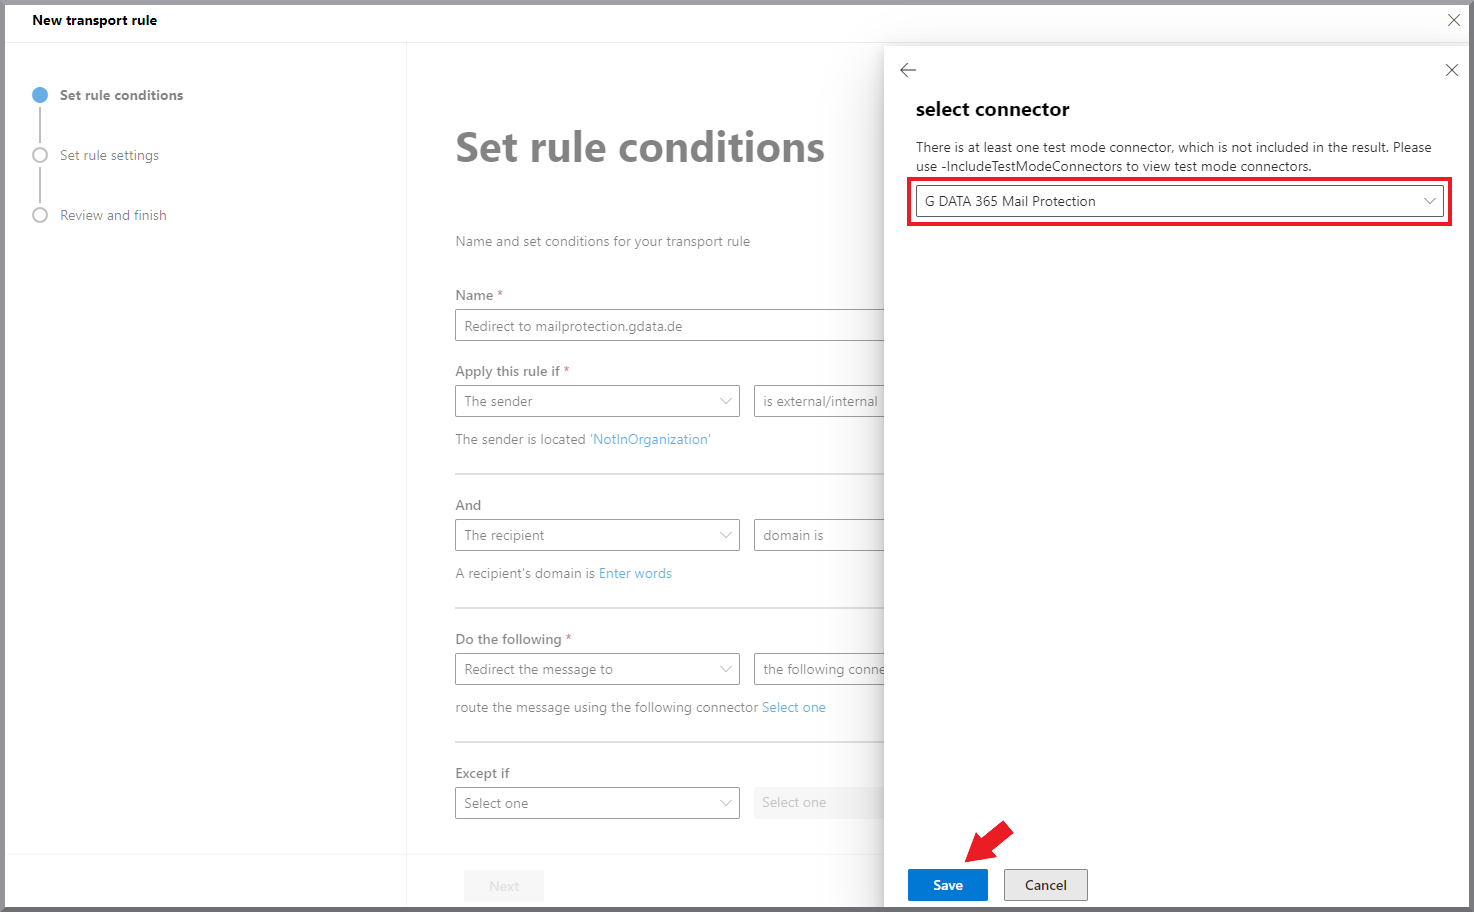
|
||
28. |
For Außer wenn, select the following values from the drop-down menus:
Show screenshot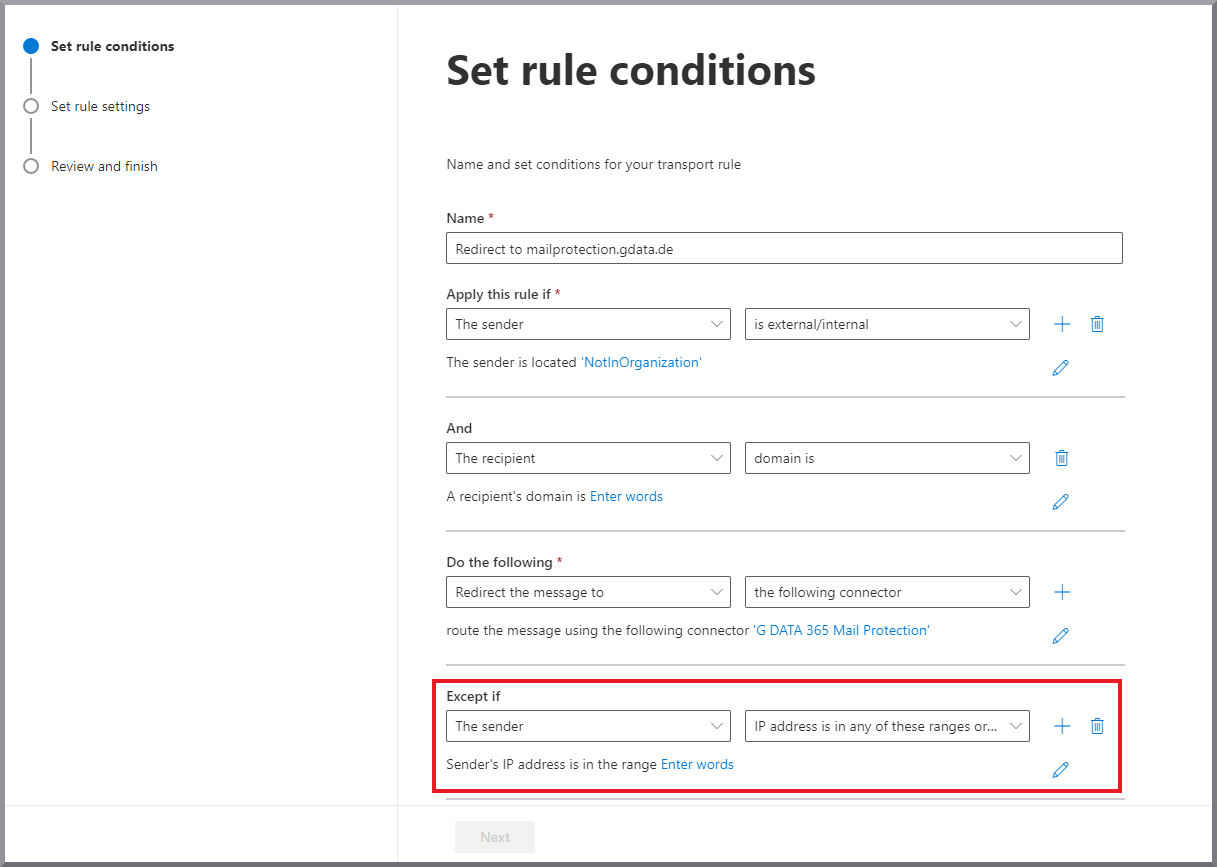
|
||
29. |
A side pane opens on the right edge of the screen. Enter the following IP range there: 194.156.84.32/28 and click Speichern. Show screenshot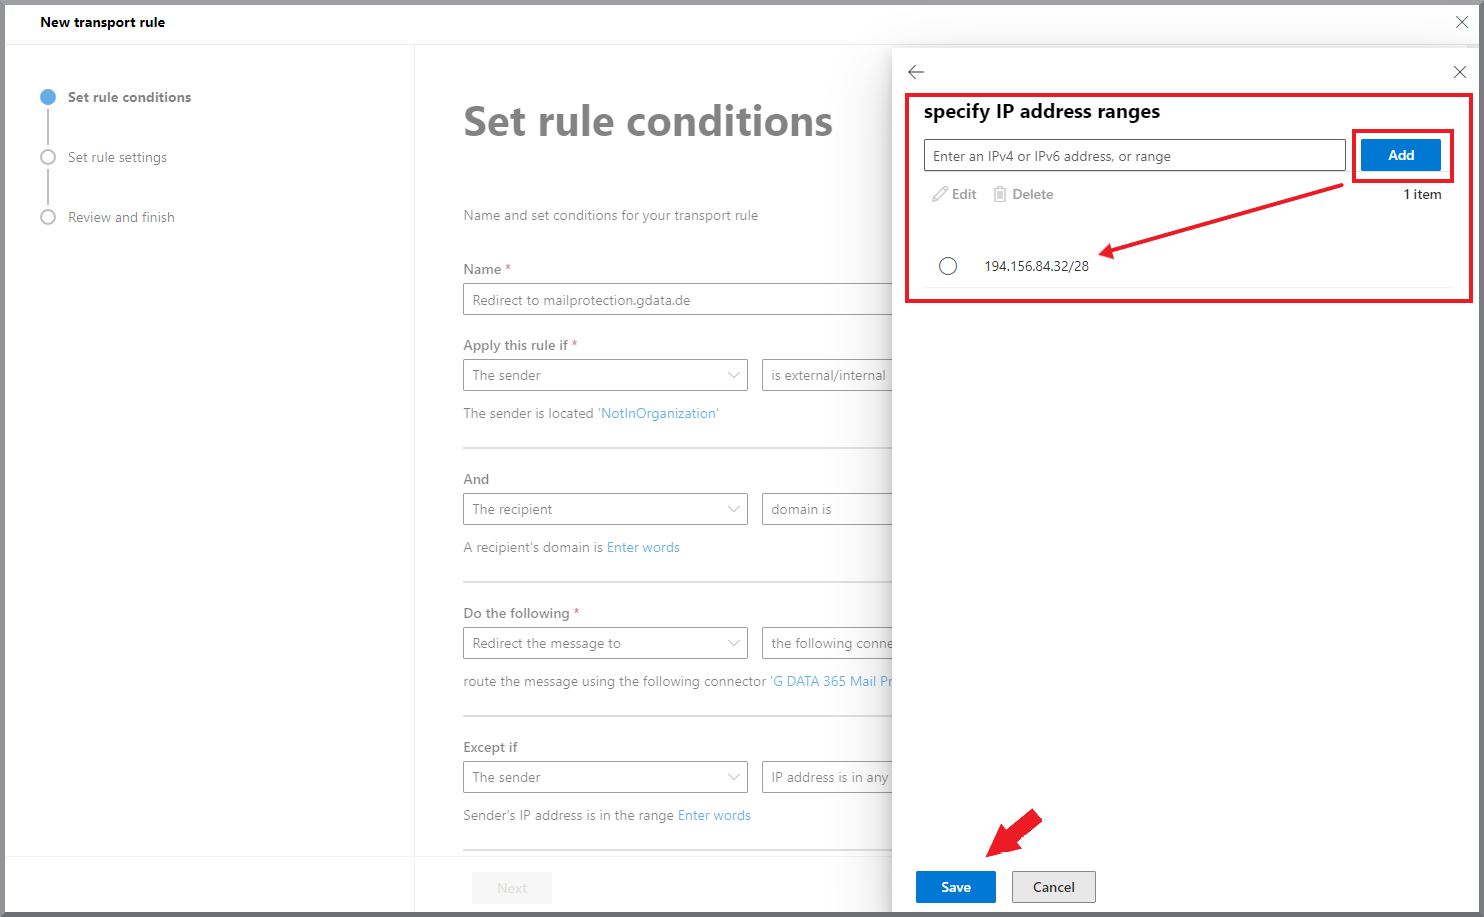
|
||
30. |
Click Weiter. |
||
31. |
Configure the following settings for the rule: Rule mode = Enforce Severity = High Show screenshot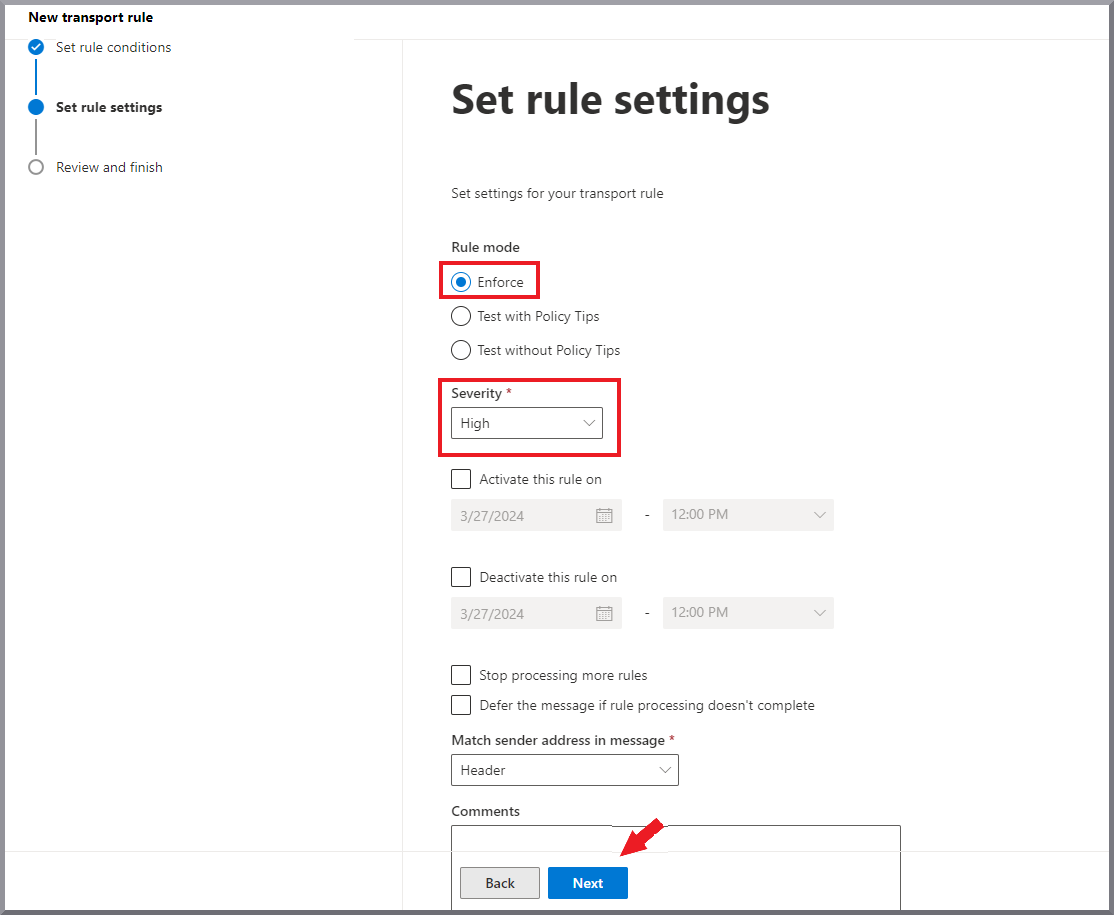
|
||
32. |
Click Weiter. |
||
33. |
Review the settings and click Fertig stellen. Show screenshot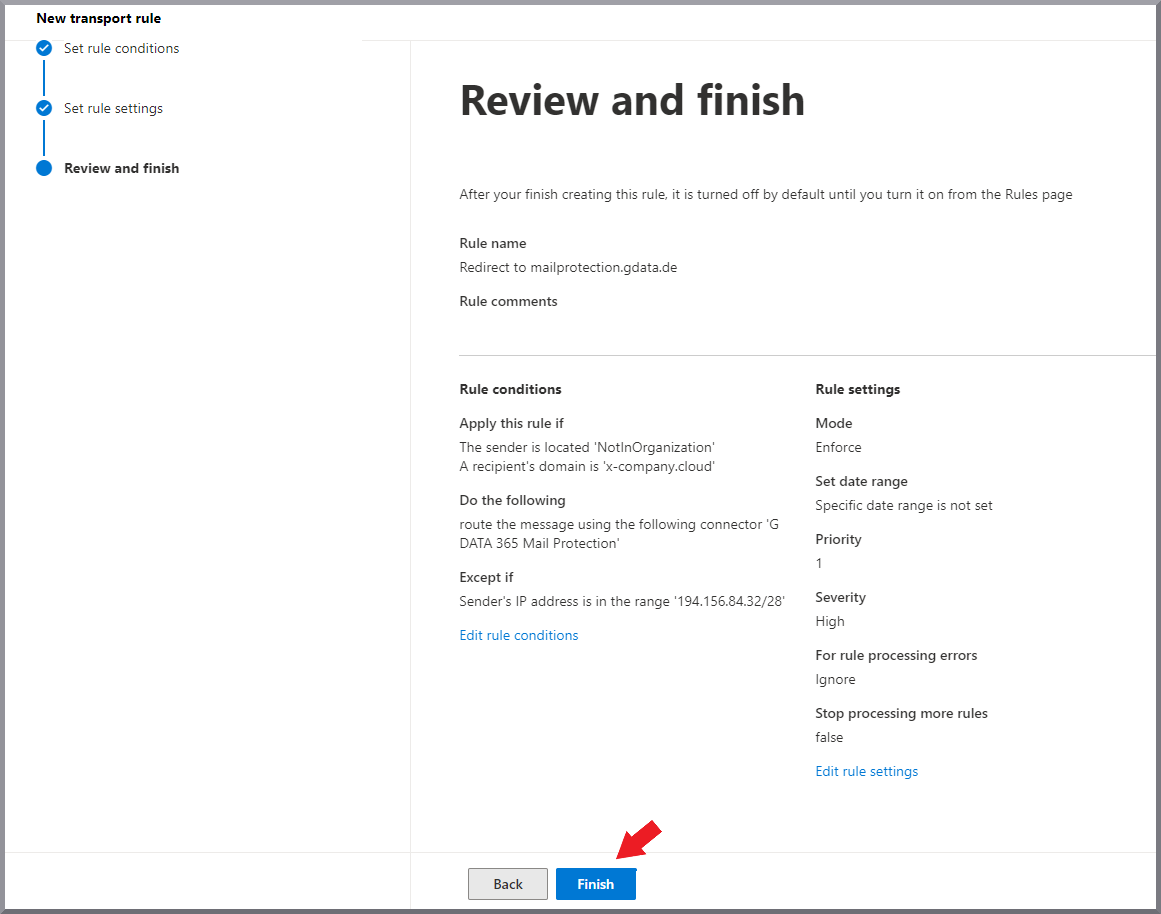
|
||
34. |
Click the row of the created rule in the Exchange Admin Center and enable the rule using the toggle switch in the pane that opens on the right edge of the screen. Show screenshot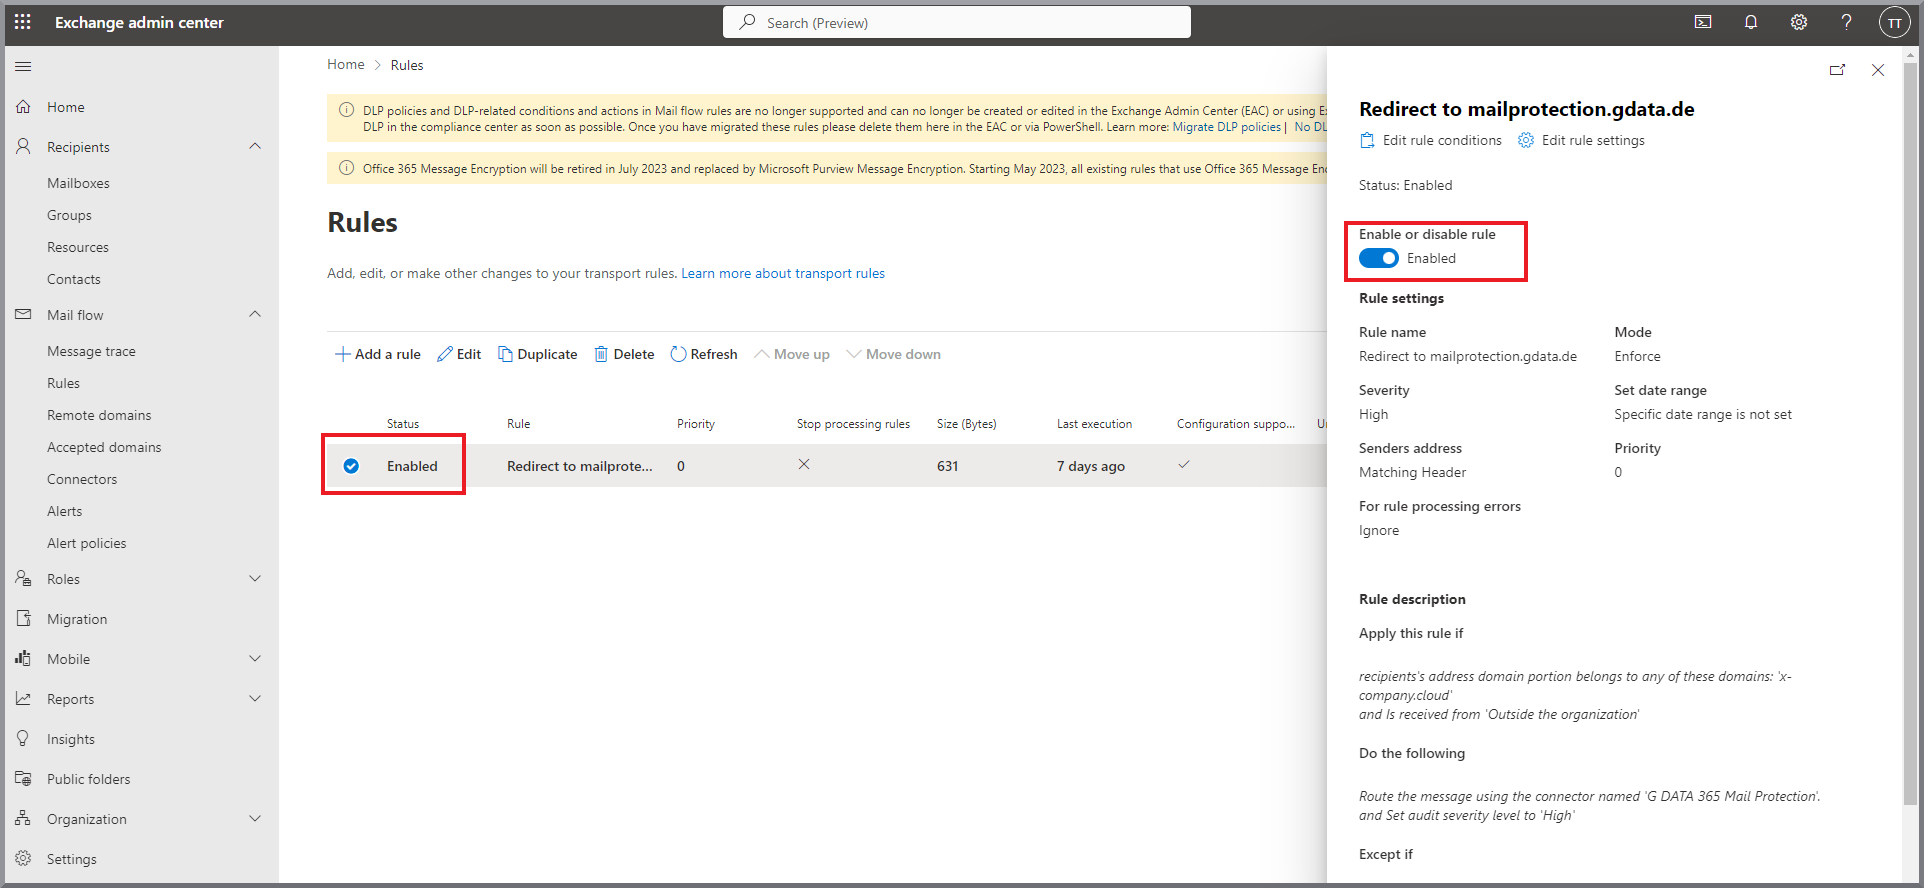
|