G DATA 365 | Mail Protection
Add the Microsoft Exchange Online to be monitored in the G DATA Web Portal.
1. |
Connect to our G DATA Web Portal and log in. |
||
2. |
In the left navigation tree below G DATA 365 | Mail Protection, go to Settings and the Mail Server tab. |
||
3. |
Click + Add mail server. Screenshot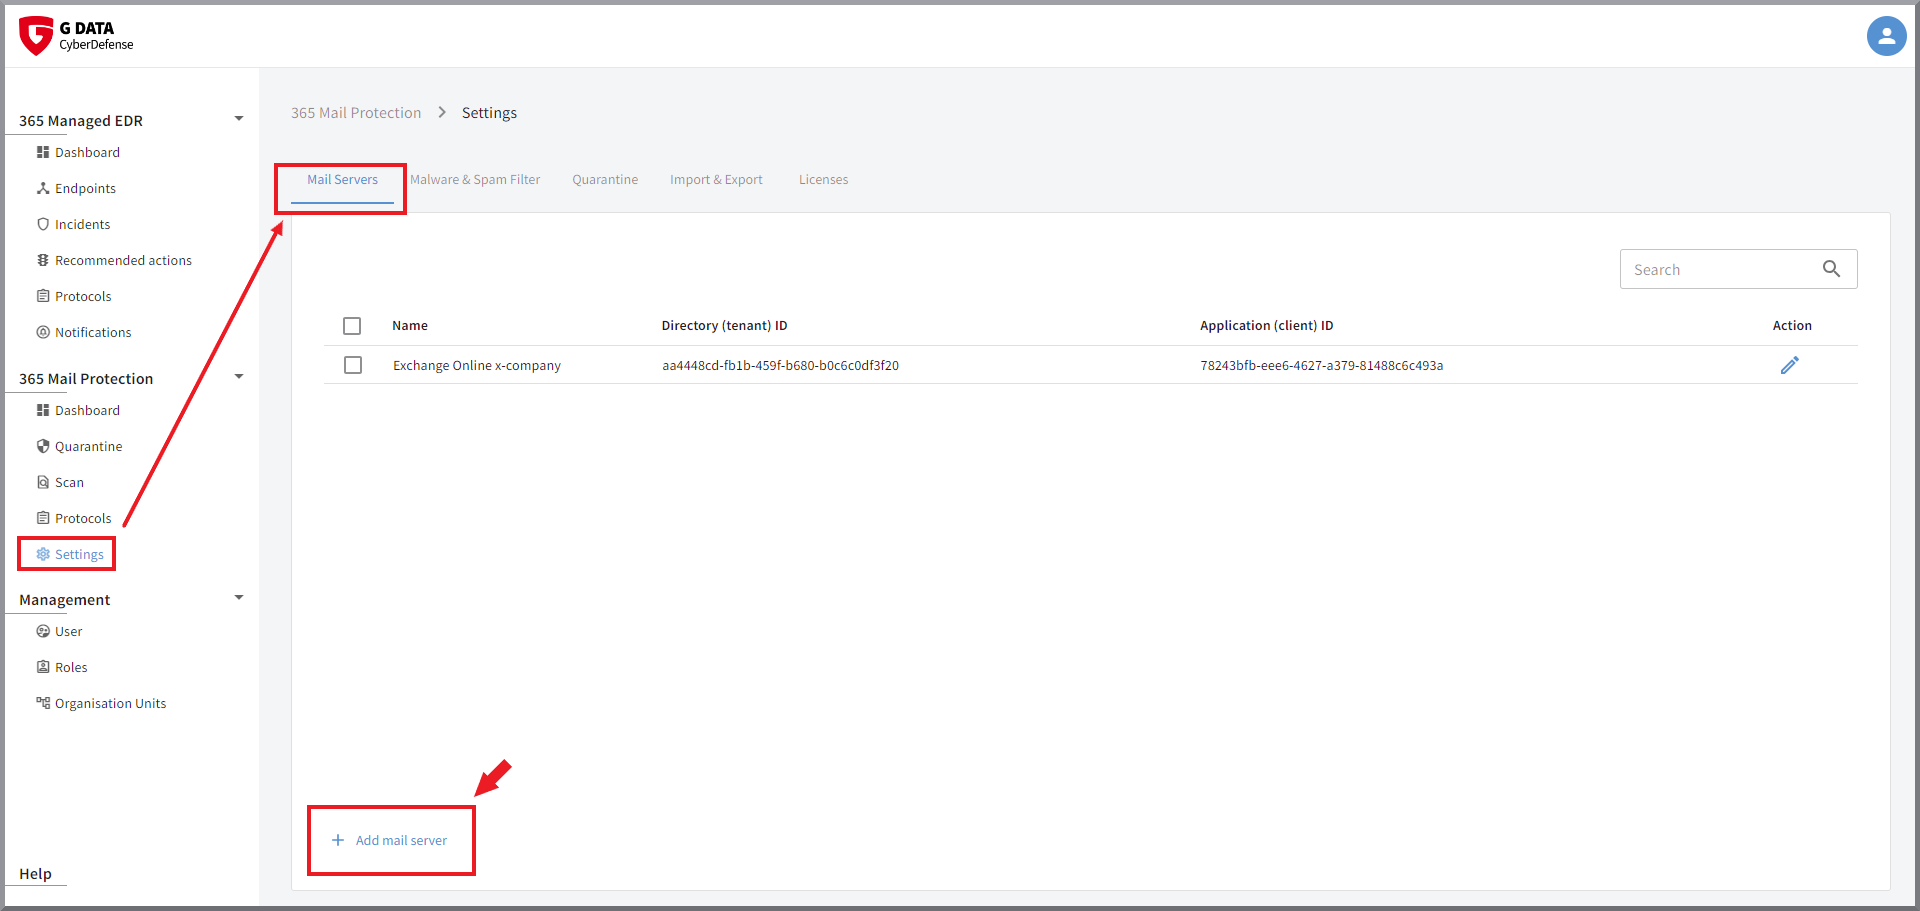
|
||
4. |
This window opens: 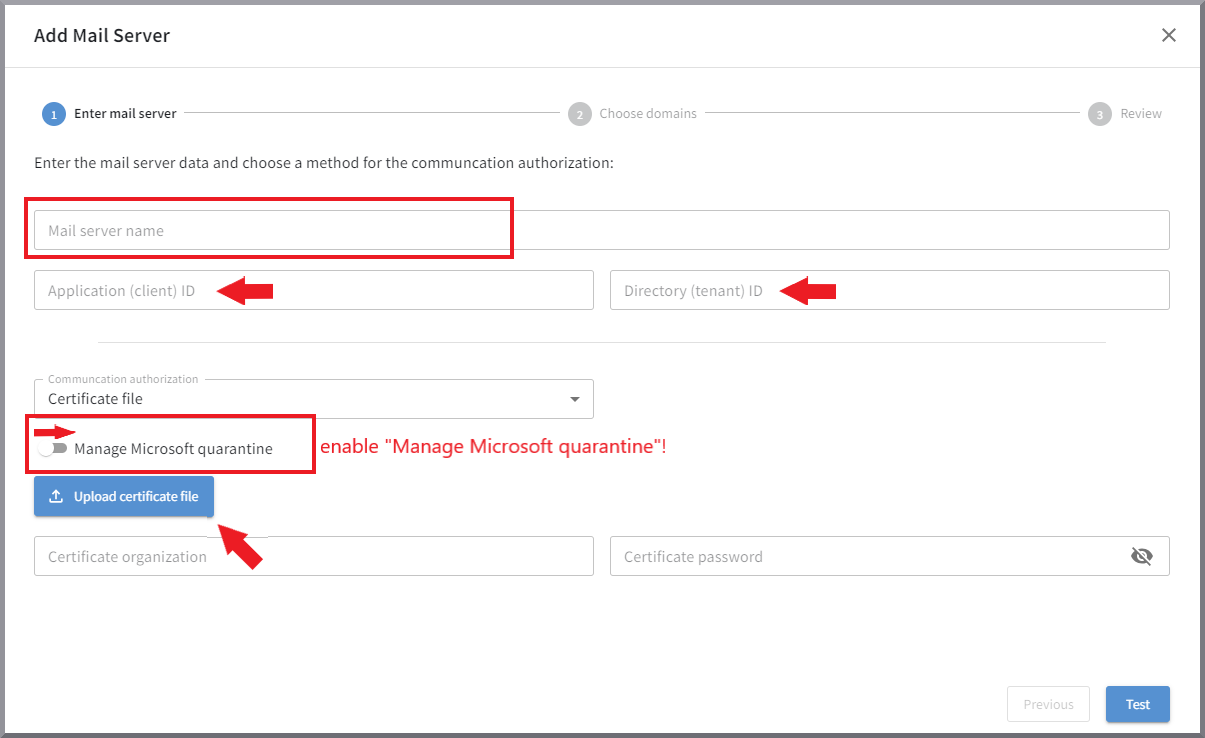
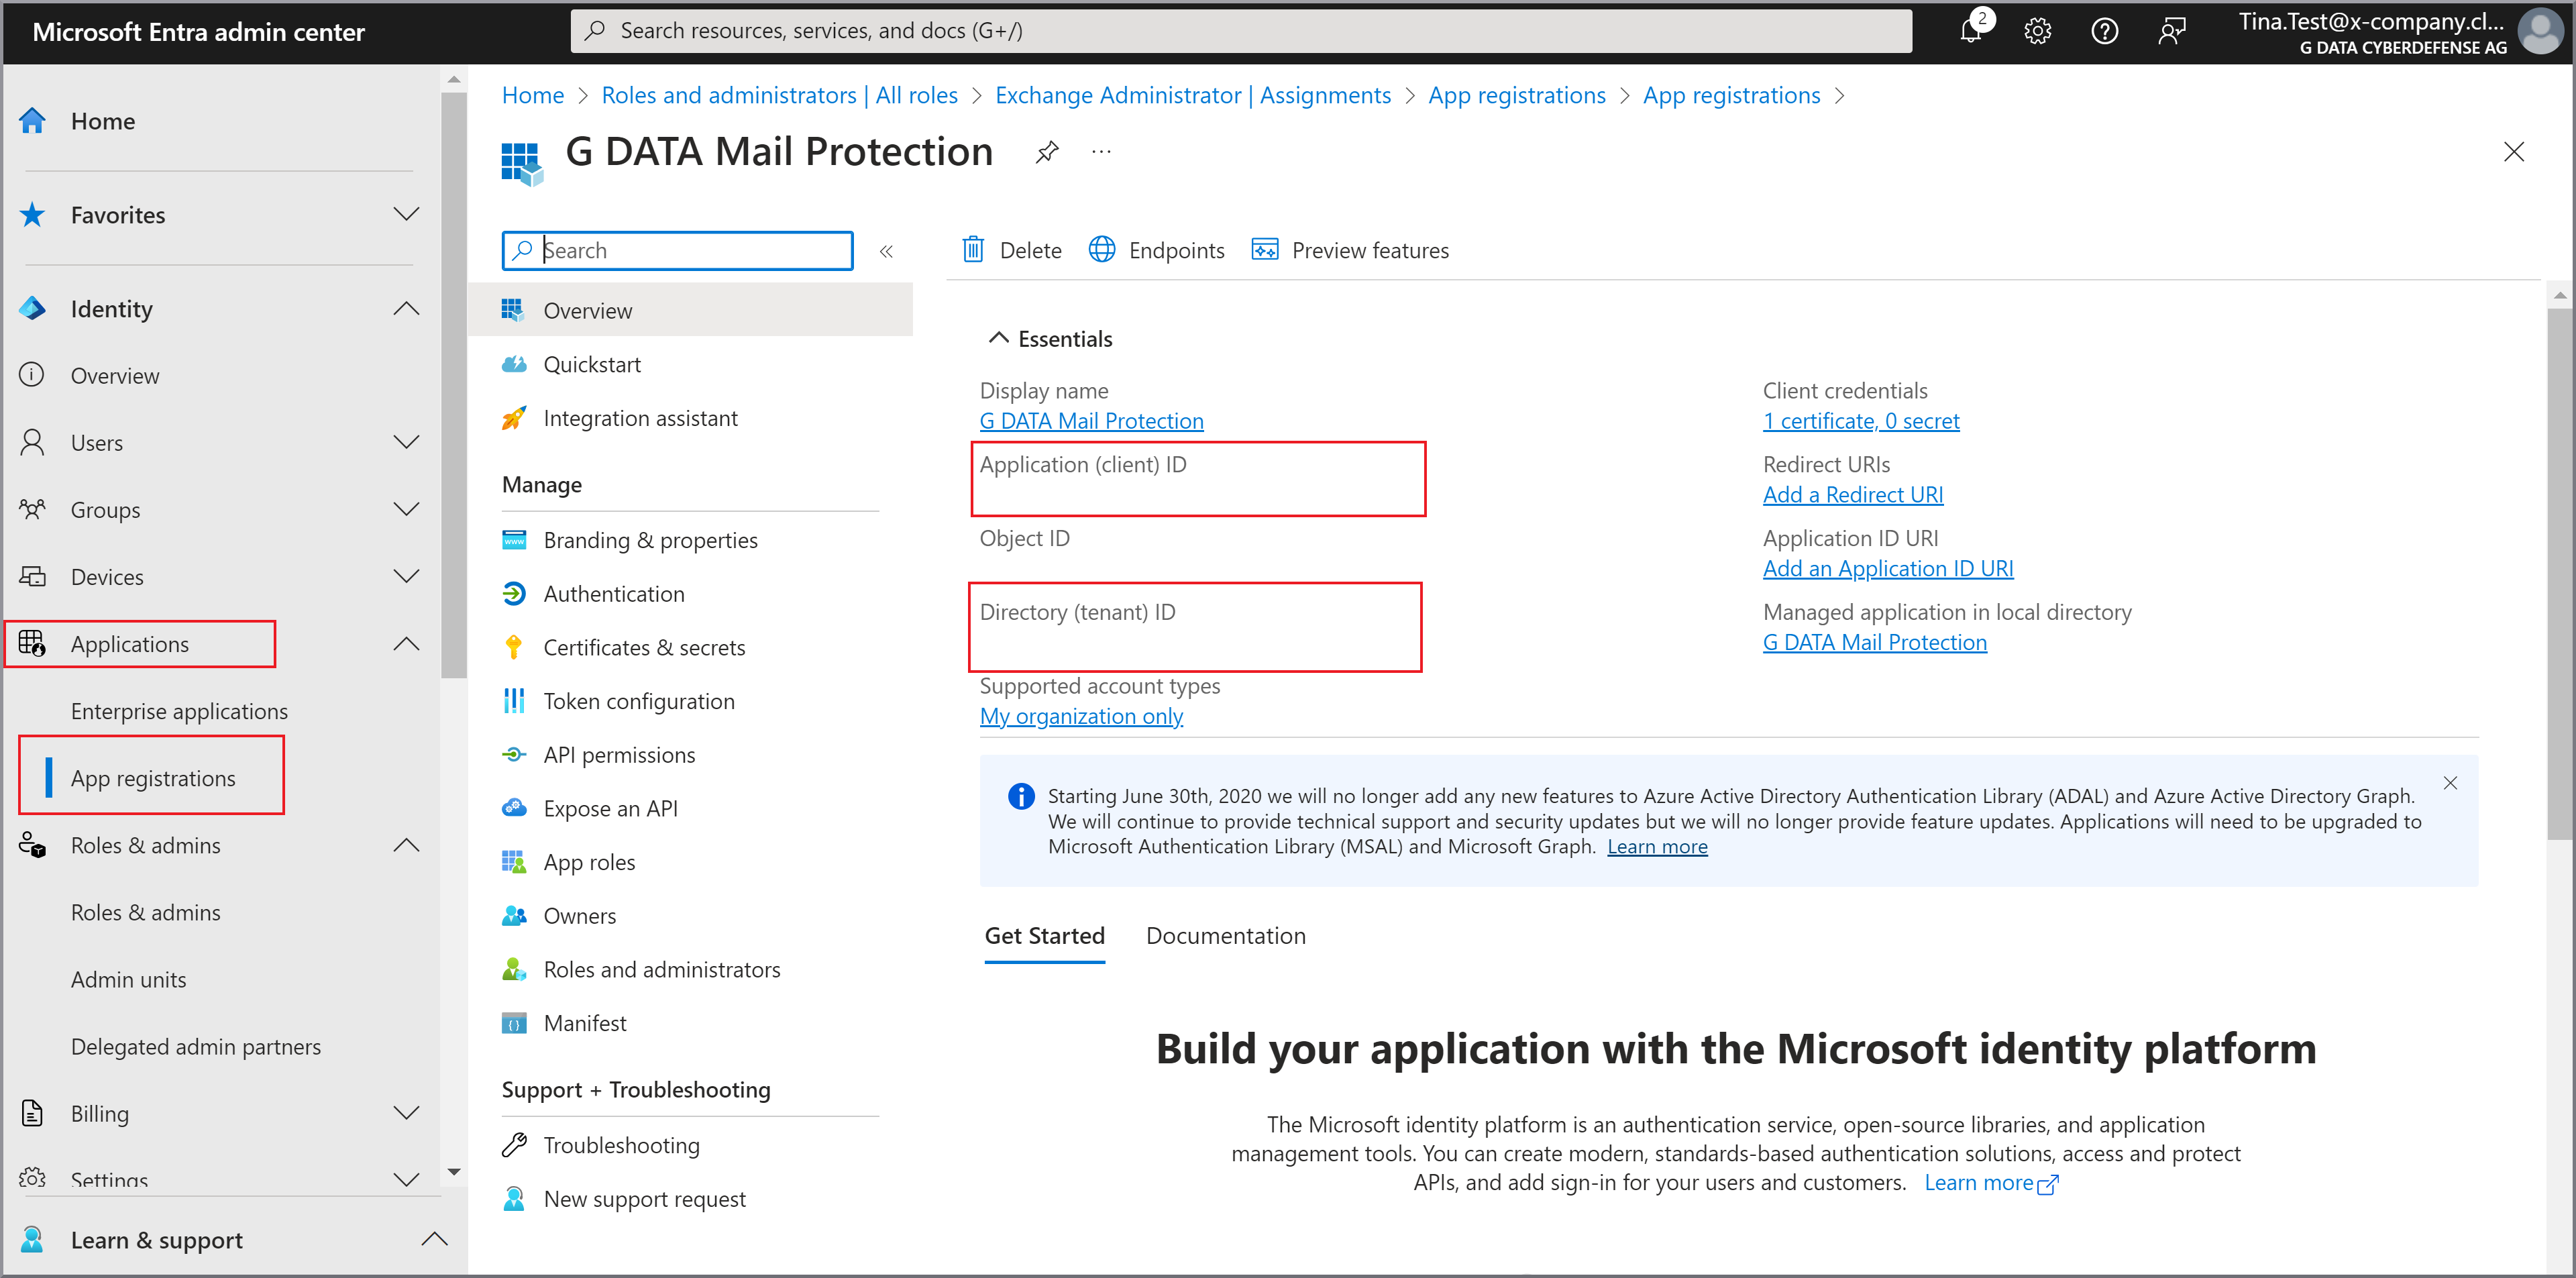
Assign a display name to the server. Enter the Application (client) ID and the Directory (tenant) ID of your Microsoft Exchange Online here.
Select whether you would like to secure access to the G DATA 365 | Mail Protection with a client secret or a certificate. For security reasons, we recommend using a certificate in all cases. If you would like to manage the quarantine of the Microsoft Exchange Online together with the quarantine of the G DATA 365 | Mail Protection via our interface, the use of a certificate is required. Enable the toggle switch for the Microsoft quarantine if you would like to manage the quarantine of the Microsoft Exchange Online together with the quarantine of the G DATA 365 | Mail Protection via our interface. If you have decided to use a certificate, upload the PFX file you created from the directory used when creating it. Otherwise, enter your client secret. |
||
5. |
Use the Test button to test whether access is successful. If you are shown an error message regarding an invalid certificate, check the password used again. If the test has confirmed a valid certificate, click Next. |
||
6. |
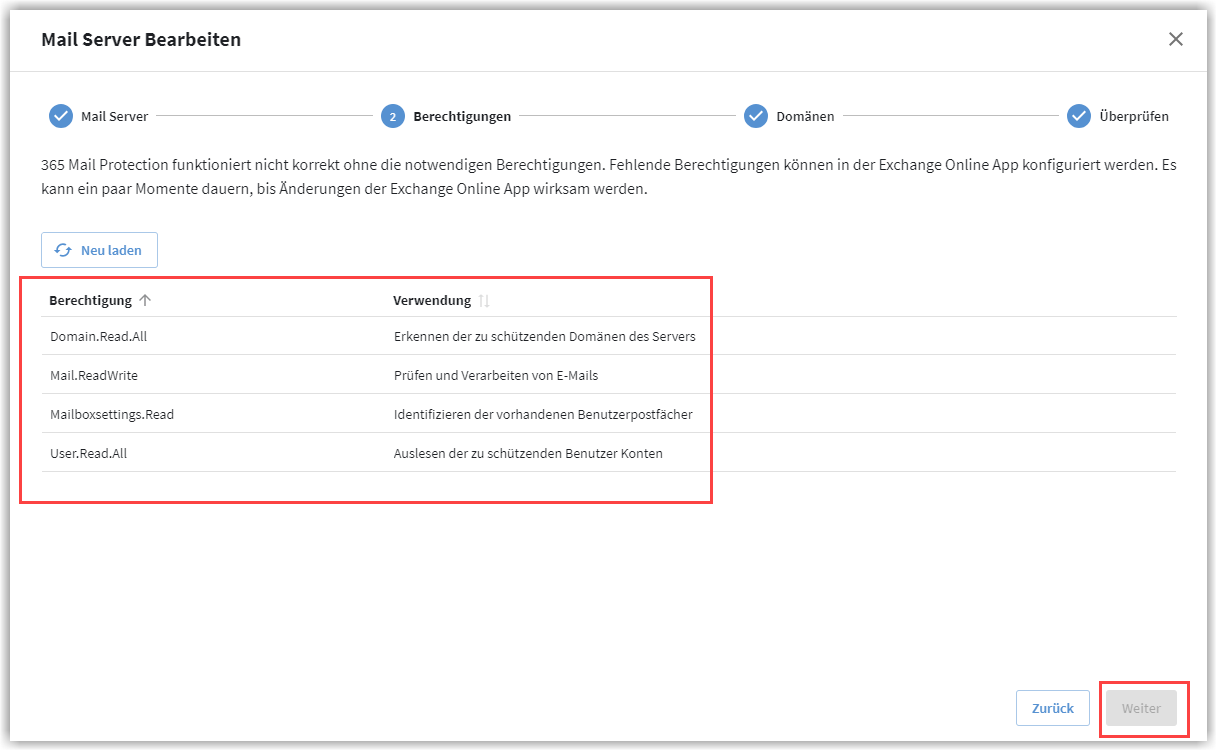
If you followed the setup guide, you should receive the following confirmation on the next page that all permissions have been granted correctly: 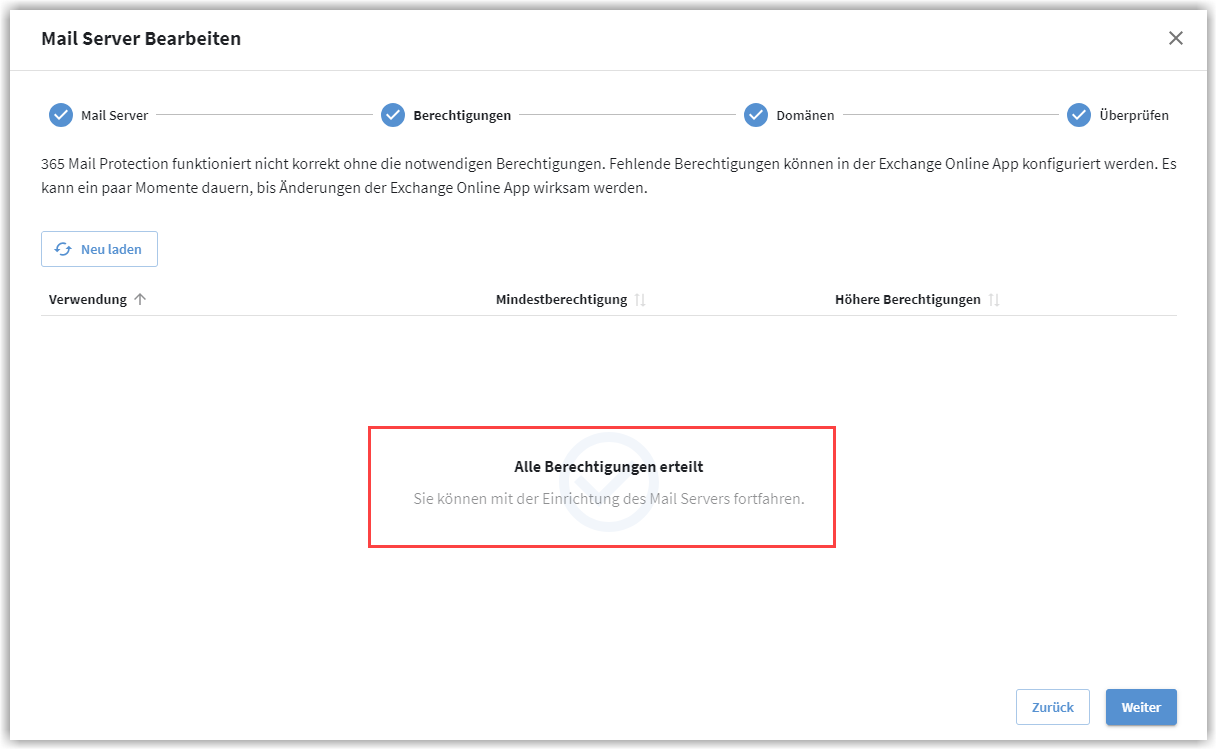
If the permissions have not yet been granted in full, you will receive an overview at this point indicating which permissions are still required for the G DATA 365 | Mail Protection. Before you can continue, these permissions must still be granted in Exchange Online.
If all permissions have been granted correctly, click Next. It may now take some time (up to an hour) for the domains entered as Accepted domains in the Microsoft Exchange Online to be read and displayed here.
|
||
7. |
On the following page, check the domains that are being checked by G DATA 365 | Mail Protection.
Screenshot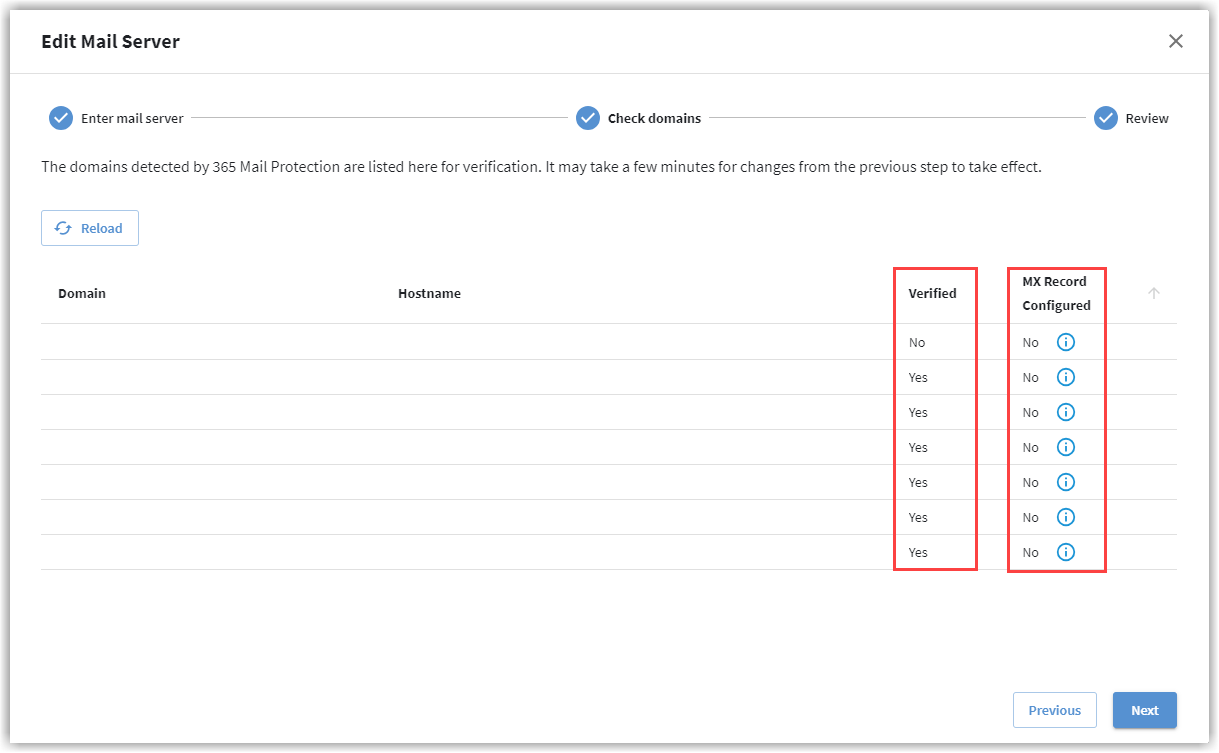
Click Next. |
||
8. |
|||
9. |
Next, if desired, you can test whether email sending via G DATA 365 | Mail Protection works smoothly. As soon as you have selected a recipient email address from the drop-down menu, the Test button becomes active. It takes a moment before the result is displayed. You can also skip this test for now and proceed directly to step 10. The test can be performed at any time. Screenshot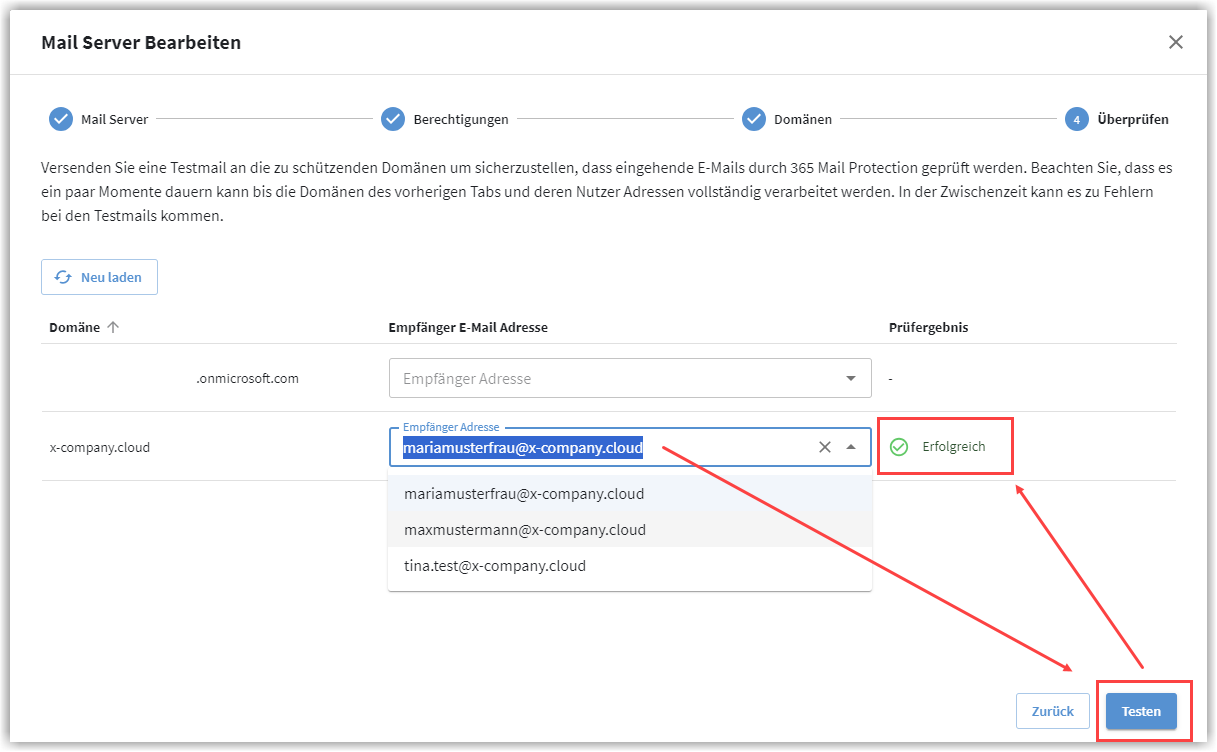
|
||
10. |
Click Finish. The setup of the mail server for G DATA 365 | Mail Protection is complete. |