G DATA 365 | Mail Protection
Setting permissions in Microsoft Exchange Online
G DATA 365 | Mail Protection not only checks incoming email. It also scans your mailboxes at regular intervals to subsequently detect infected email messages that slipped through and move them to the quarantine.
In addition, if desired, you can conveniently manage the quarantine of Microsoft Exchange Online together with our quarantine section via a single, clearly structured interface.
This article describes how to grant the permissions required for this:
1. |
Open your Entra website and sign in. |
2. |
Select Applications and App registrations. Open All applications. Show screenshot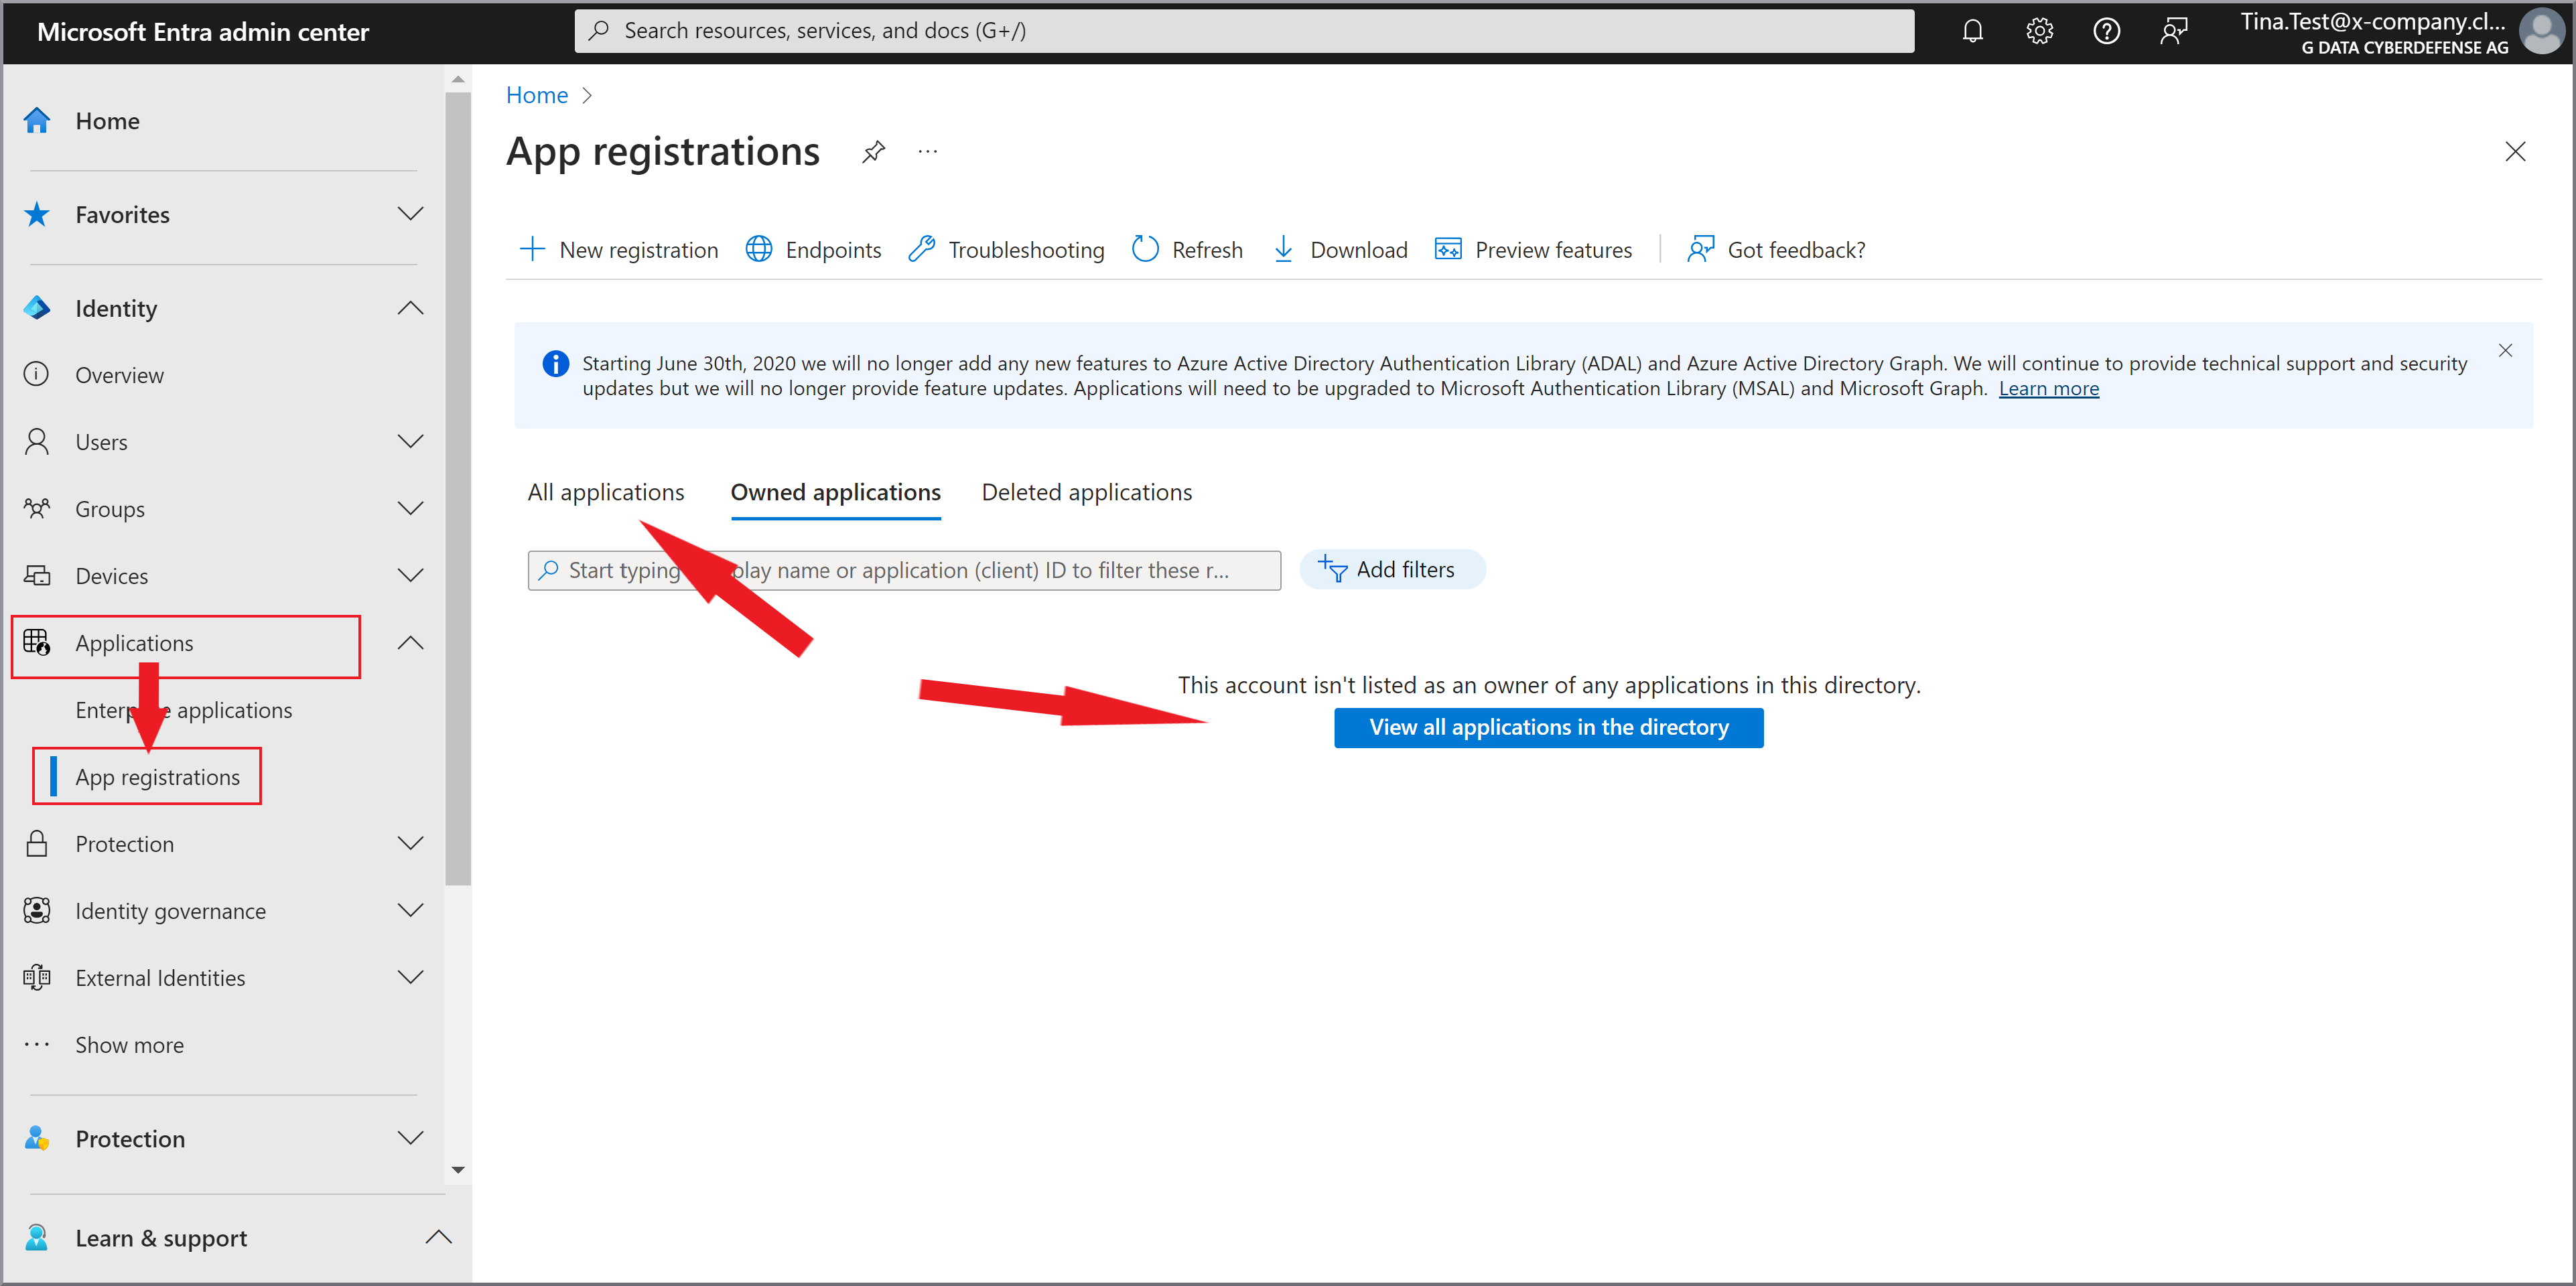
|
3. |
Click the G DATA Mail Protection row. |
4. |
Click API permissions. Show screenshot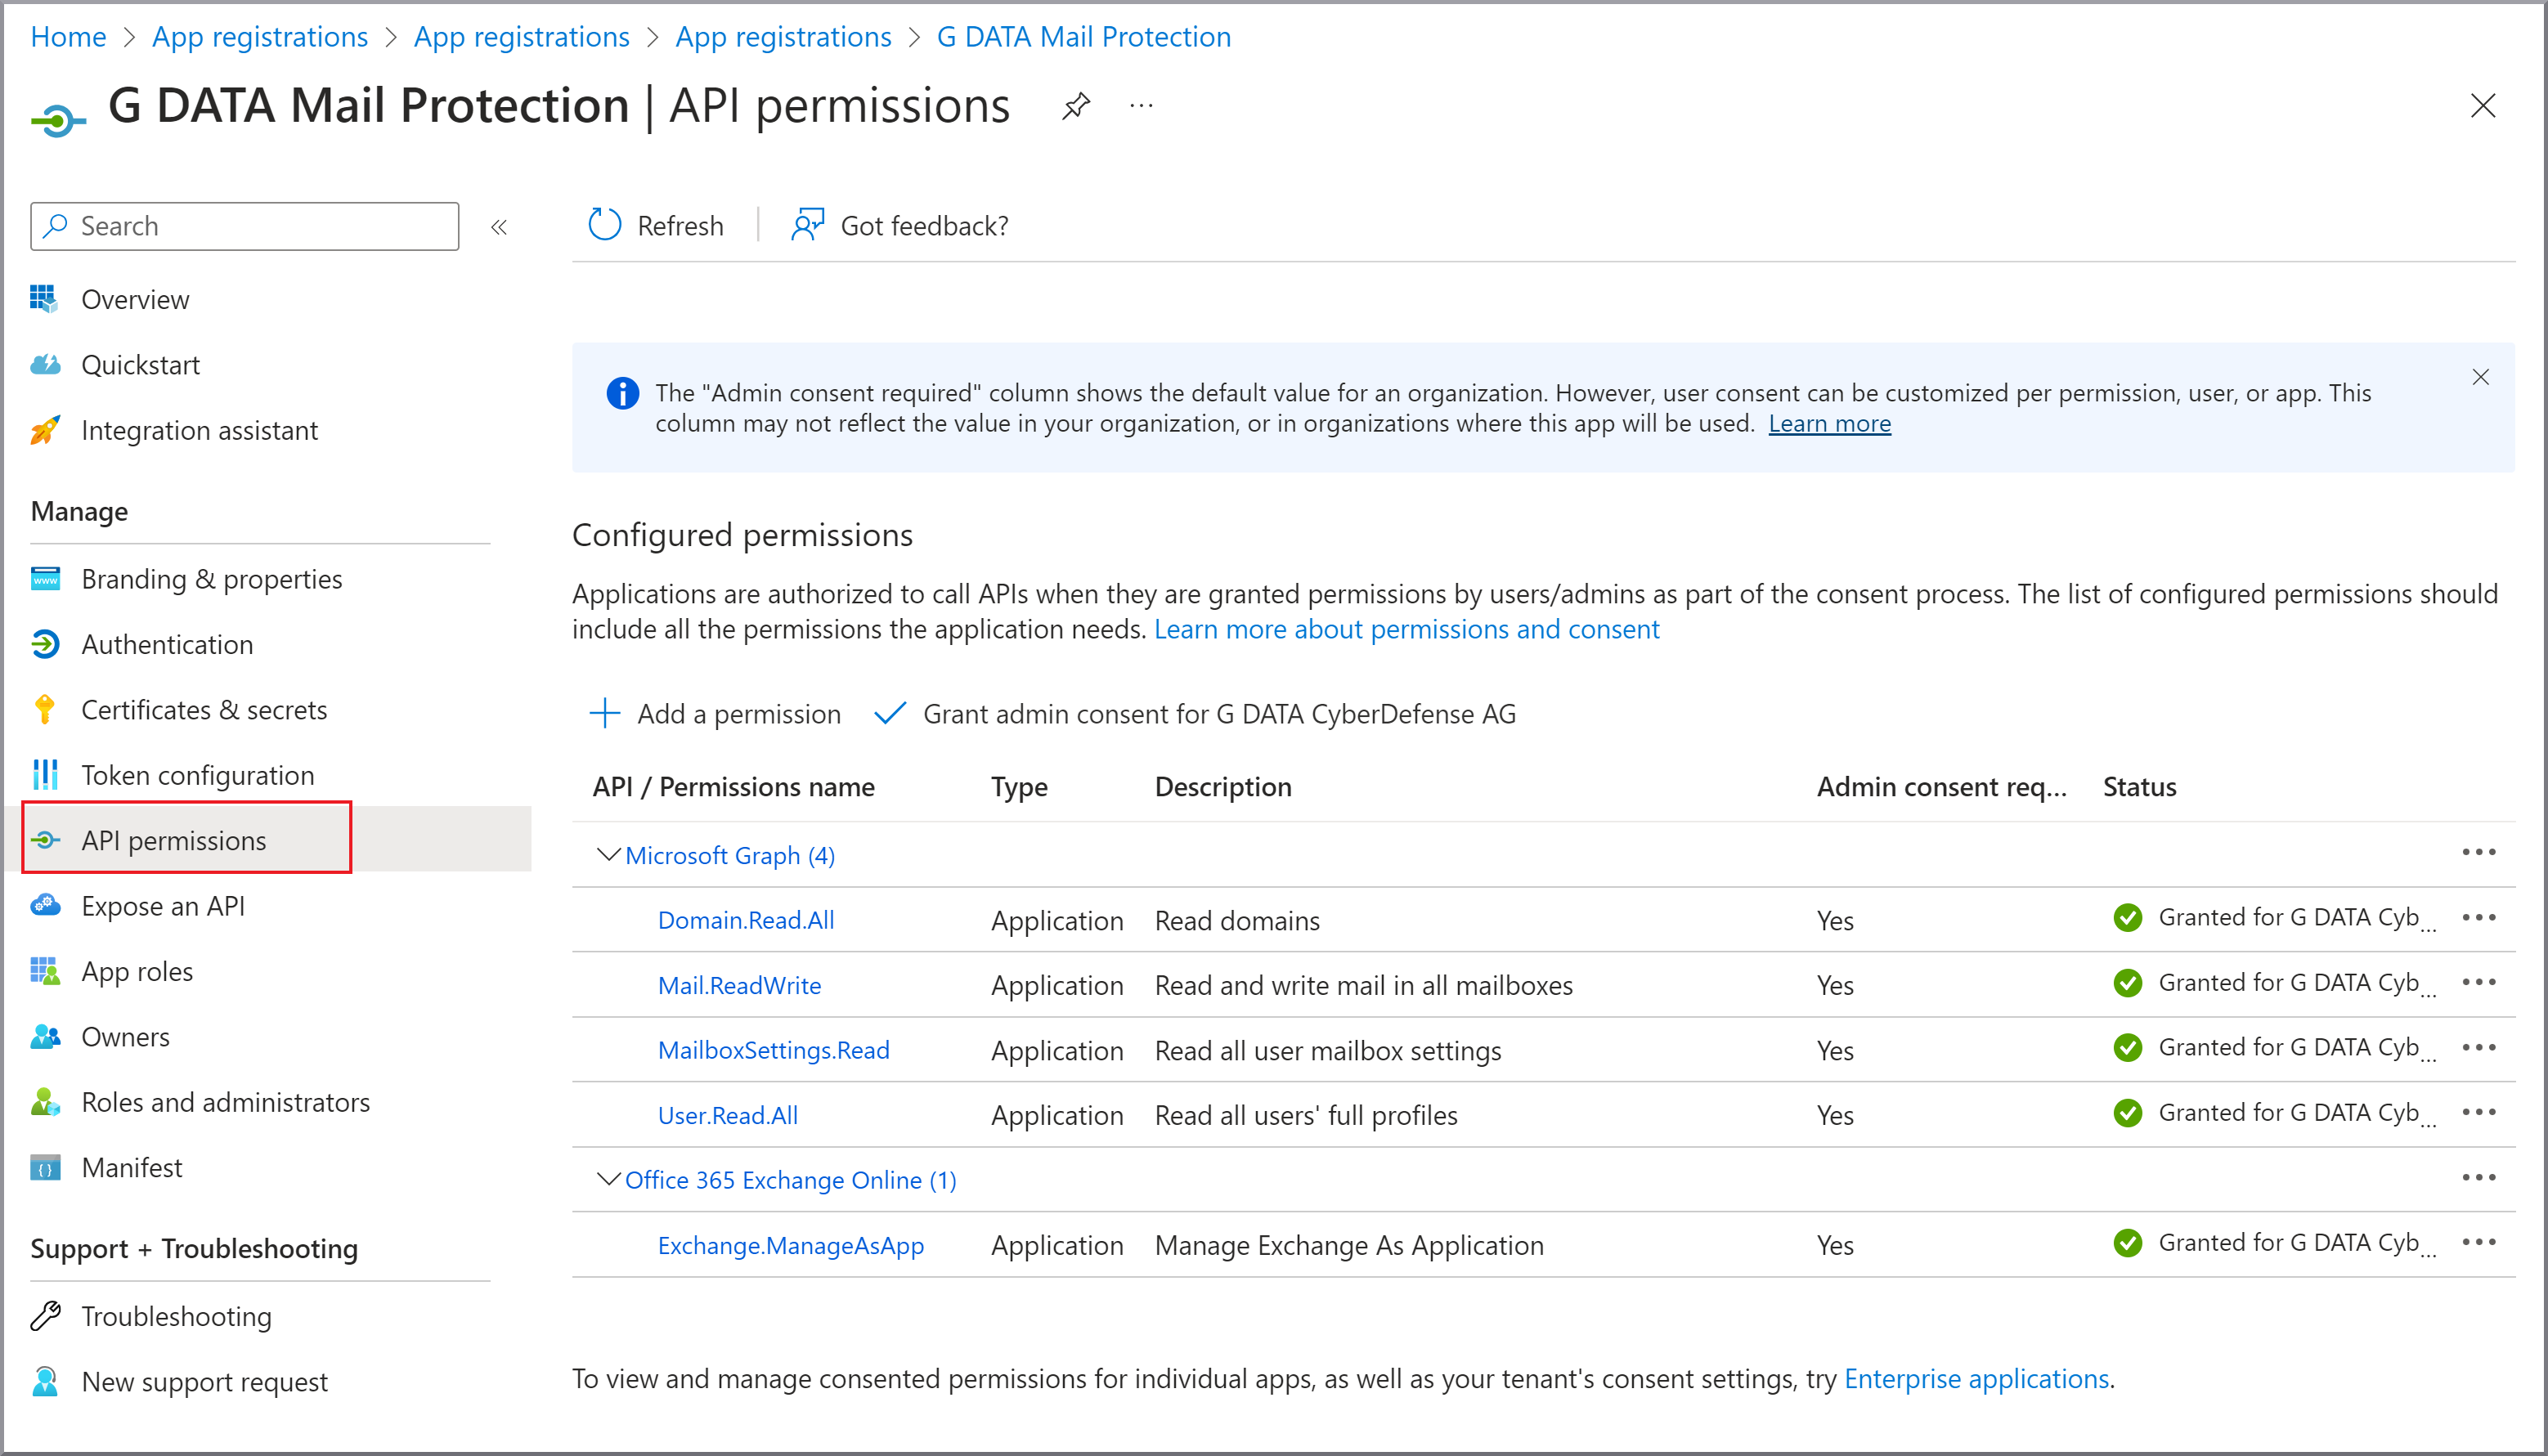
|
5. |
Select + Add a permission and then Microsoft Graph. Show screenshot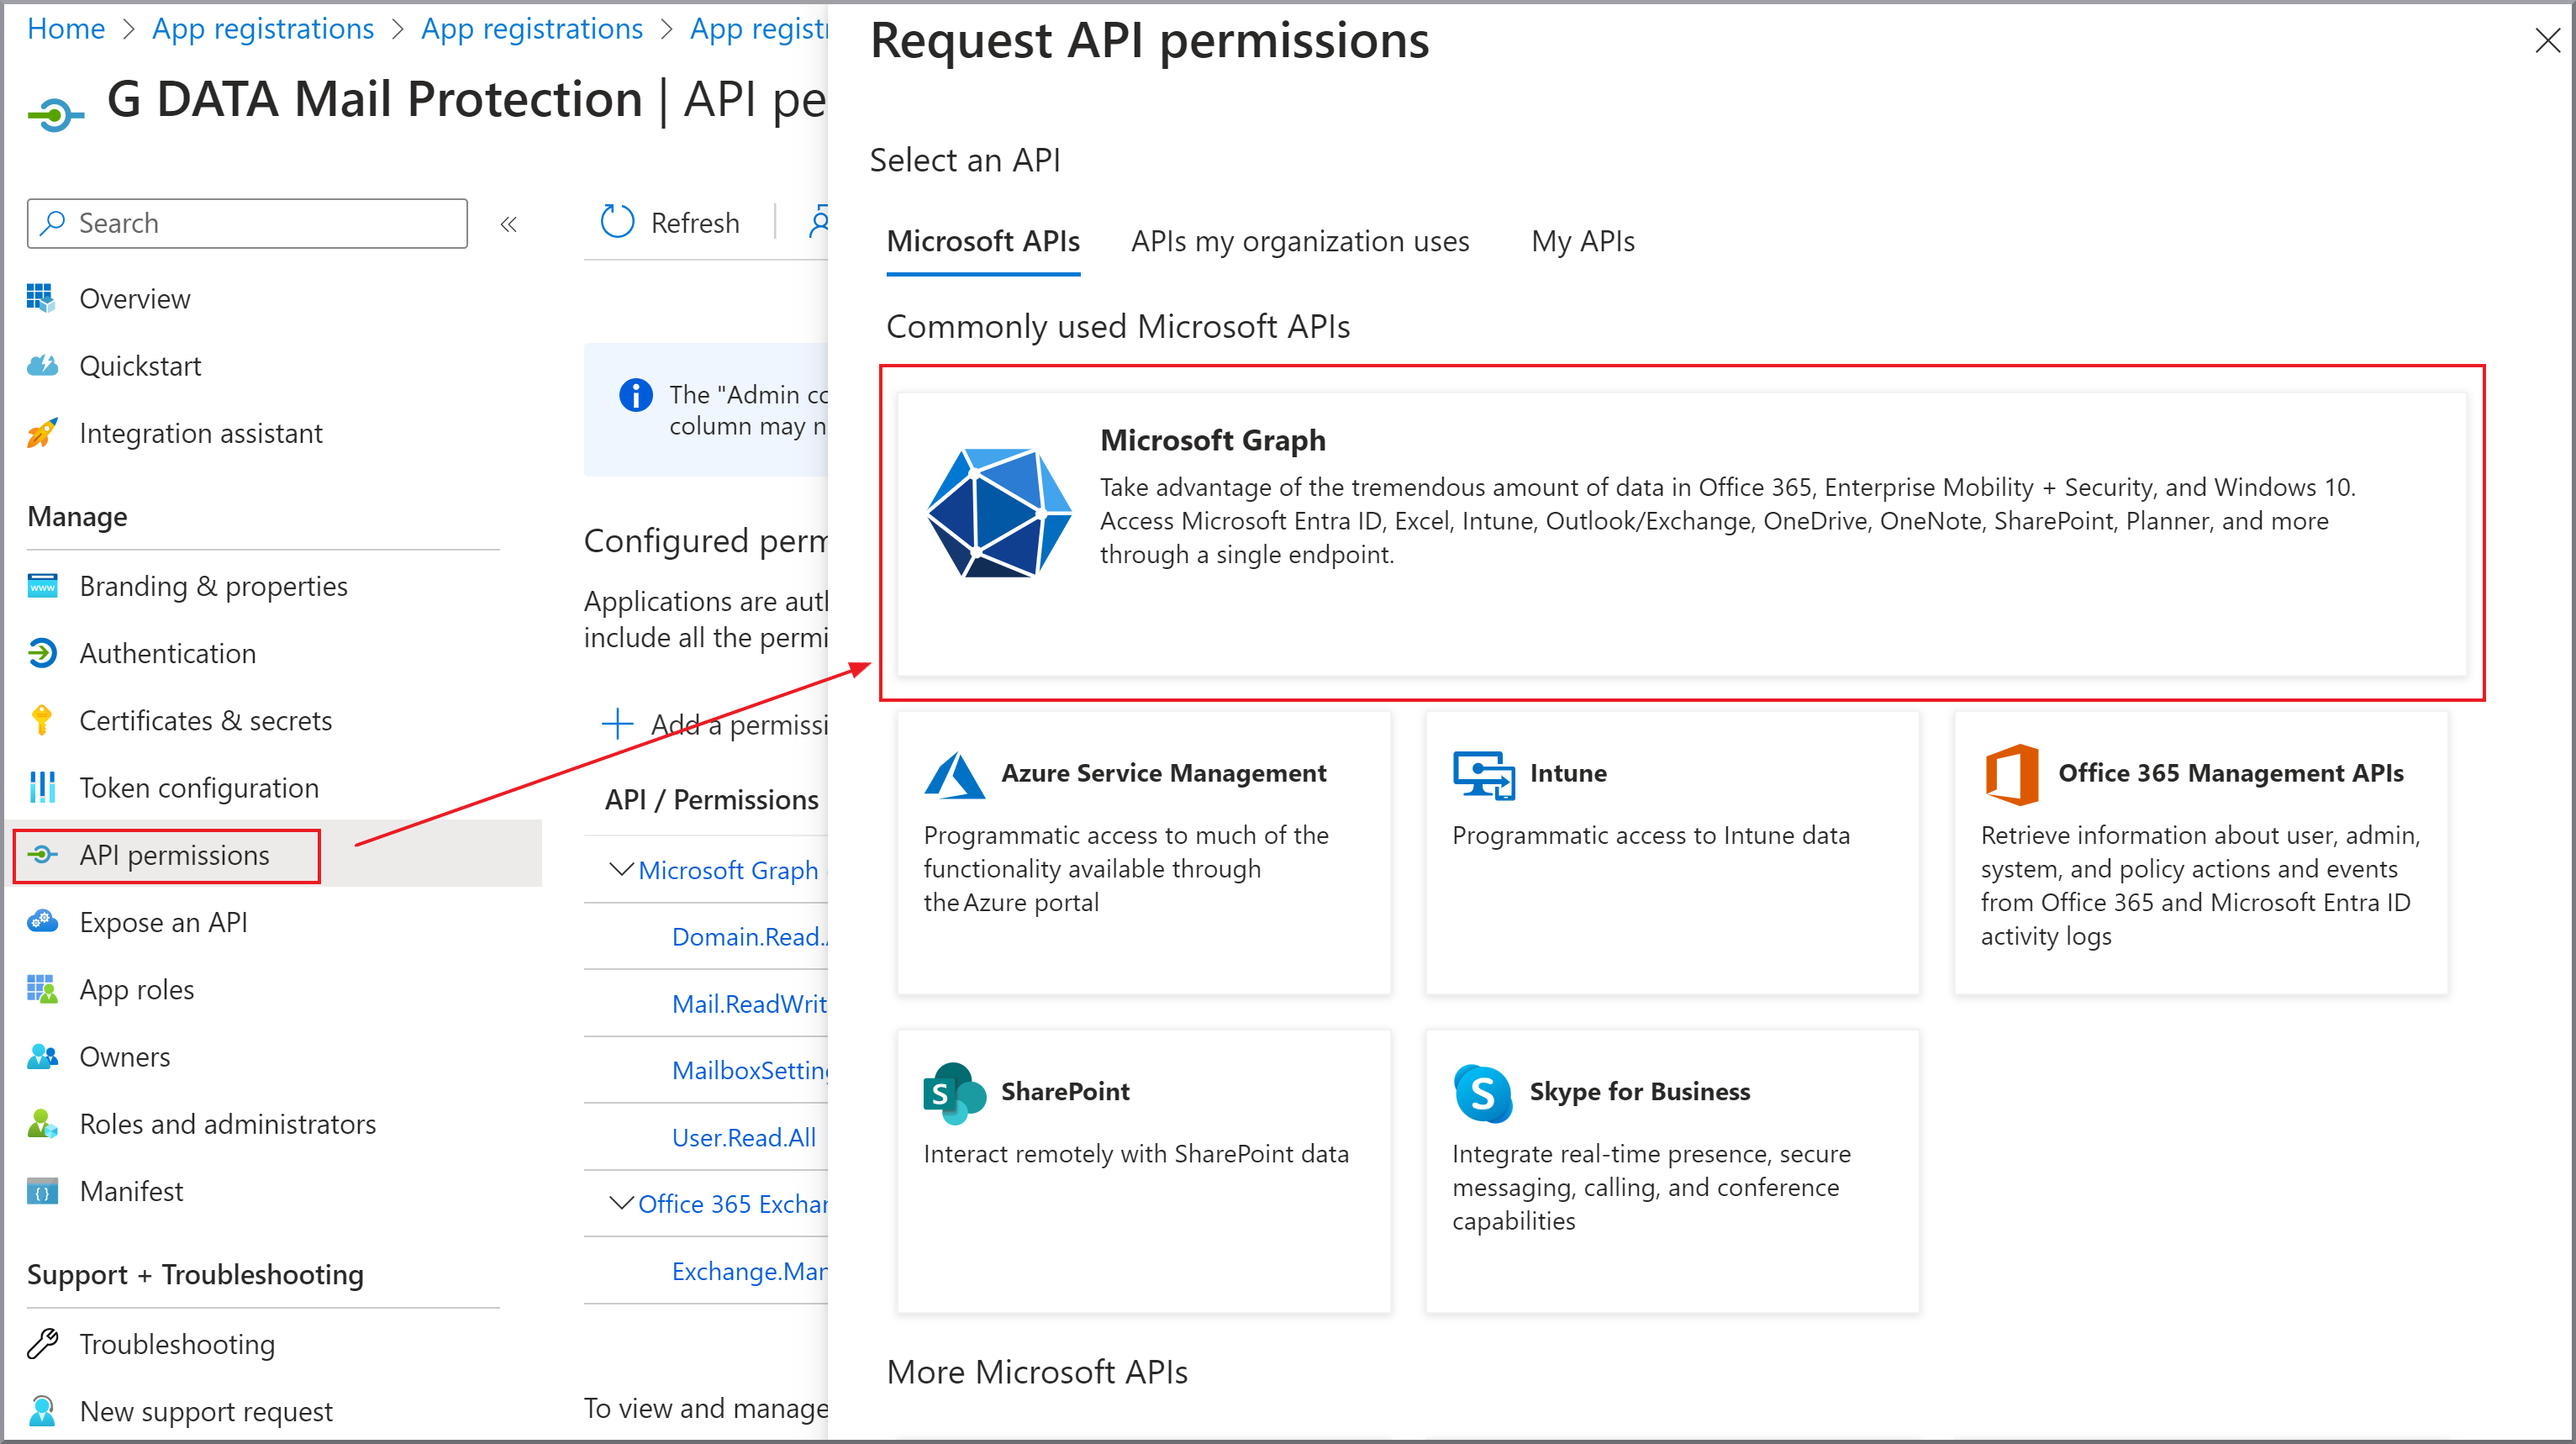
|
6. |
Select Application permissions. Show screenshot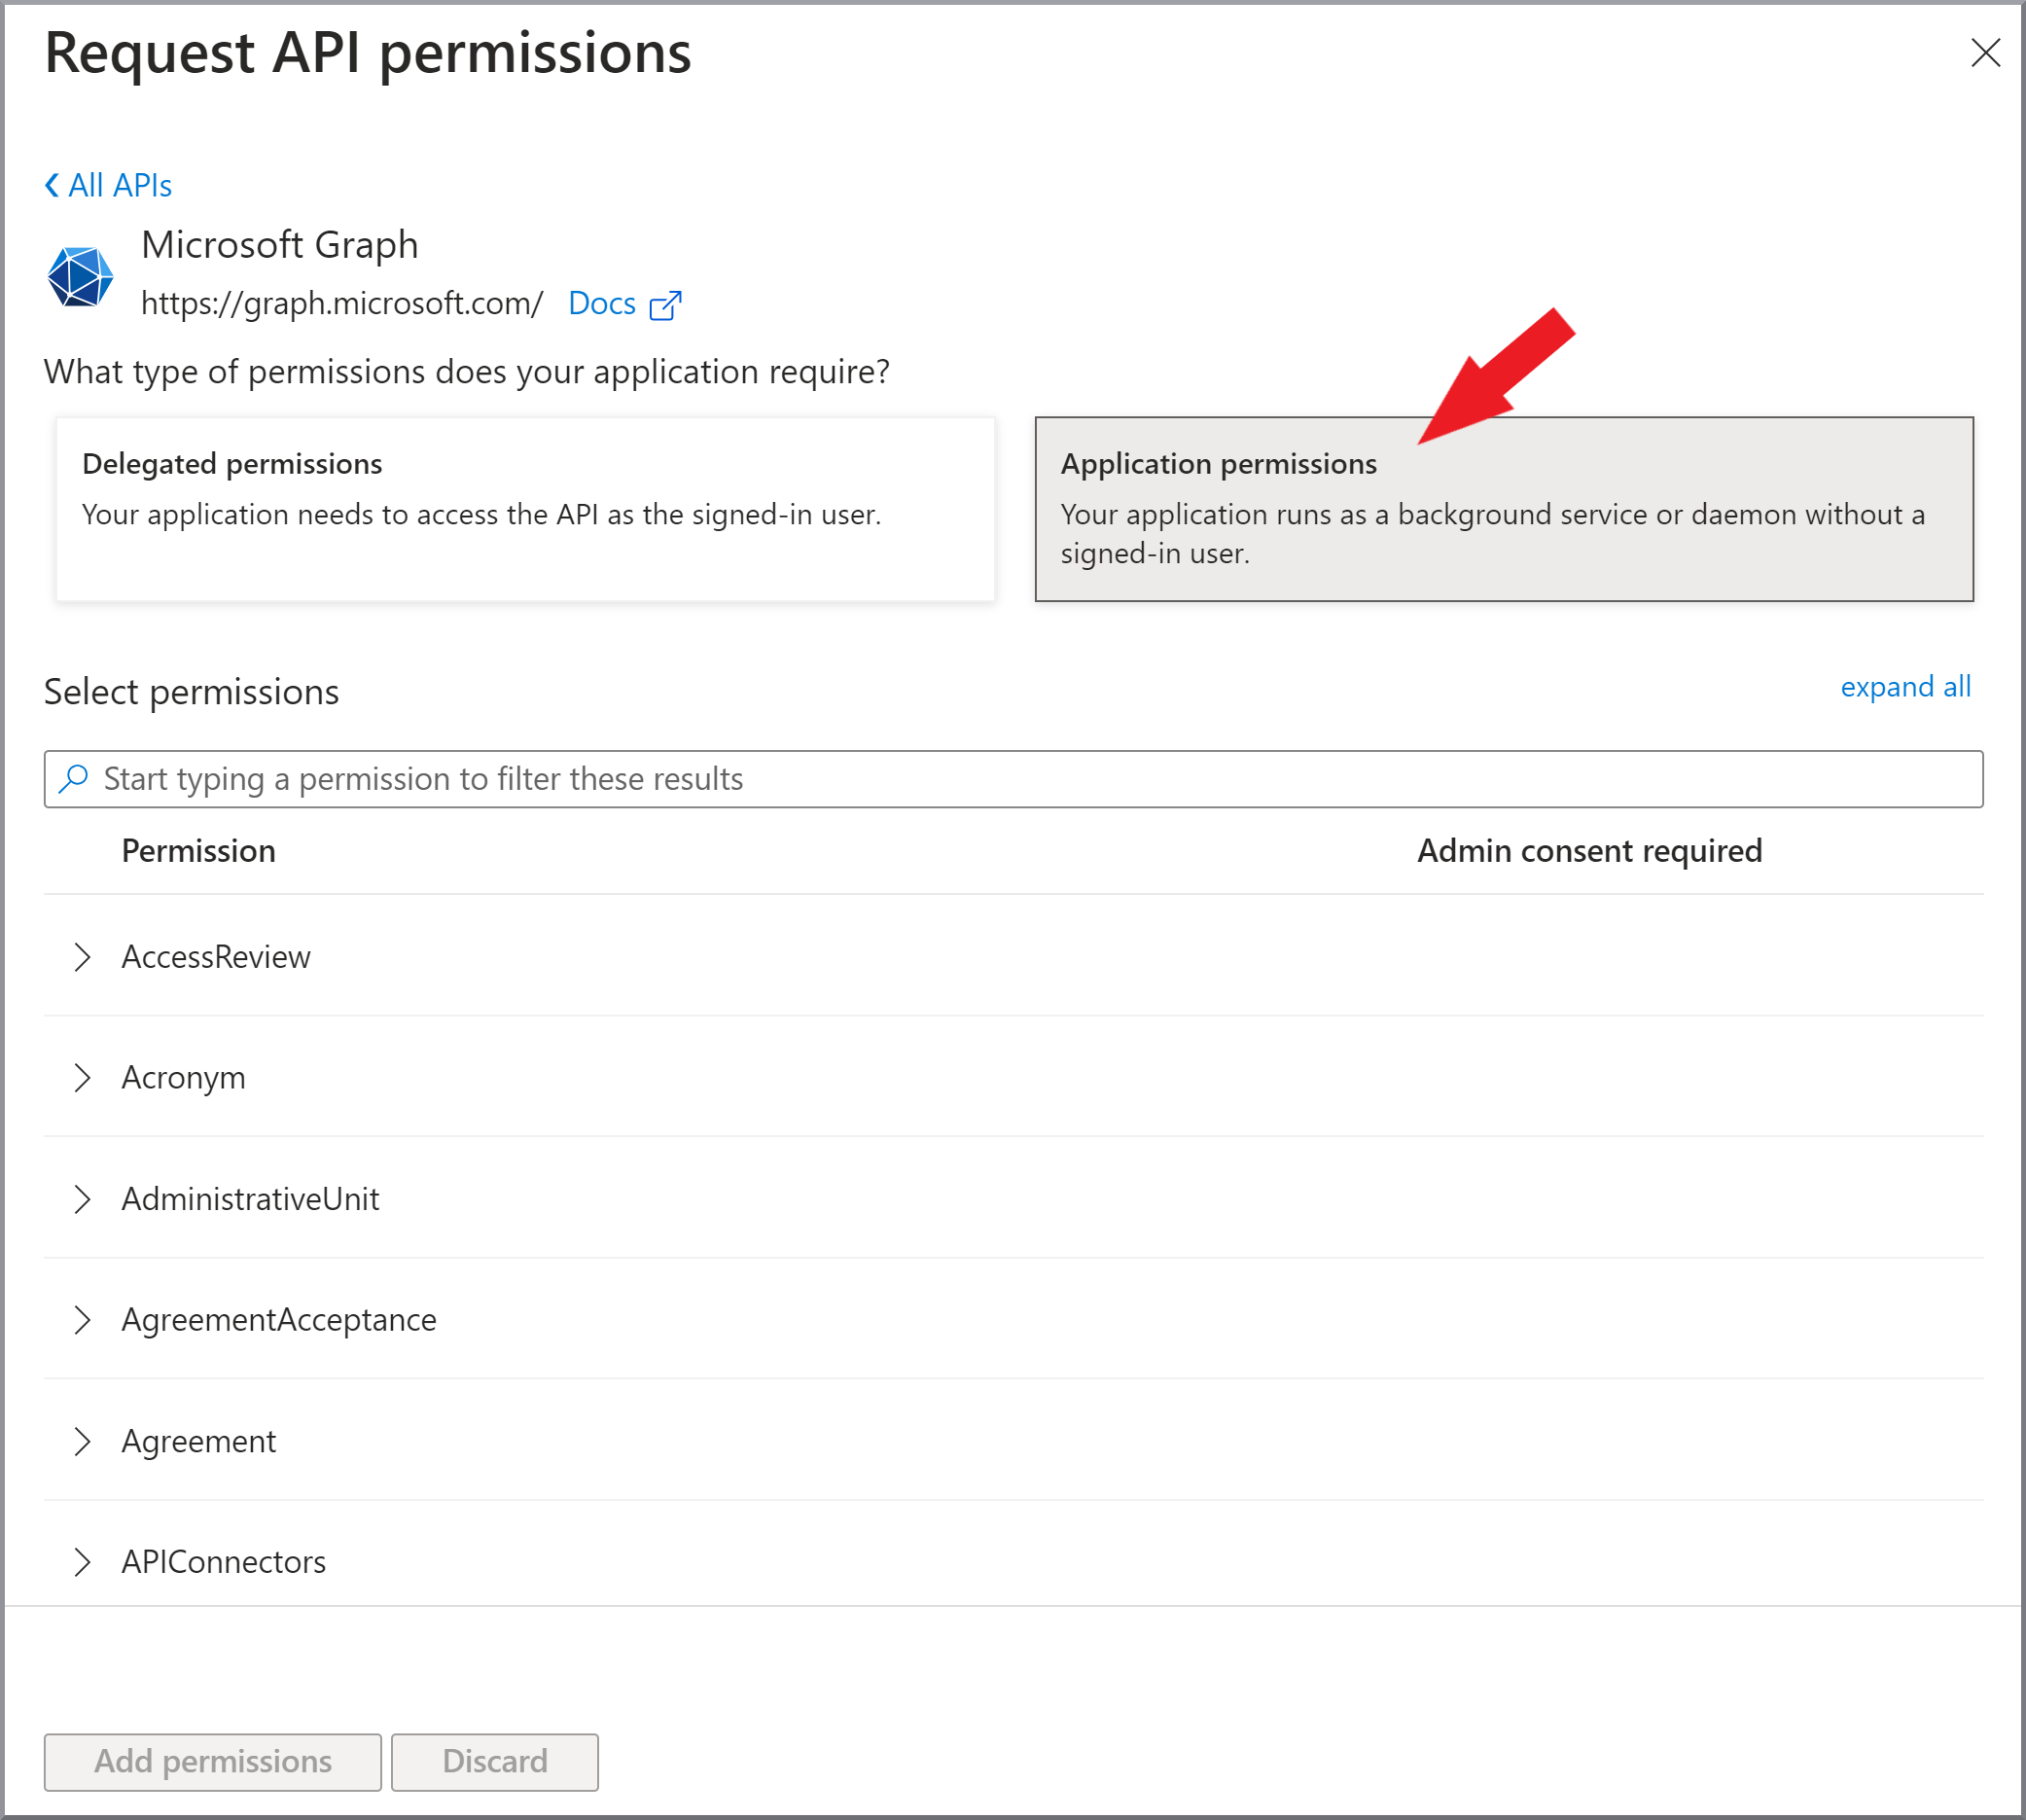
|
7. |
Scroll down and locate the permissions shown in the following screenshot. Select the corresponding permissions. 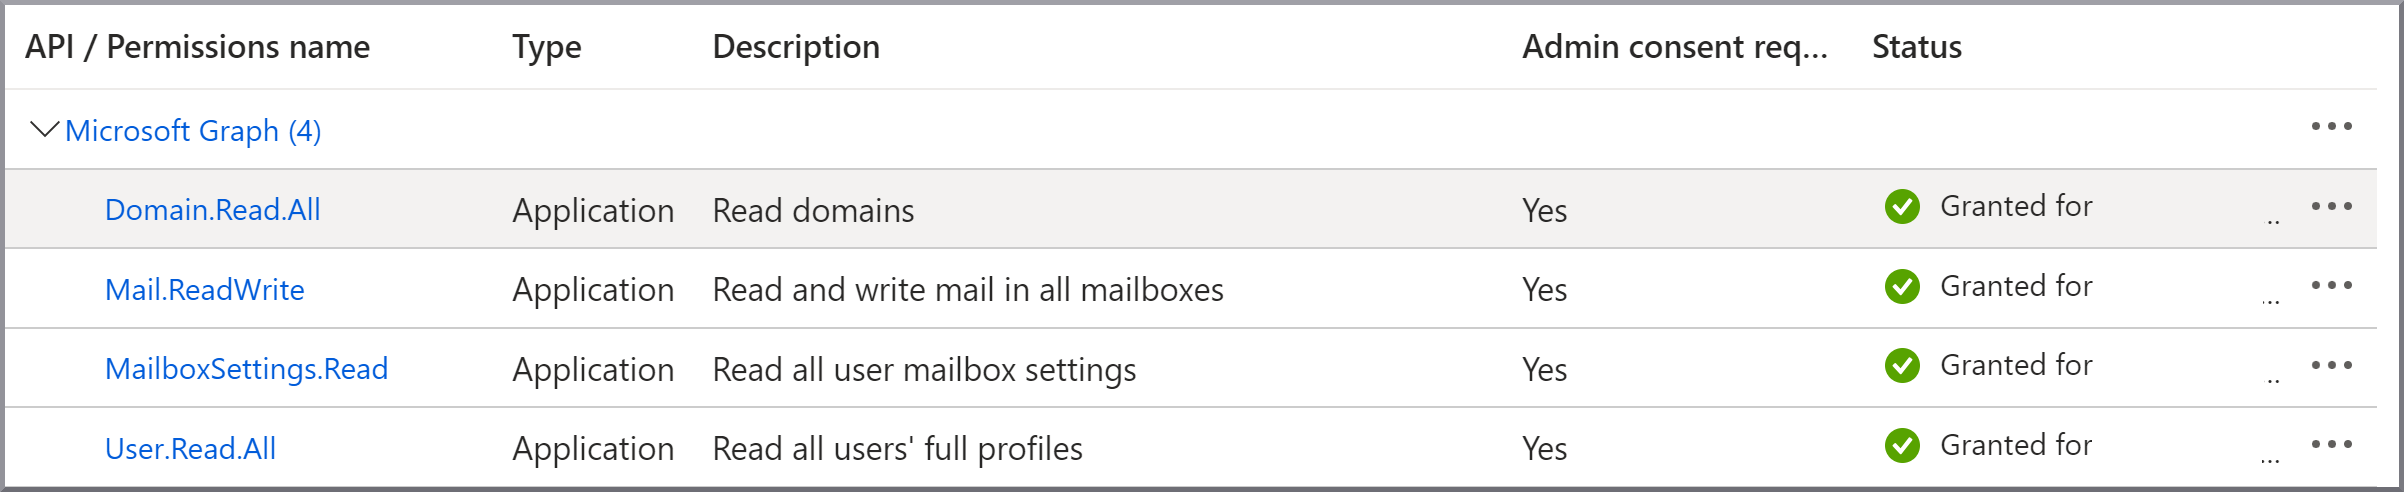
|
8. |
Click Add permissions. |
9. |
If it is present, delete the delegated Microsoft permission User.Read via the three dots in the row. Show screenshot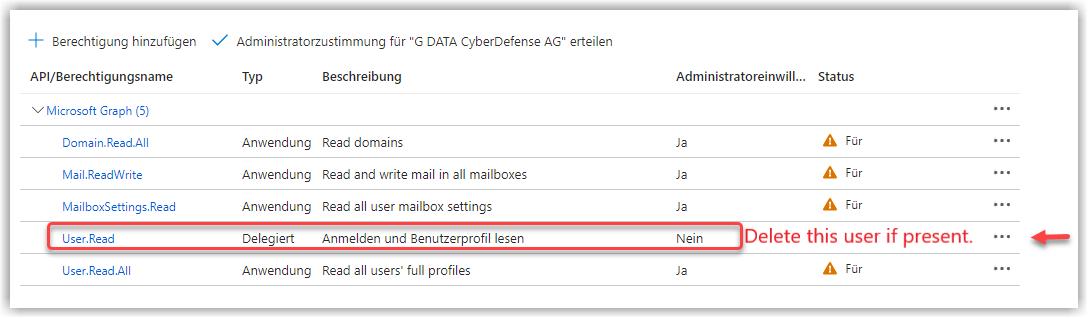
|
10. |
Click + Add a permission and then APIs my organization uses. Filter by the word Office and select Office 365 Exchange Online. Show screenshot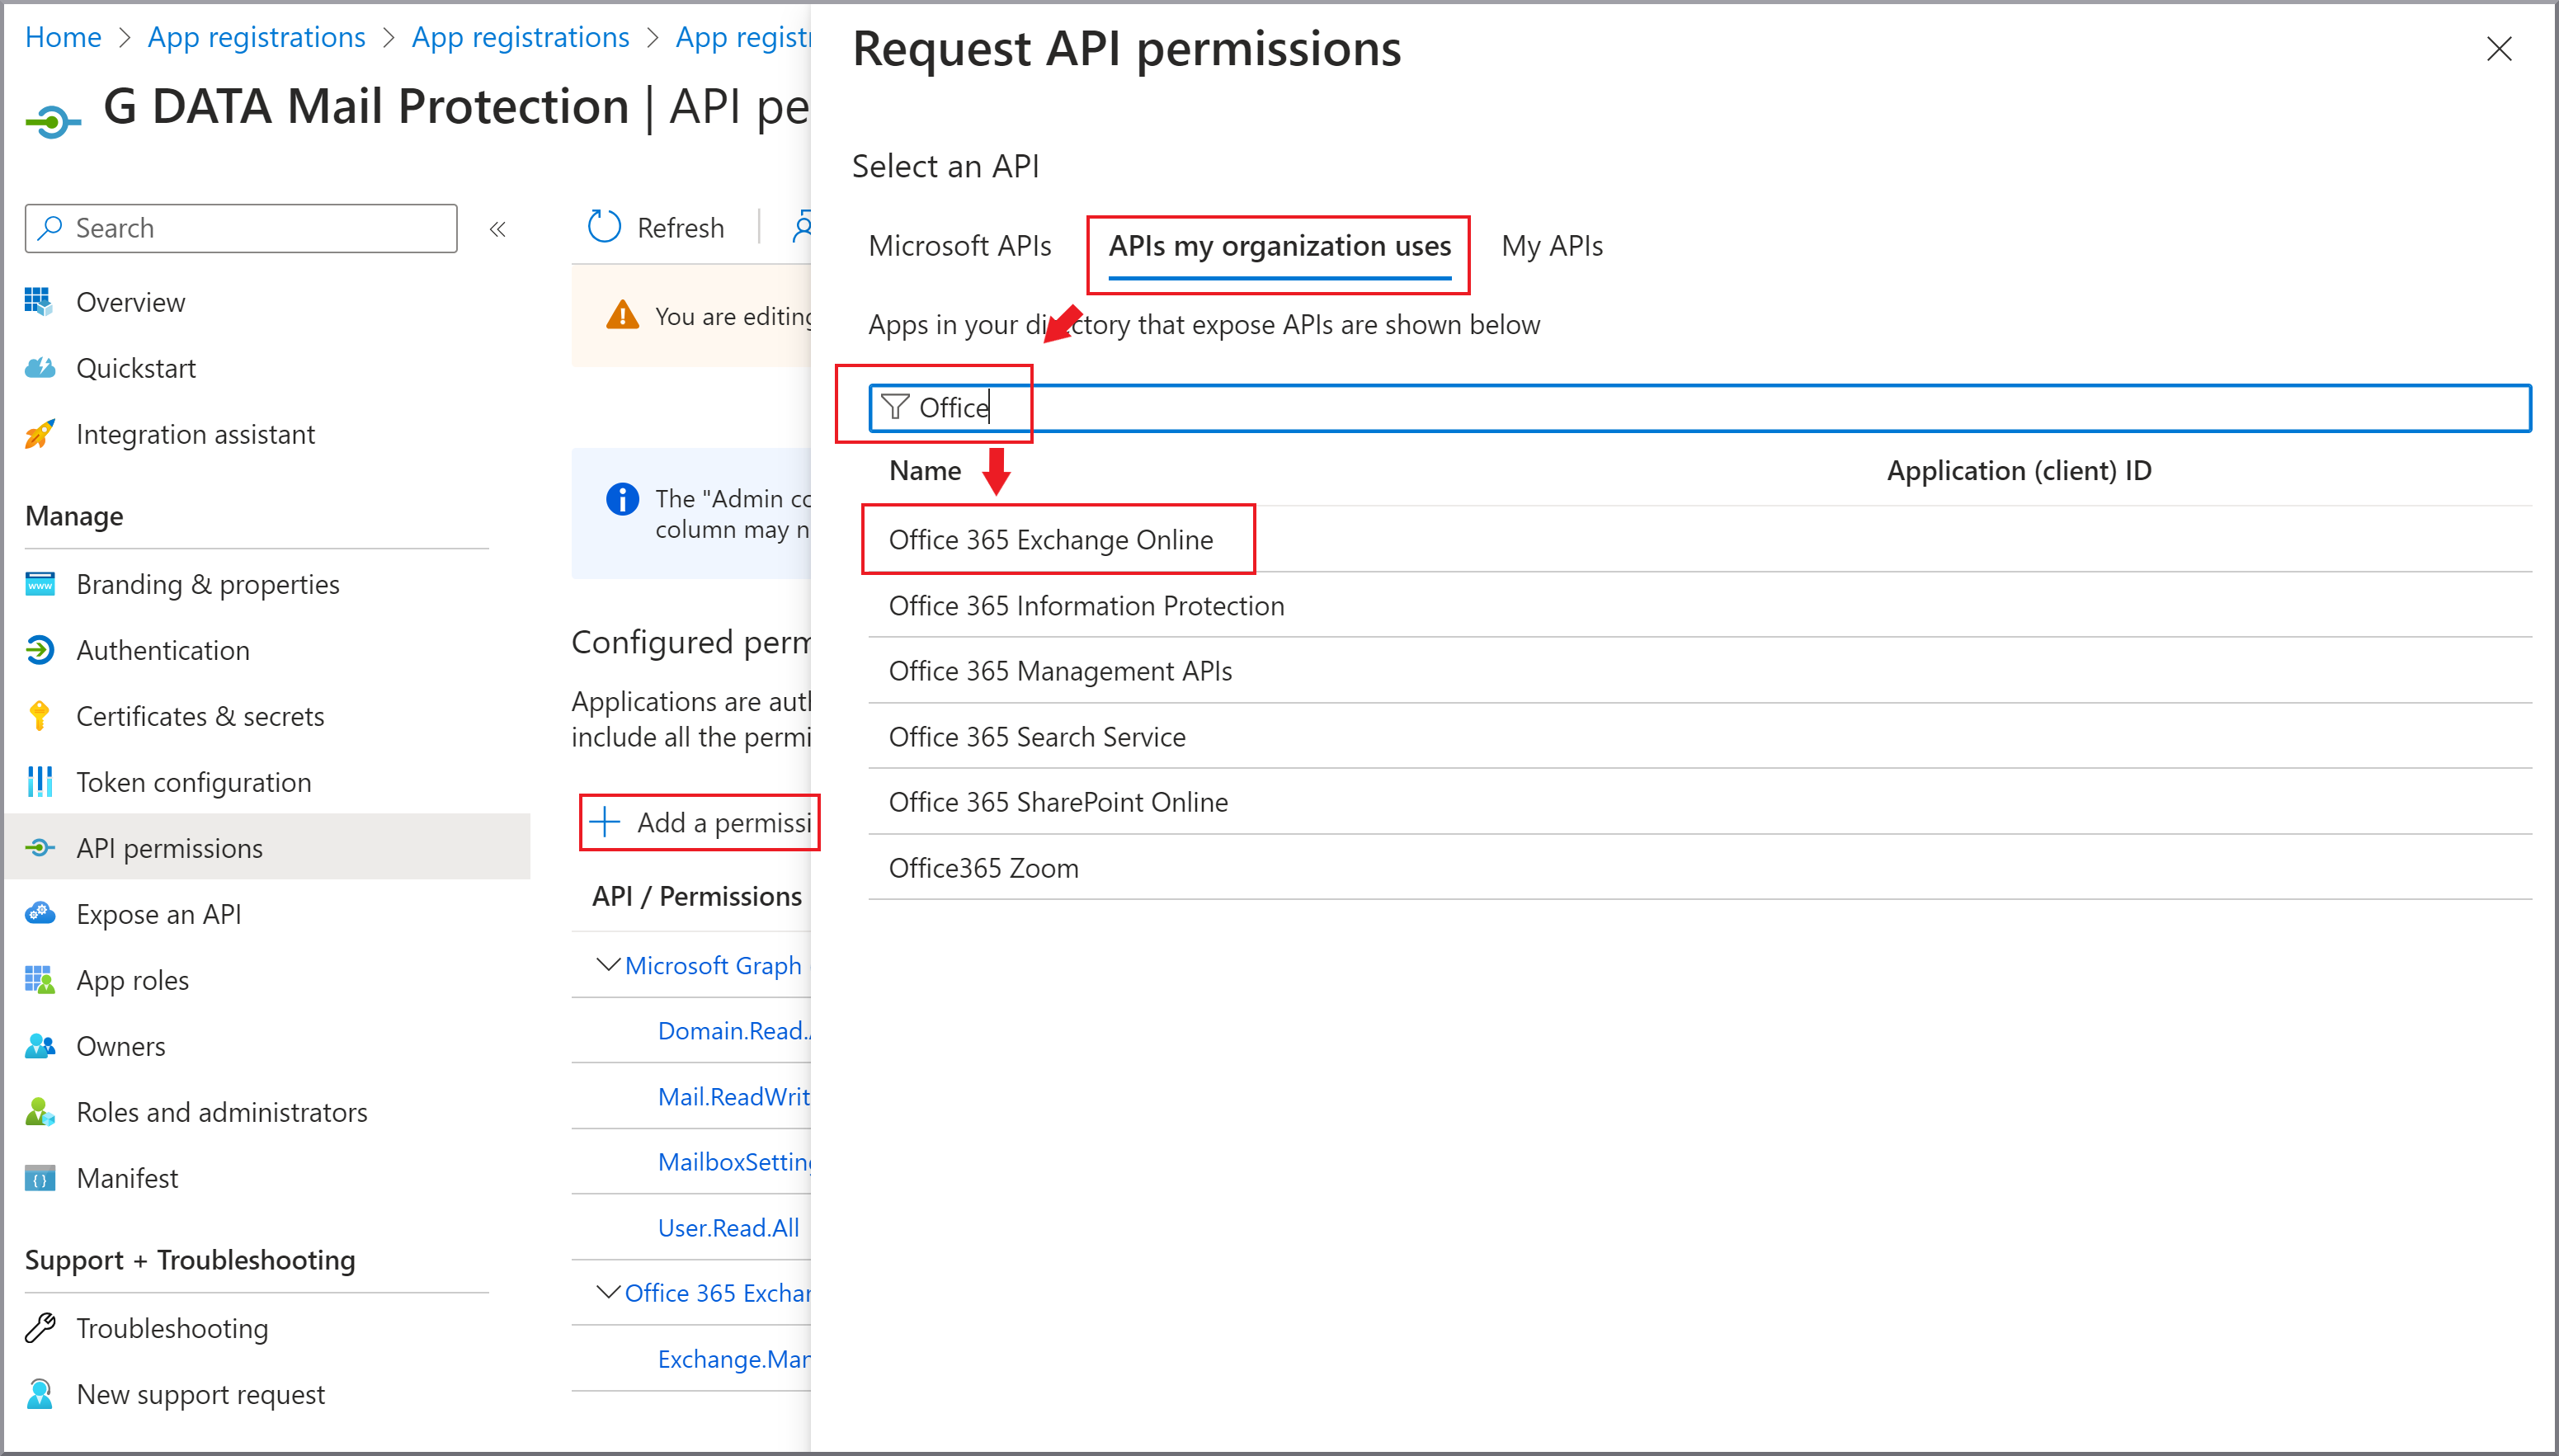
|
11. |
Click Application permissions and select the Exchange.ManageAsApp permission. Show screenshot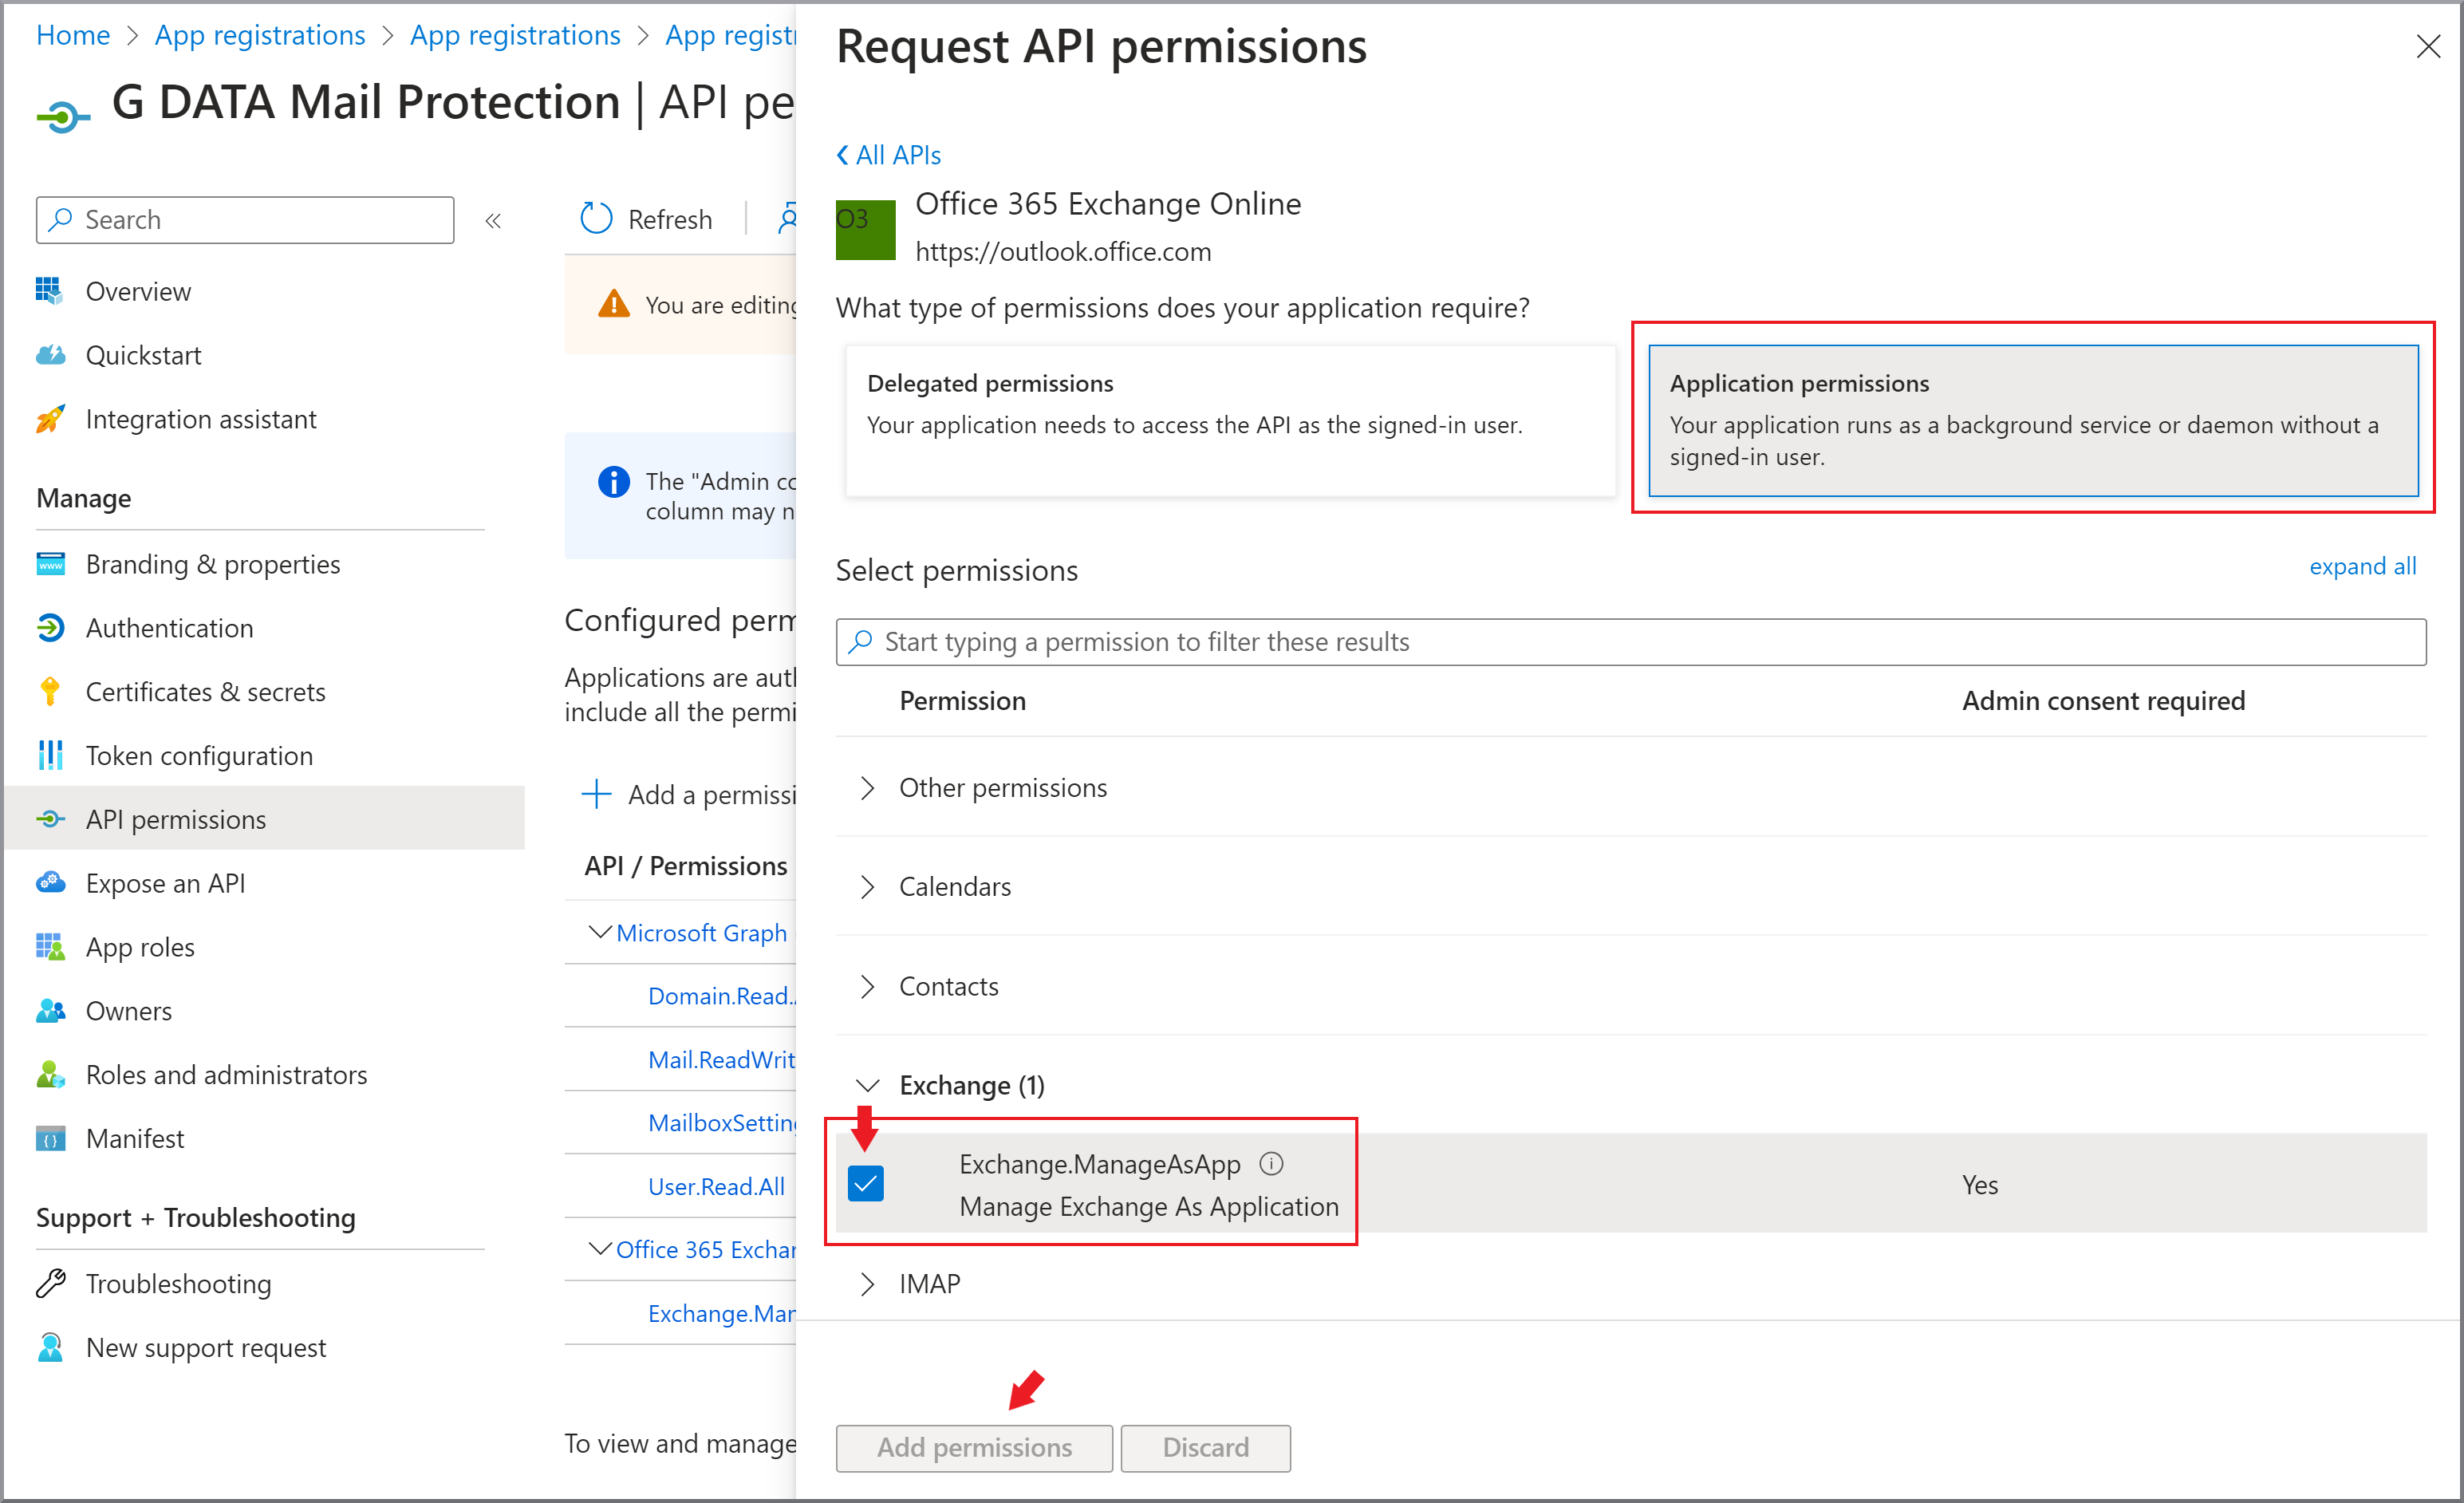
|
12. |
Click Add permissions. |
13. |
Verify that the permissions match the screenshot shown below and grant admin consent. 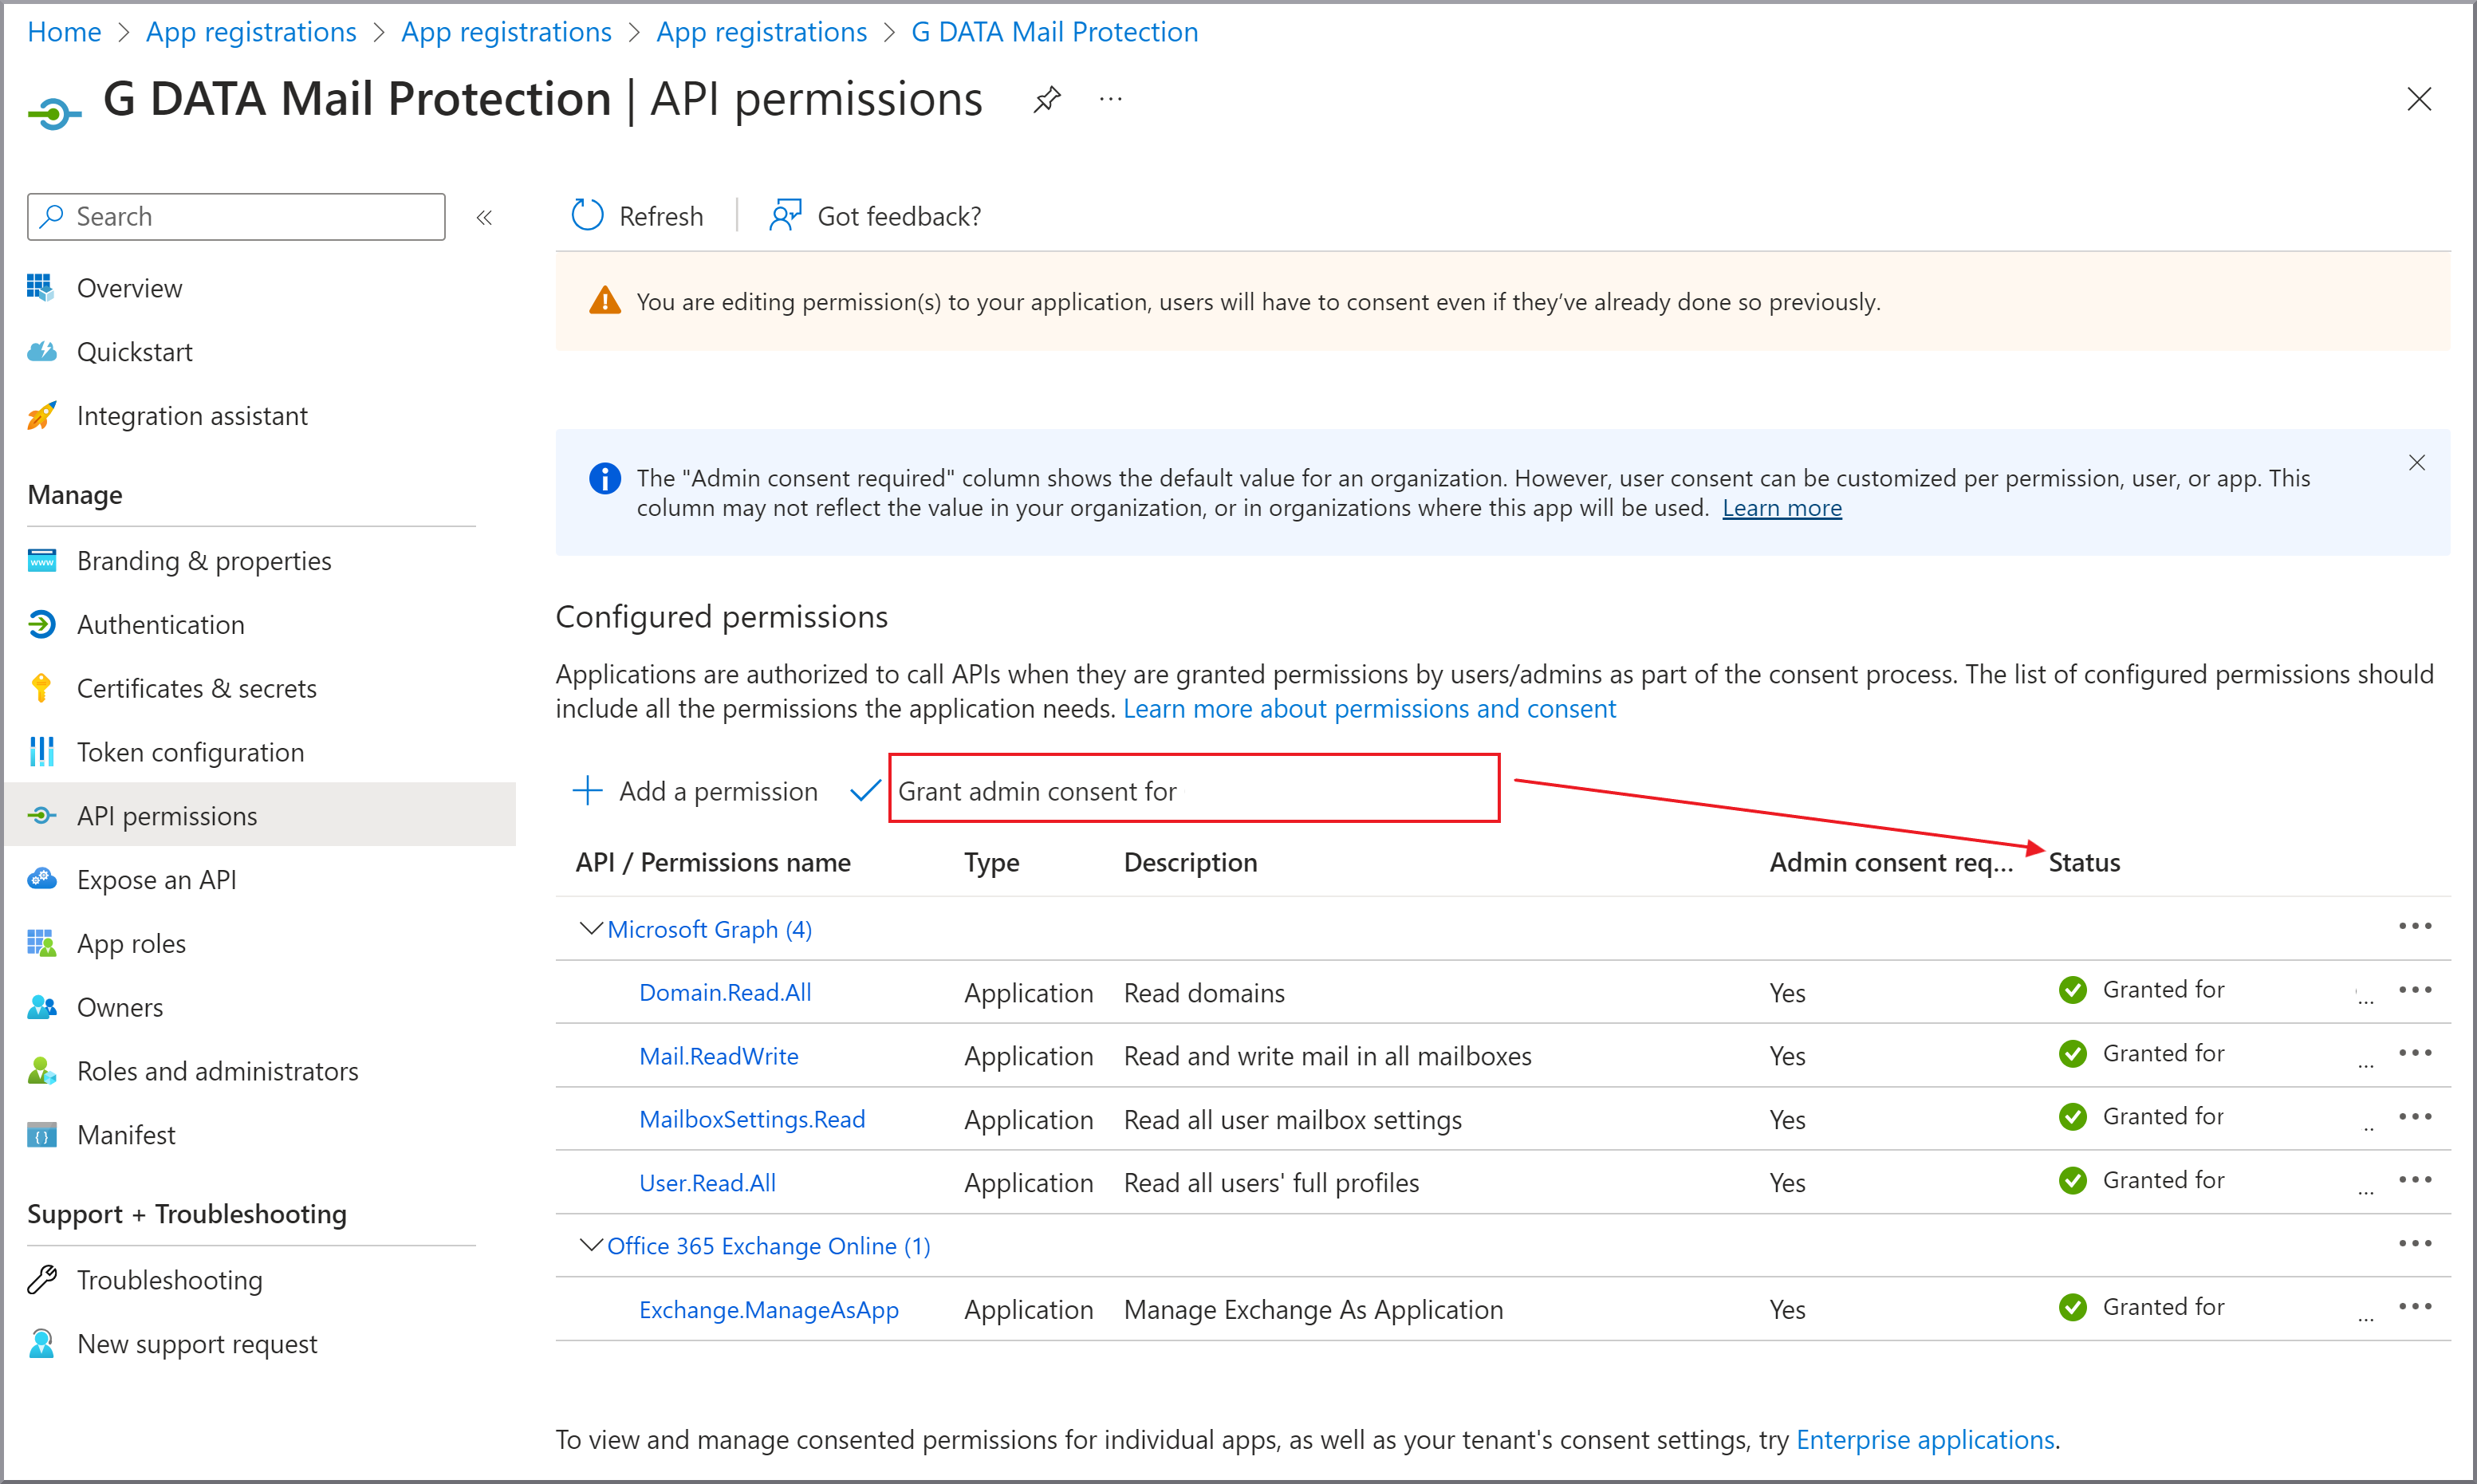
|
14. |
If you have not already done so, upload a certificate for G DATA 365 | Mail Protection’s secure access. |
15. |
Select Roles and administrators and click the Exchange Administrator role row. Show screenshot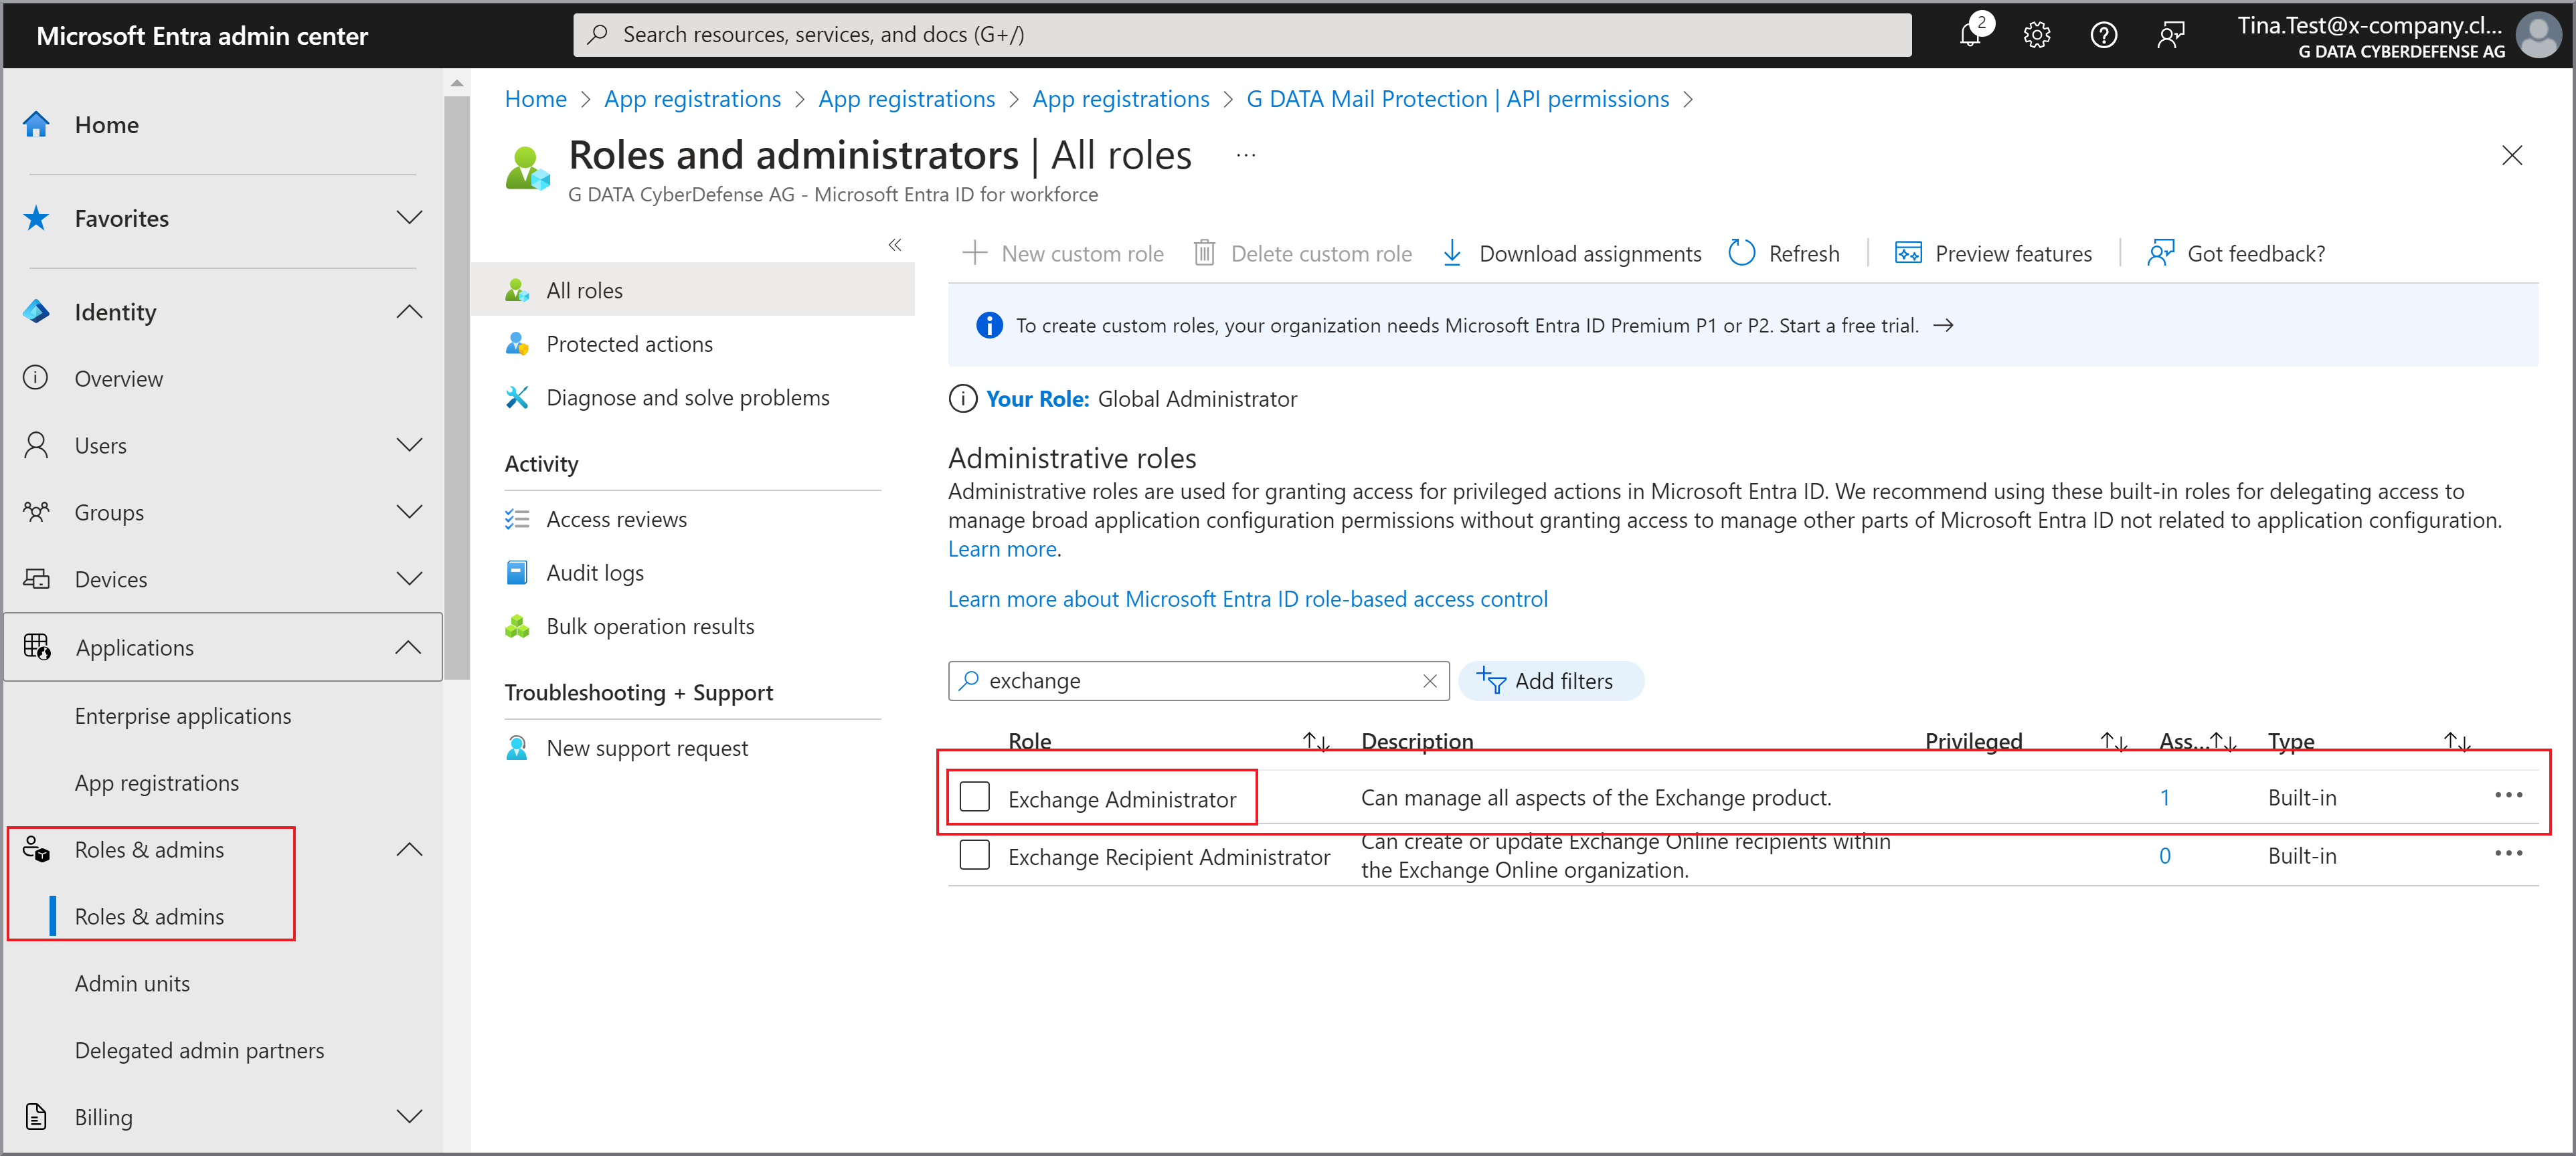
|
16. |
Click Add permissions. Show screenshot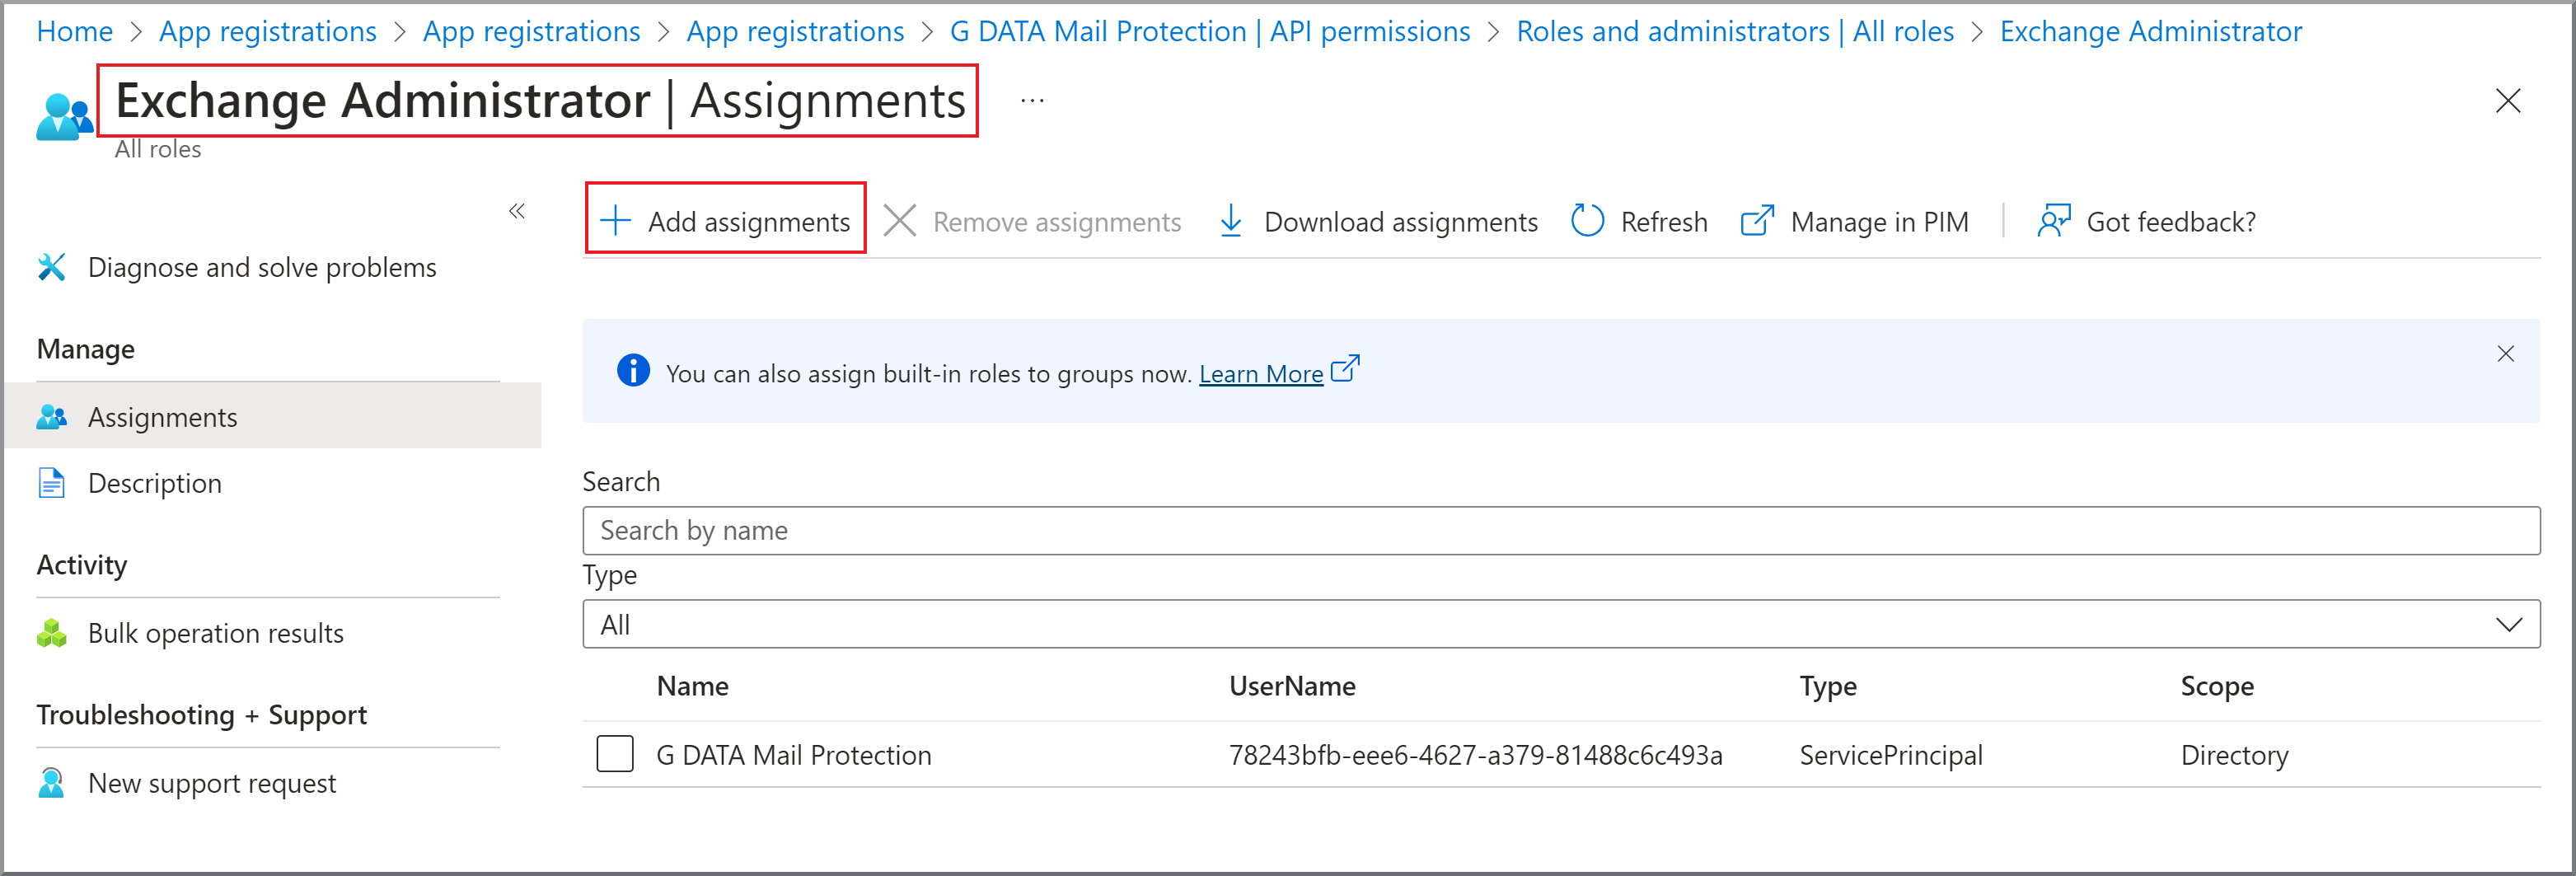
|
17. |
A new window opens on the right side of the screen with a list of your active users. Enter the search term G DATA in the search bar (above the user list). G DATA 365 | Mail Protection will then be suggested. Select this row and click Add. Show screenshot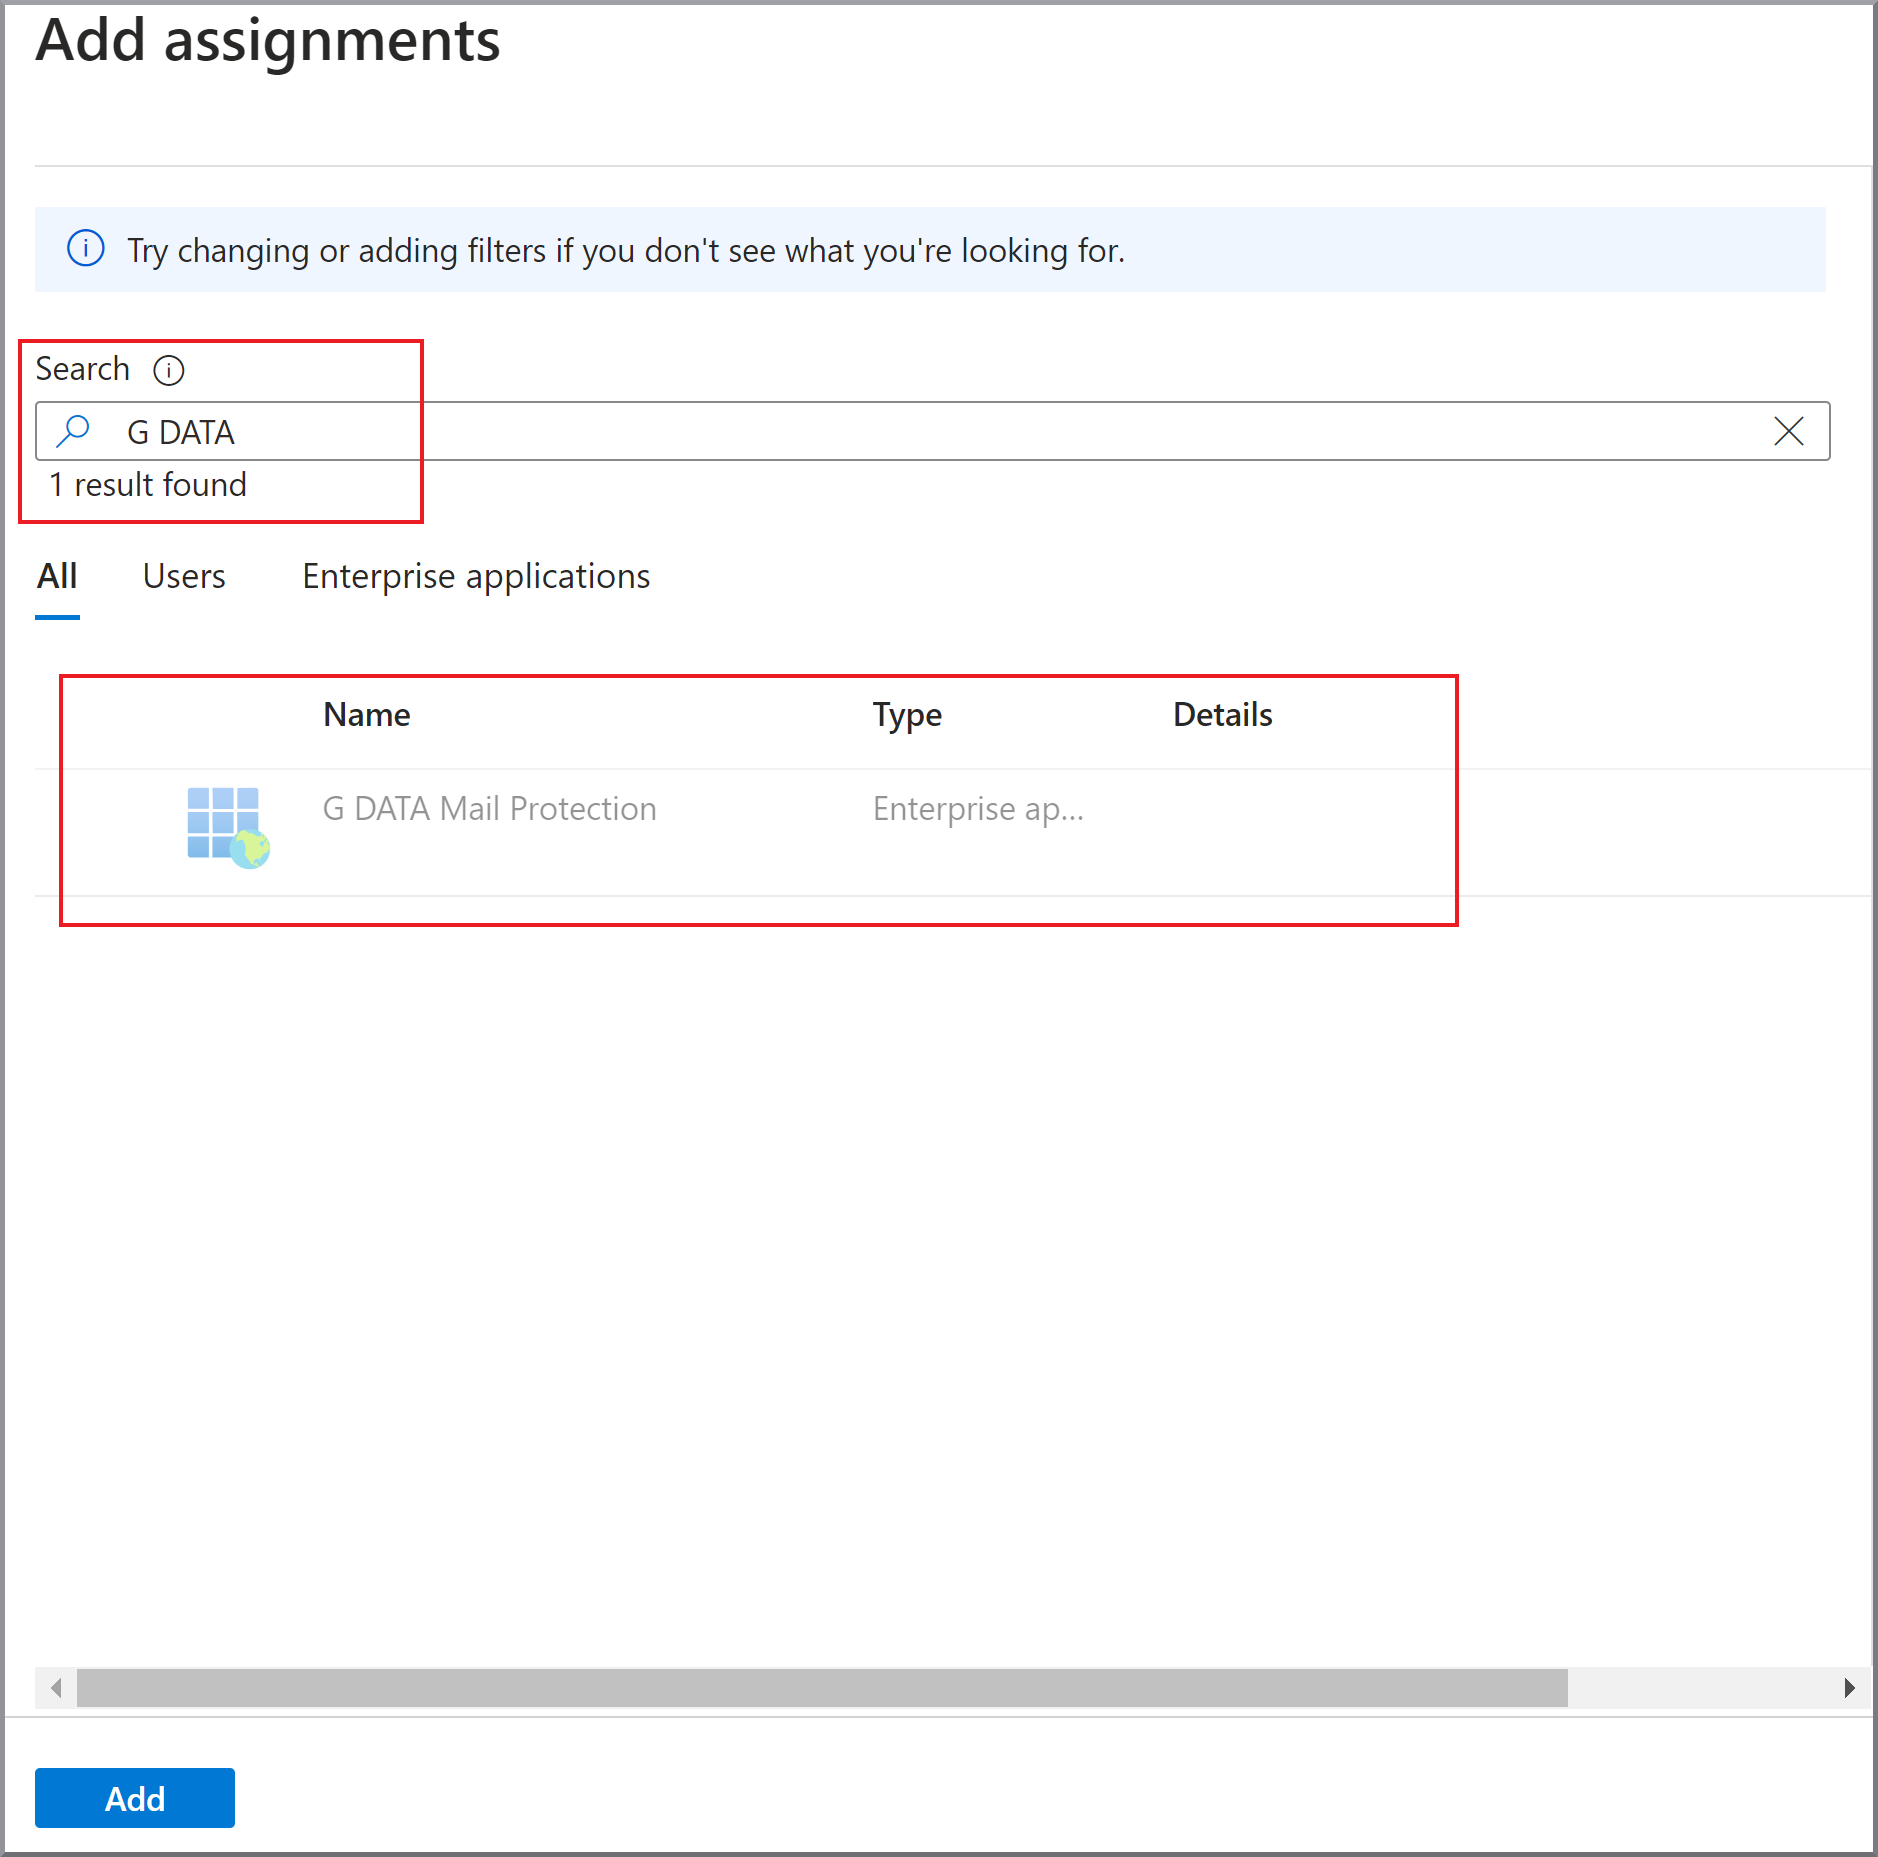
|
18. |
The G DATA 365 | Mail Protection is now assigned the Exchange Administrator role. Show screenshot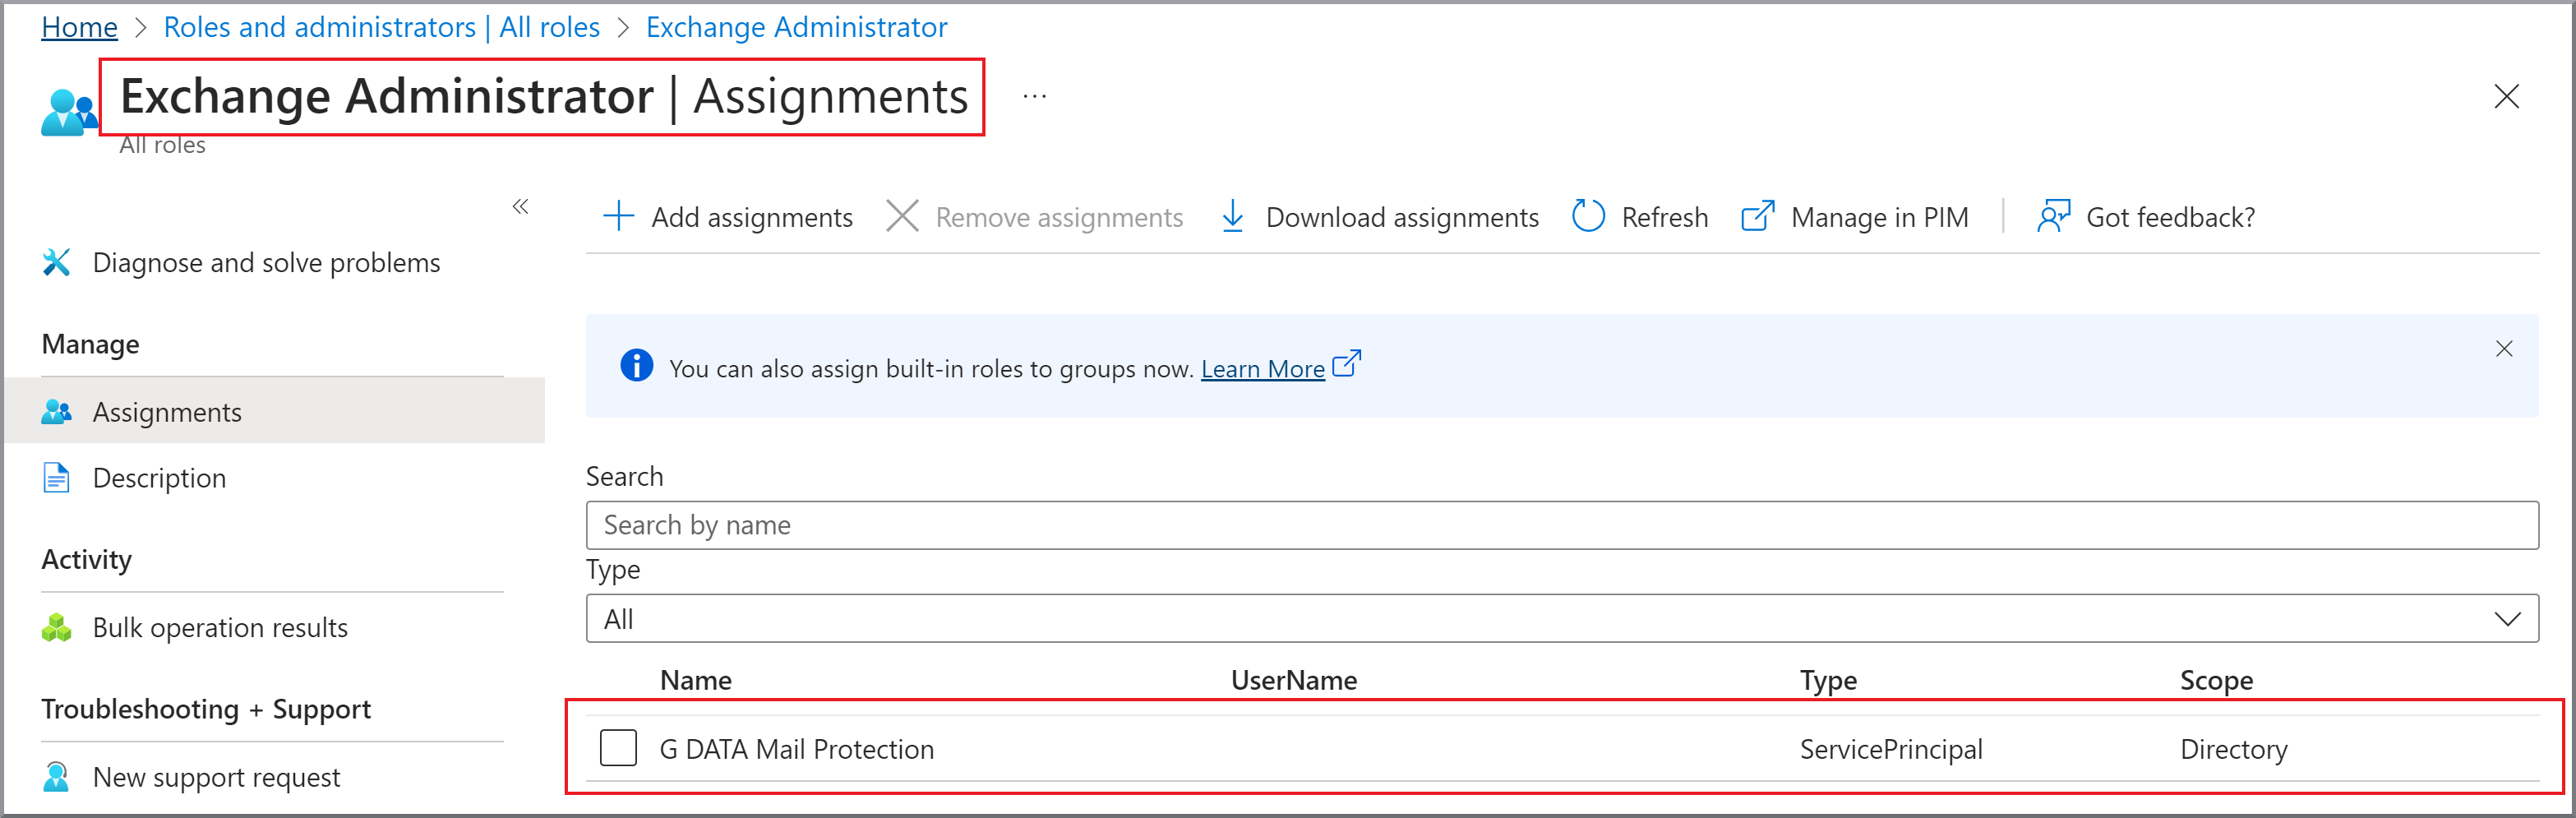
|