G DATA Mail Protection
Point your domain’s MX record to G DATA Mail Protection
|
Before changing the MX record for your domains, read the Setup Guide for deploying G DATA Mail Protection and follow the notes on using the connector and mail flow rule. |
It is not possible to provide general instructions for all Customers here. There are too many different configurations and too many providers that manage domains.
First, you need to know where your domain is managed (not to be confused with where the domain is hosted). If your internal IT department does not manage your DNS and you do not know where to change the MX record, you can find various DNS lookup tools online. These tools can help you identify the provider managing your domain. Your web hosting provider’s support team may also be able to help.
We use our fictional Customer x-company to explain how to configure the MX record correctly. You can adapt this example to your domain management provider’s interface.
Our fictional Customer has a domain named x-company.cloud, managed by IONOS. When Microsoft Exchange Online was set up, this domain was connected to Microsoft Exchange Online. Microsoft automatically configured the domain at IONOS.
1. |
First, our fictional Customer signs in to their account. Show IONOS example screenshot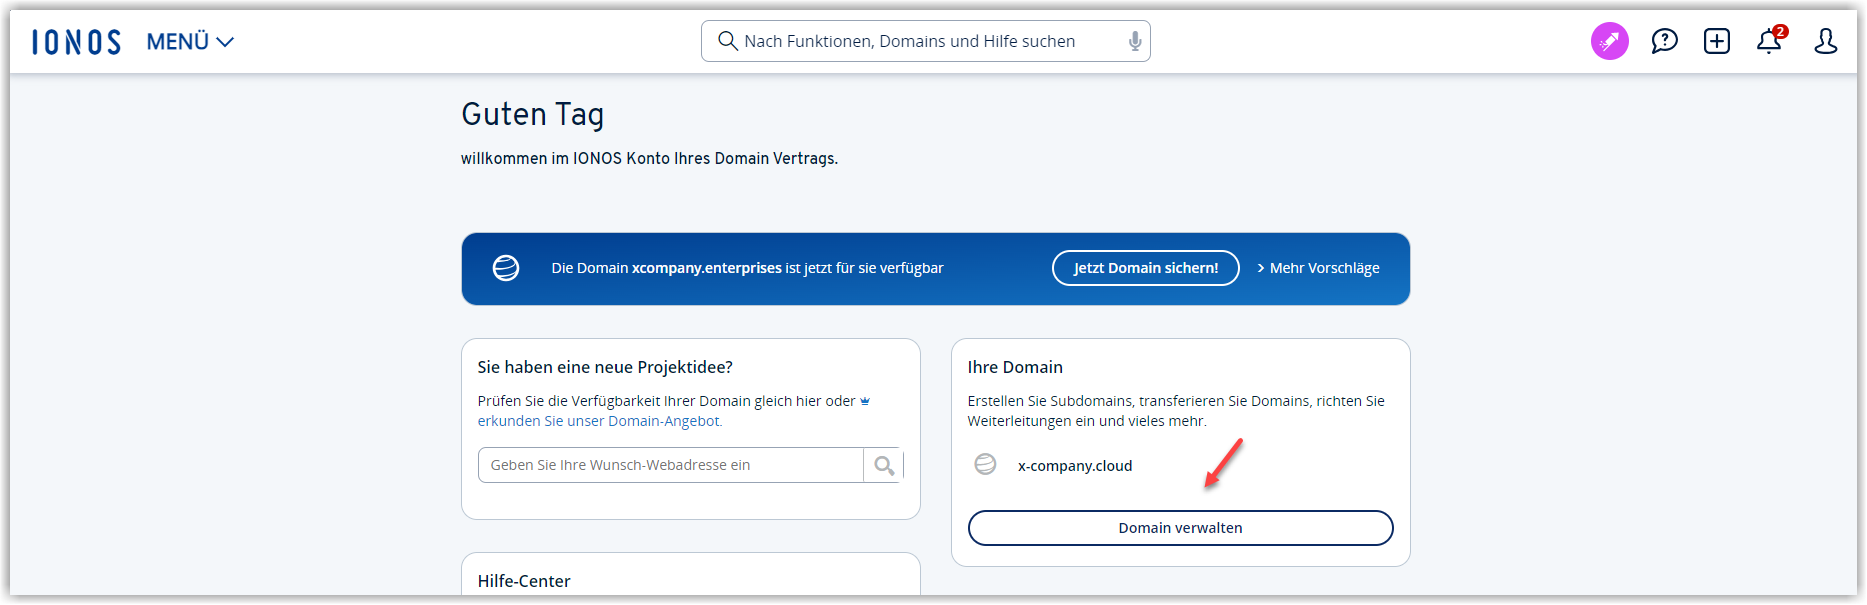
|
2. |
They then find the section where they can edit their domain’s DNS records. Show IONOS example screenshot
|
3. |
The DNS configuration set up by Microsoft looks like this: 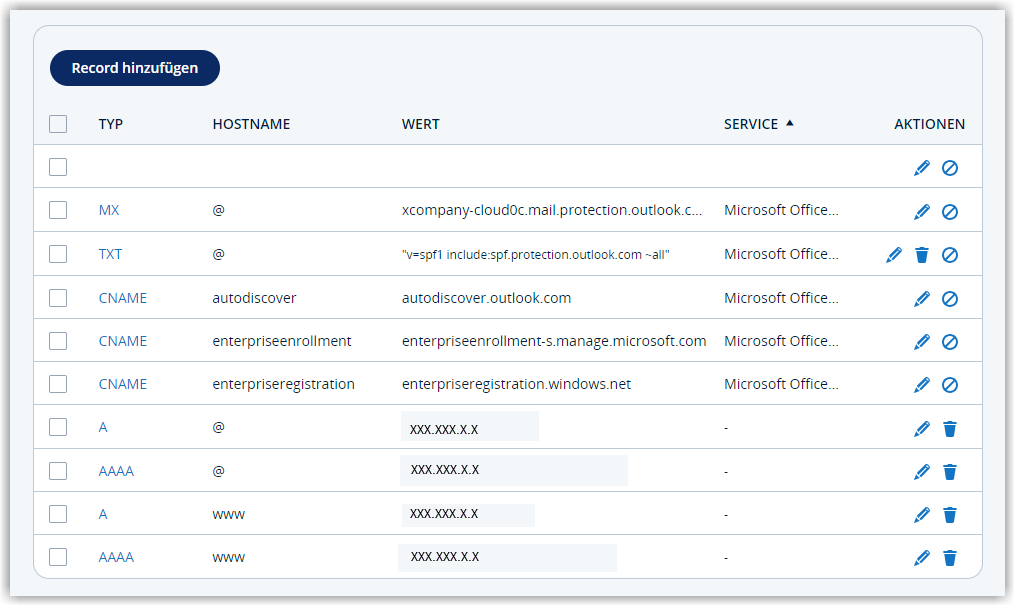
|
4. |
They change the MX record to: mailprotection.gdata.de After saving, IONOS deletes all other records configured by Microsoft. 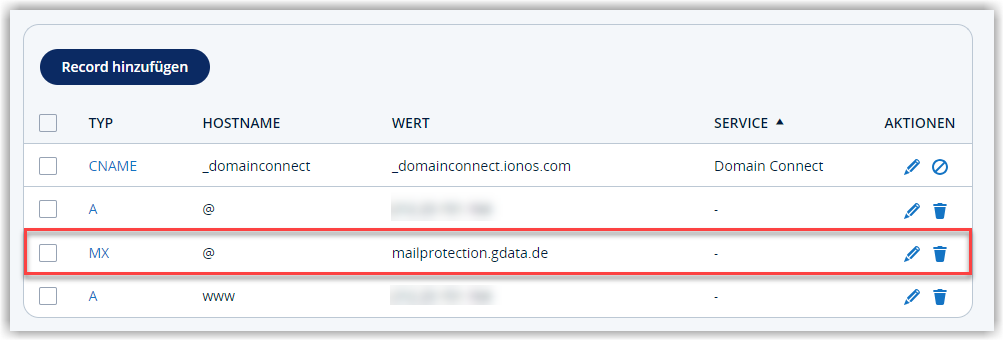
|
From now on, all emails to x-company.cloud are first sent to our G DATA Mail Protection.
Find the DNS records to enter manually in the Microsoft admin center
To restore the correct DNS configuration for Microsoft Exchange Online in our example, the DNS records removed by IONOS must be added again manually. Otherwise, the Customer’s Outlook clients can no longer connect to Microsoft Exchange Online.
After the DNS changes, error Alerts already appear in the Microsoft admin center:
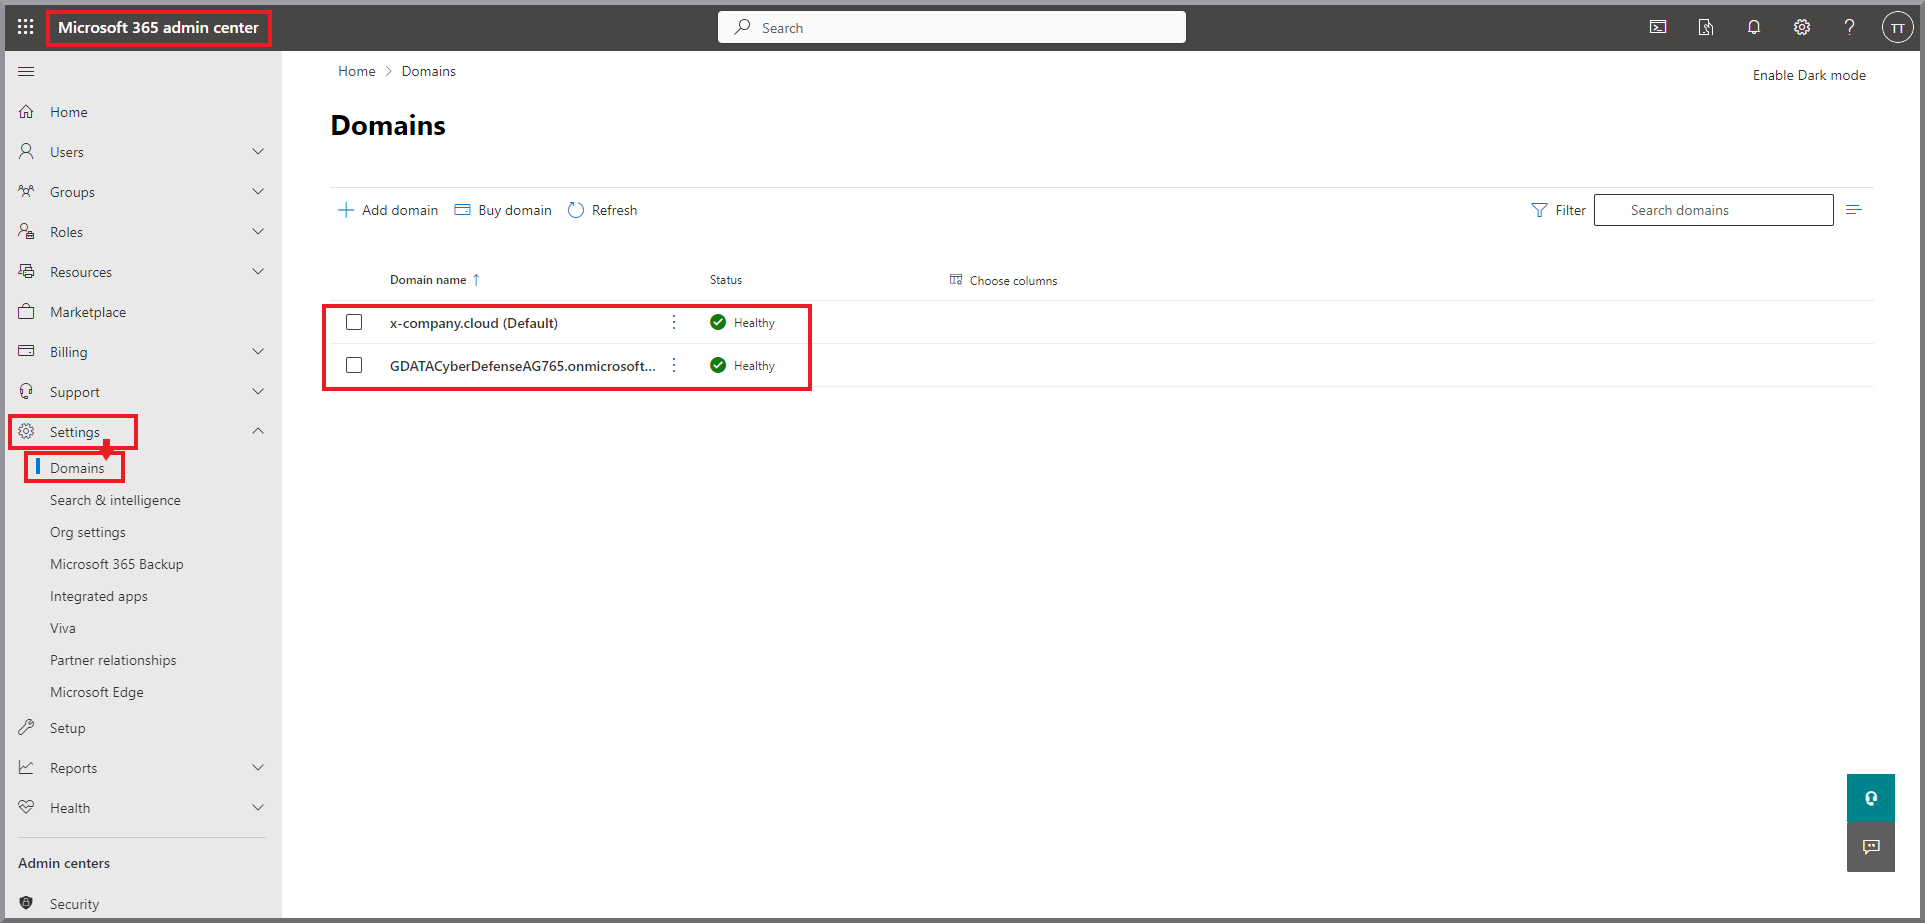
1. |
By clicking the domain and the DNS records tab, our example Customer opens the DNS overview page in the Microsoft admin center. 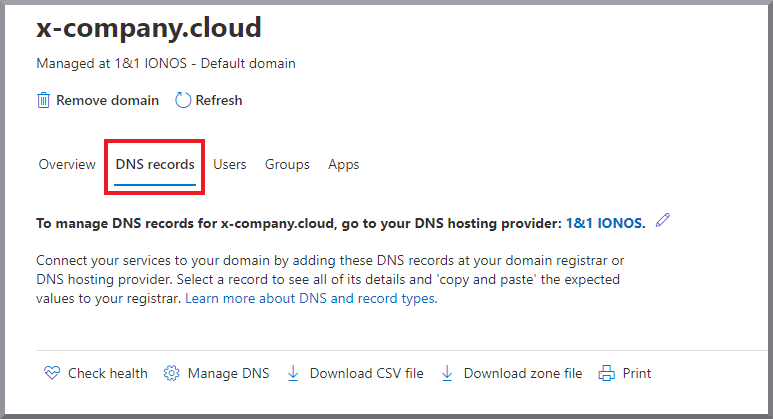
|
2. |
All DNS records required by Microsoft are shown here with an error. The MX record error shown in Microsoft Exchange Online as a result of the change is expected and can be left as is. In our example, the records highlighted in yellow under Exchange (TXT and CNAME) must be entered at IONOS. The records highlighted in orange (CNAME) only need to be entered in certain cases (for example, when using Microsoft Intune and Android). 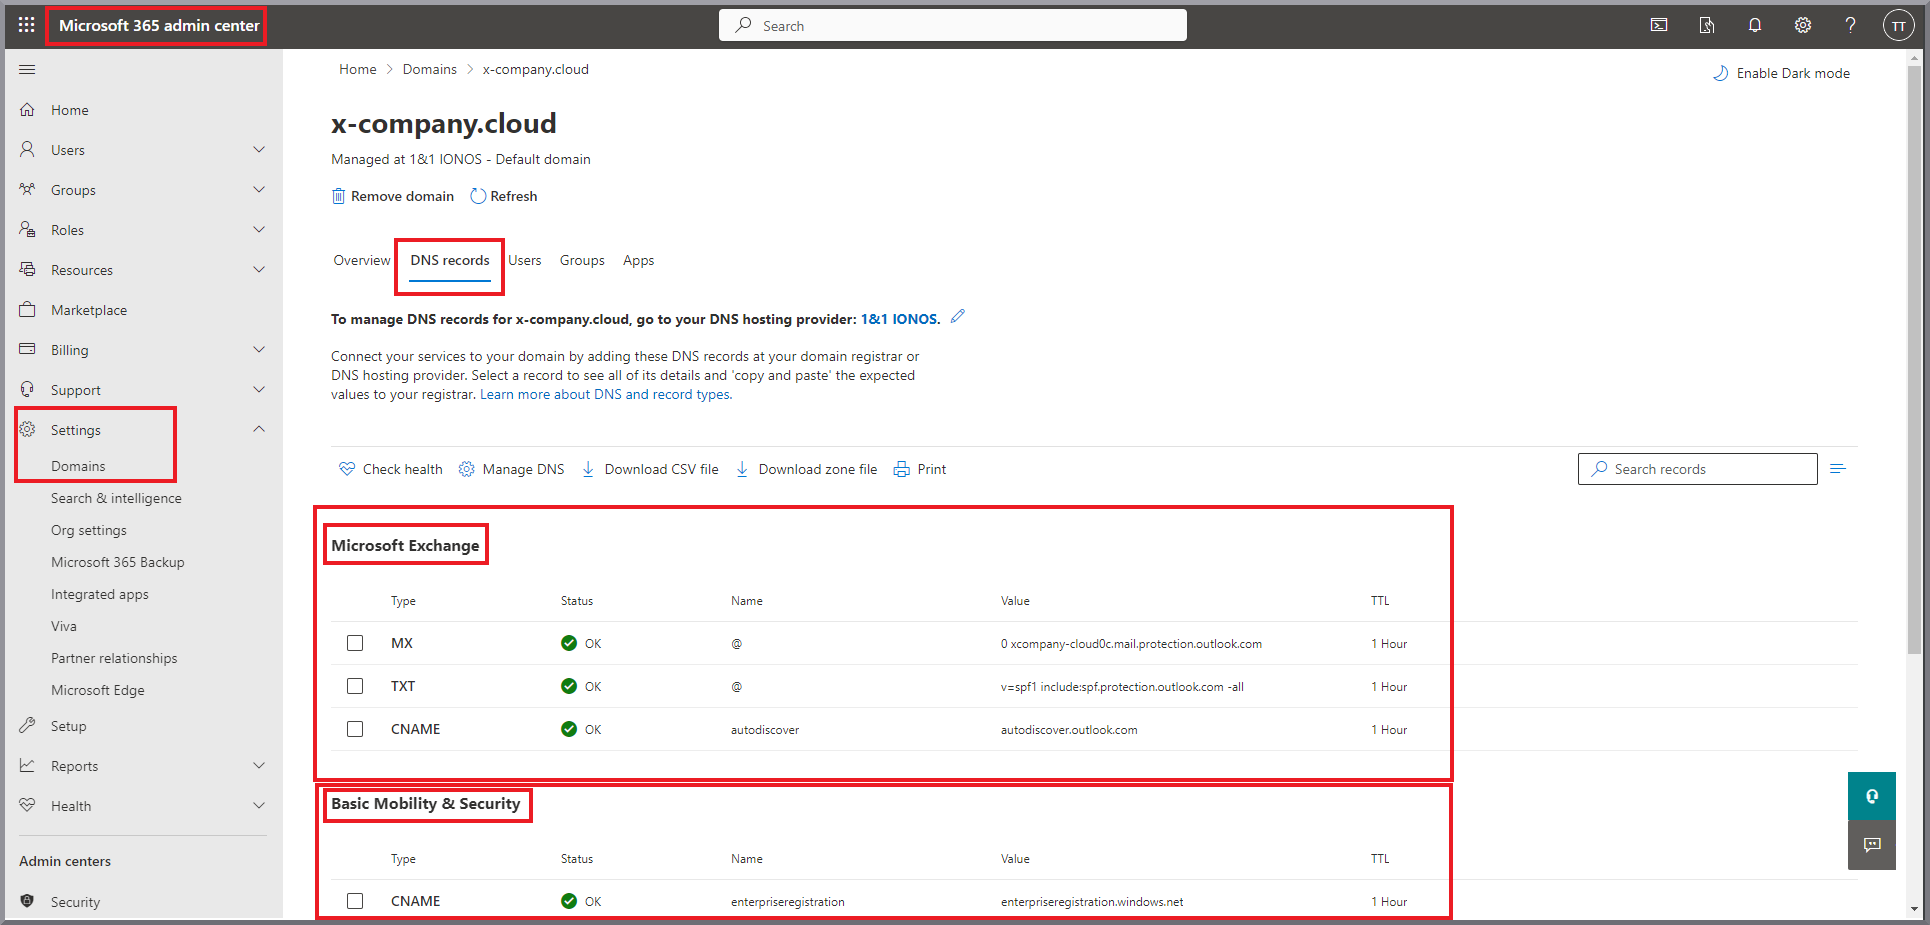
|
Enter the required DNS records using IONOS as an example
1. |
If the window has already been closed, the Customer signs in to their account again. Show IONOS example screenshot
|
2. |
They then find the section where they can edit their domain’s DNS records. Show screenshot
|
3. |
They click Add record. Show screenshot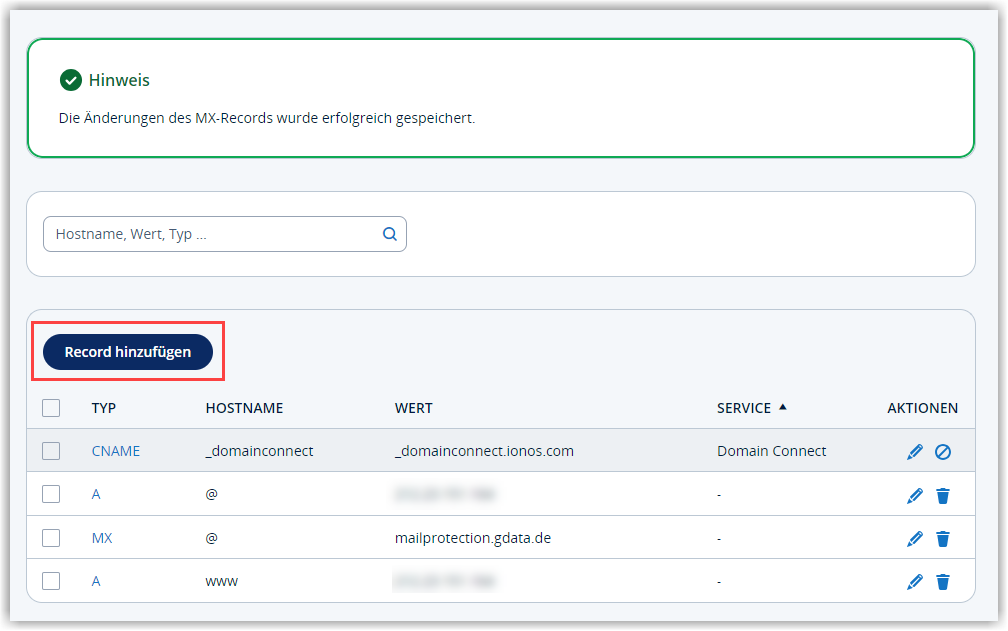
|
4. |
They select the type of record to create. You can find this information in the first column of the Microsoft DNS overview page. Show screenshot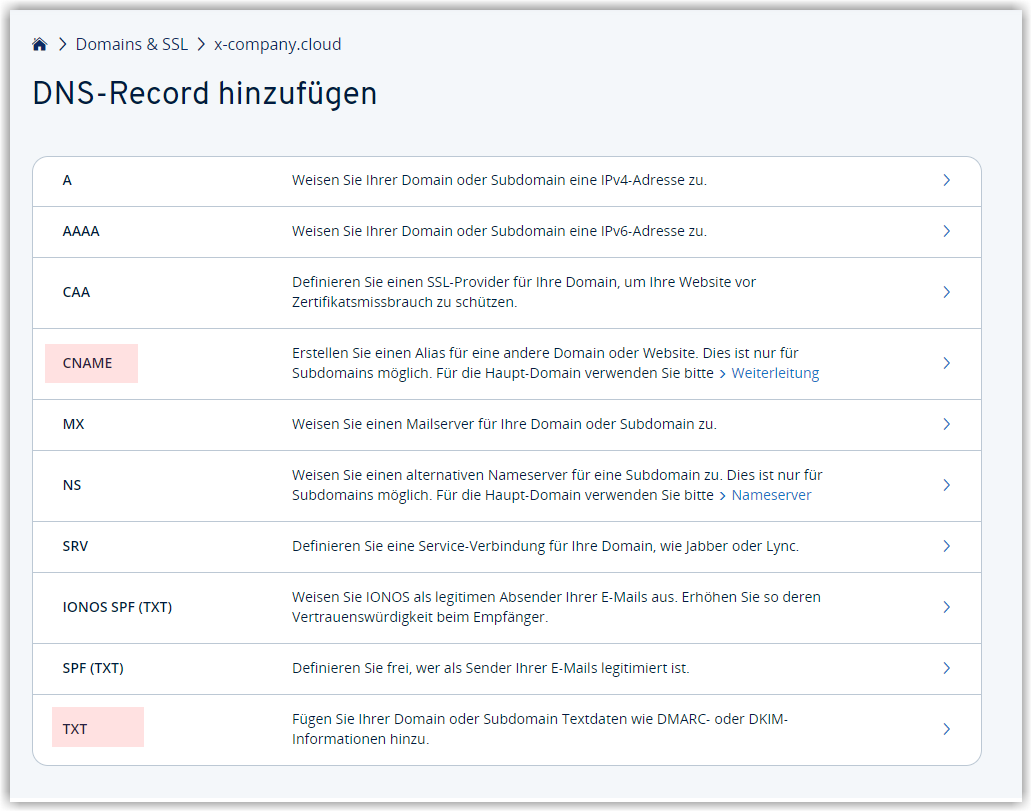
|
5. |
They enter the information from the Microsoft DNS overview page: Name, Value, and TTL. Show screenshot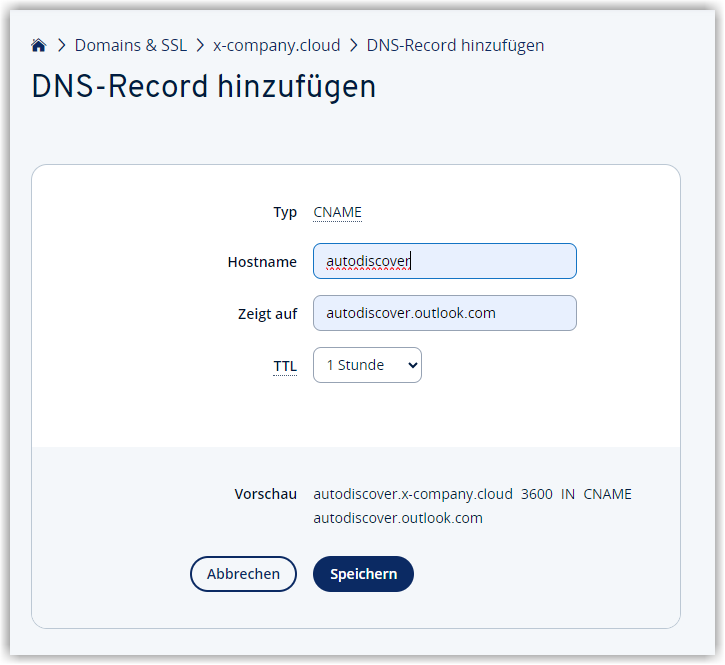
|
6. |
They save the information by clicking Save. |
7. |
They then repeat steps 4–6 for all required DNS records. Show screenshot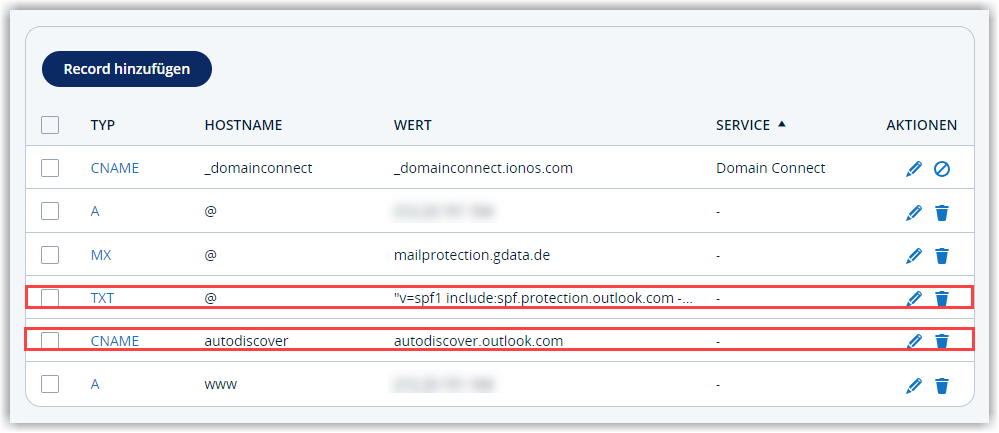
|
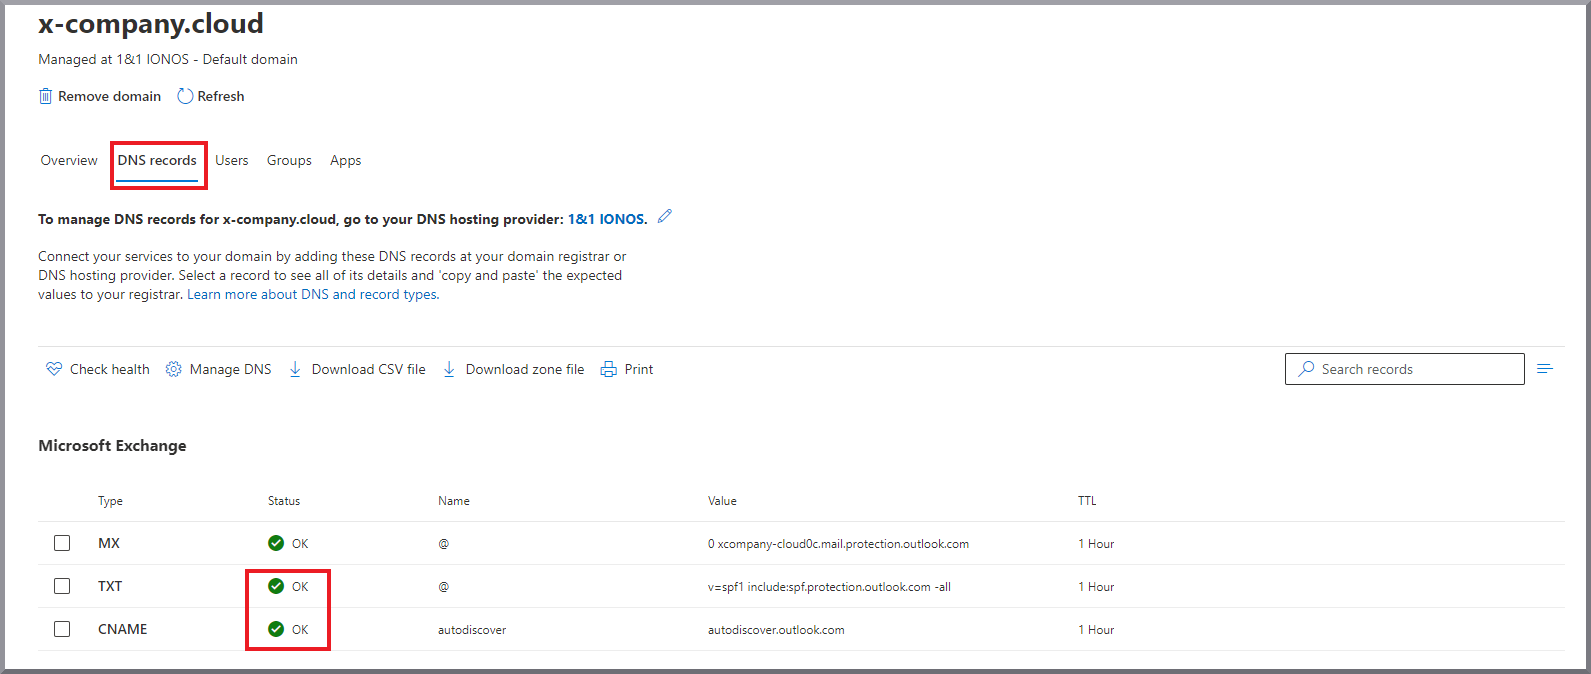
The relevant DNS records should appear on the Microsoft DNS overview page with the status OK.