G DATA XDR
User management
Users are created as individuals who are to be granted permissions in your G DATA Web Portal to manage the portal and/or the included products.
During the Kick-offs, you define which of your employees is to receive the IT Operation Manager role. During the Onboardings, our G DATA Security Operations Team sets up a corresponding user for this employee.
You can use this user to create and manage all other required users.
|
There is only one user with IT Operation Manager permissions, and this user can only be created by our
G DATA Security Operations Team. The IT Operation Manager cannot be deleted. |
Controls within the portal
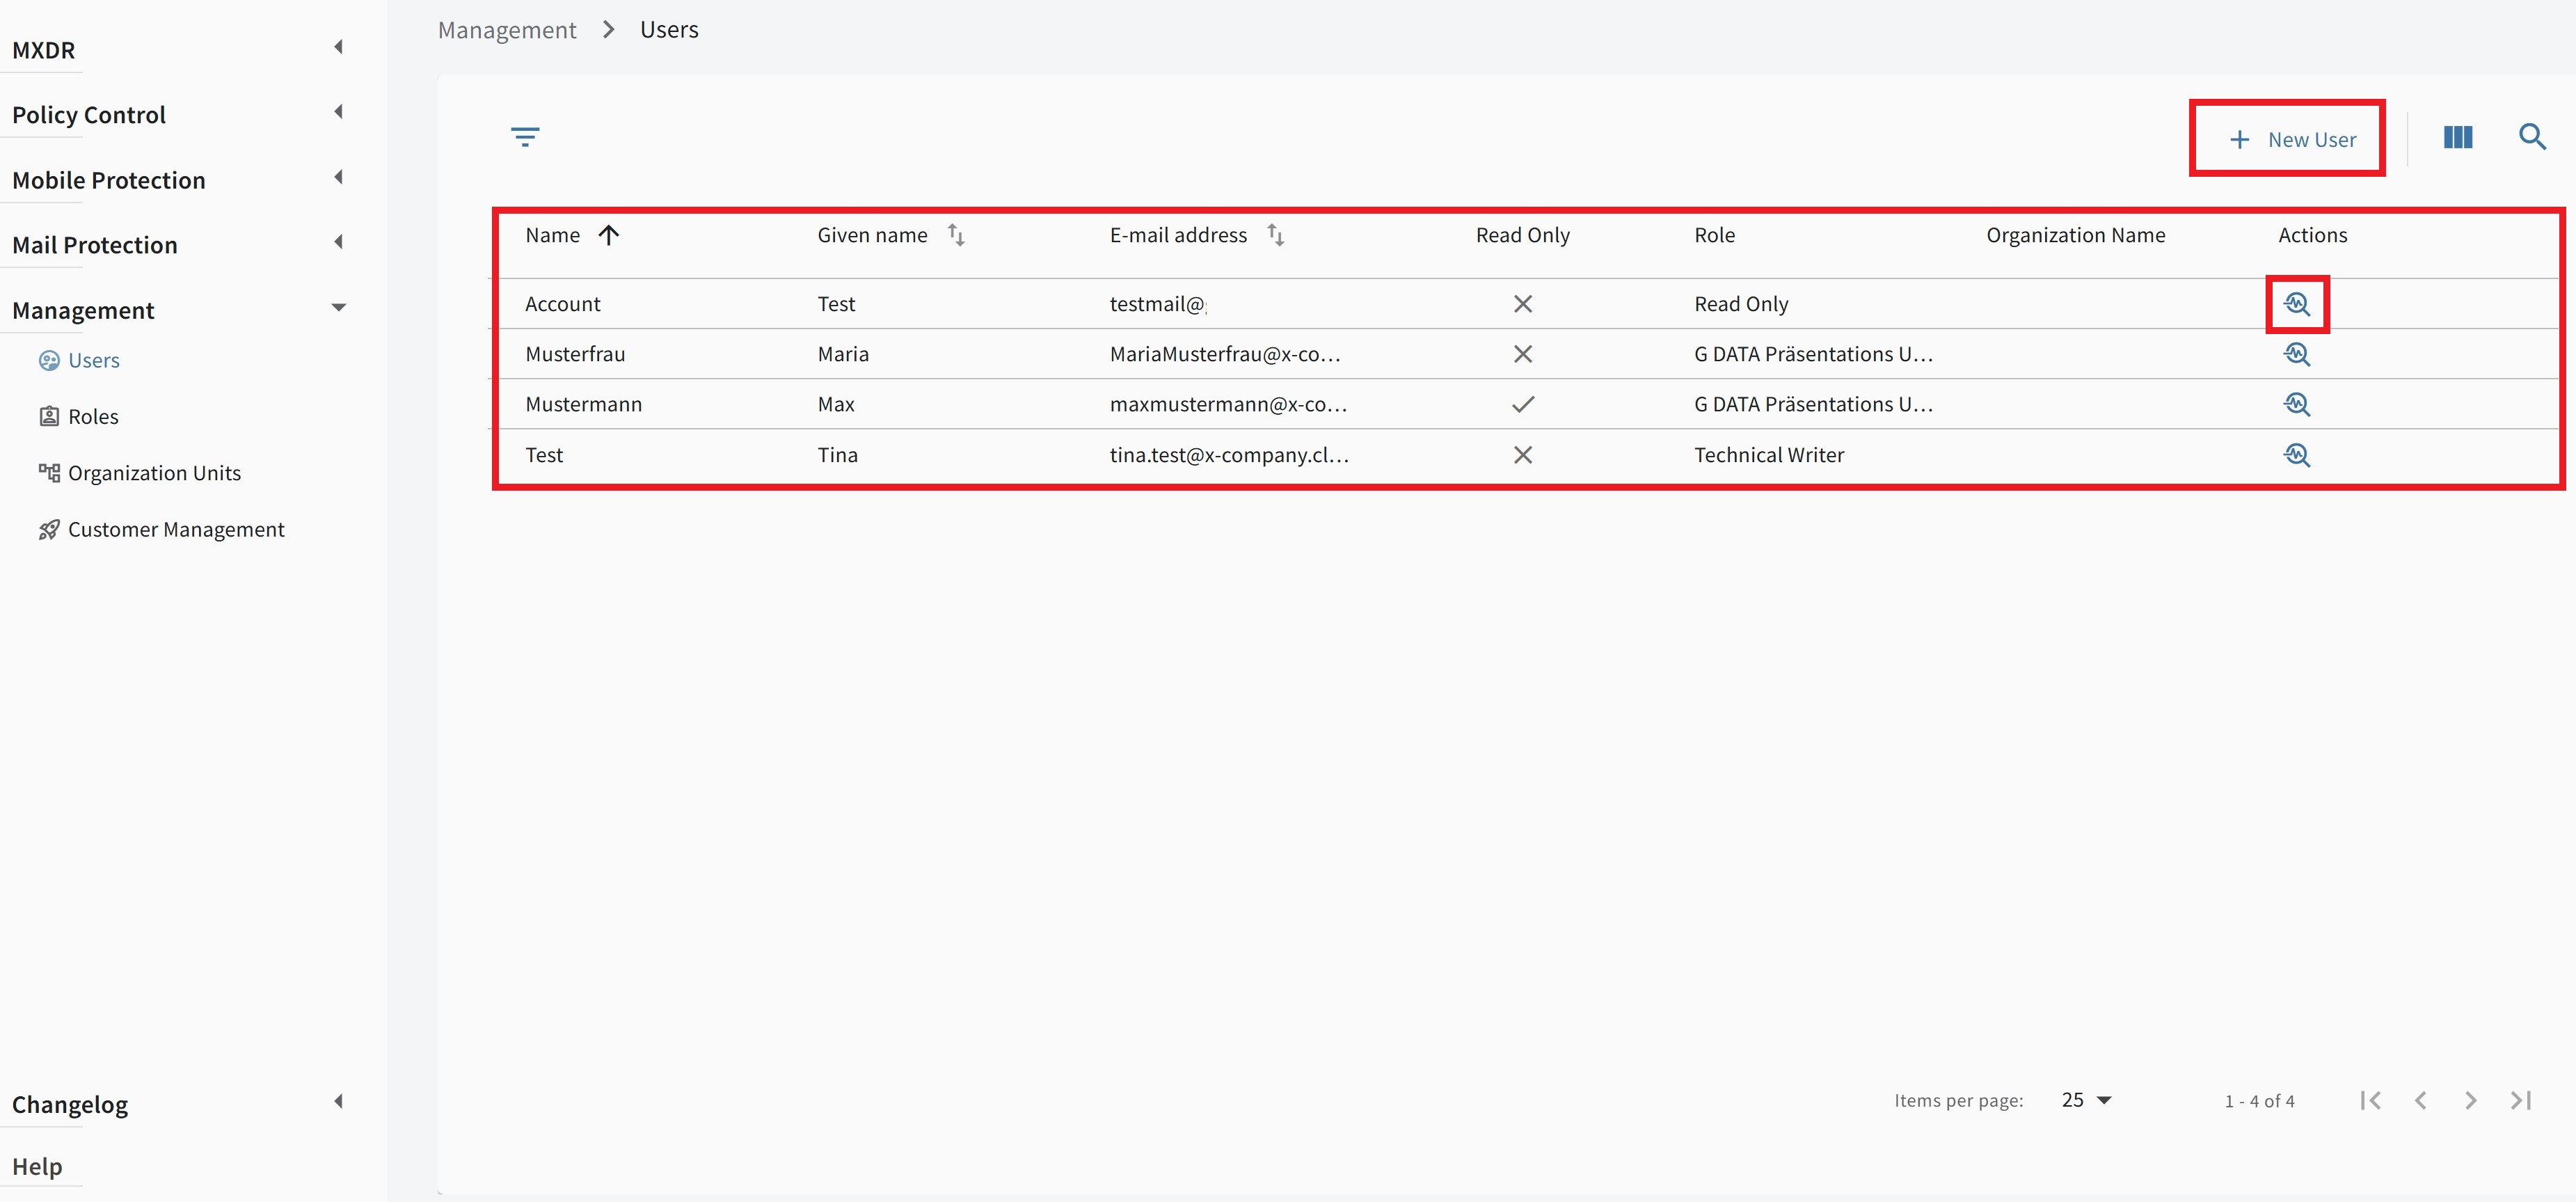
Create a user
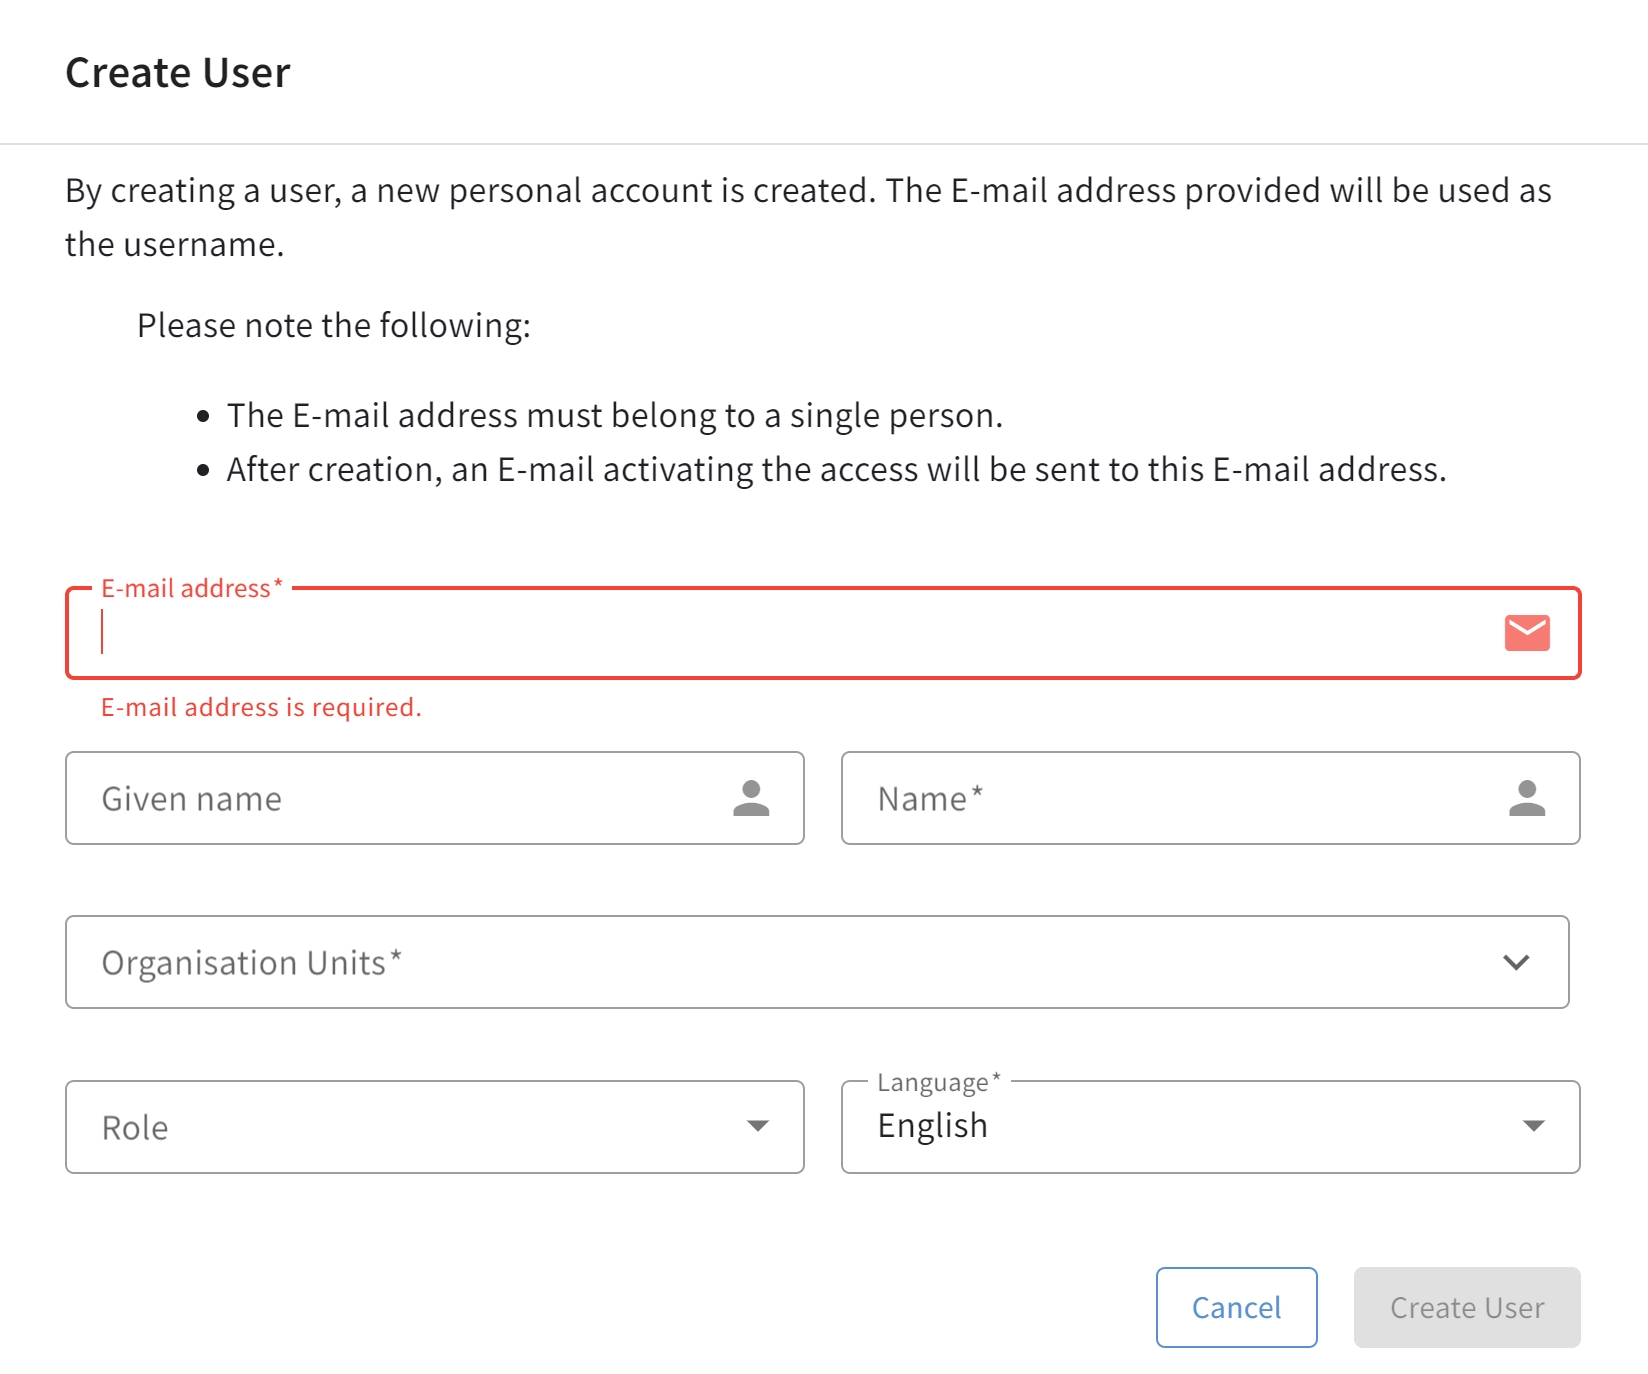
You can create a new user using the + New user button. The user is created using their email address.
| Shared mailboxes must not be used here for privacy reasons. |
Required fields are: email address, last name, the Organization Unit to be assigned, and the language.
After the user has been created, our backend sends a confirmation email to the specified email address. Using this
email, the user can confirm the address and set a personal password.
To sign in to the G DATA Web Portal, use the email address and password.
Optionally, you can already assign the intended role to the user in this step; however, this can also be done later.
|
As long as no role has been assigned to the user, the user can already sign in at portal.gdata.de, but does not yet have access to the available data. The user can only view this data after the corresponding permissions have been granted by assigning the role. |
Entering the first name of your employees is also optional.
Screenshot
Open the details pane
If you want to edit, temporarily deactivate, or delete a user, click the
 icon in the user list to open the details pane for a
user.
icon in the user list to open the details pane for a
user.
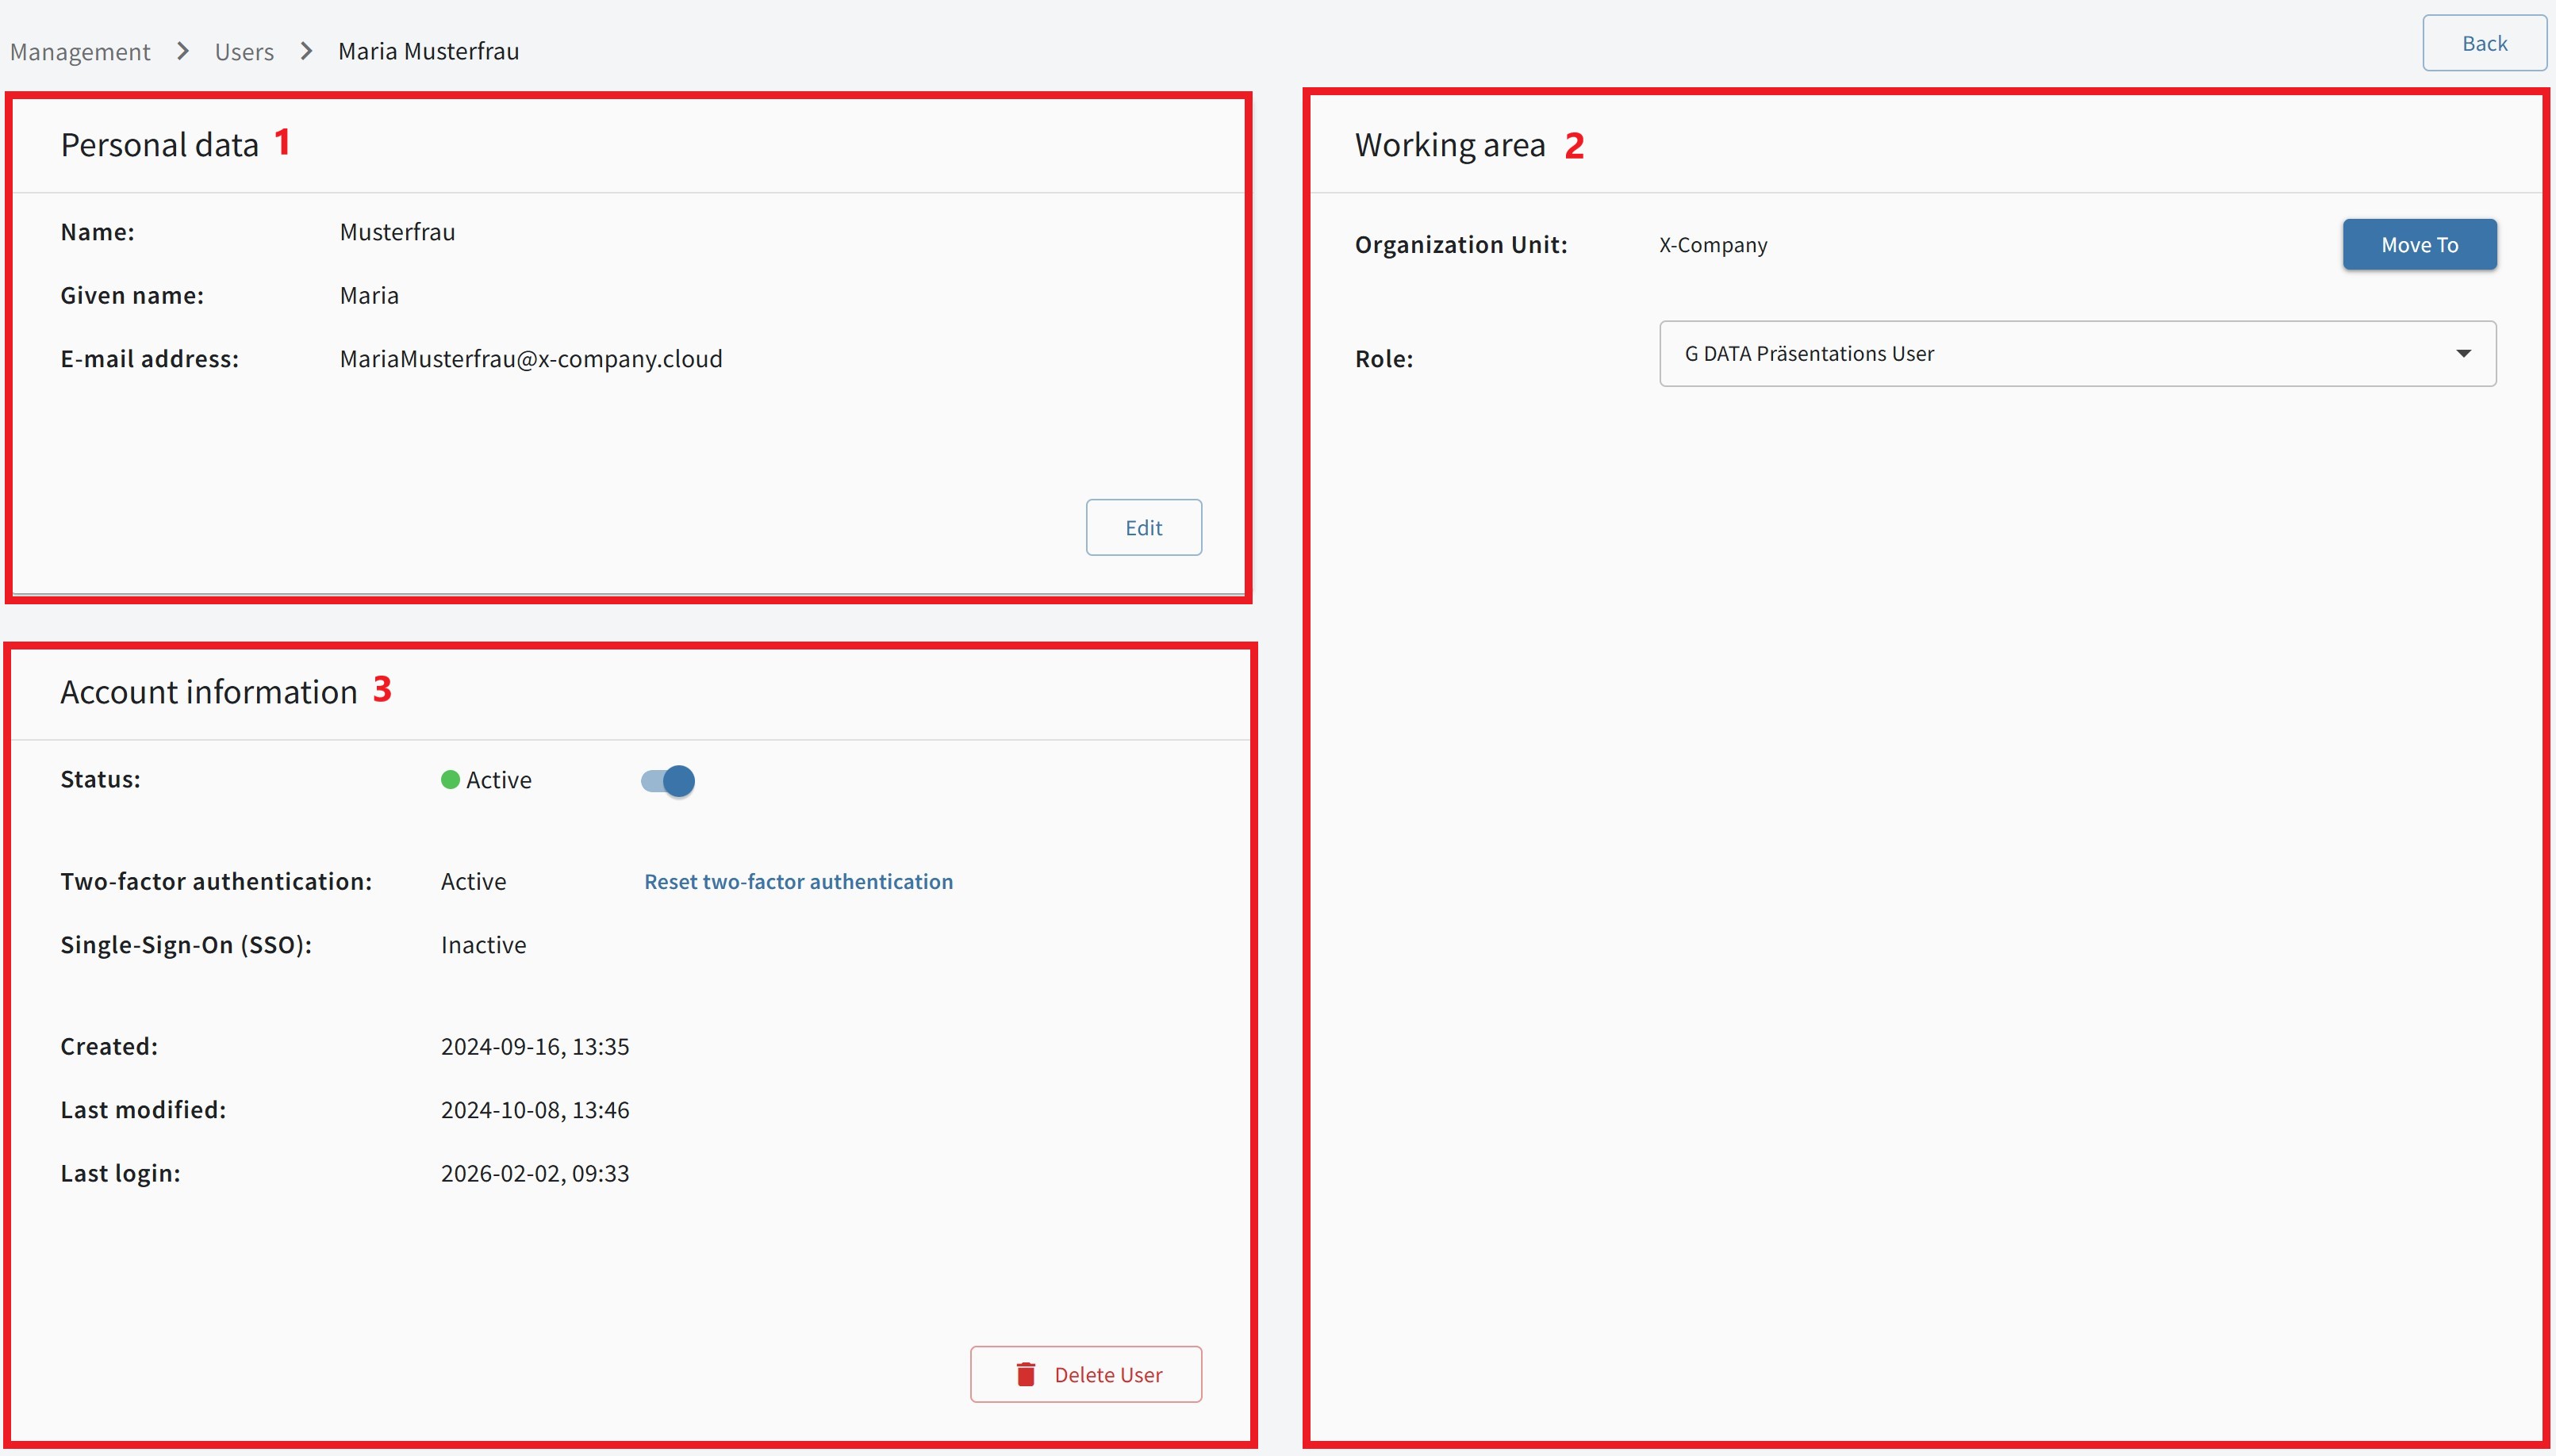
Here, authorized users can view and edit the following data:
1 |
Personal data |
In the details pane, you will find the user’s personal information. Click the desired row to change the first name and last name.
The linked email address cannot be changed here. |
||
2 |
Workspace |
You can move the user to a different Organization Unit here. To do so, click kbdn:[Move] and then select the desired new OU (Organization Unit). In this area, you can also assign roles. To do so, click the existing role; a drop-down menu opens in which you can select the desired new role. |
||
3 |
Account Information |
Some details about the selected account are visible here. These include the status of single sign-on (SSO) and two-factor authentication (2FA), as well as the dates when the account was created and last edited, and when the last login occurred. Here you have the option to deactivate the account (or, for inactive accounts, to activate them again). In addition, two-factor authentication (2FA) can be reset here. Clicking kbdn:[Delete user] deletes the displayed account.
|
Sort, filter, and search users

You can sort users alphanumerically by last name, first name, and email address (→ 1). You can also configure the list by hiding individual columns and searching for entries (→ 2). The search is a full-text search and takes into account the Last name, First name, Email address, Role, and Organization Unit columns.
If you want to display a specific group of users, a separate filter function is available (→ 3). Here you can filter entries by status: active, inactive, and read-only.