G DATA XDR
Restoring artifacts from quarantine
Click Quarantine, and then
search or filter the row with the artifact that you want to restore.
Filter artifacts 
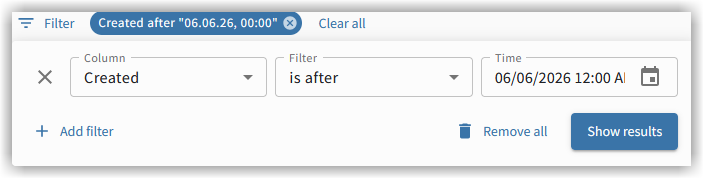
If you do not want to display all artifacts in the list, you can filter the artifacts using the filter icon based on various criteria:
|
When the page is opened, artifacts that are older than one month are already hidden. |
| Column | Filter | Value |
|---|---|---|
Status |
equals (=) |
In Quarantine |
Customer |
contains |
String entered in Value (free text) |
Endpoint |
contains |
String entered in Value (free text) |
Artifacts |
contains |
String entered in Value (free text) |
Detections |
contains |
String entered in Value (free text) |
Created |
is before |
Free input or calendar selection |
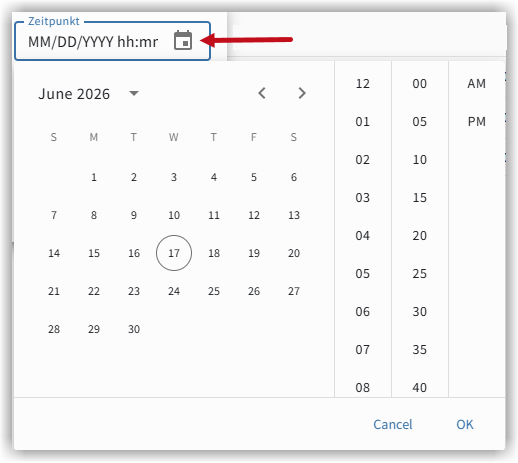
By clicking  you can add additional filters.
|
When you add the first filter, you have the option to select the filter logic (AND or OR). 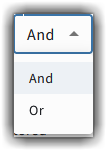
All additional filters are linked to each other using the filter logic selected first. A different selection is no longer possible at this point. |
The filter window closes when you press the button
The set filters are displayed next to the filter icon and can be reset by clicking the x.
Search artifacts 
Using the search (magnifying glass), you can quickly and easily search for artifacts. Enter free text in the search field. The artifacts for which matches were found are then displayed.
Click  in the Actions column of the artifact row.
The Restore dialog opens.
1 |
Click |
2 |
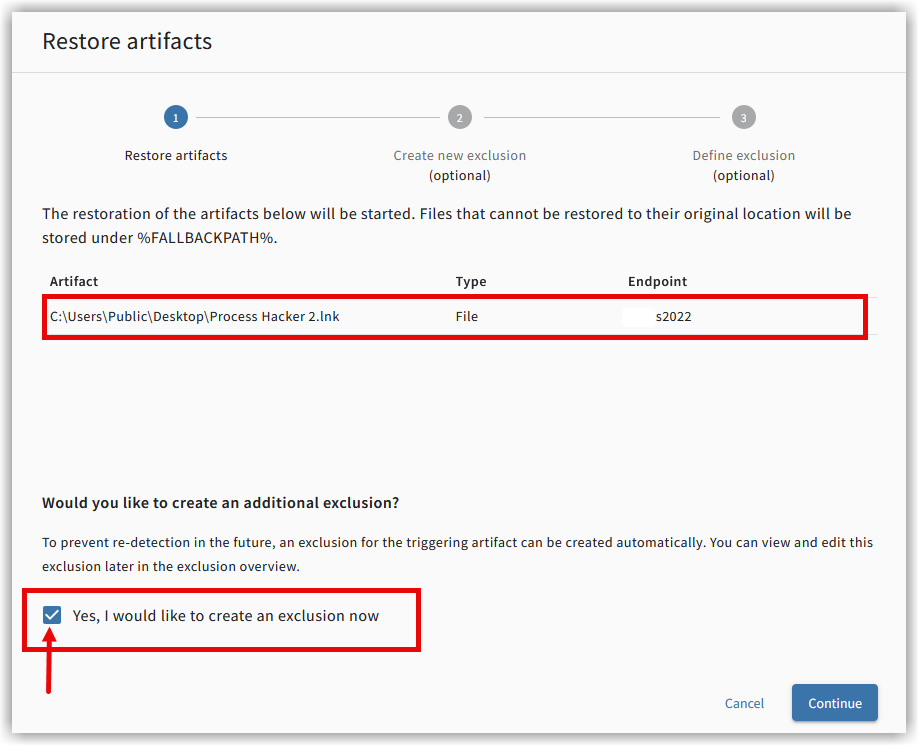
In the window that opens, you can see where the artifact will be returned to. Use the checkbox (see screenshot) to select one of the following options:
|
3 |
Click |
4a |
Optional: the checkbox for setting the Exclusion is selected. If the checkbox is selected, you are accessing the same function that you can use for creating the Exclusion manually. Differences from creating Exclusions manuallyThe difference is that the required information is already defined. At this point, it is possible to expand the scope of the Exclusion and to increase the scope using placeholders. For example, you can expand a file in the user directory of the user admin to all users with this directory: 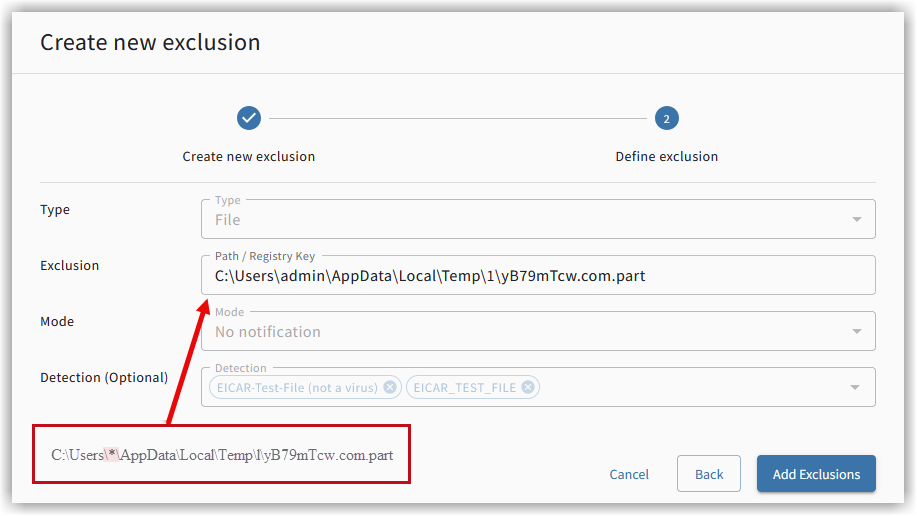
At the end, click |
4b |
If you have cleared the checkbox for setting Exclusions, click
|
The artifact is returned to its original location.
|
If it was not possible to restore an artifact, the artifact is stored unencrypted in the following directory
on the endpoint:
Keep in mind that after restoration, a file will be detected again by the G DATA Agent if
|