G DATA MXDR
Installation of the G DATA Agent on macOS Systems
Installation on macOS systems can be performed either using a GUI or via command prompt.
|
The FQDN of the system on which the G DATA Agent is to be installed is used for unique identification. Please ensure that the HostName (not ComputerName or LocalHostName!) is set accordingly on the macOS system. |
|
Important information on using clone templates / images. The G DATA Agent must not be installed on images that will be subsequently used to clone the image onto other systems. The installation of the G DATA Agent must always be performed after a cloning operation to ensure that incidents can be uniquely identified. |
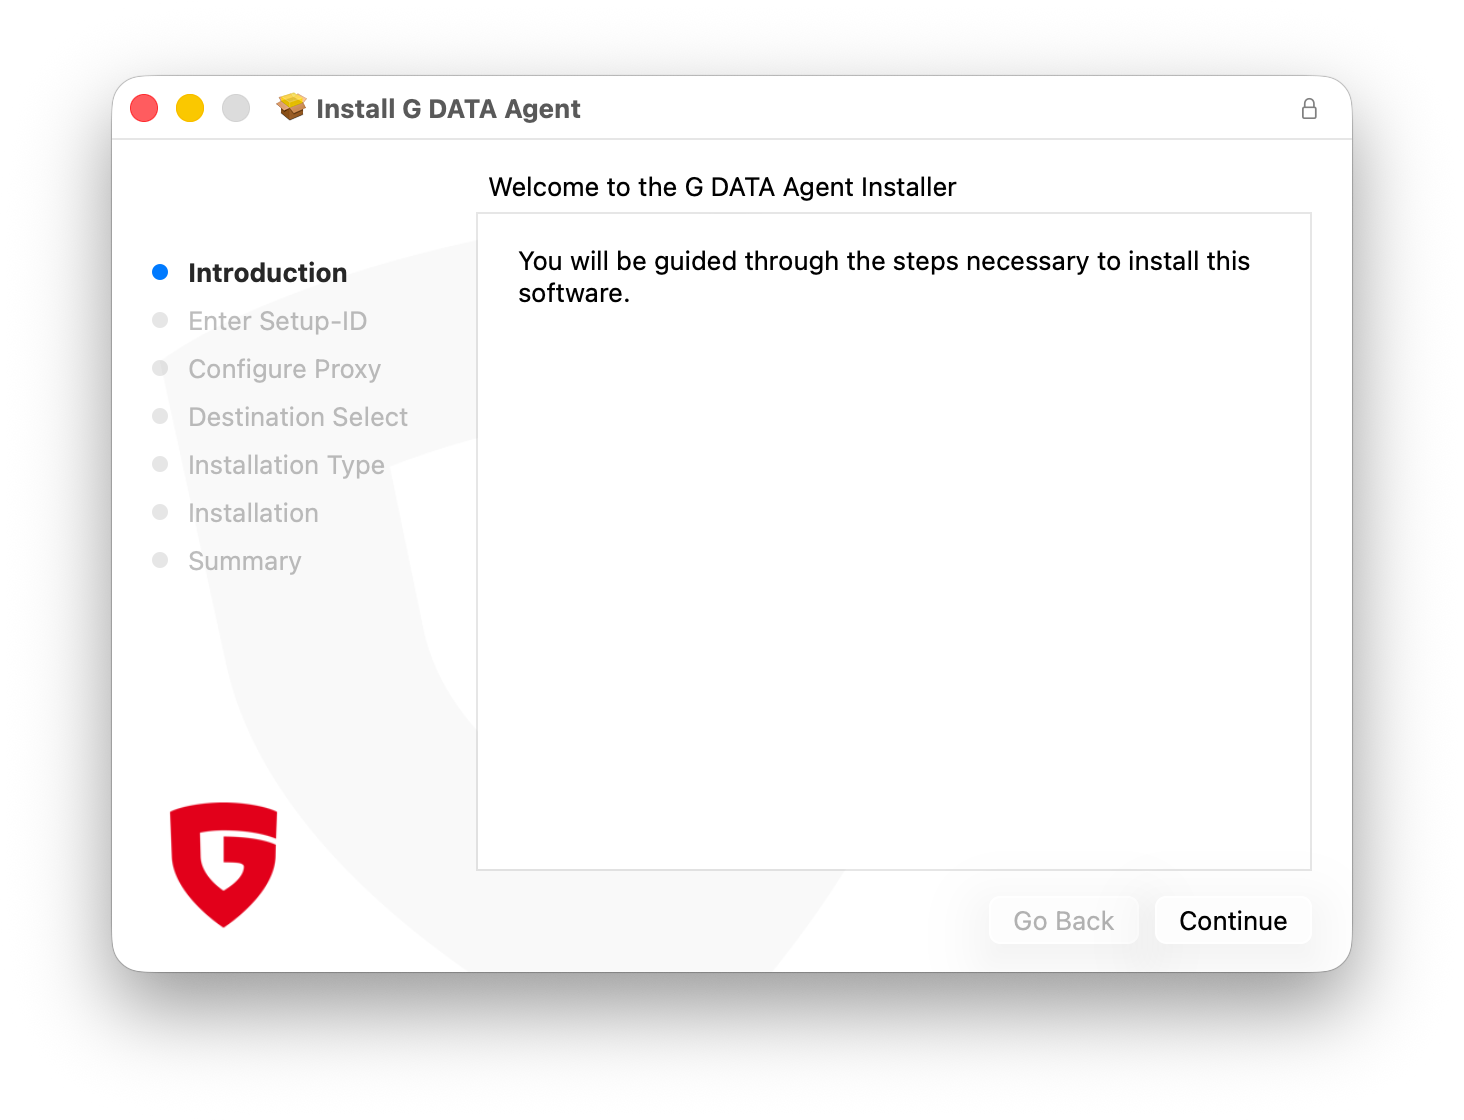
Installation using the GUI
1 |
Download the installation file either from the G DATA Web Portal in the view "Installation of new endpoints" or via direct download here. |
|||
2 |
Click on the installation file and execute it. |
|
||
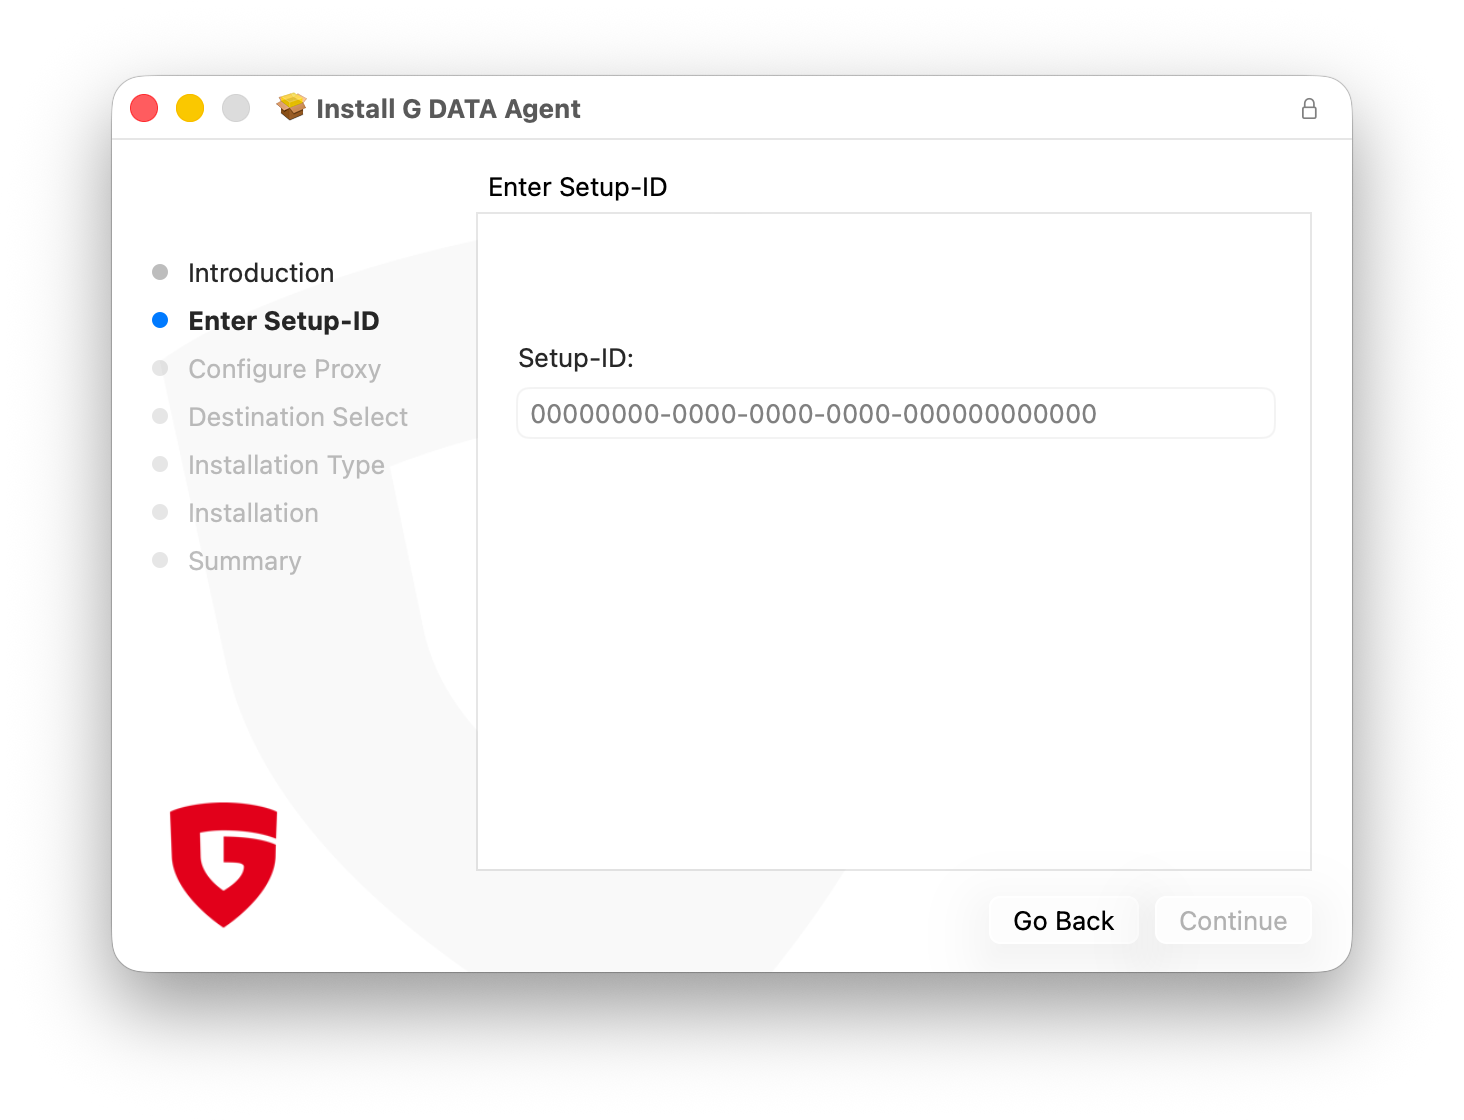
3 |
Enter the Setup-ID. You can find this in G DATA Web Portal in the view "Installing new endpoints". |
|
||
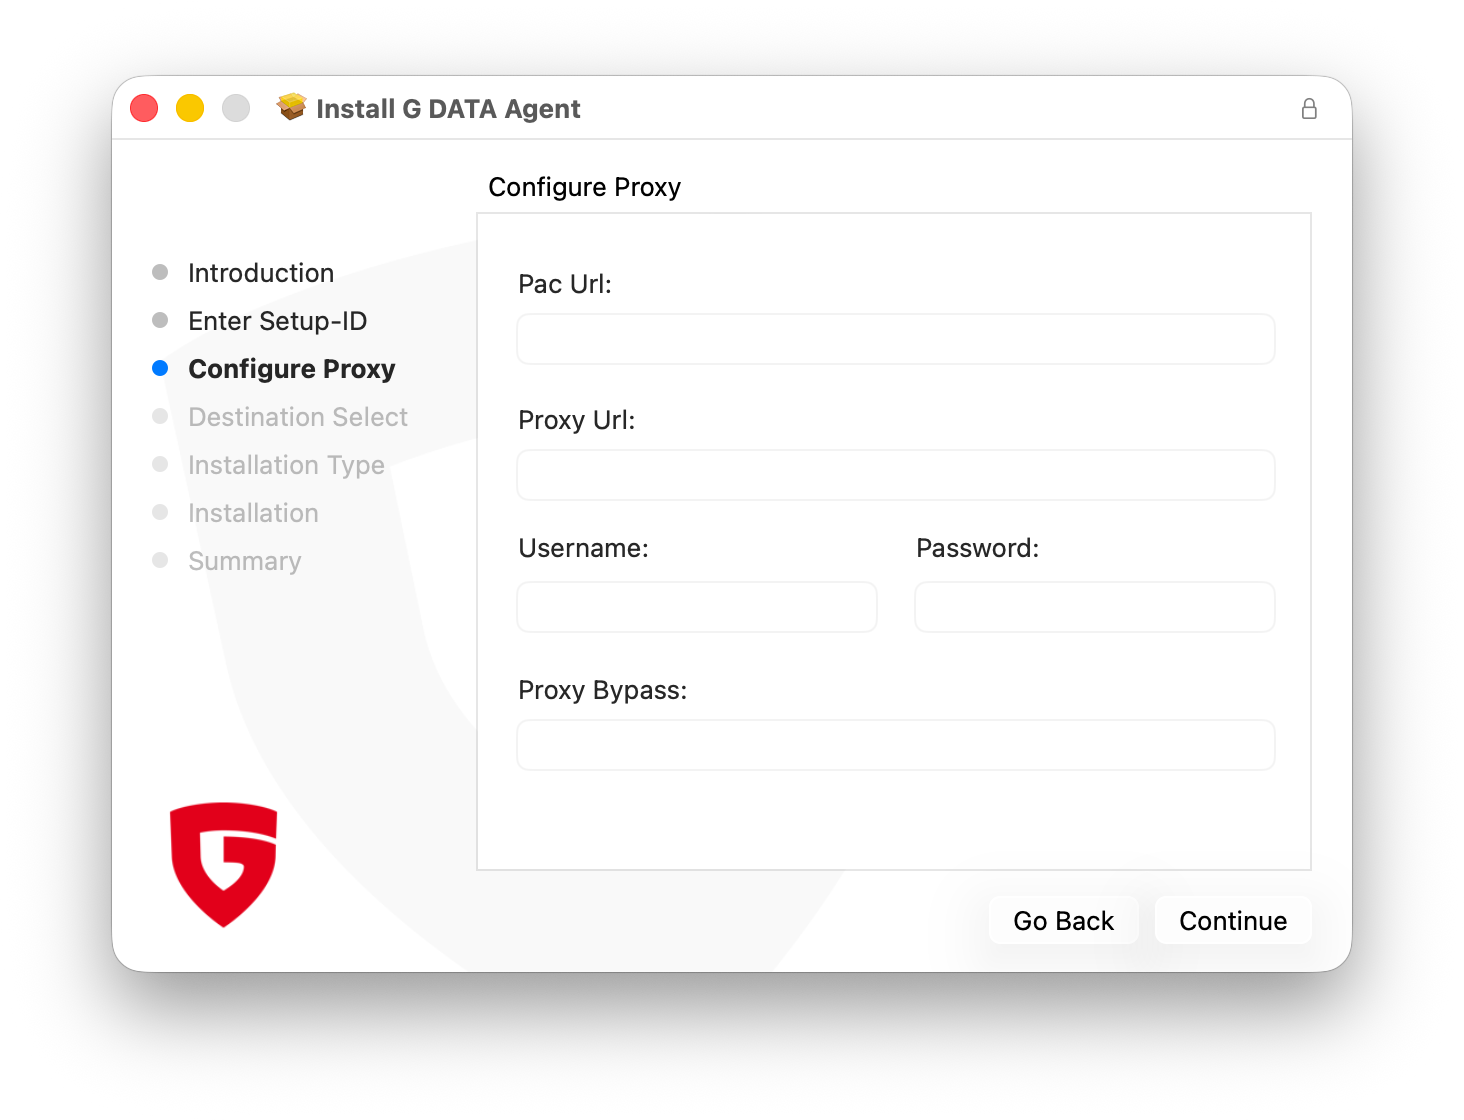
4 |
You can then optionally configure a proxy server. If you do not use a proxy server, leave the fields blank. |
|
||
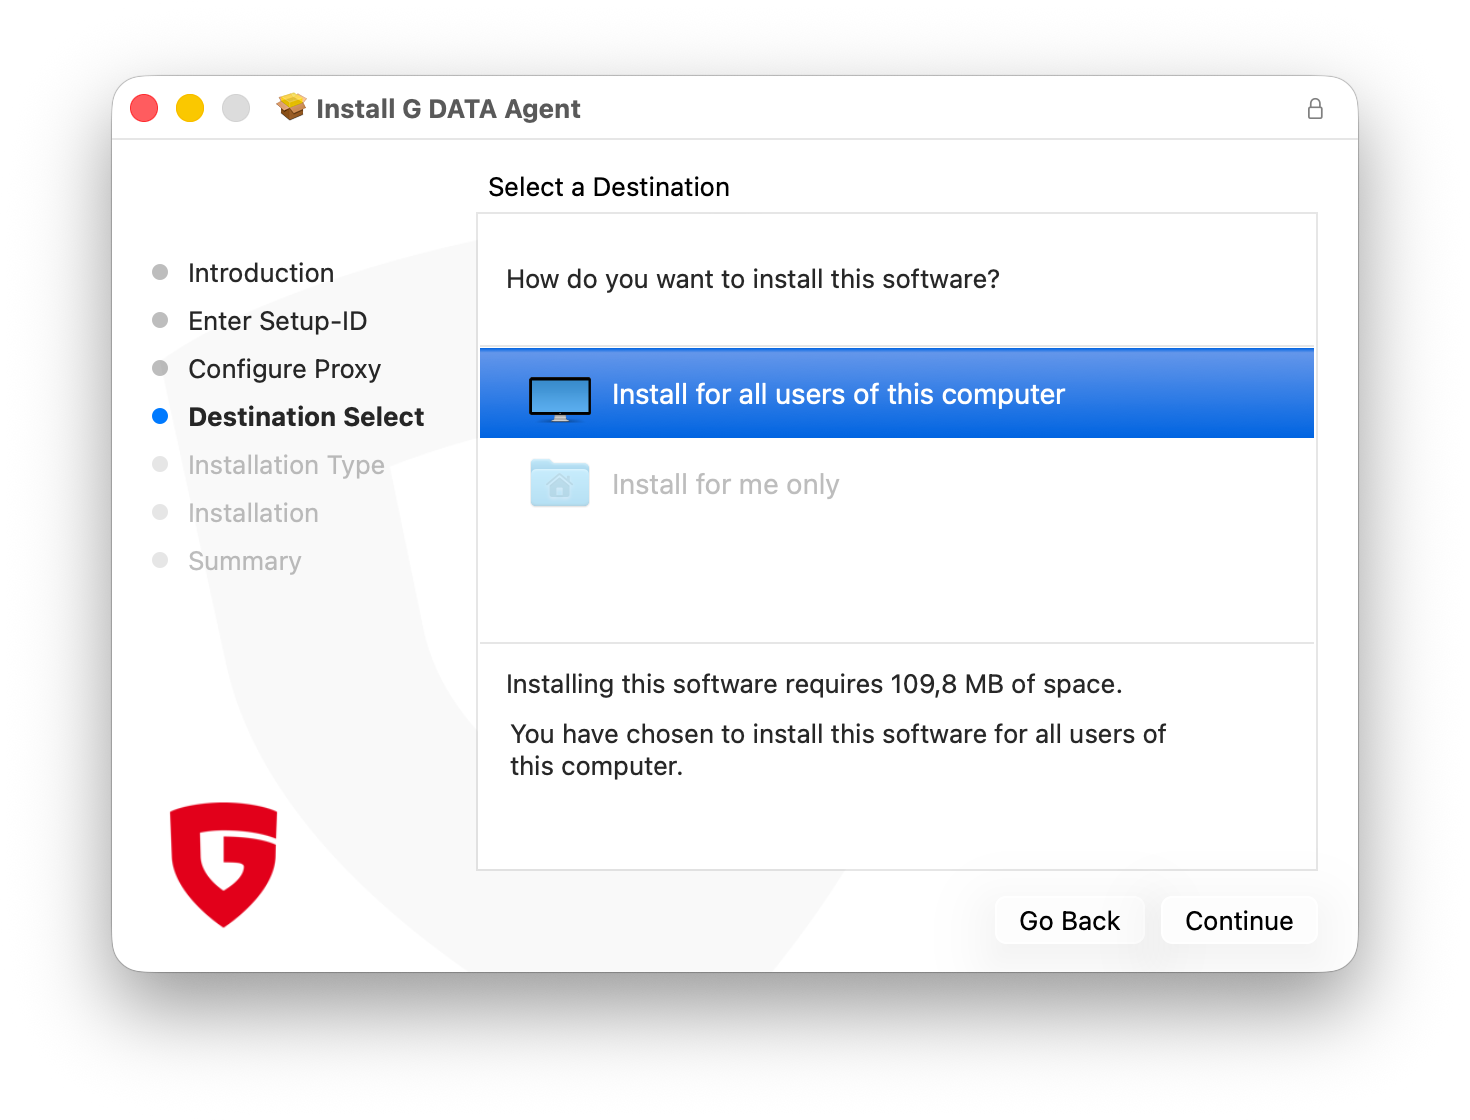
5 |
Next, you will be asked to select the users for whom the installation should be performed. Due to the nature of the software, it is only possible to install the agent for all users. Click Continue. |
|
||
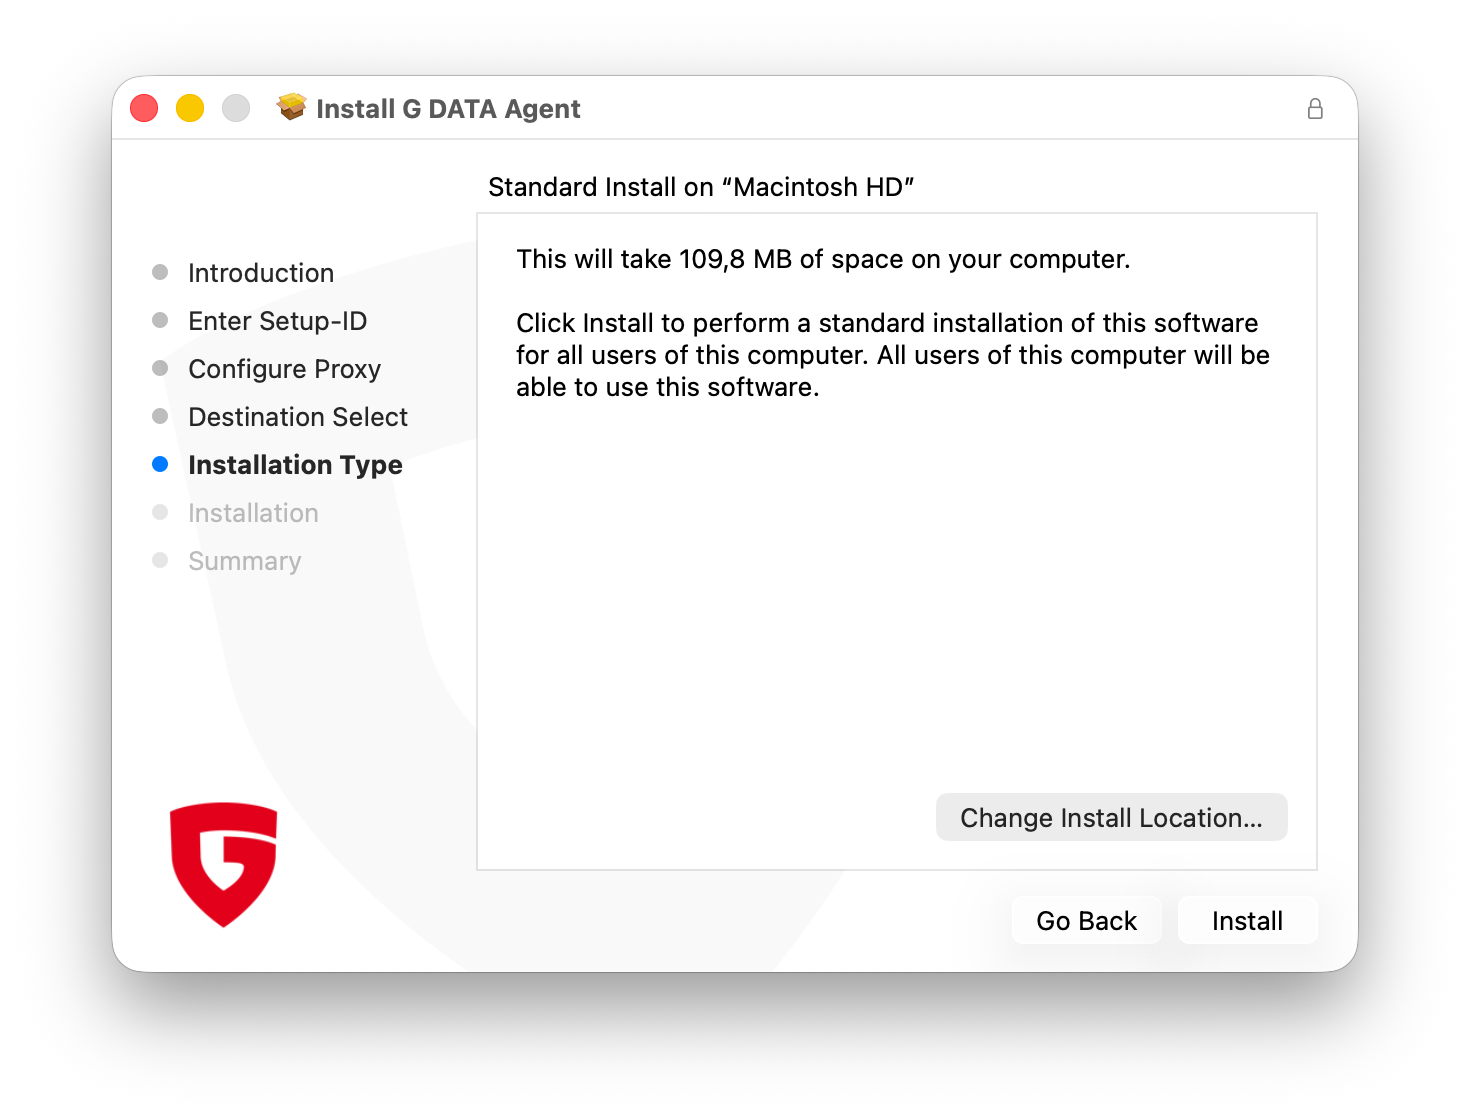
6 |
Next, you must select the volume on which the installation will take place. As in the previous step, there is no option to choose from here. Click Install.
|
|
||
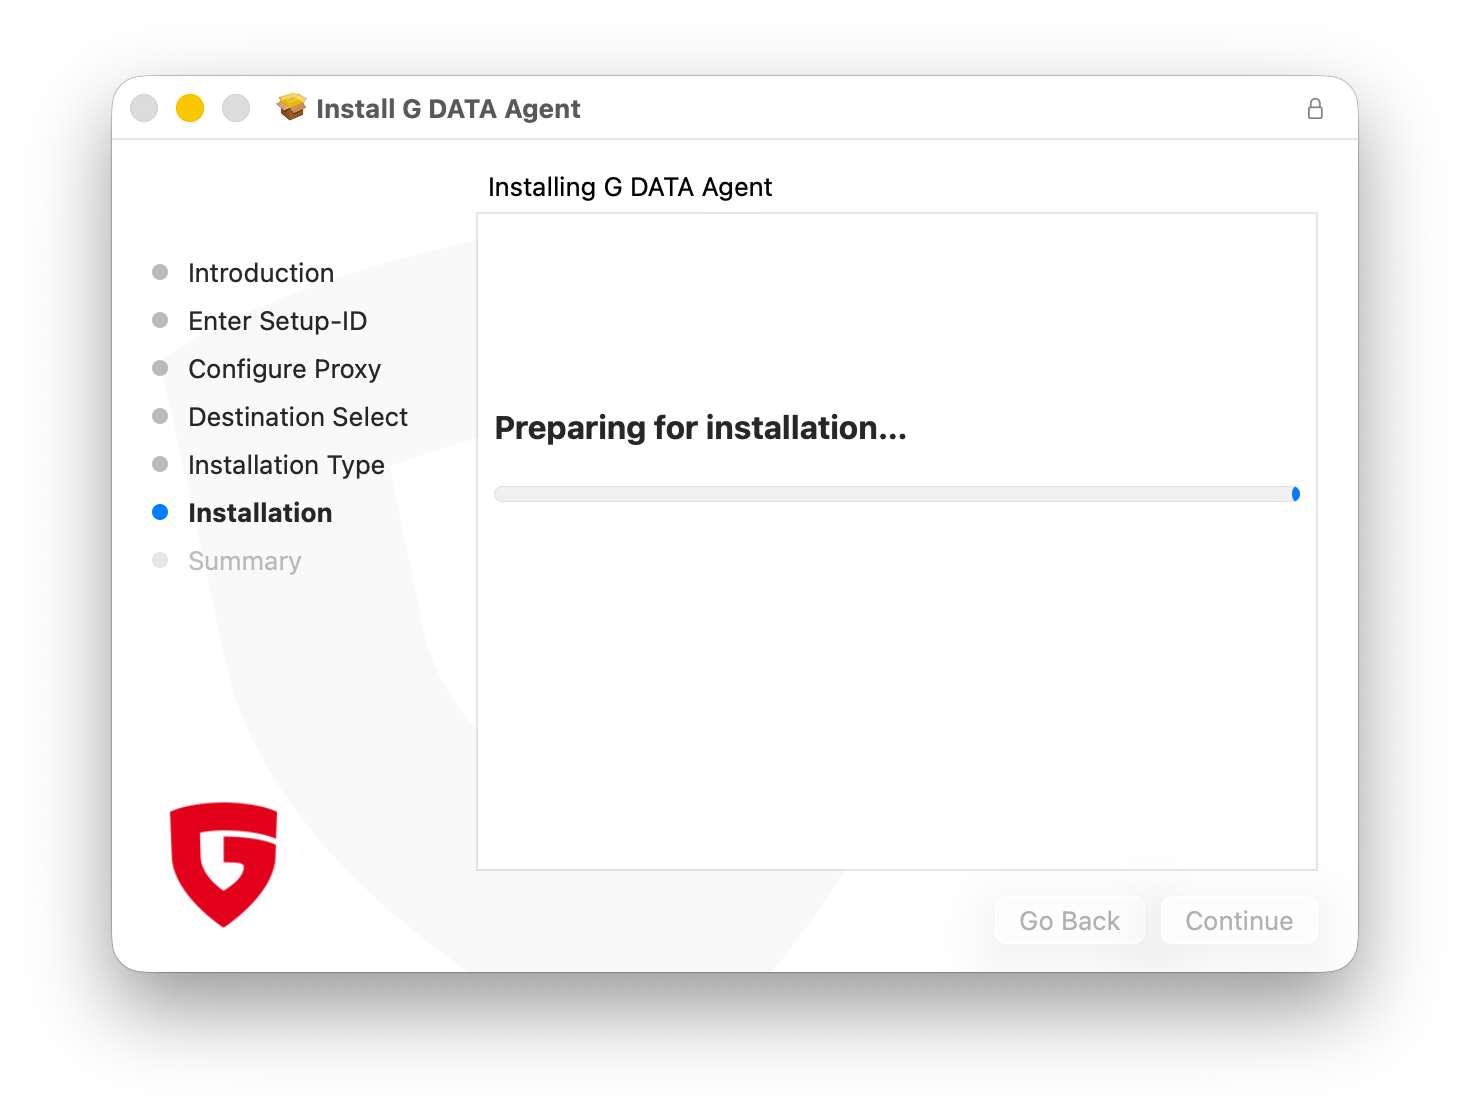
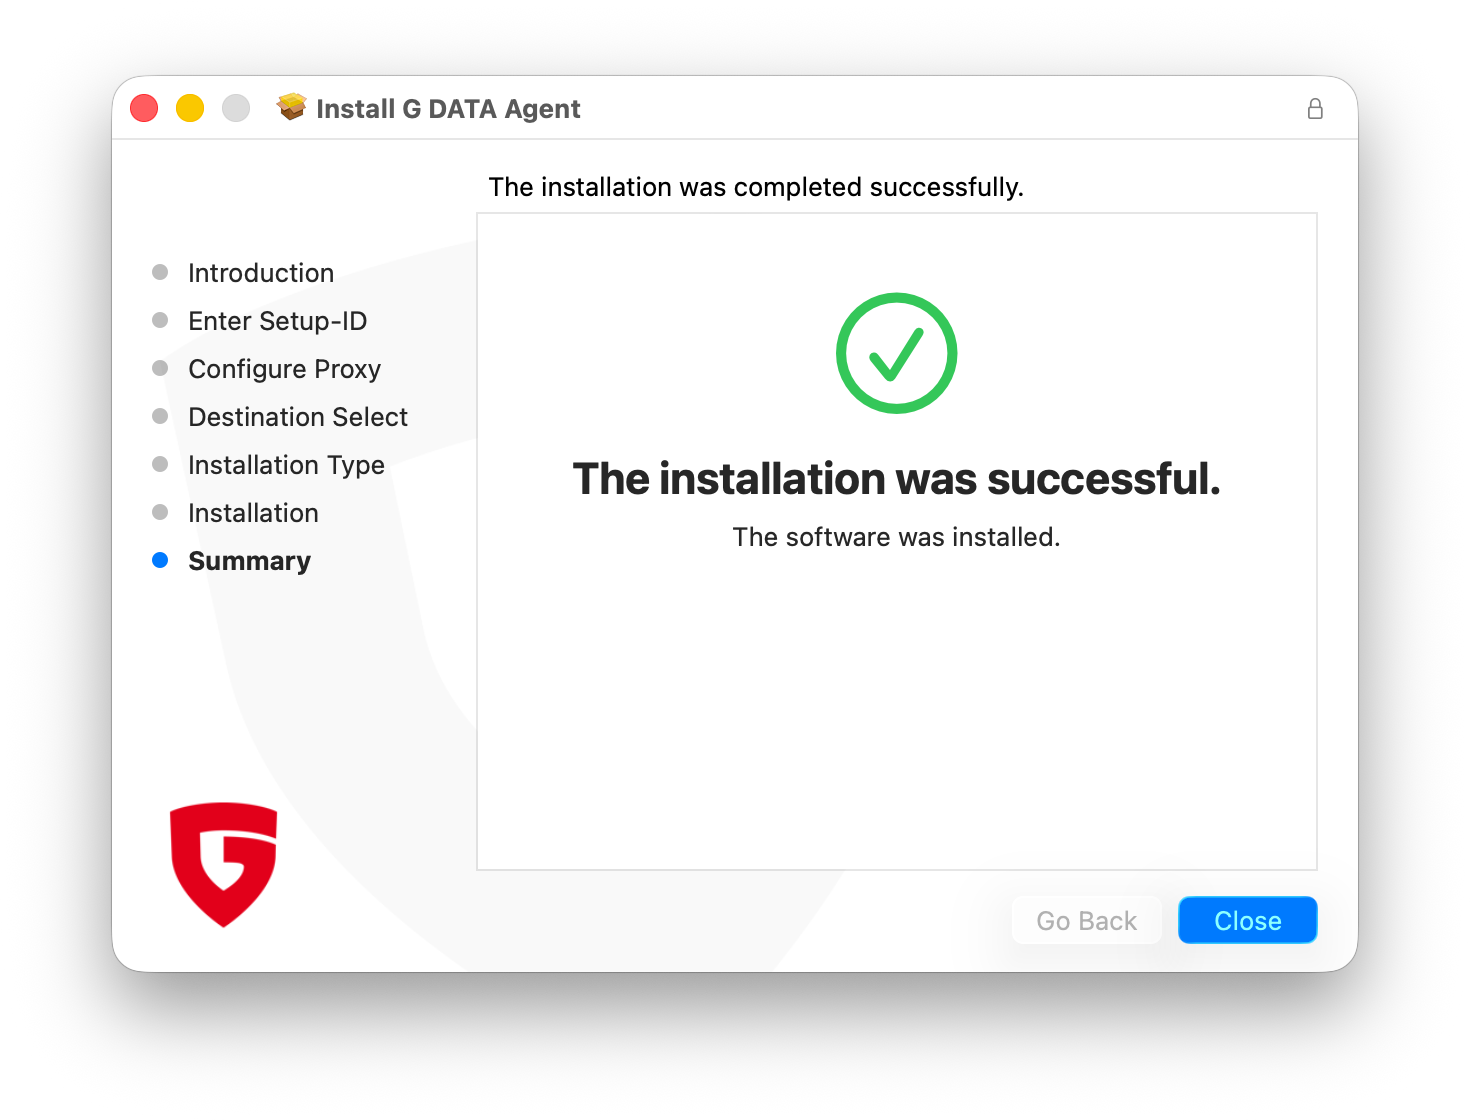
7 |
The installation process will now start. Once the installation is complete, you will receive confirmation that the agent has been successfully installed. |
|
||
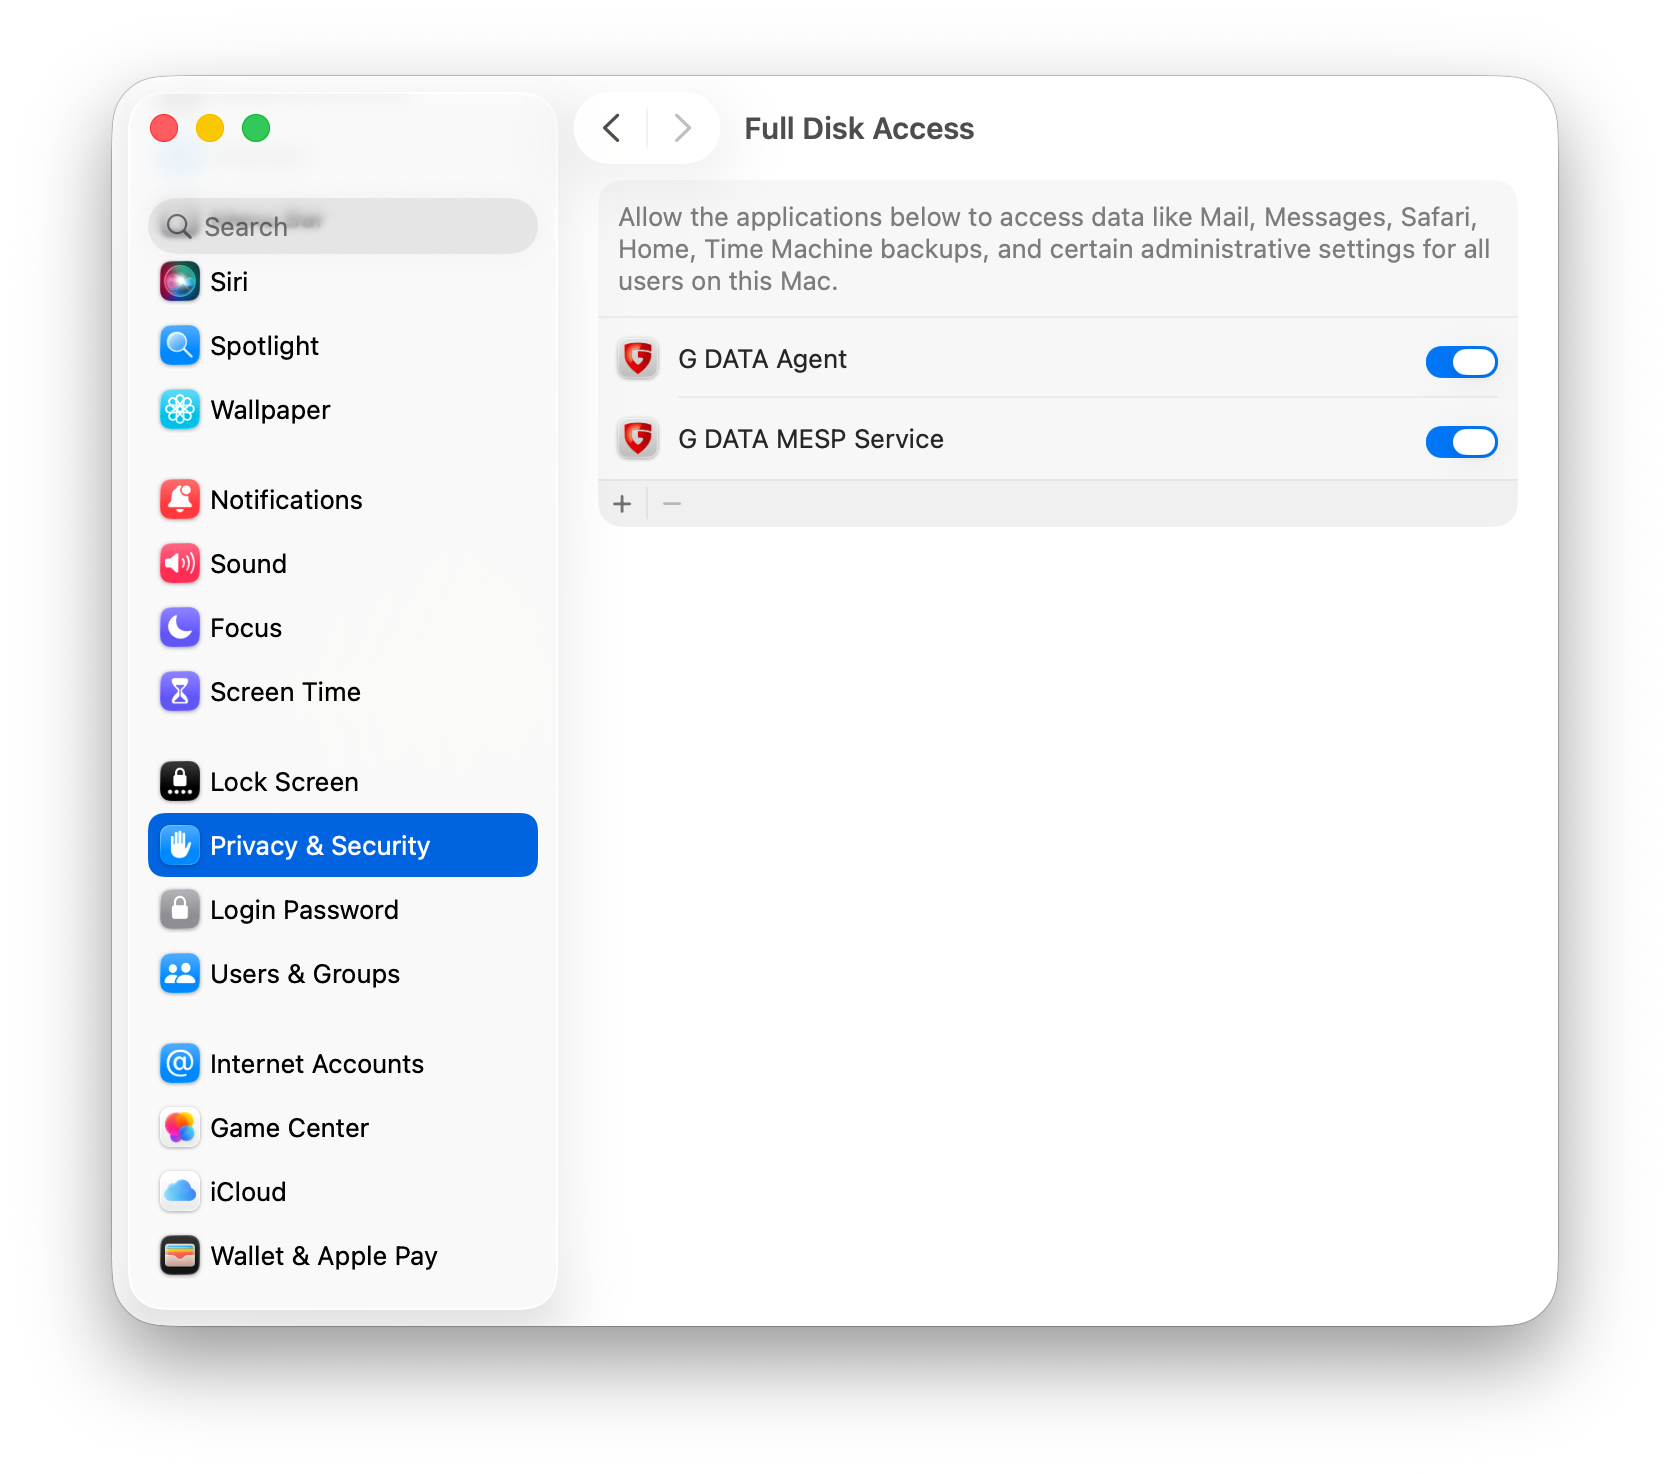
8 |
As a final step, you must grant Full Disk Access (FDA) to both, the "G DATA Agent" and the "G DATA MESP Service". To do this, go to "Privacy & Security" in the settings and set the corresponding toggle for both applications. |
|
||
Installation via command prompt
1 |
Download the installation file either from the G DATA Web Portal in the view "Installation of new endpoints" or via direct download here. |
|
2 |
When executing the installation file, a file named gdata.agent.cfg must be present or created at the installation location. It must contain the following content: Replace “setupid” with your Setup-ID (including the apostrophes), which you can find in G DATA Web Portal in the view "Installing new endpoints". Besides this entry, all other entries are optional and only need to be created if a proxy server is to be configured. |
|
3 |
Now open the command prompt. |
|
4 |
Enter the following command: |
|
5 |
Now grant the applications "G DATA Agent" and "G DATA MESP service" Full Disk Access (FDA). To do this, go to "Privacy & Security" in the settings and set the corresponding toggle for both applications. |
|
6 |
The installation is complete after successfully executing the command and assigning Full Fisk Access. |
|
Accessibility of the G DATA cloud
To ensure the managed service, the G DATA cloud must be accessible and must not be blocked by the firewall. The following listed settings are required for this. It must be ensured that *.gdatasecurity.de and *.gdatasoftware.com can be resolved and reached.
-
Port sharing
-
The G DATA agents on the endpoints must be able to reach the IPs of our backend servers via port TCP/443, IP range 194.156.84.0/22 (194.156.84.0 - 194.156.87.255).
-
-
Protocols
-
The systems must be able to communicate via the HTTPS:// and WSS:// protocols.
-
-
TLS
-
Proxy servers used must support at least TLS 1.2.
-
There can be no SSL inspection or deep packet inspection.
-