G DATA 365 | Mail Protection
Malware & spam filter settings
| Do not forget to save all changes using the button in the top right-hand corner of the window. The position of the toggle switch and the stored values are only applied after saving. |
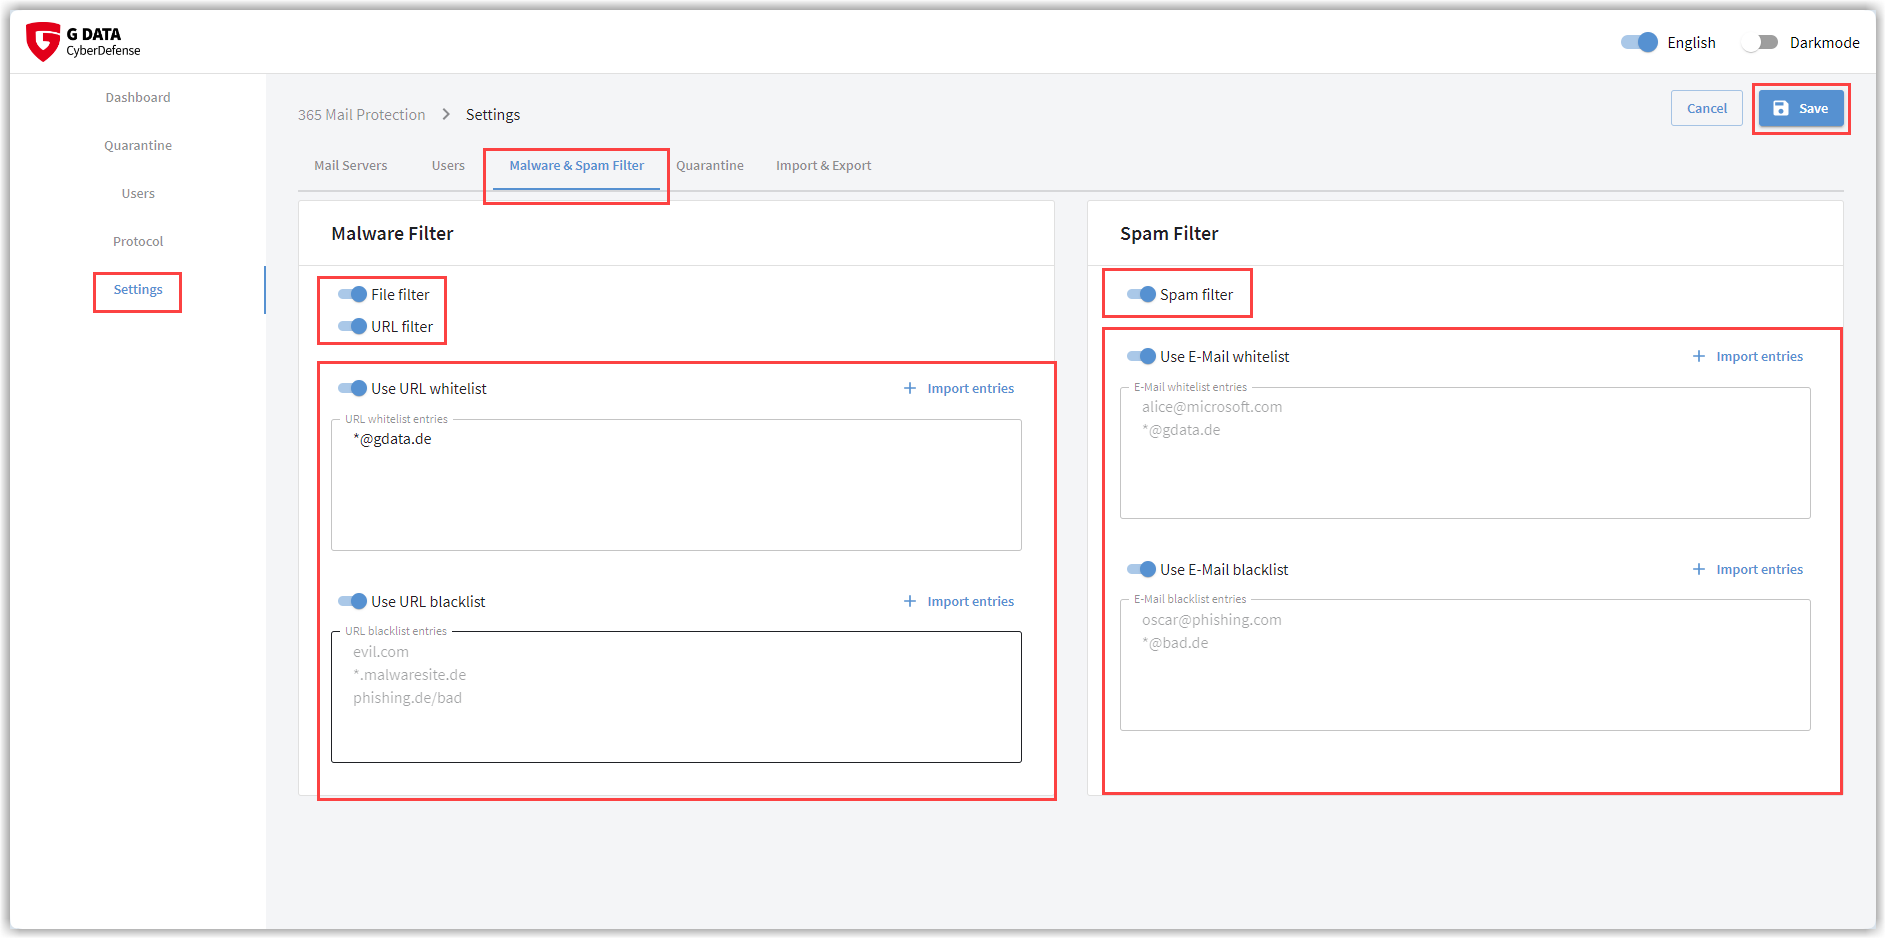
Malware Filter
This is where you set the scope and exceptions with which the protection components should work.
Should the G DATA 365 | Mail Protection file attachments and URL protection be turned off or on?
| The checking of file attachments and URLs should only be switched off in exceptional cases. Never switch off protection on the basis of assumptions in order to allow reported infected e-mails through. You should also be careful when maintaining the whitelist. The mere fact that you know the sender of an e-mail or a specific website does not justify false positives. It can never be ruled out that senders of e-mails or website operators are themselves victims of a virus outbreak and unknowingly spread the infection further. When in doubt, let us check the detection! |
Maintaining white and blacklists.
You can write the white and blacklist entries directly in the field provided.
Use the following syntax:
-
www.domäne.de = only the main domain
-
*.domäne.de = Domain including all subdomains
-
domäne.de/ = only specific domain pages
Write each entry in a separate row.
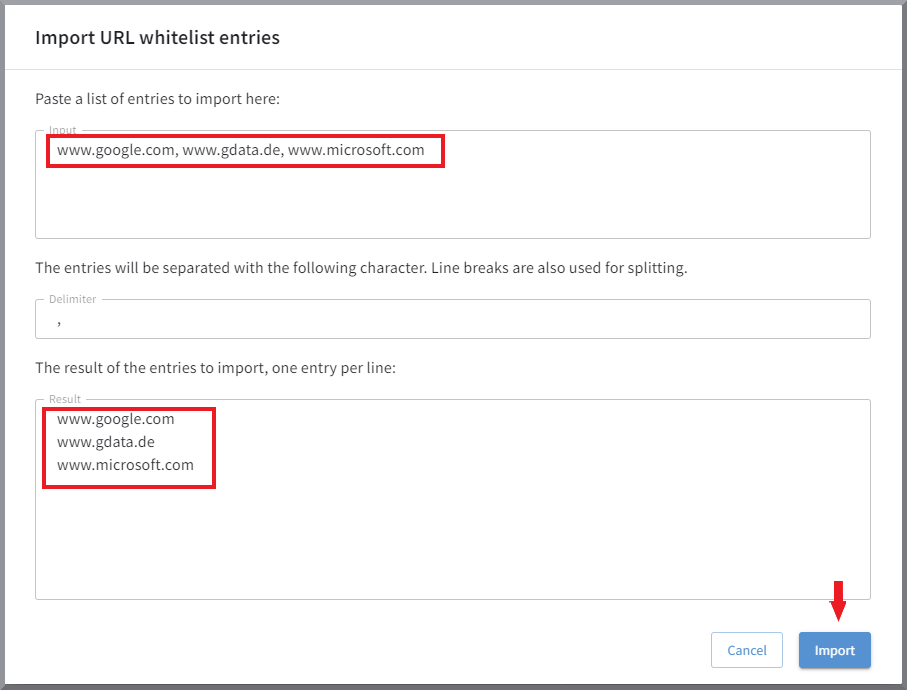
If you already have an exported list of entries, separated by a special character, click on + Import entries. Copy the content into the upper block and enter the separator character used. You will then see the list of separated entries as it will look when imported. Here you can check everything is correct. Click on the Import button if you want to import the list.
Screenshot
Spam filter
Here you can switch the check for spam e-mails on and off and create a whitelist / blacklist.
Please note that the entries you create yourself as a white or blacklist do not represent a professional spam filter. This is already provided by activating our spam function. Not every e-mail that has slipped through has to be entered here. The probability of receiving this sender again is low, as the sender names of spam attacks are constantly changing. Persistent newsletters that cannot be stopped, on the other hand, with blacklist entries.
Whitelist entries should also be carefully considered. Sender addresses known to you can be used by spammers. These spam senders would then have a free pass. The sender of a desired newsletter, which is correctly recognized as a mass mailing to your whitelist makes perfect sense.
You can write the whitelist and blacklist entries directly in the field provided.
Use the following syntax:
-
alice@microsoft.com = individual e-mail addresses
-
*@gdata.de = all senders of a domain
Write each entry in a separate row.
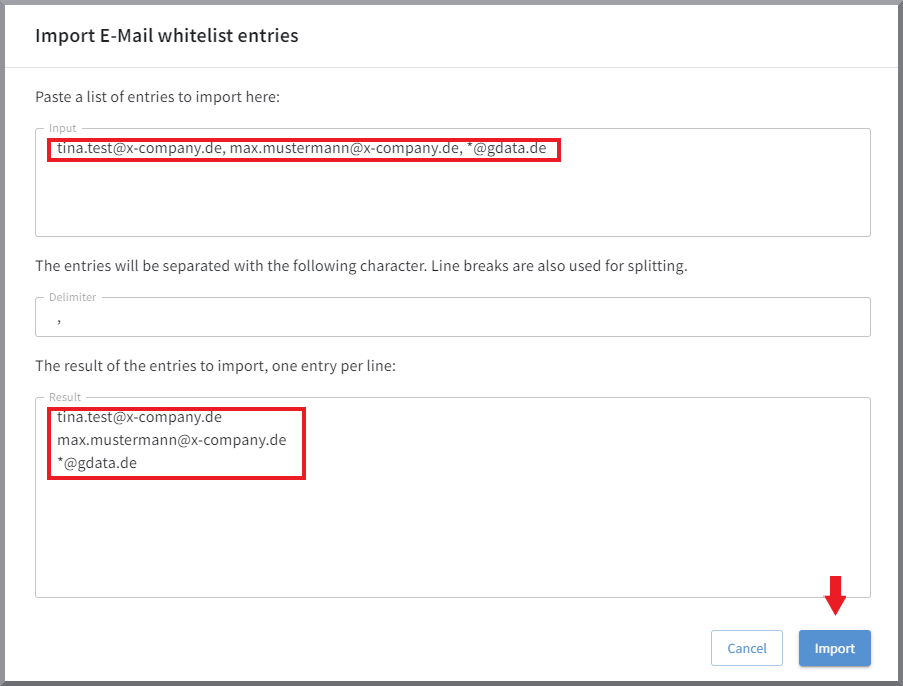
If you already have an exported list of entries, separated by a special character, click on + Import entries. Copy the content into the upper block and enter the separator character used. You will then see the list of separated entries as it will look when imported. Here you can check everything is correct. Click on the Import button if you want to import the list.
Screenshot