G DATA 365 | Mail Protection
Create connectors and rule
This article describes how to create an outbound and an inbound connector and use a rule to route your e-mail traffic via the G DATA 365 | Mail Protection.
The necessary steps can be carried out either via Exchange Powerscript commands or via the Microsoft Exchange Admin Center interface:
Extend Windows Powershell for the connection to Microsoft 365 (Exchange Online Powershell)
1. |
Open the Powershell. Enter the following command to install the Exchange Management Module: Answer the queries with Y. |
2. |
Start the connection with the following command: Replace the user MaxMustermann@x-company.cloud with your user! Show Screenshot
|
3. |
A login window will open. Enter your password here. |
4. |
Continue with the point |
Connectors und Regel unter Verwendung der Exchange Online PowerShell anlegen
1. |
Open the Exchange PowerShell and log in to Office 365 (You can find support for this under Extend Powershell for the connection to Microsoft 365). |
||
2. |
Create a new outbound connector with the following command: |
||
3. |
Create a rule with the following command: At this replace x-company.cloud and x-company.onmicrosoft.com with your domain names. |
||
4. |
Create a new inbound connector with the following command:
|
Creating connectors and rules via the Microsoft Exchange Admin Center
1. |
Open the Exchange Admin Center and log in. |
||
2. |
Select E-mail flow and Connectors. Click Next. Show Screenshot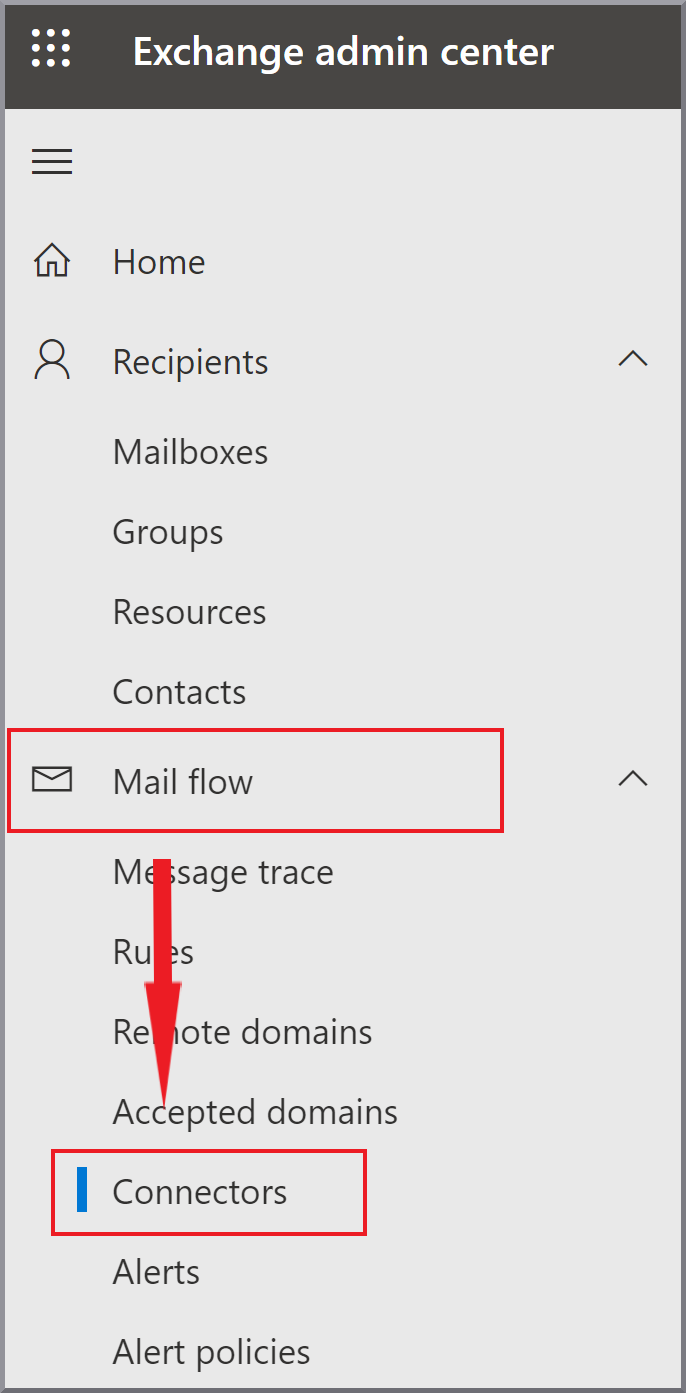
|
||
3. |
Click on + Add Connector. |
||
4. |
Wählen Sie aus:
Then click Next. Show Screenshot
|
||
5. |
Enter the name G DATA 365 Mail Protection and optionally a description. Tick the Checkbox Turn it on. Click Next. Show Screenshot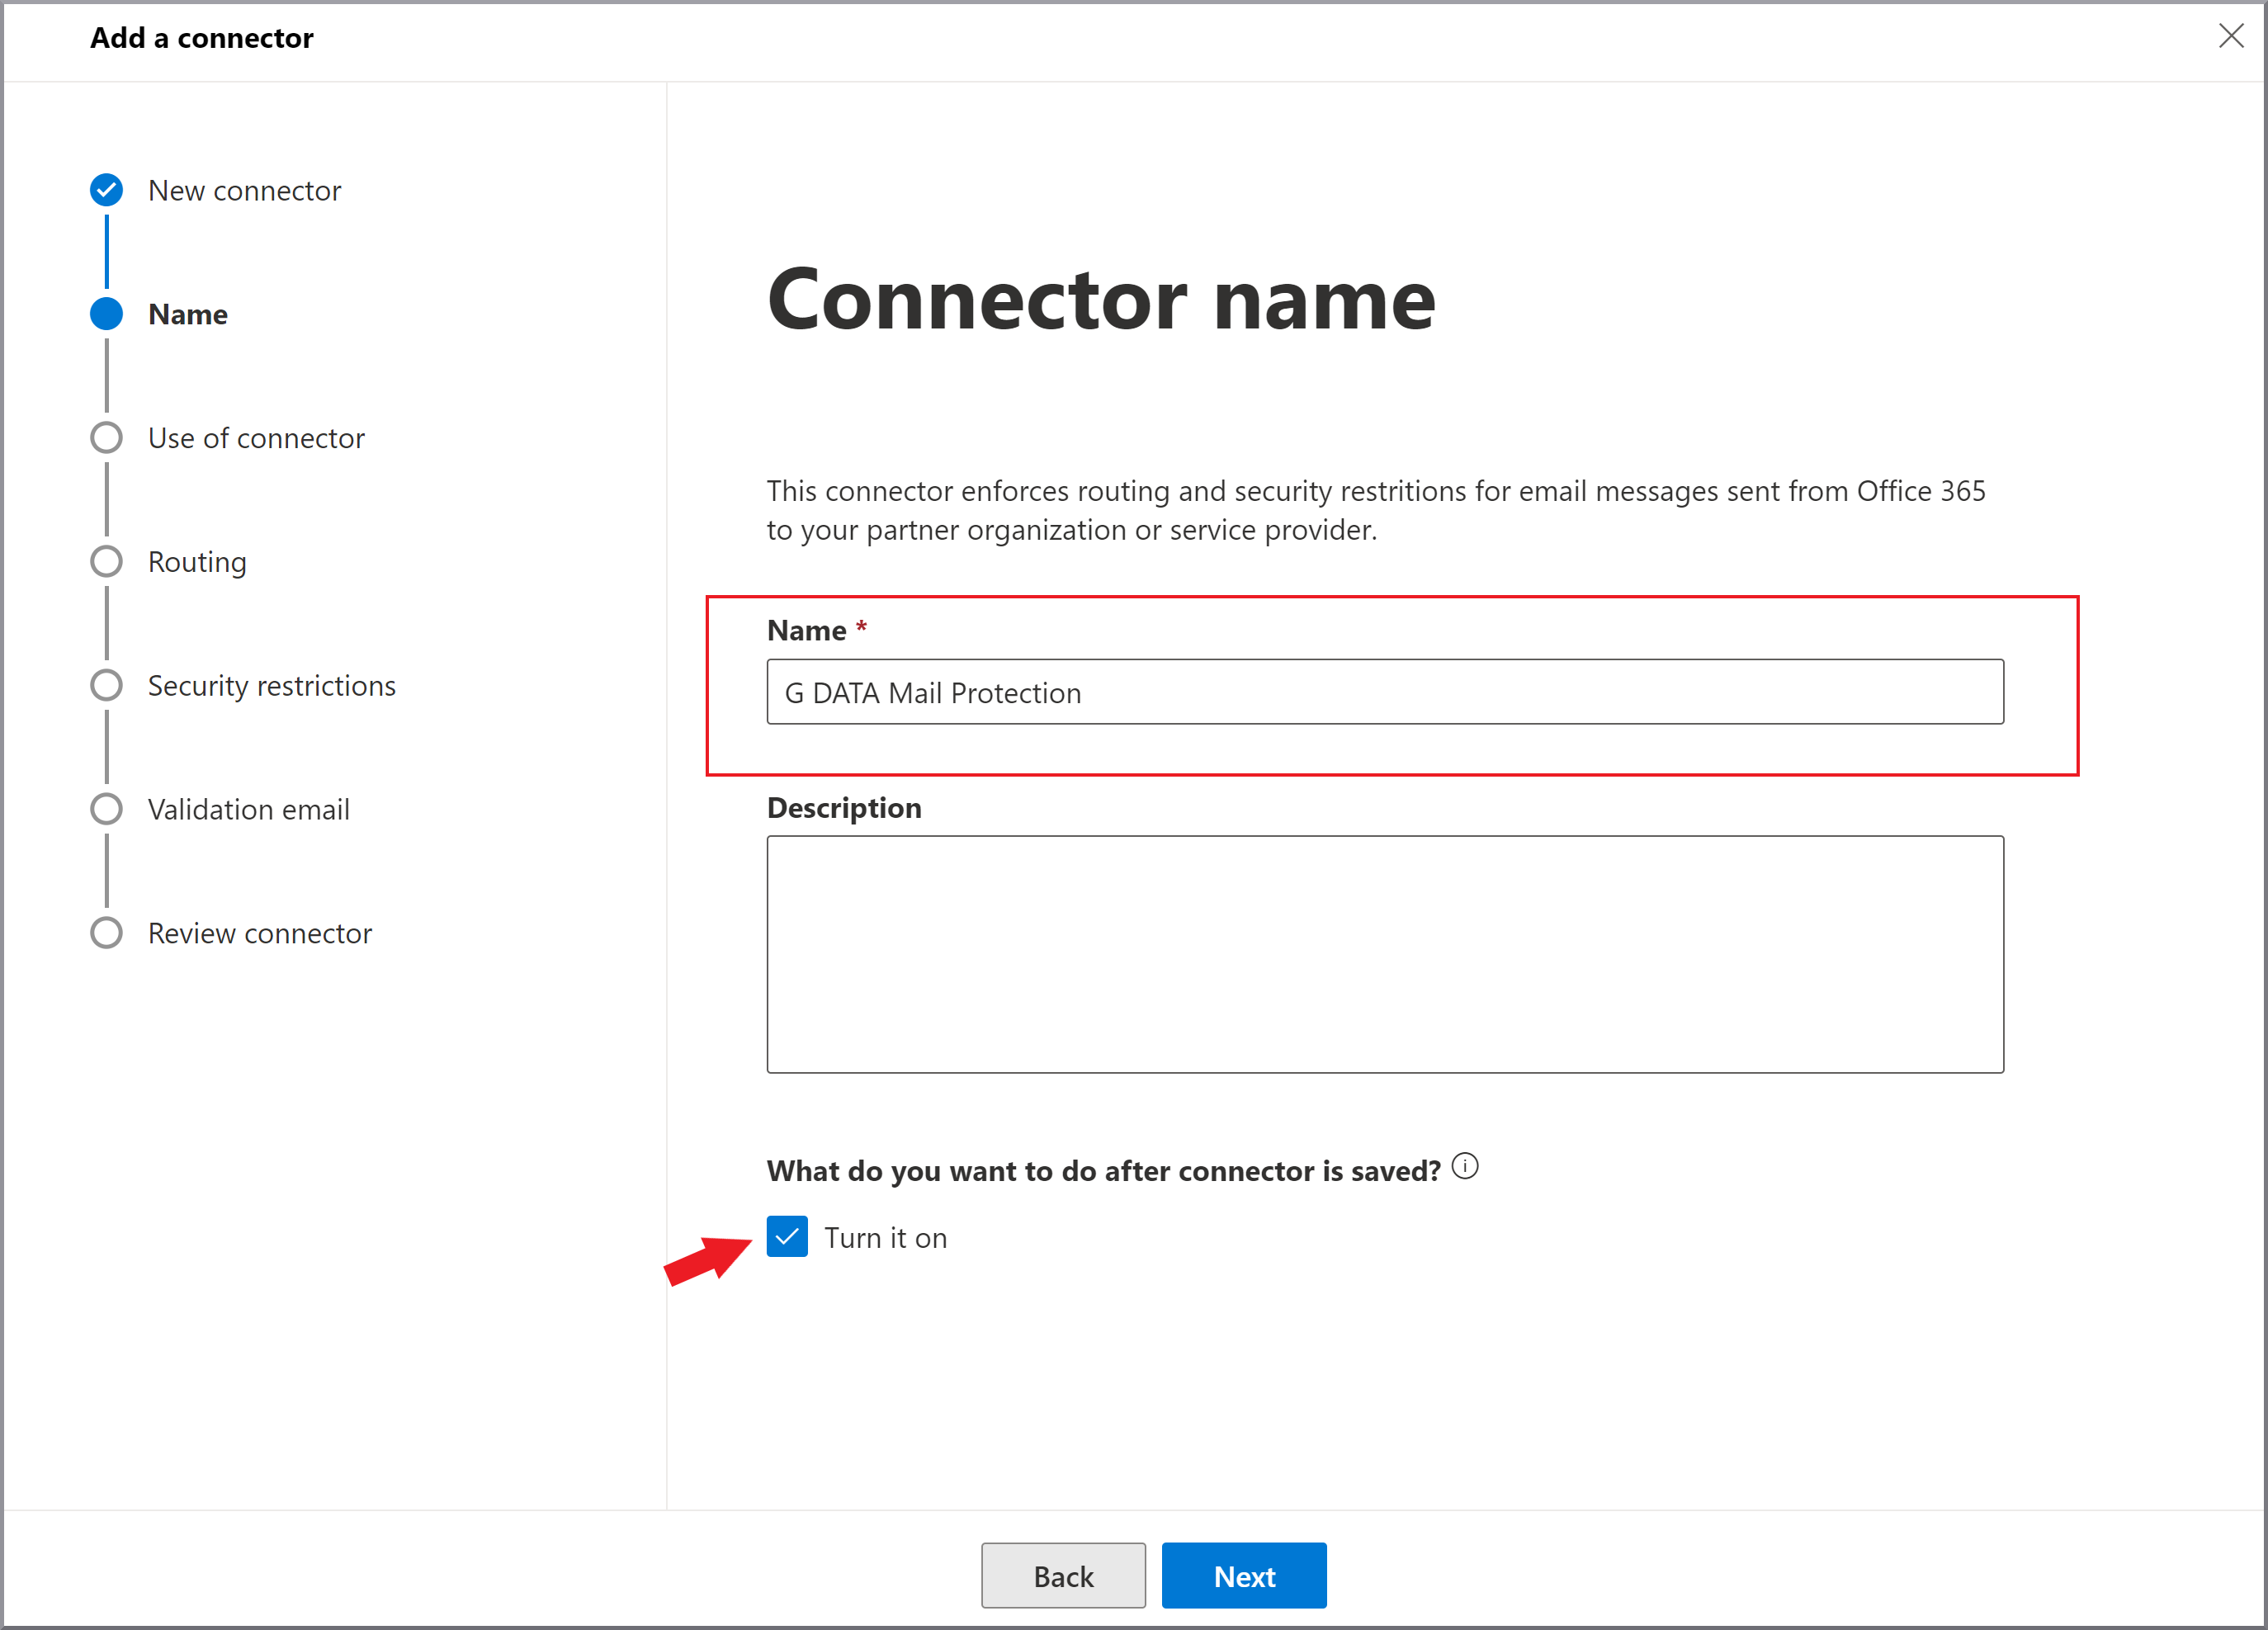
|
||
6. |
Select: Only when I have a transport rule set up that redirects messages to this connector. Click Next. Show Screenshot
|
||
7. |
Select: Route email through these smarthosts and enter the name mailprotection.gdata.de as smarthost. Add it to the smarthost list via +. Click Next. Show Screenshot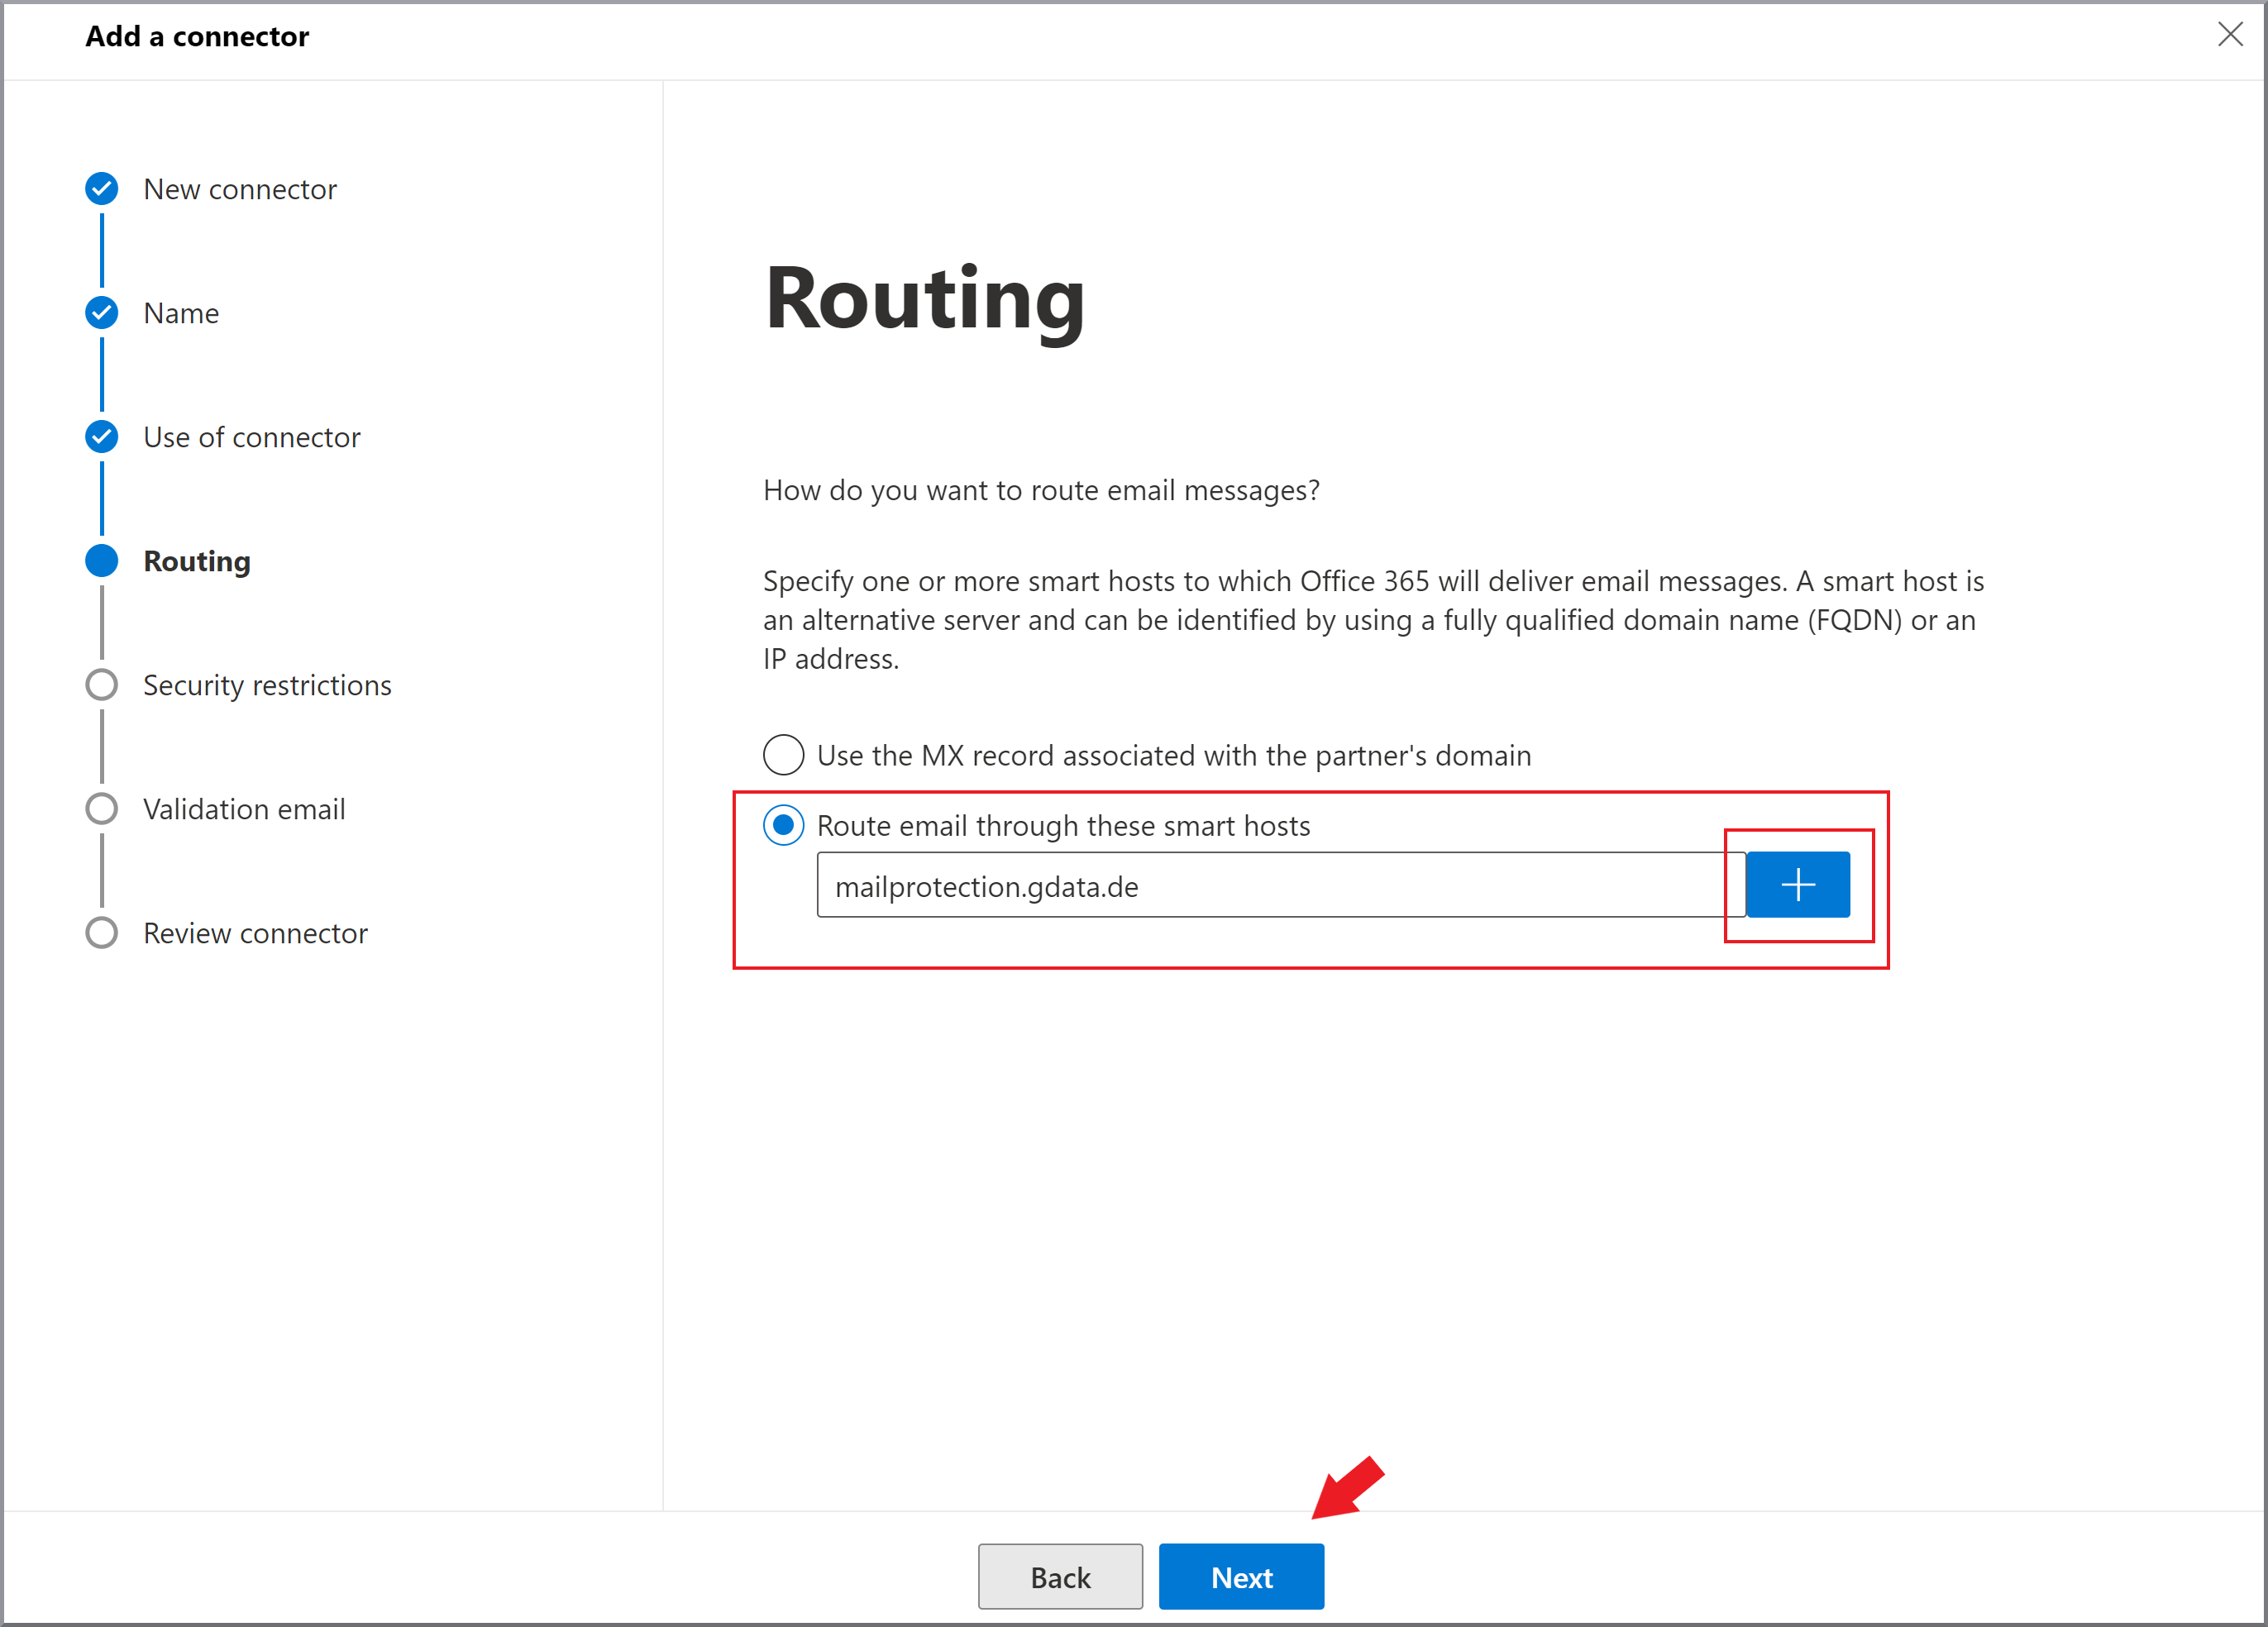
|
||
8. |
Select: Always use Transport Layer Security (TLS) to secure the connection (recommended) and Issued by a trusted certification authority (CA). Click Next. Show Screenshot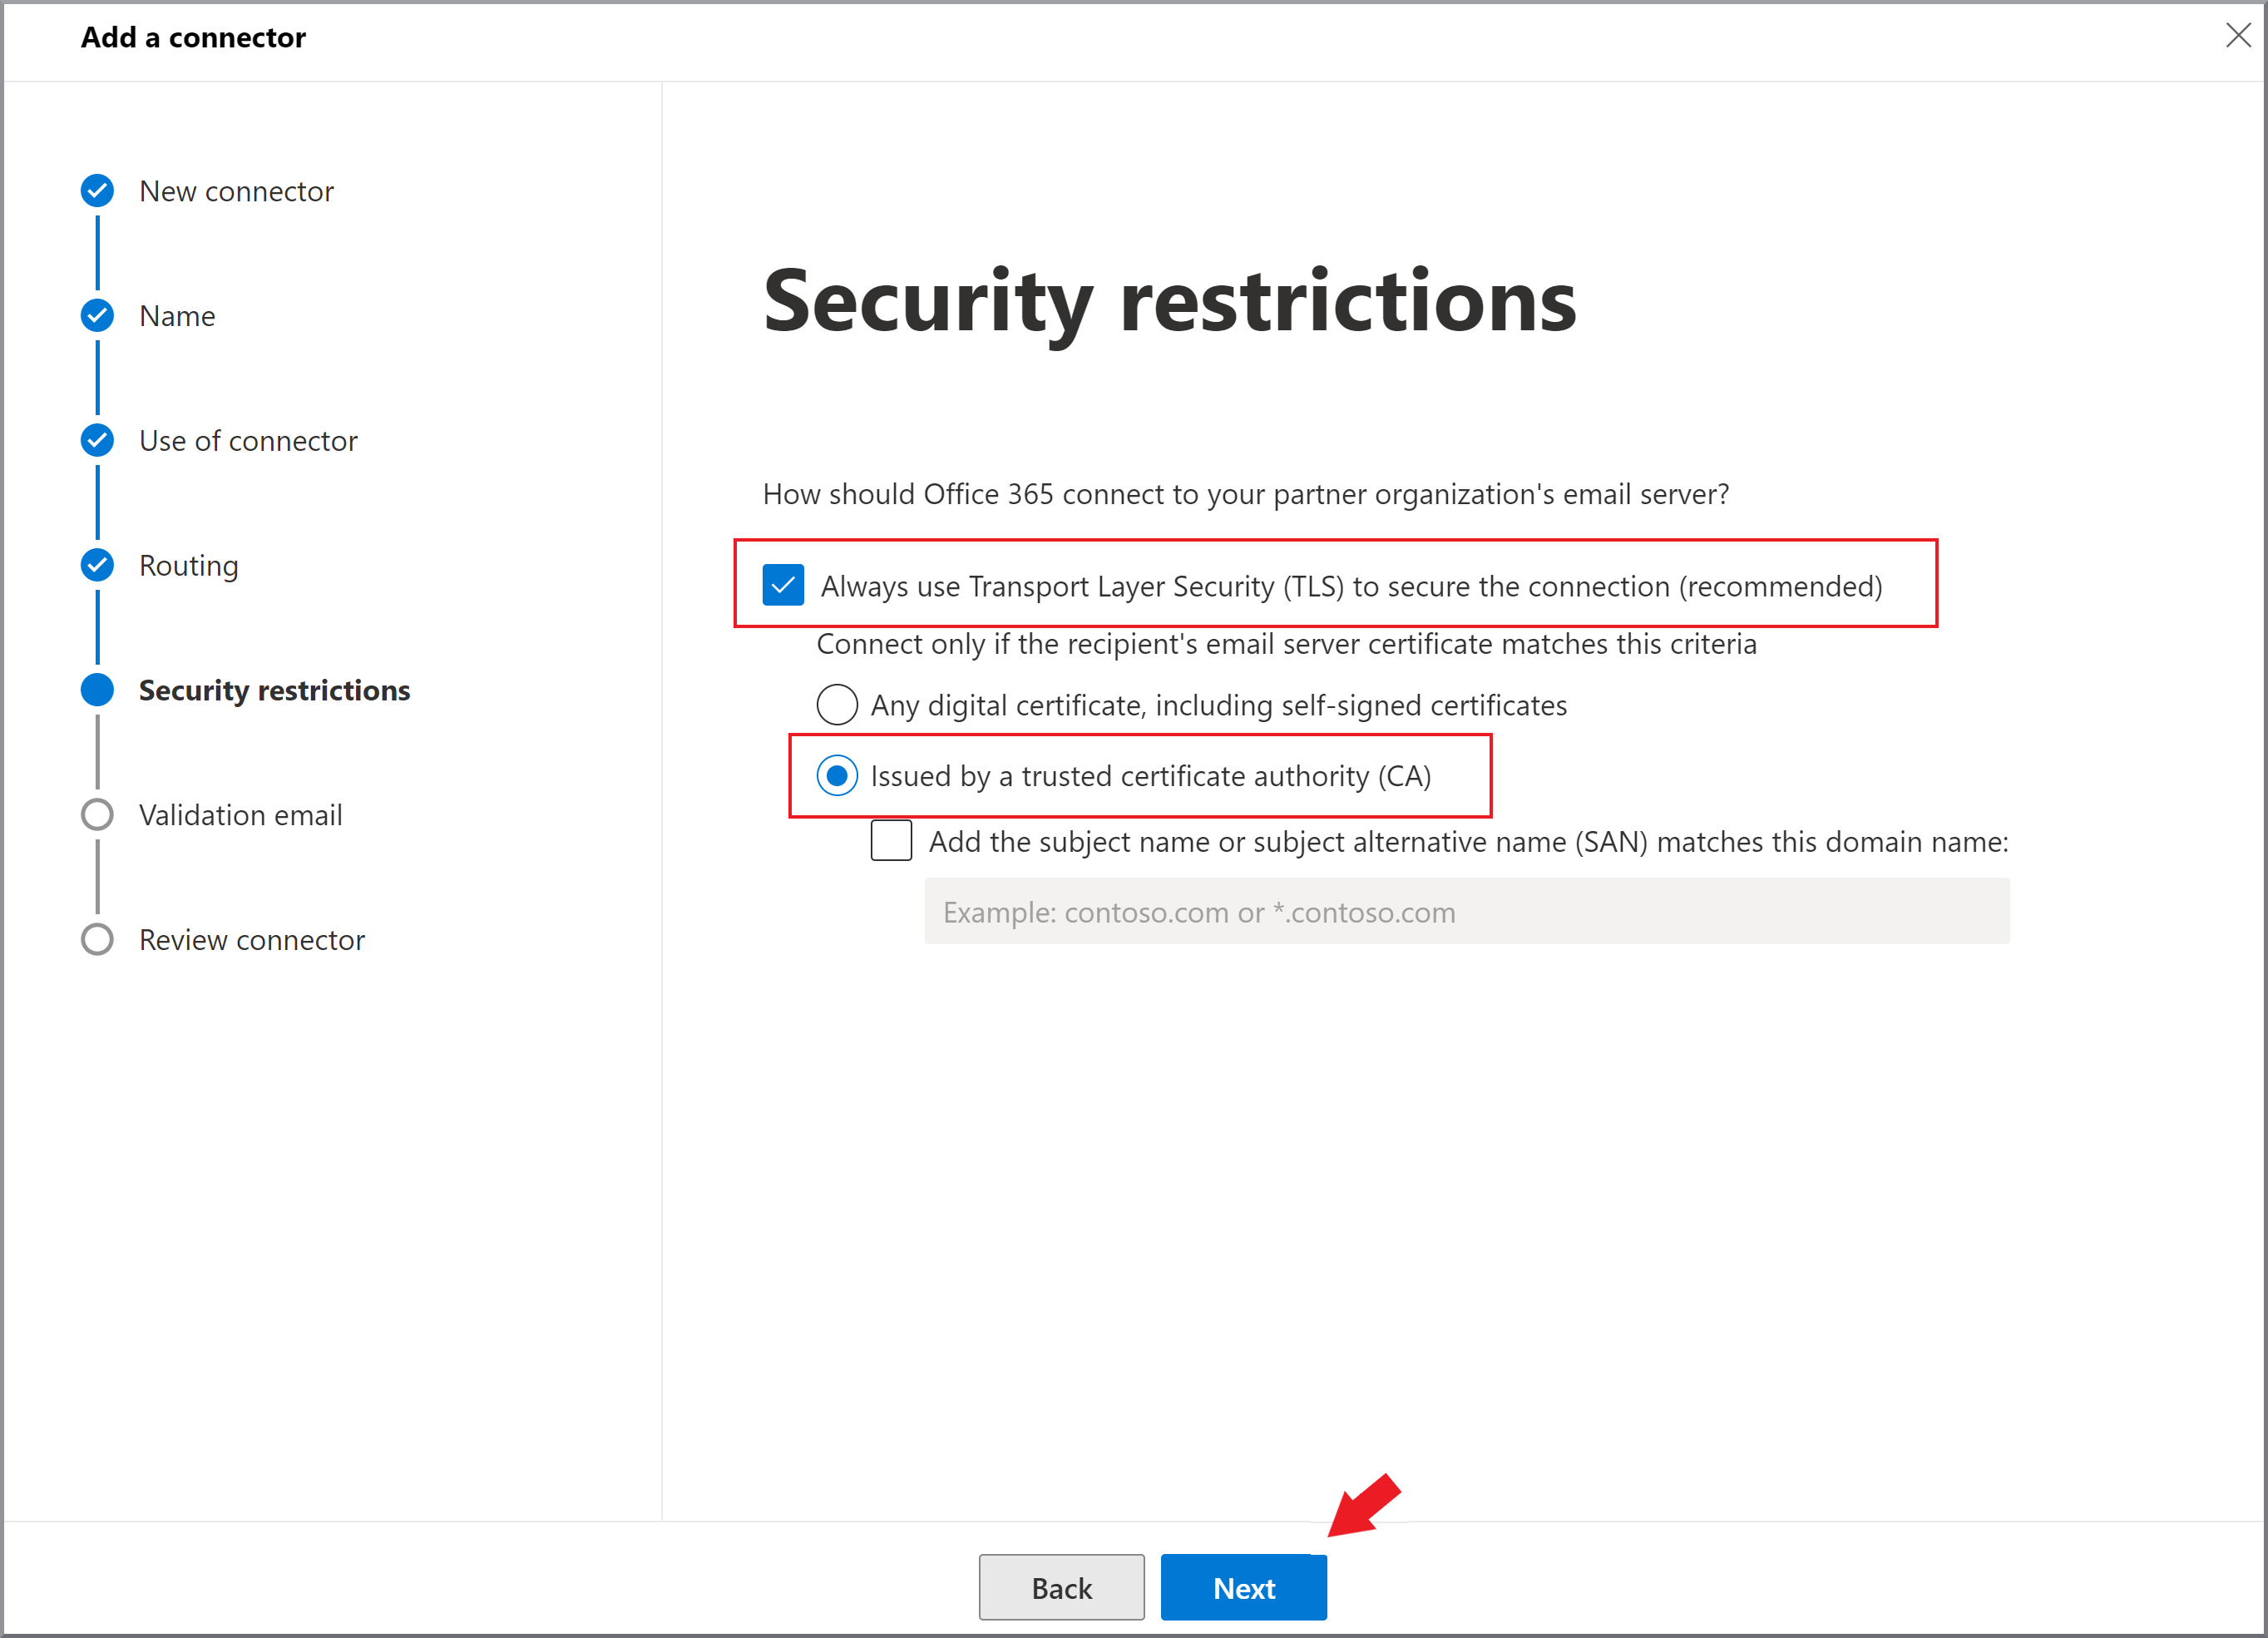
|
||
9. |
Create a list with at least one of your e-mail addresses per domain (add via +) and start a check of the Connector with regard to these e-mail addresses by clicking on Check. This test should run without errors. If you encounter problems, please also refer to our indications for setting up the connector. Click Next. Show Screenshot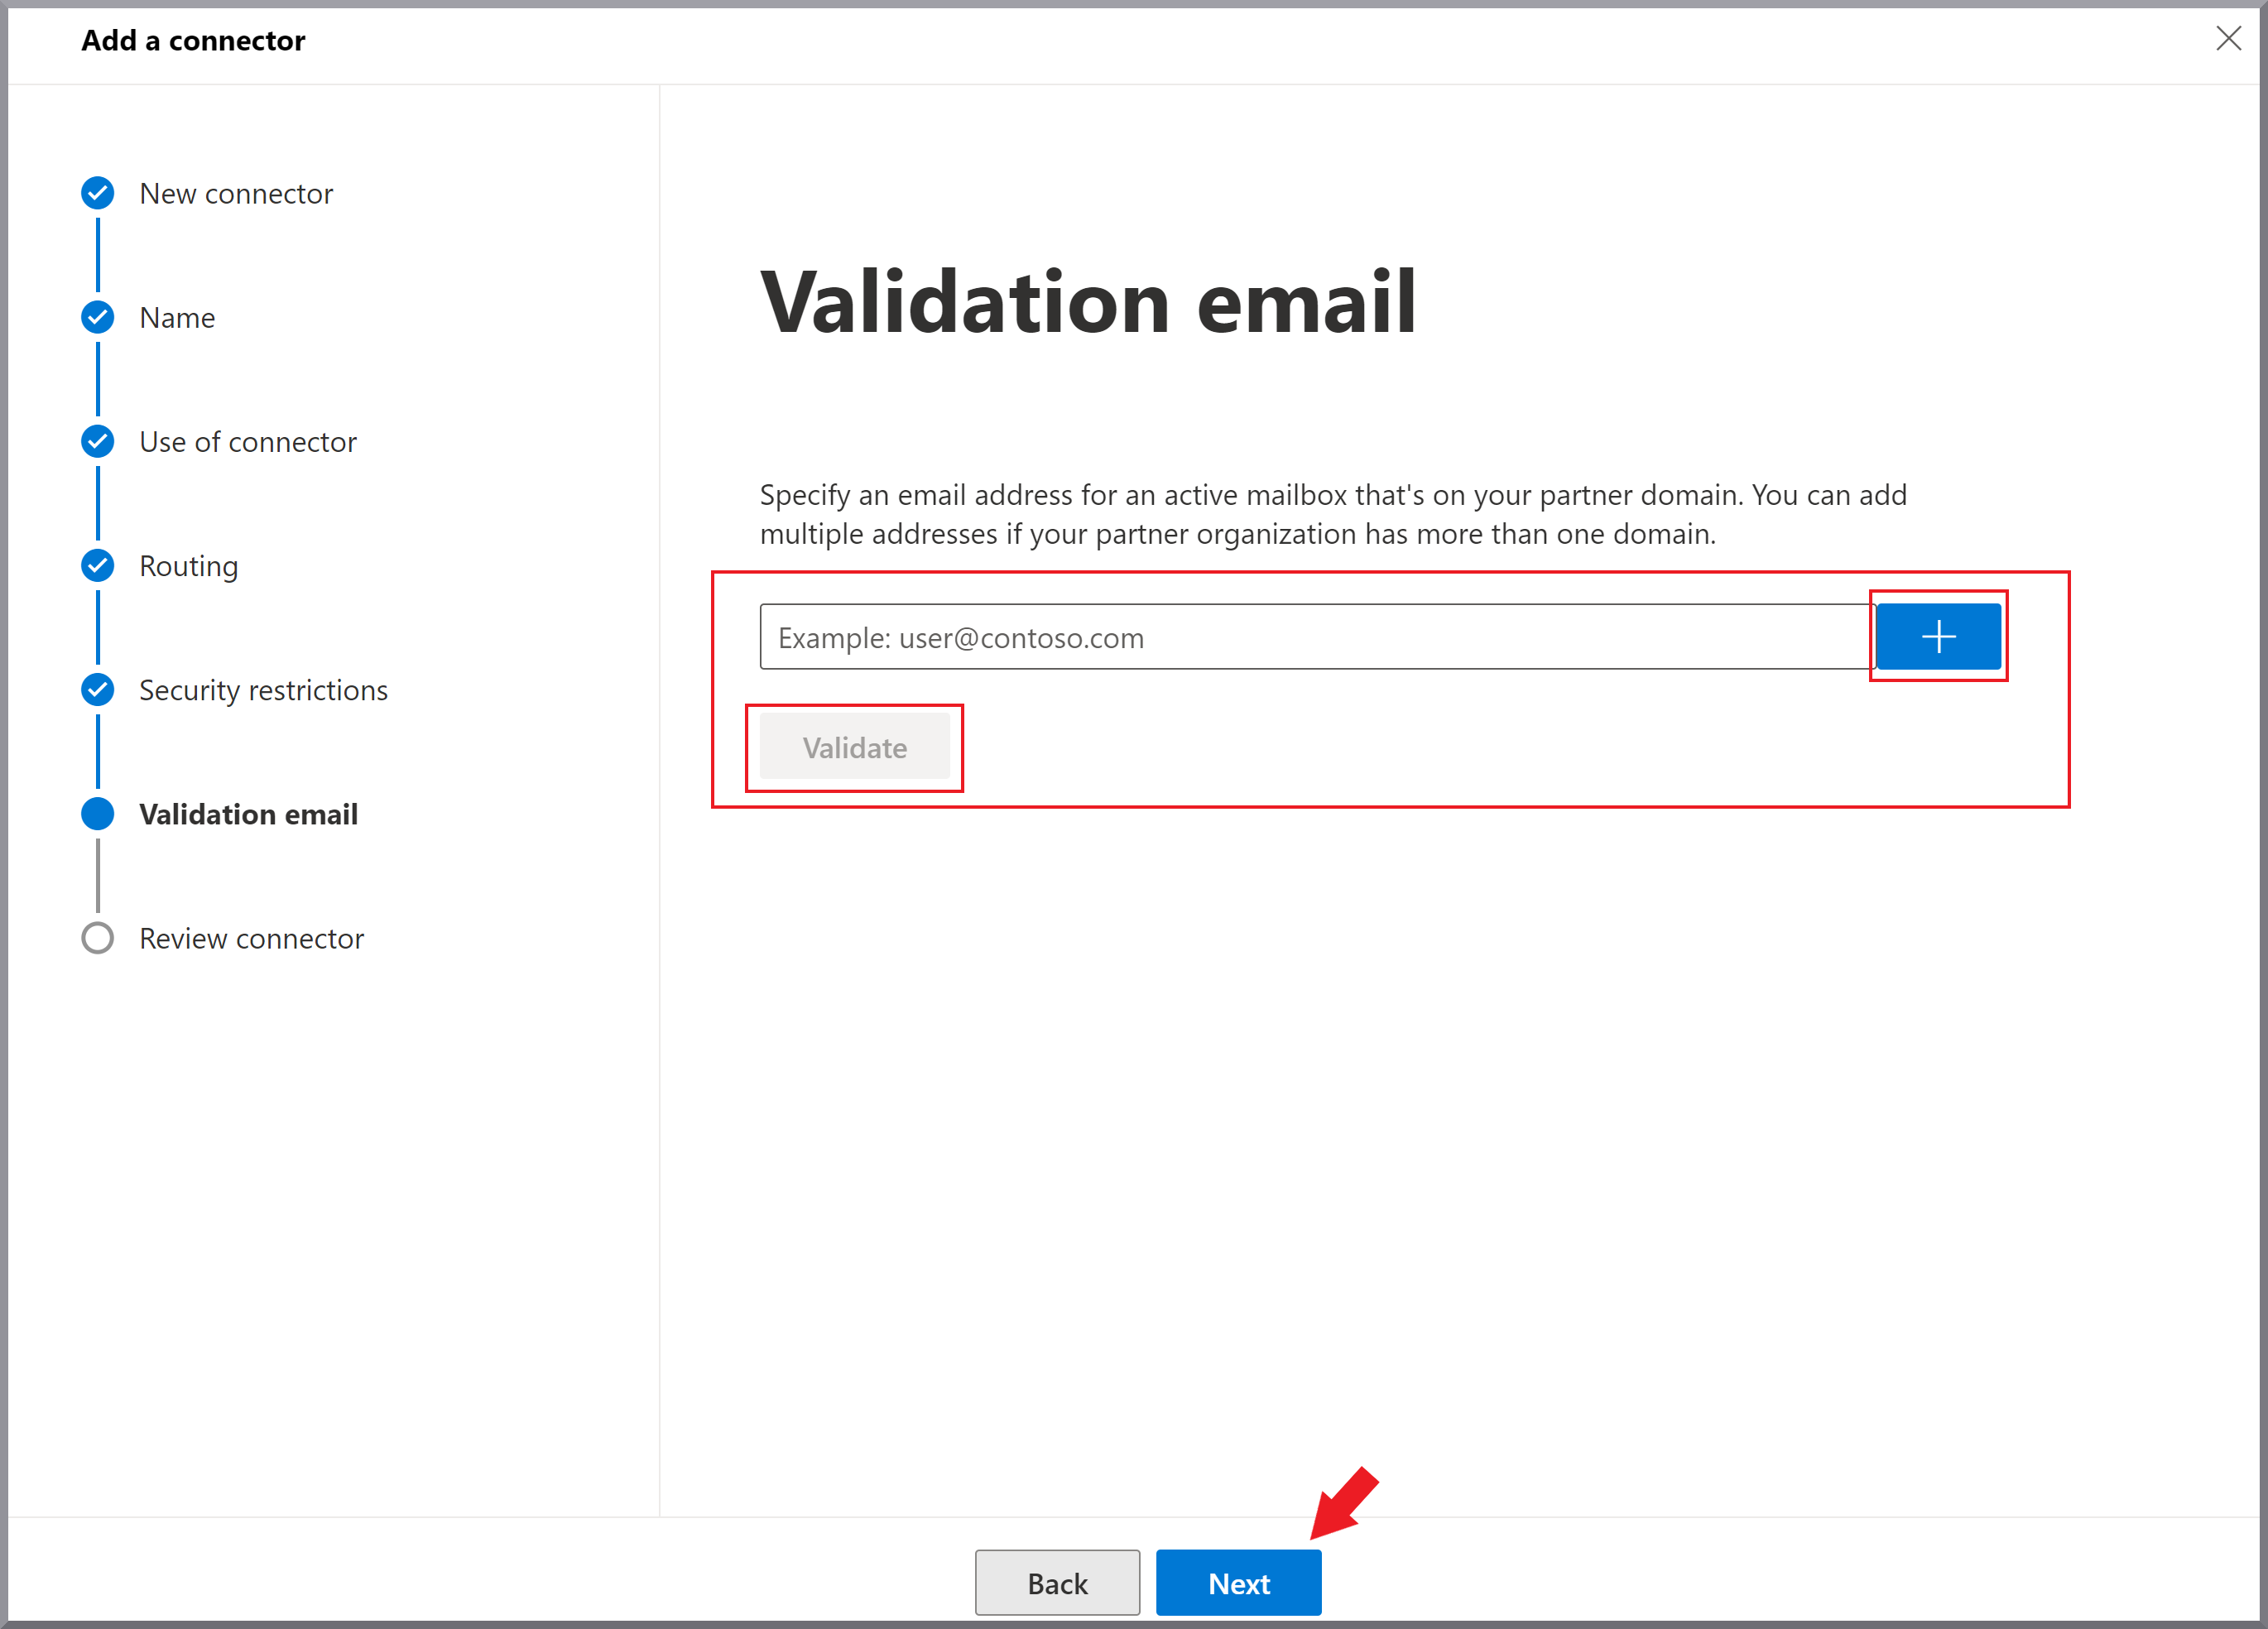
|
||
10. |
Check the setting in the summary and click on Create connector. Click Finish. Show Screenshot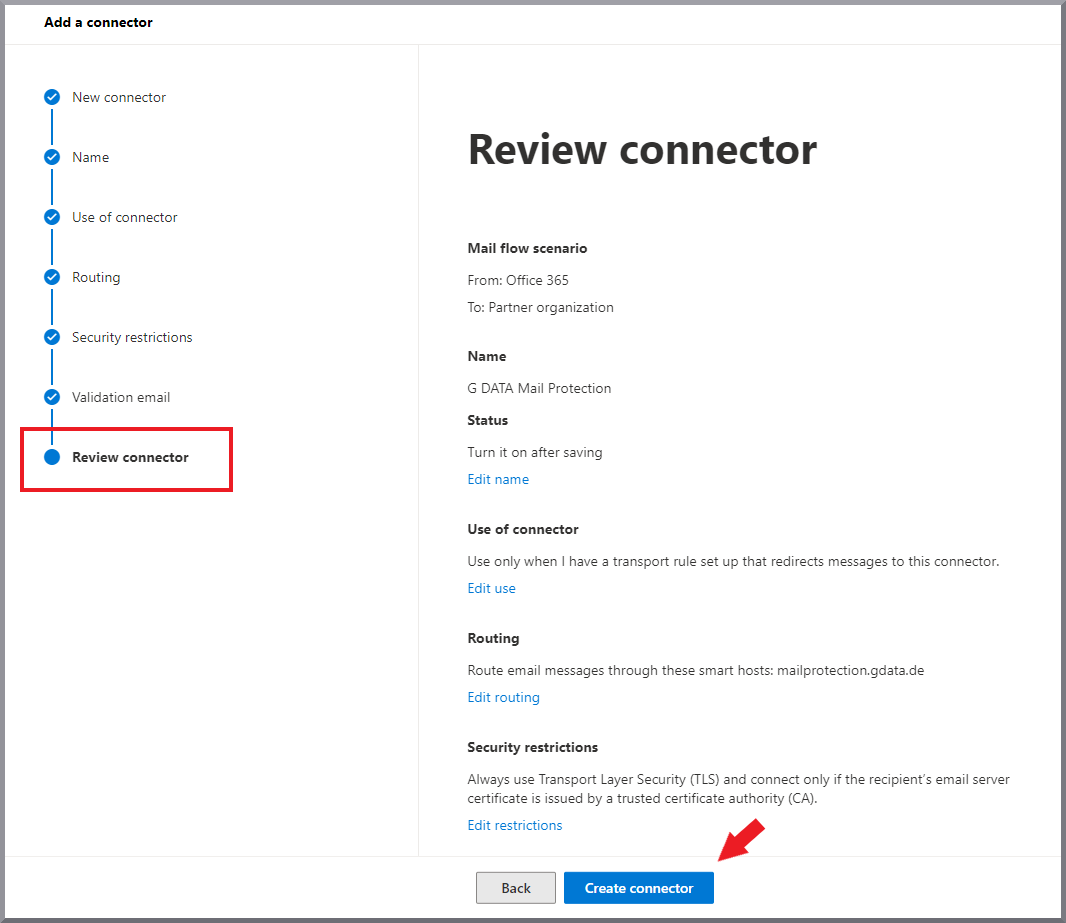
|
||
11. |
Click + Add Connector. |
||
12. |
Select:
Click Next. Show Screenshot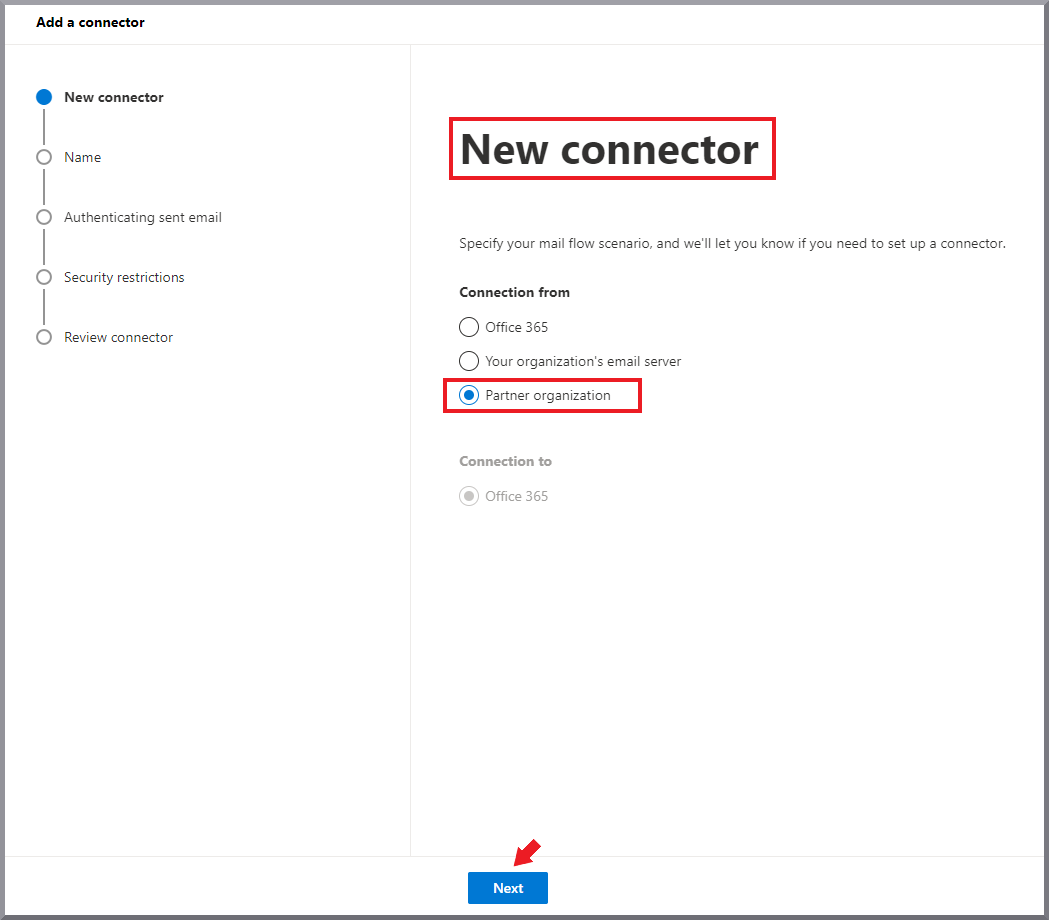
|
||
13. |
Enter the name G DATA Mailprotection Inbound Secure Connector and optionally a description. Tick the Checkbox Turn it on. Click Next. Show Screenshot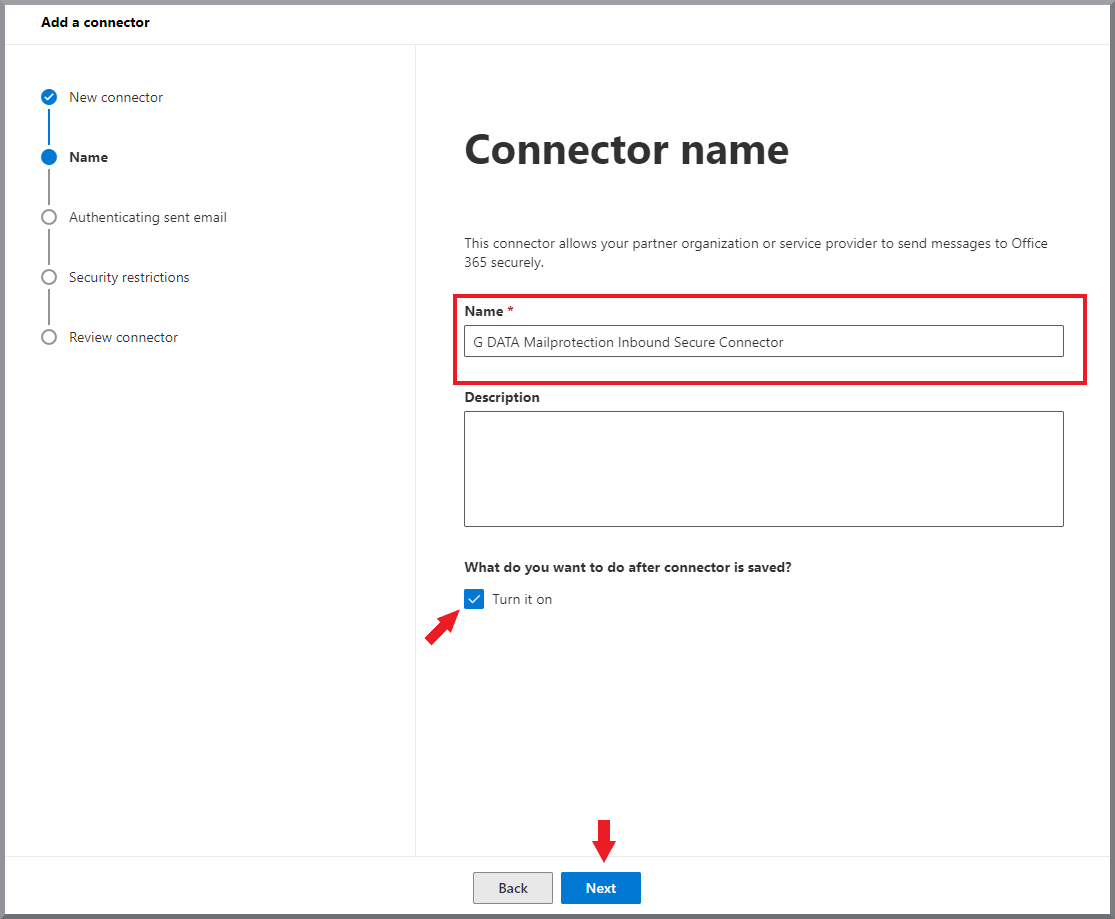
|
||
14. |
Select By verifying that the IP address of the sending server matches one of the following IP addresses, which belong to your partner organization. Enter the IP 194.156.84.32/28 and add it to the list with +. Click Next. Show Screenshot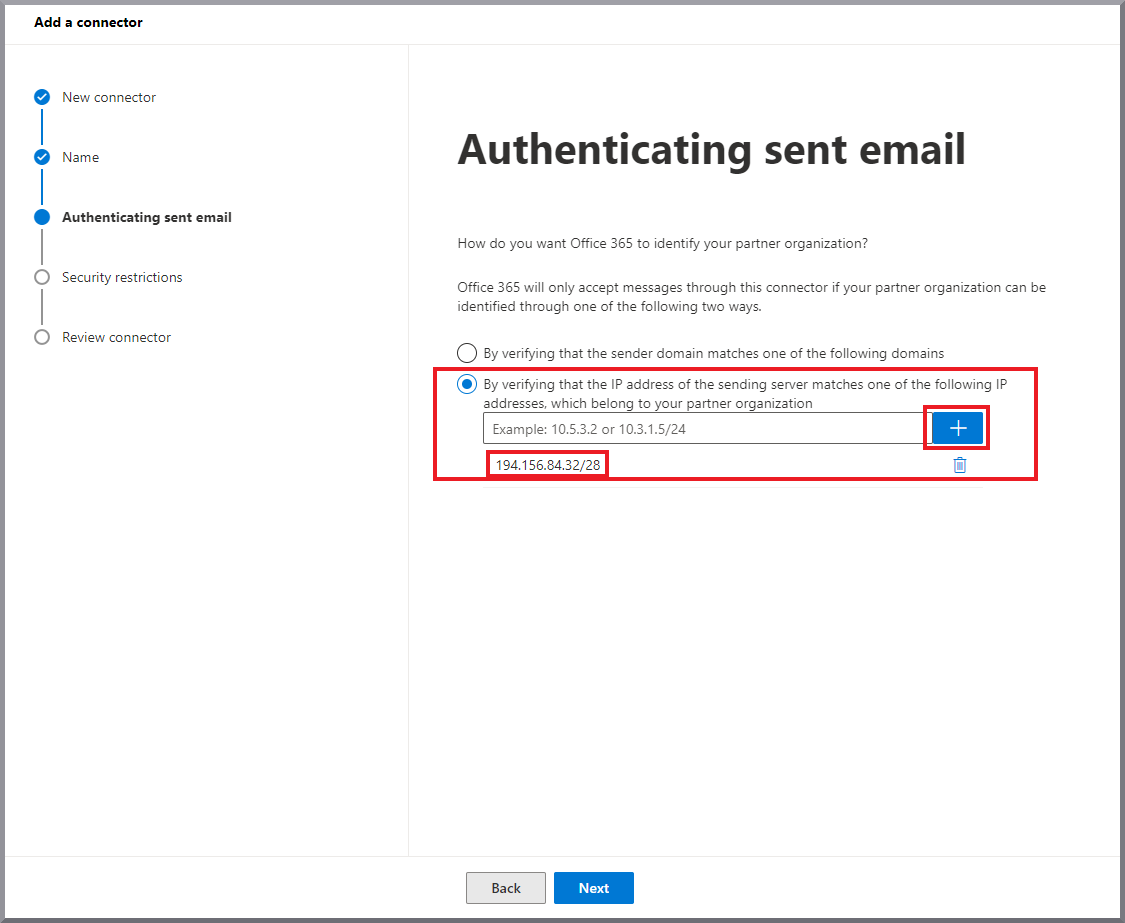
|
||
15. |
Tick the checkbox for Reject e-mails if they are not sent via TLS. Click Next. Show Screenshot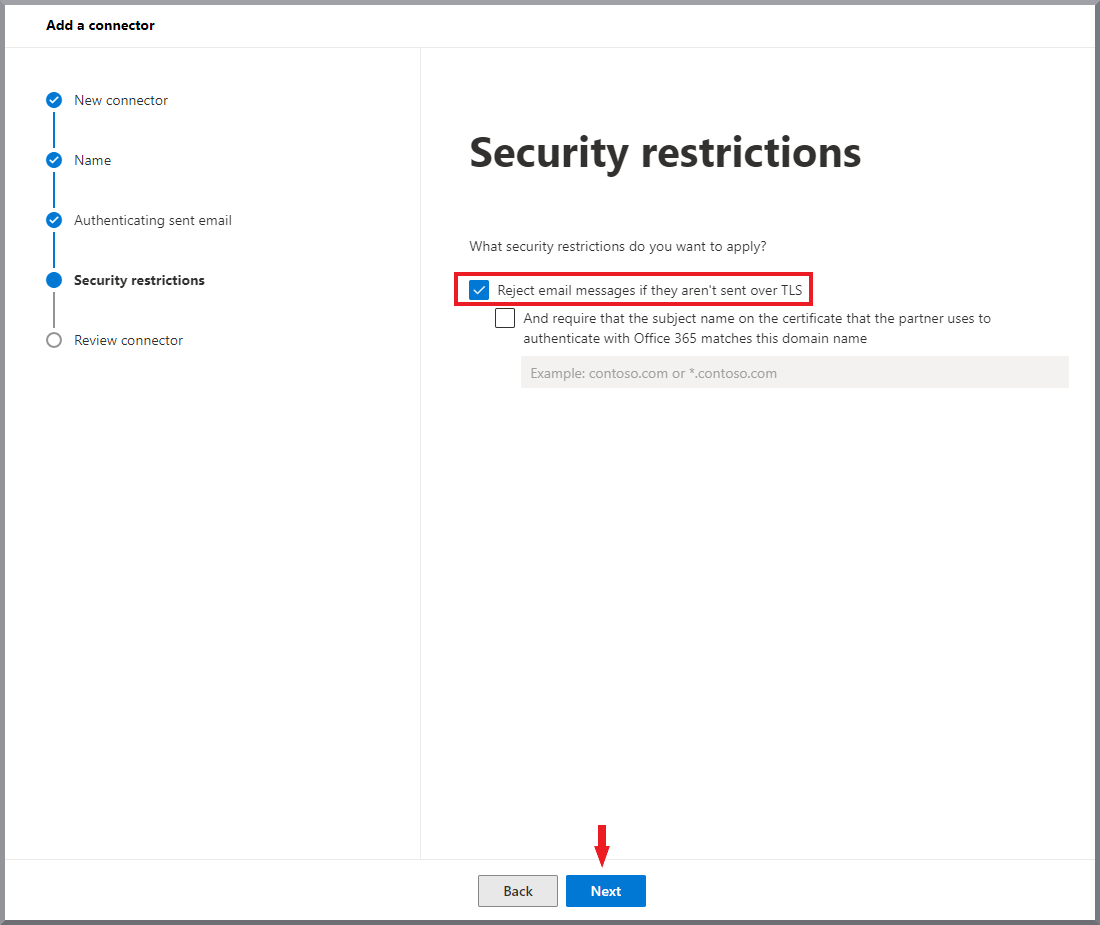
|
||
16. |
Check the setting in the summary and click on Create connector. Click Finish. |
||
17. |
Open the page Advanced filtering. |
||
18. |
Here you will find the inbound connector you have just created with Advanced filtering deactivated. Click on the row of the connector G DATA Mailprotection Inbound Secure Connector. An editing window opens on the right-hand side of the screen. Select the item Skip these IP addresses that are assigned to the connector:. Enter the IP range 194.156.84.32/28. Select Apply to entire organization and click on Save. Show Screenshot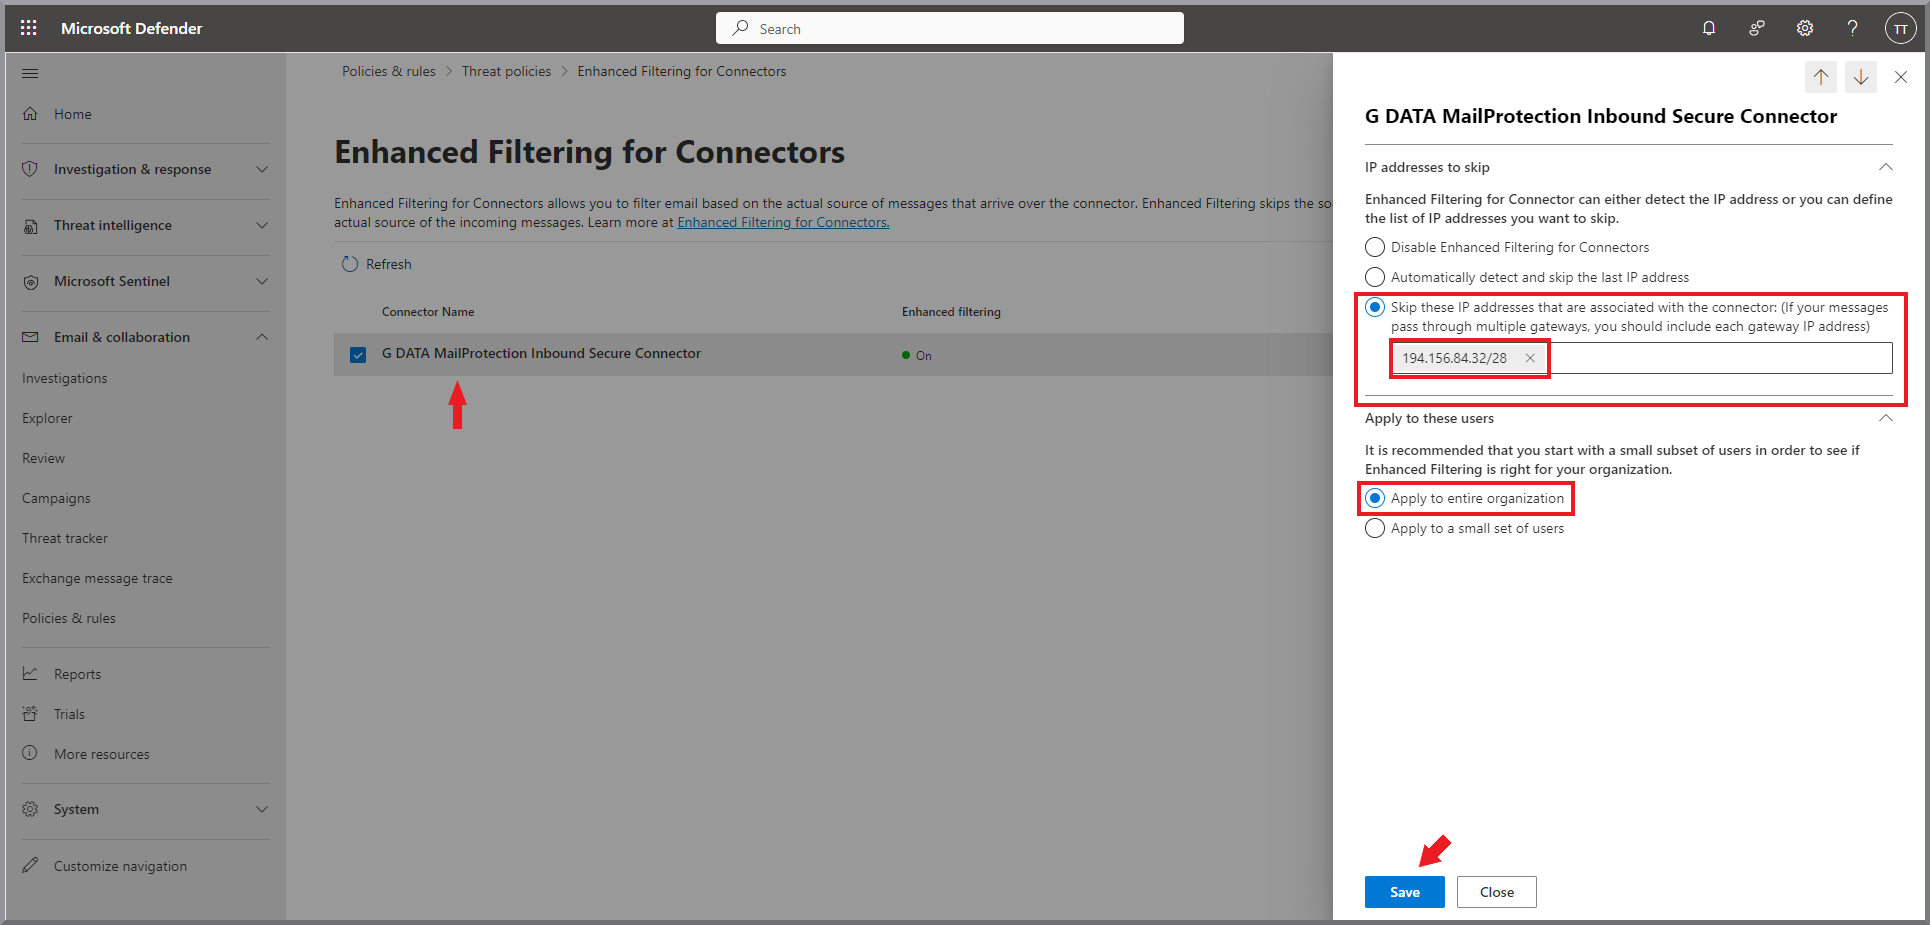
|
||
19. |
Filtering for the connector is now displayed as On. Show Screenshot
|
||
20. |
Show Screenshot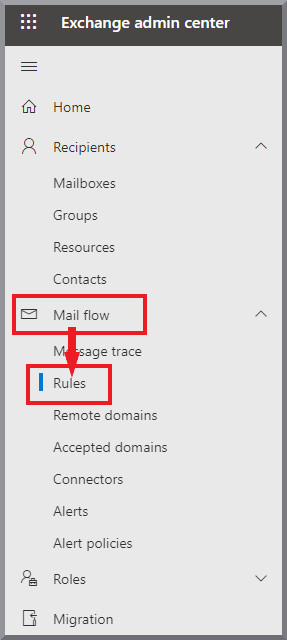
|
||
21. |
Click + Add Rule and select Create a new rule. Show Screenshot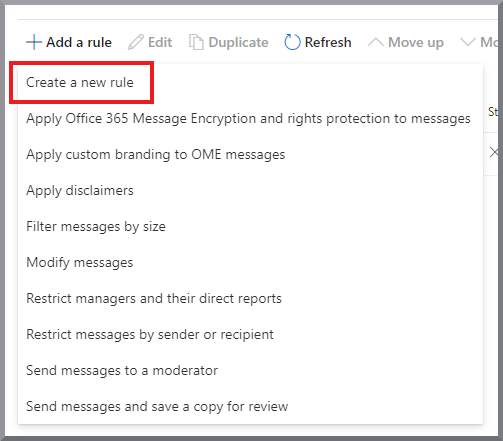
|
||
22. |
Enter Redirect to mailprotection.gdata.de as the name of the rule. For Apply this rule if, select the following values from the pull-down menus: The sender and is external/internal Show Screenshot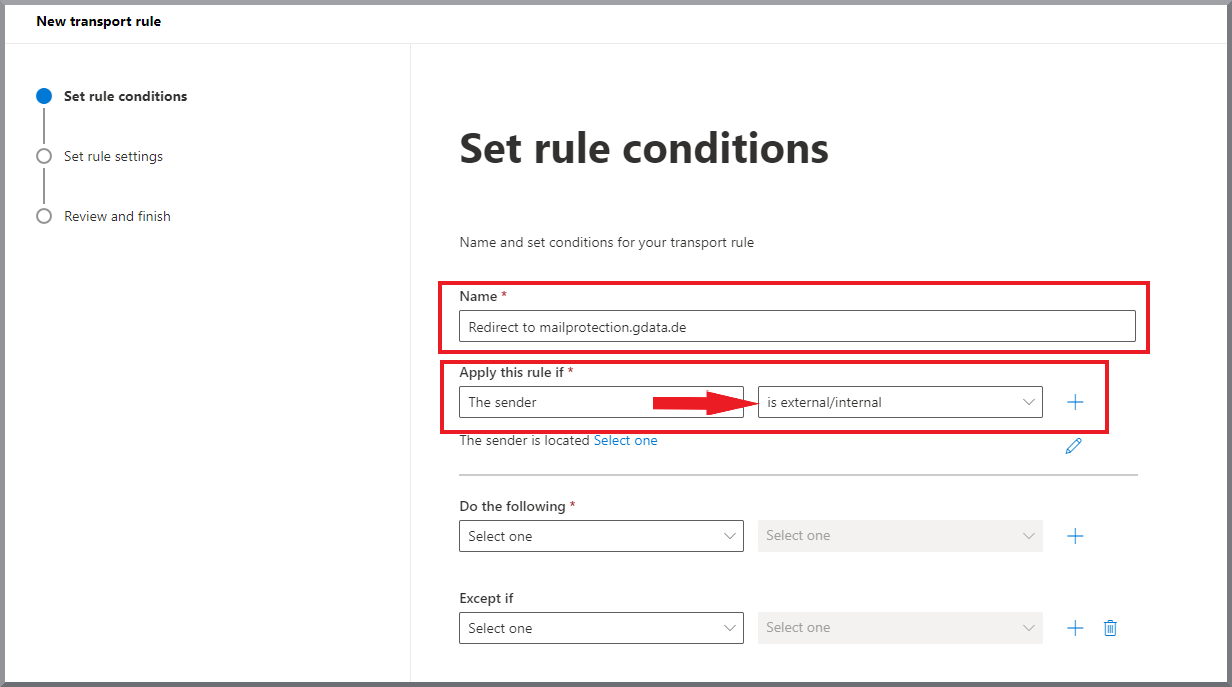
|
||
23. |
A side window opens on the right-hand side of the screen. Select the option Outside the organization and click on Save. Show Screenshot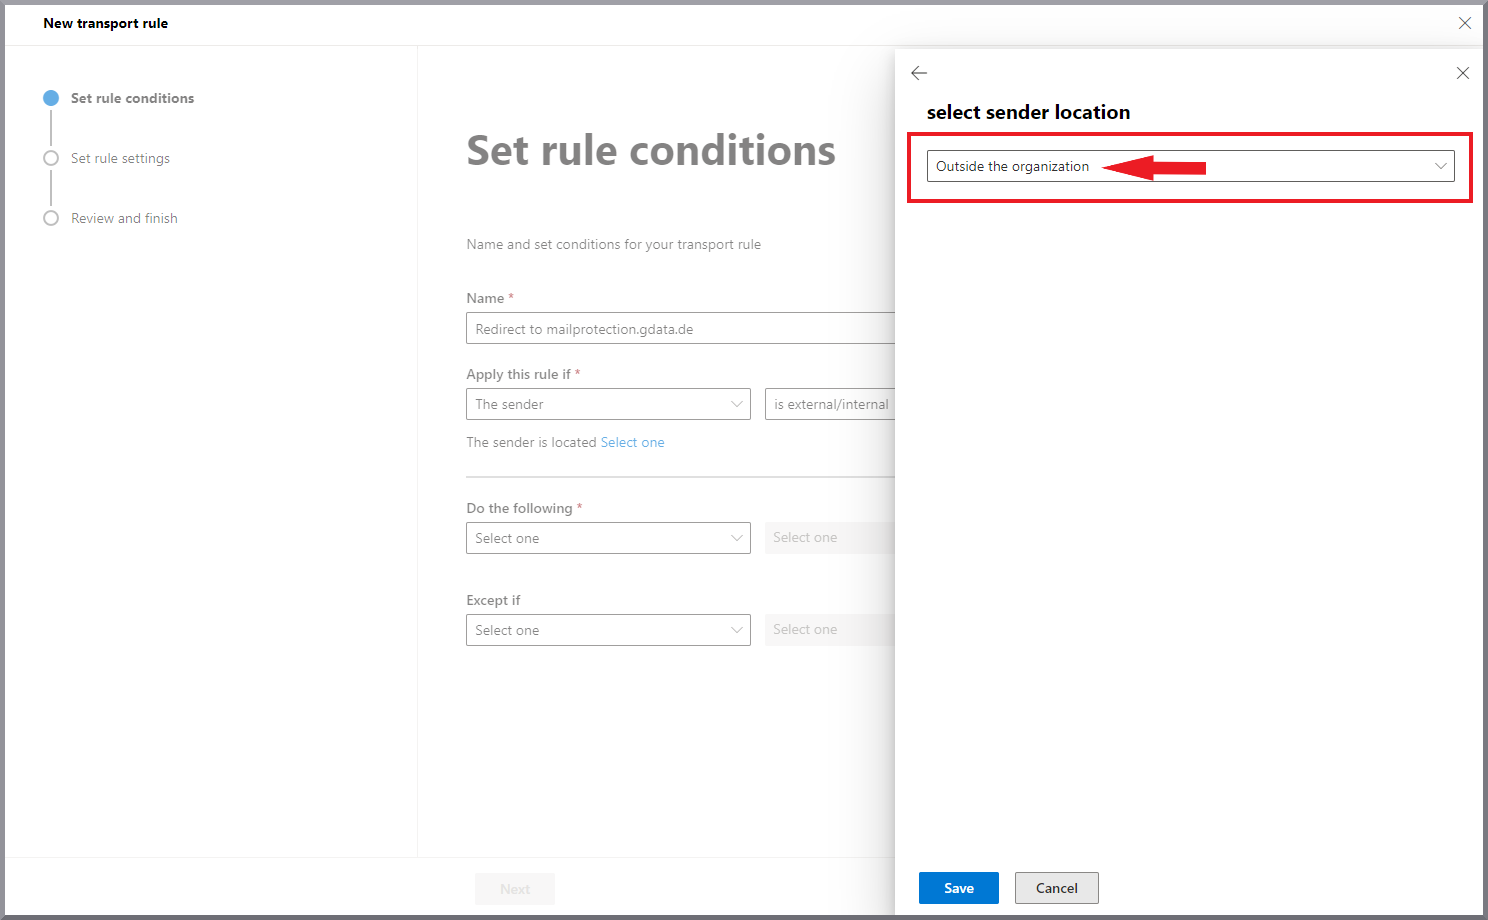
|
||
24. |
Add a new AND condition using the + and select these options from the pull-down menus: The recipient and Domain is. Show Screenshot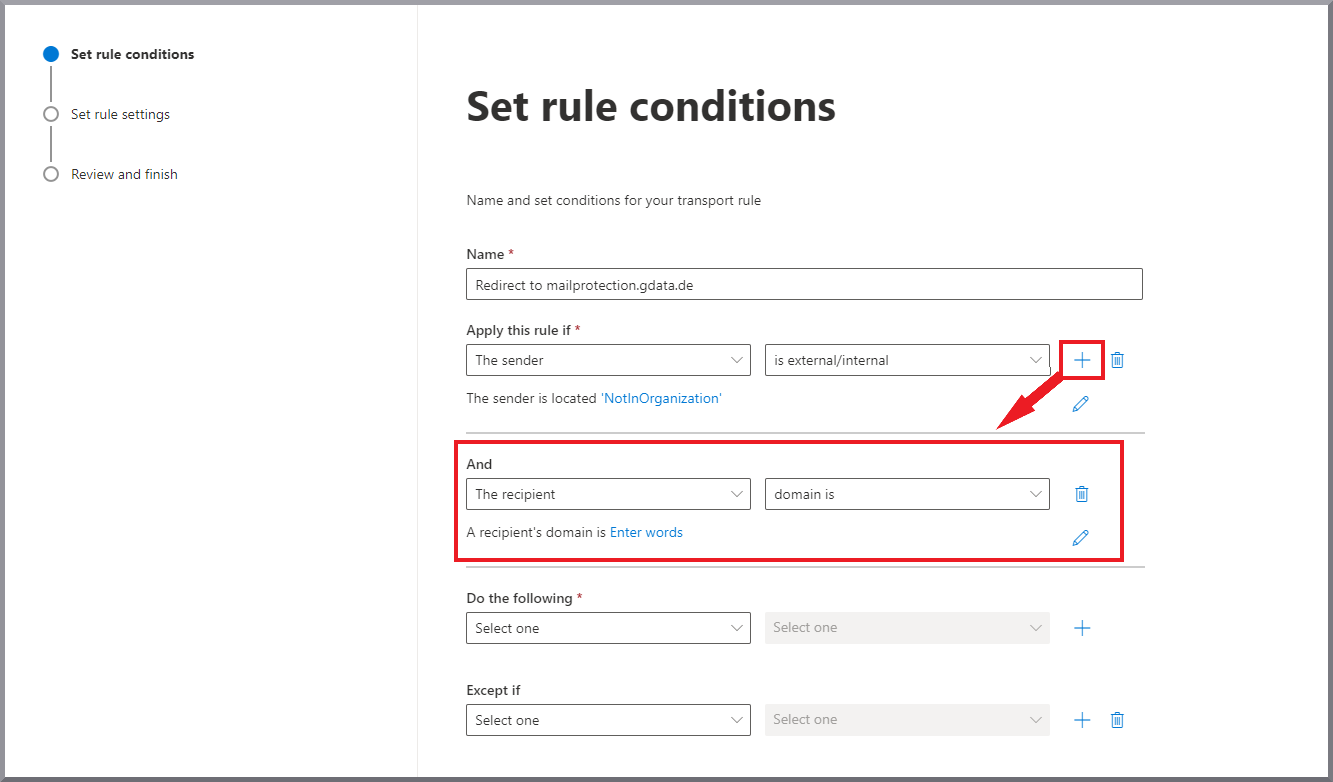
|
||
25. |
Create a list of all domains to be checked by G DATA 365 | Mail Protection. If there are several domains, each domain must be entered individually and added to the list using the Add button.
Finally, click on Save. Show Screenshot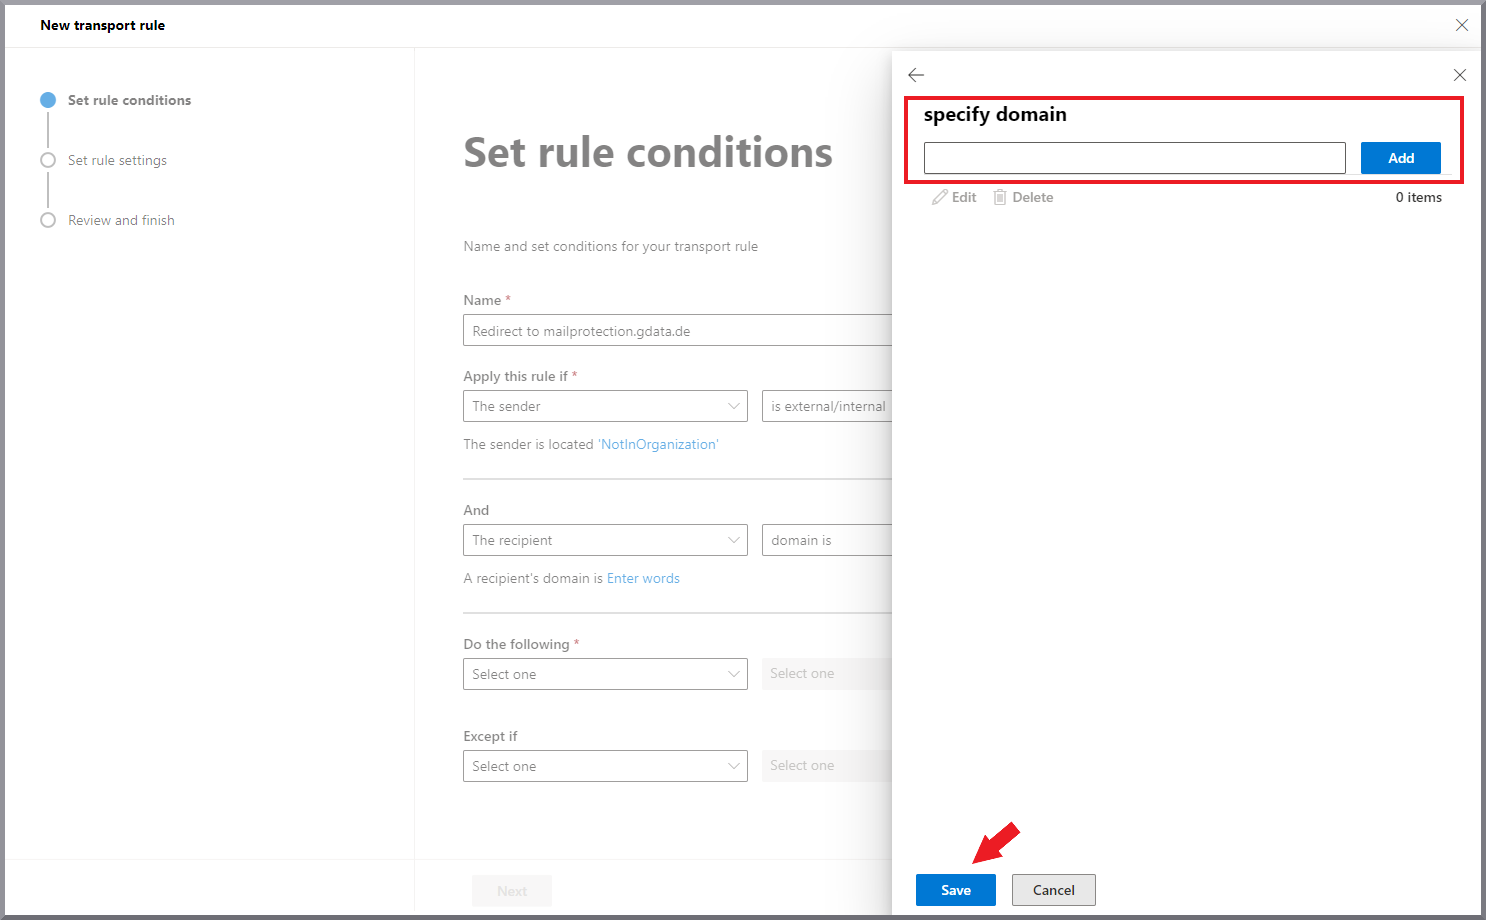
|
||
26. |
Select the following values from the pull-down menus for Proceed as follows:
Show Screenshot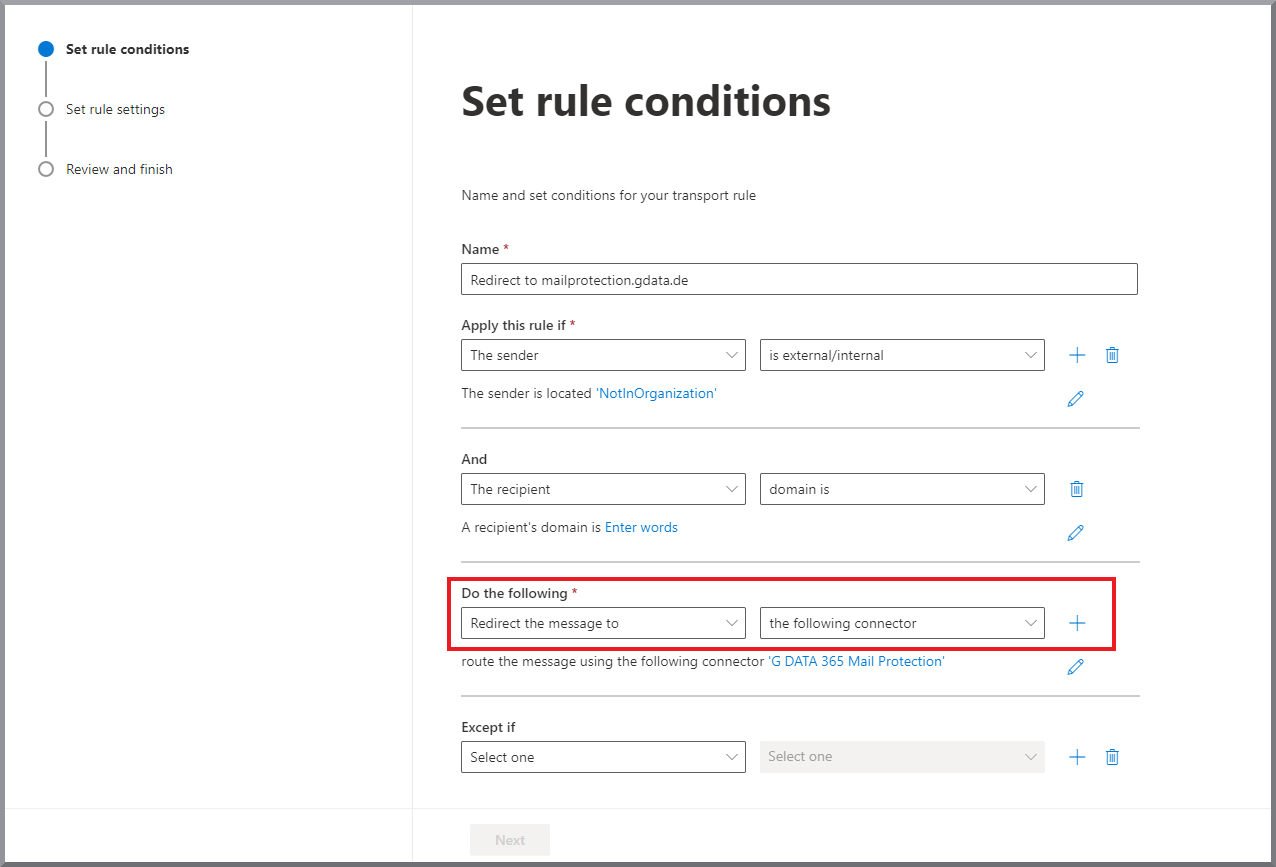
|
||
27. |
A side window opens on the right-hand side of the screen. Select the G DATA 365 Mail Protection connector and click Save. Show Screenshot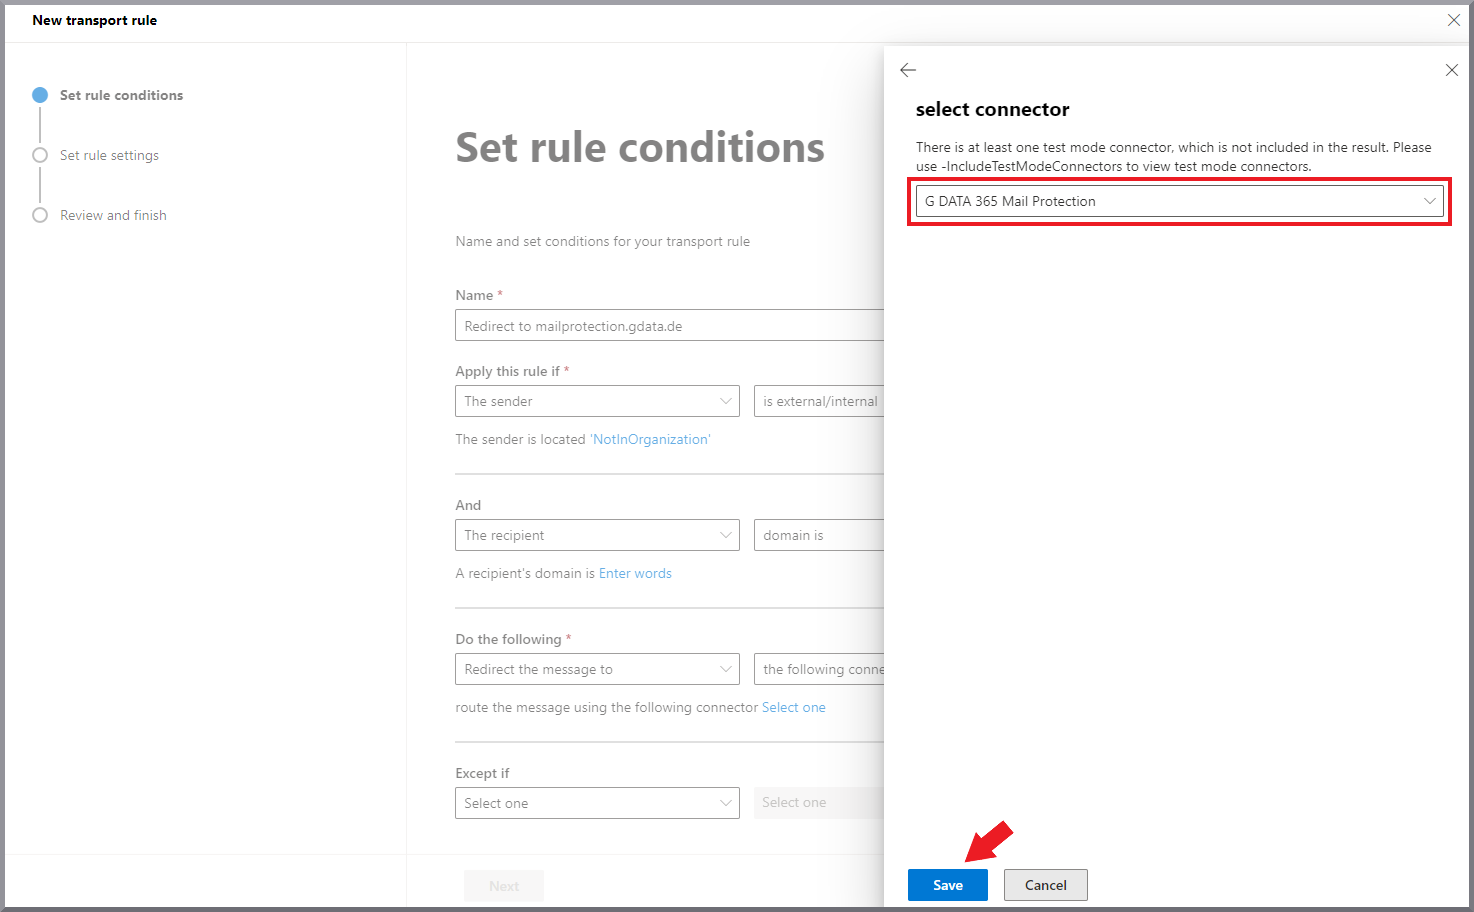
|
||
28. |
For Except if, select the following values from the pull-down menus:
Show Screenshot
|
||
29. |
A side window opens on the right-hand side of the screen. Enter the following IP range there: 194.156.84.32/28 and click Save. Show Screenshot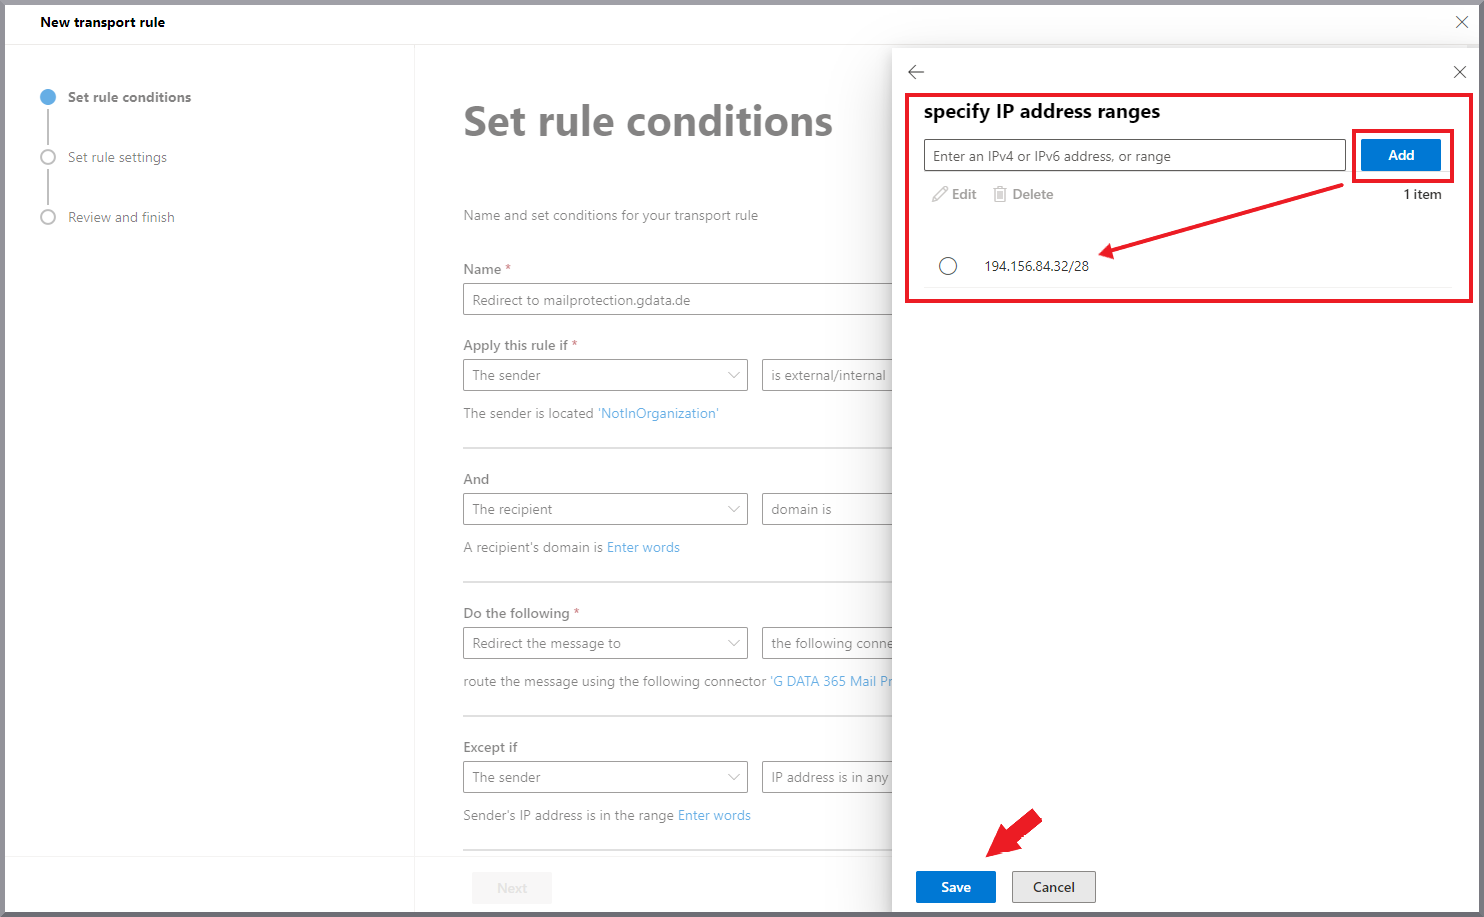
|
||
30. |
Click Next. |
||
31. |
Specify the following settings for the rule:
Show Screenshot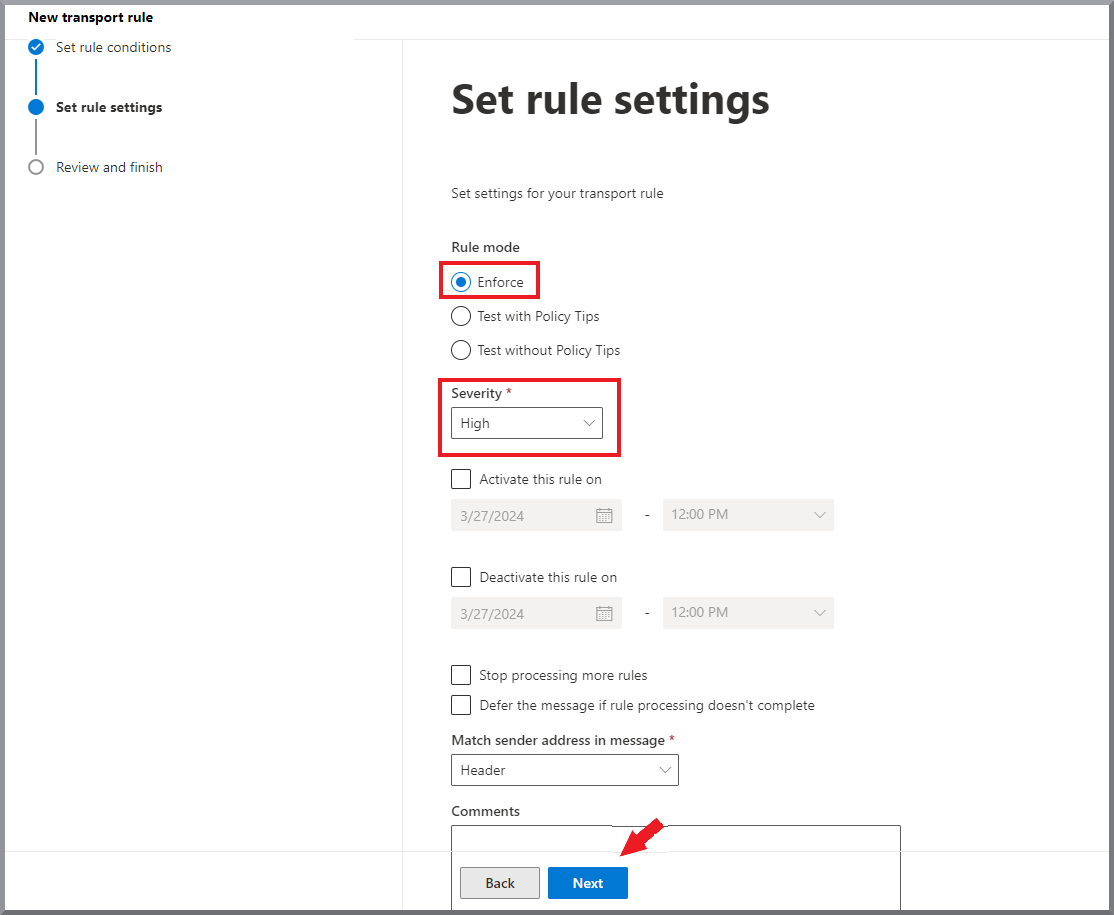
|
||
32. |
Click Next. |
||
33. |
Check the settings and click Finish. Show Screenshot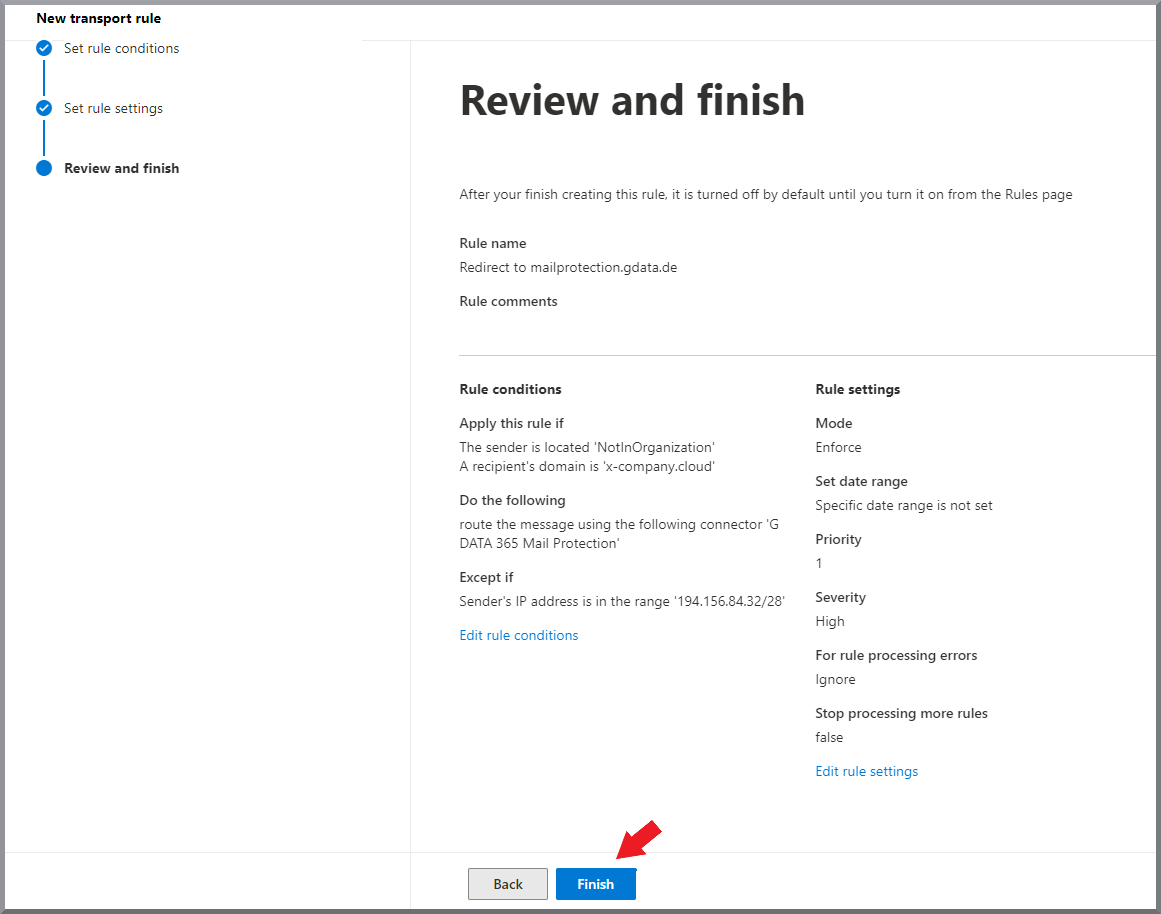
|
||
34. |
Click on the row of the created rule in the Exchange Admin Center and activate the rule using the toggle switch in the window that opens on the right-hand side of the screen. Show Screenshot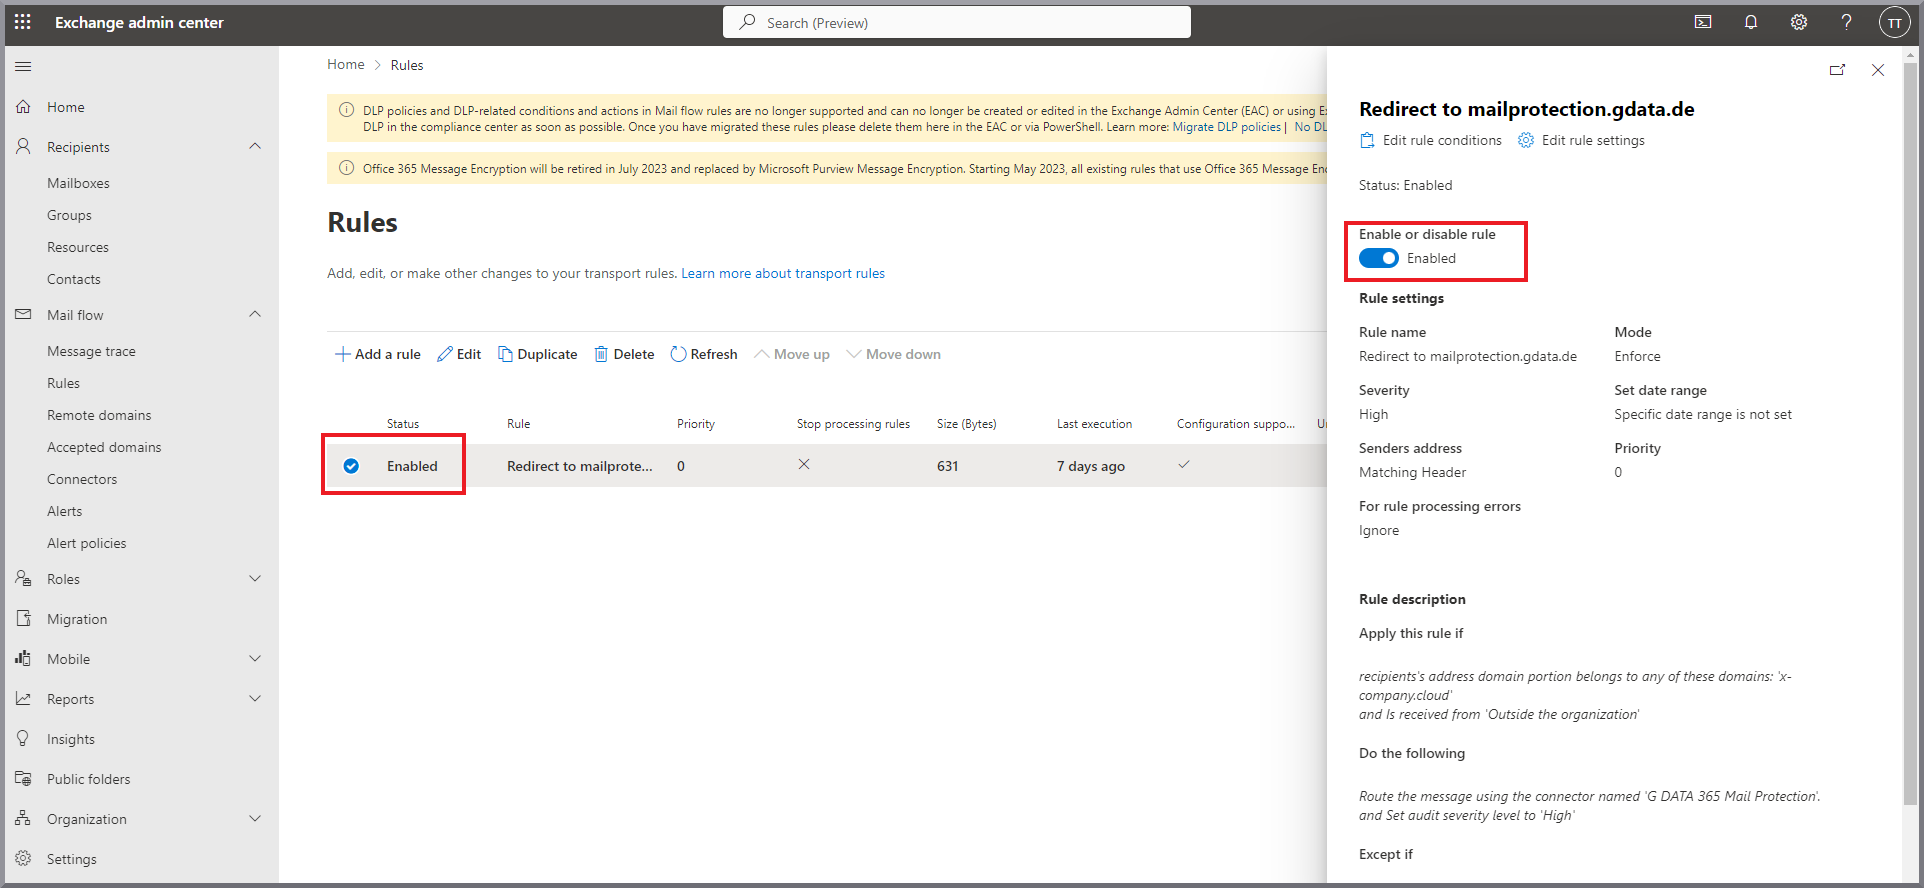
|