G DATA 365 | Mail Protection
Change the MX record of your domain
|
Before you make any changes to the MX record for your domains, please read the set-up guide for the product launch G DATA 365 | Mail Protection and note the indications for the use of the connector and the rule. |
It is not possible to provide general instructions for all customer scenarios at this point. There are too many different constellations and too many places where domains are managed.
First of all, it is important for you to know where your domain is managed (not to be confused with the location where the domain is hosted). If you do not manage the DNS in your in-house IT department and do not know where the MX record needs to be changed, you can find some DNS lookup tools on the Internet. You can use such tools to find out the administration center of your domain. Your web host’s support team may also be able to help you with this.
Using our fictitious customer x-company as an example, we will explain here how the MX entry must be set correctly. You can apply this example to your administrative office, adapted to the interfaces there.
Our fictitious customer has a domain with the name x-company.cloud, which he manages with IONOS. When he set up his Microsoft Exchange Online he connected this domain to his Microsoft Exchange Online. He has set up his domain at IONOS through Microsoft automatically.
|
All Screenshots concerning actions in IONOS can only be provided in german at this point. |
1. |
First, our customer logs in to his account. Screenshot IONOS example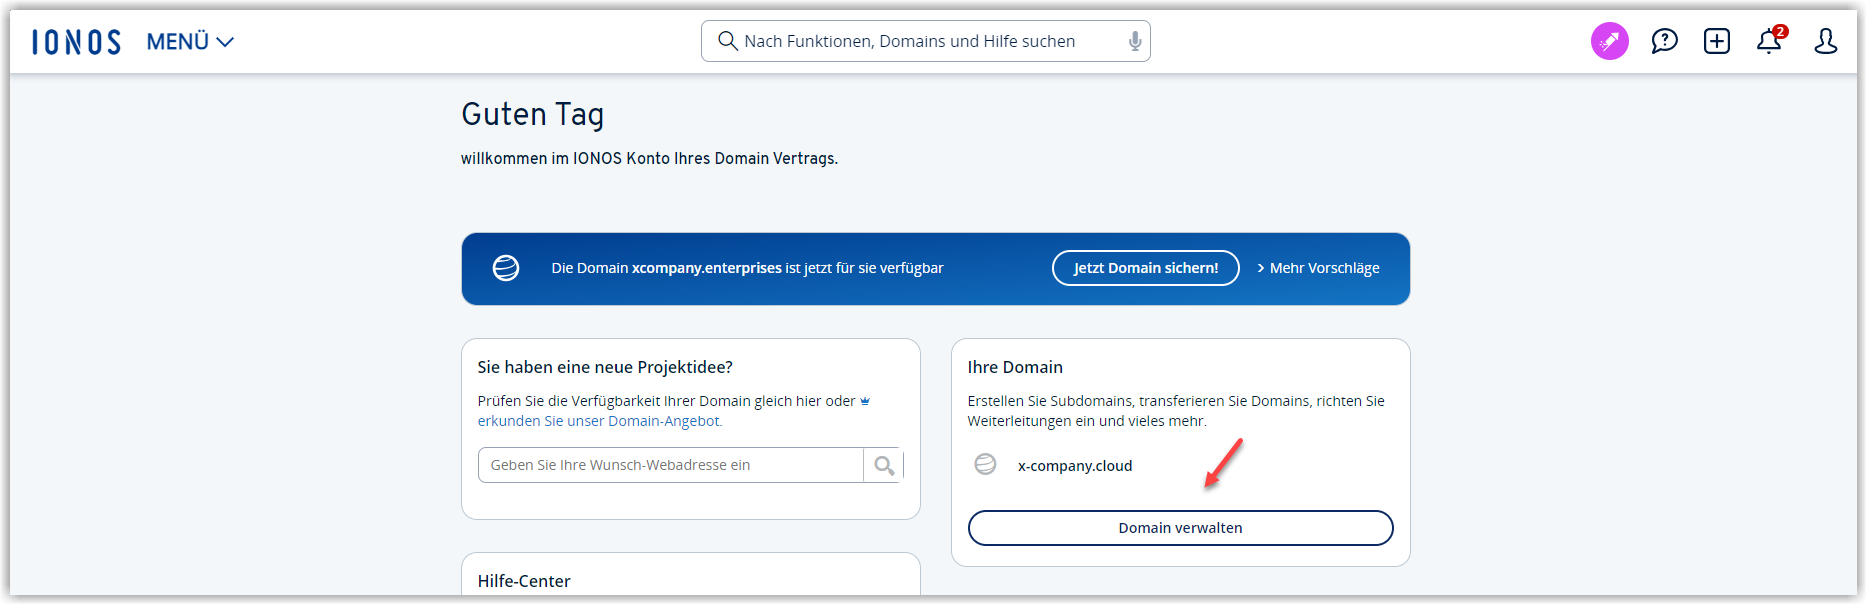
|
2. |
The customer then searches for the location where it can edit the DNS entries for its domain. Screenshot IONOS example
|
3. |
The DNS set up by Microsoft then looks like this: 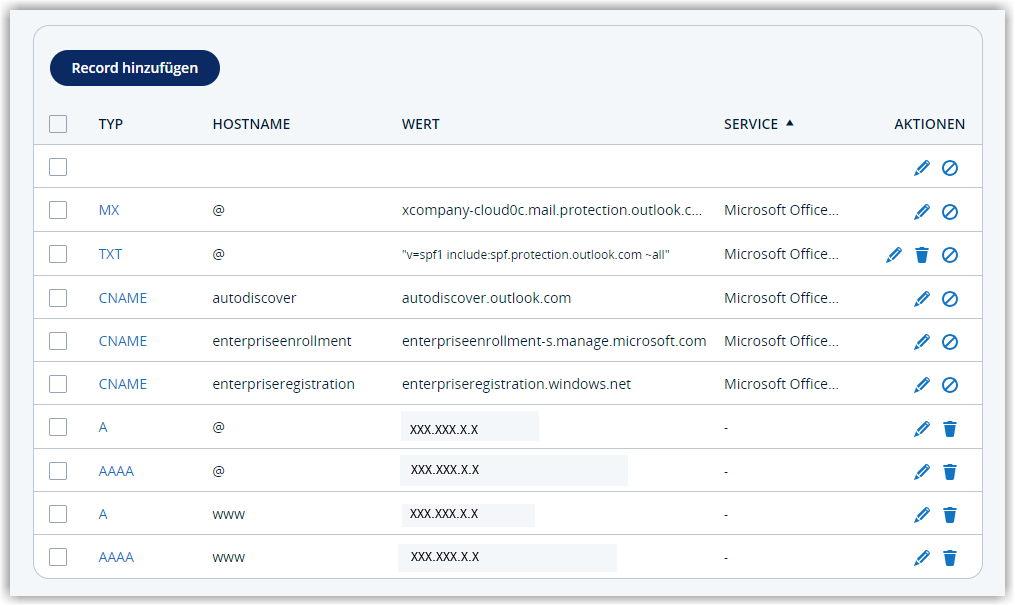
|
4. |
There it changes the MX record to: mailprotection.gdata.de *After saving, IONOS deletes all other entries from Microsoft * 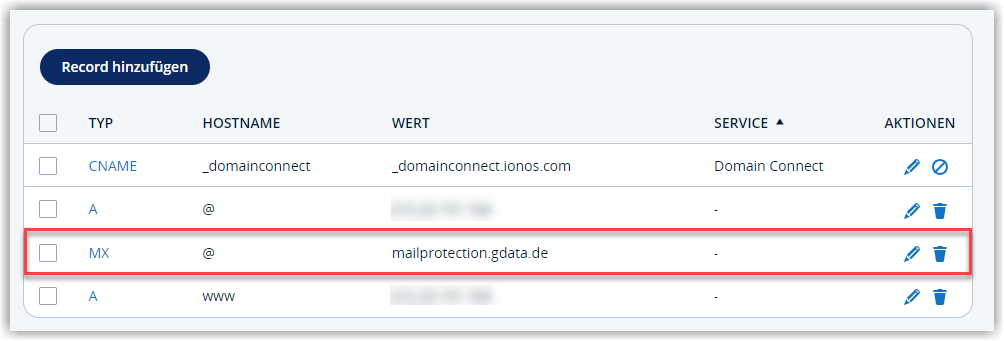
|
From now on, all e-mails to x-company.cloud will first be sent to our G DATA 365 | Mail Protection.
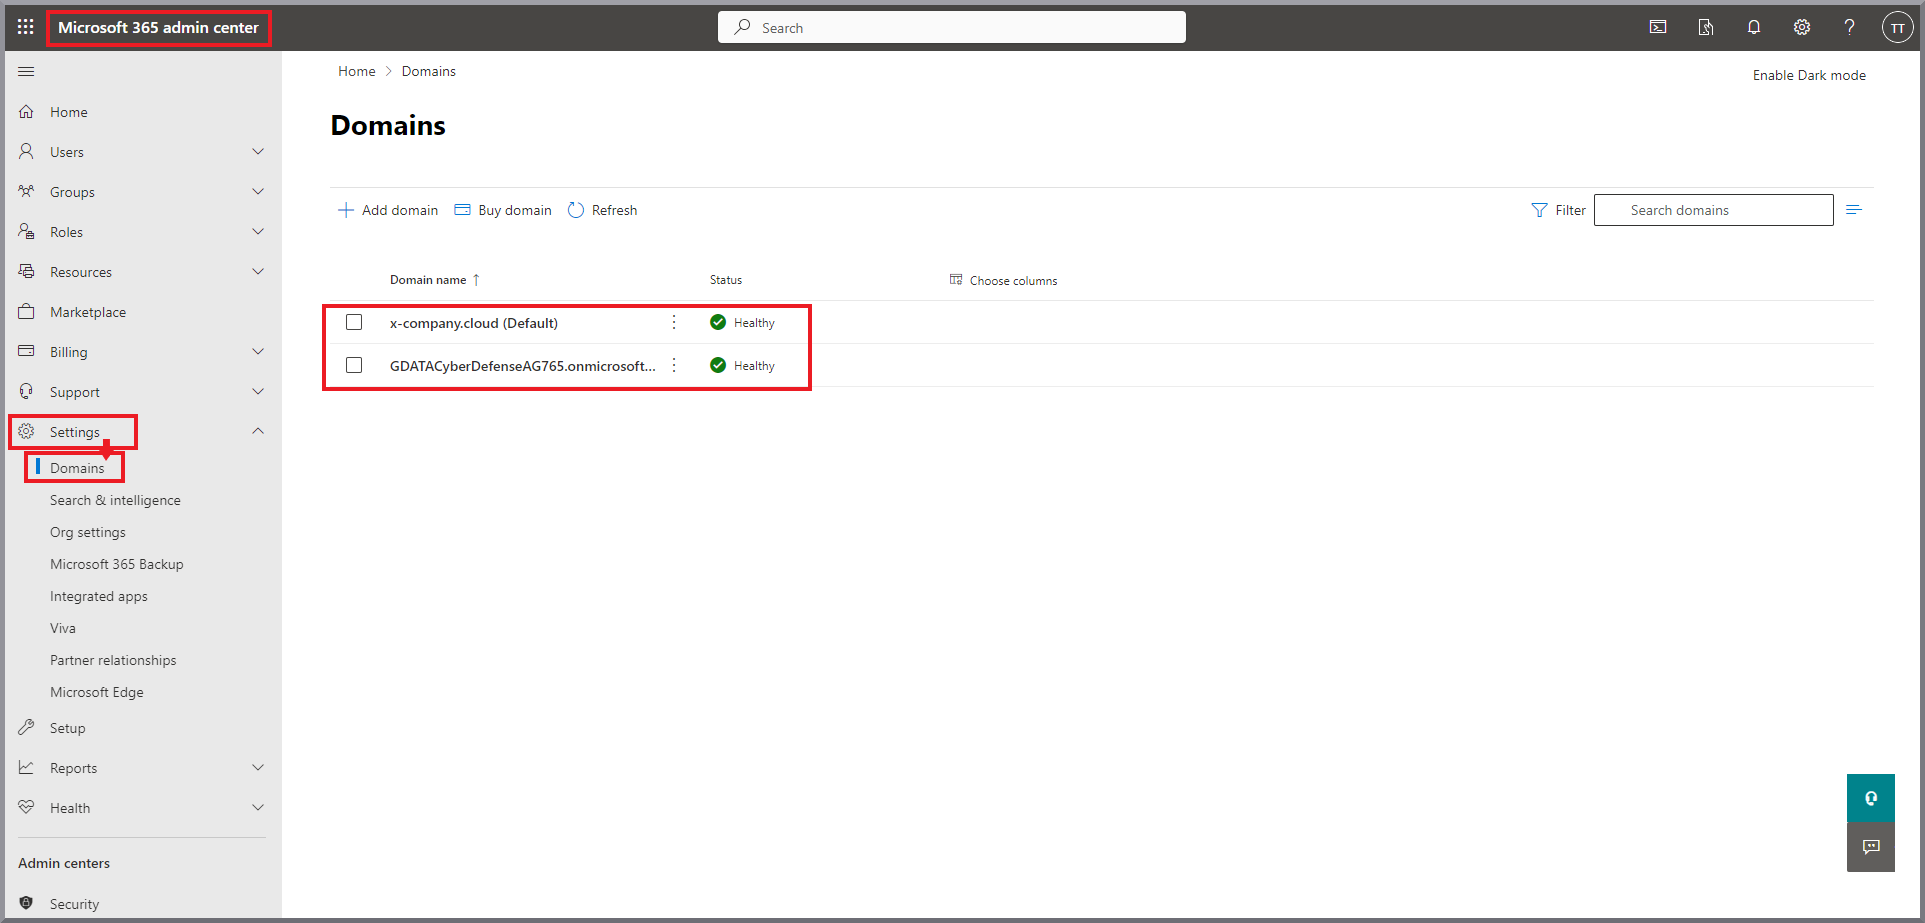
Finding the DNS records to be entered manually in the Microsoft Admin Center
In order for the DNS for Microsoft Exchange Online to be correct again for our example customer, the DNS entries removed by IONOS must be added again manually. Otherwise, his Outlook clients will no longer be able to connect to Microsoft Exchange Online.
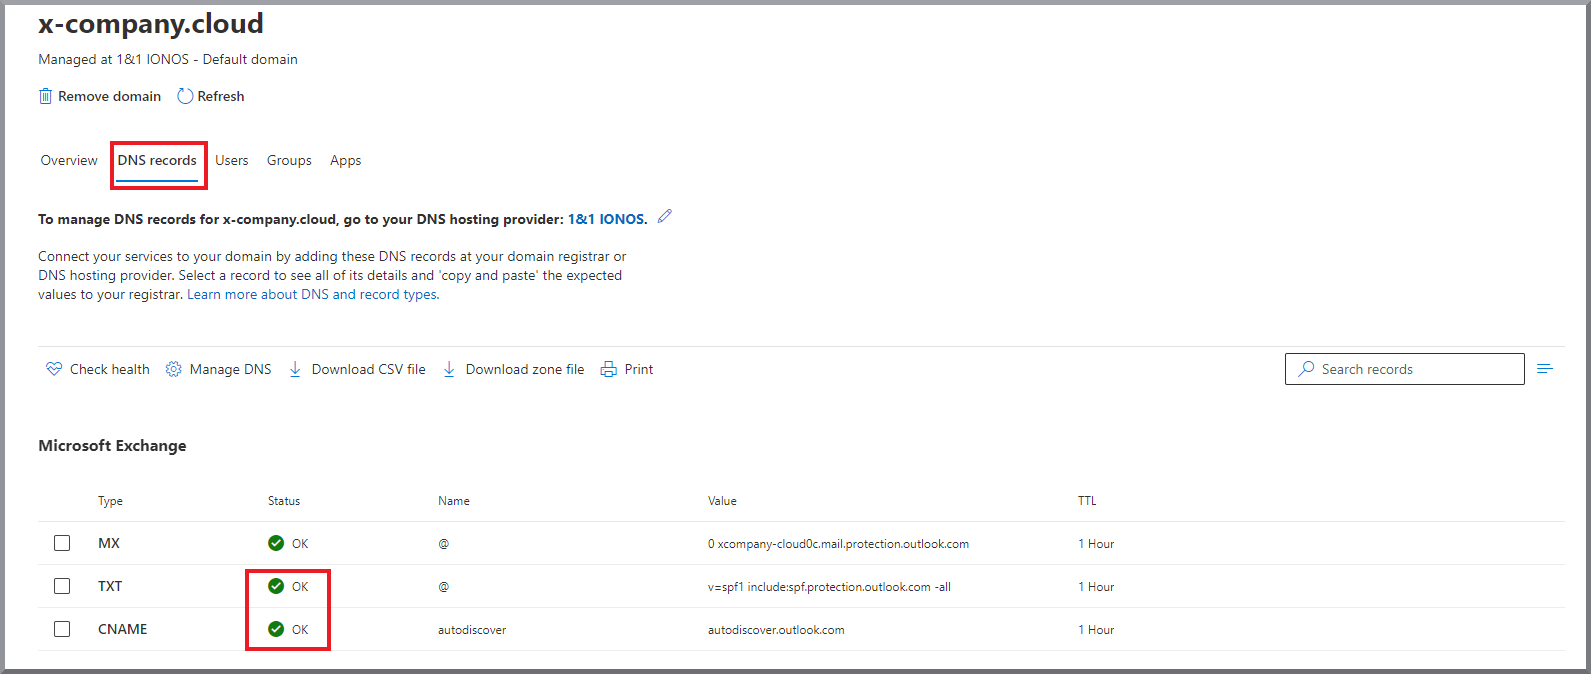
In the Microsoft Admin Center there are already error messages after the intervention in the DNS:
1. |
By clicking on the domain and the DNS records tab, our example customer switches to the DNS overview page in the Microsoft AdminCenter. 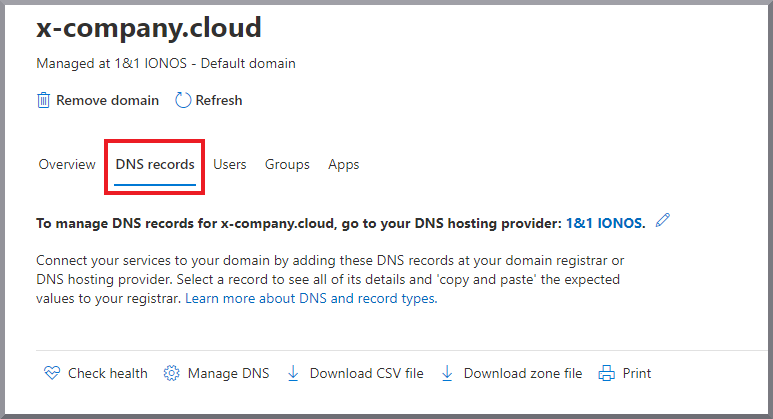
|
2. |
All DNS entries required by Microsoft are displayed there with an error. The display of an error in the MX record due to the change in Microsoft Exchange Online is correct and can remain as it is. In our example, the entries highlighted in yellow under the Exchange heading (TXT and CName) must be entered in IONOS. The entries marked in orange (CName) only need to be entered in certain cases (e.g. when using Microsoft Intune and Android). 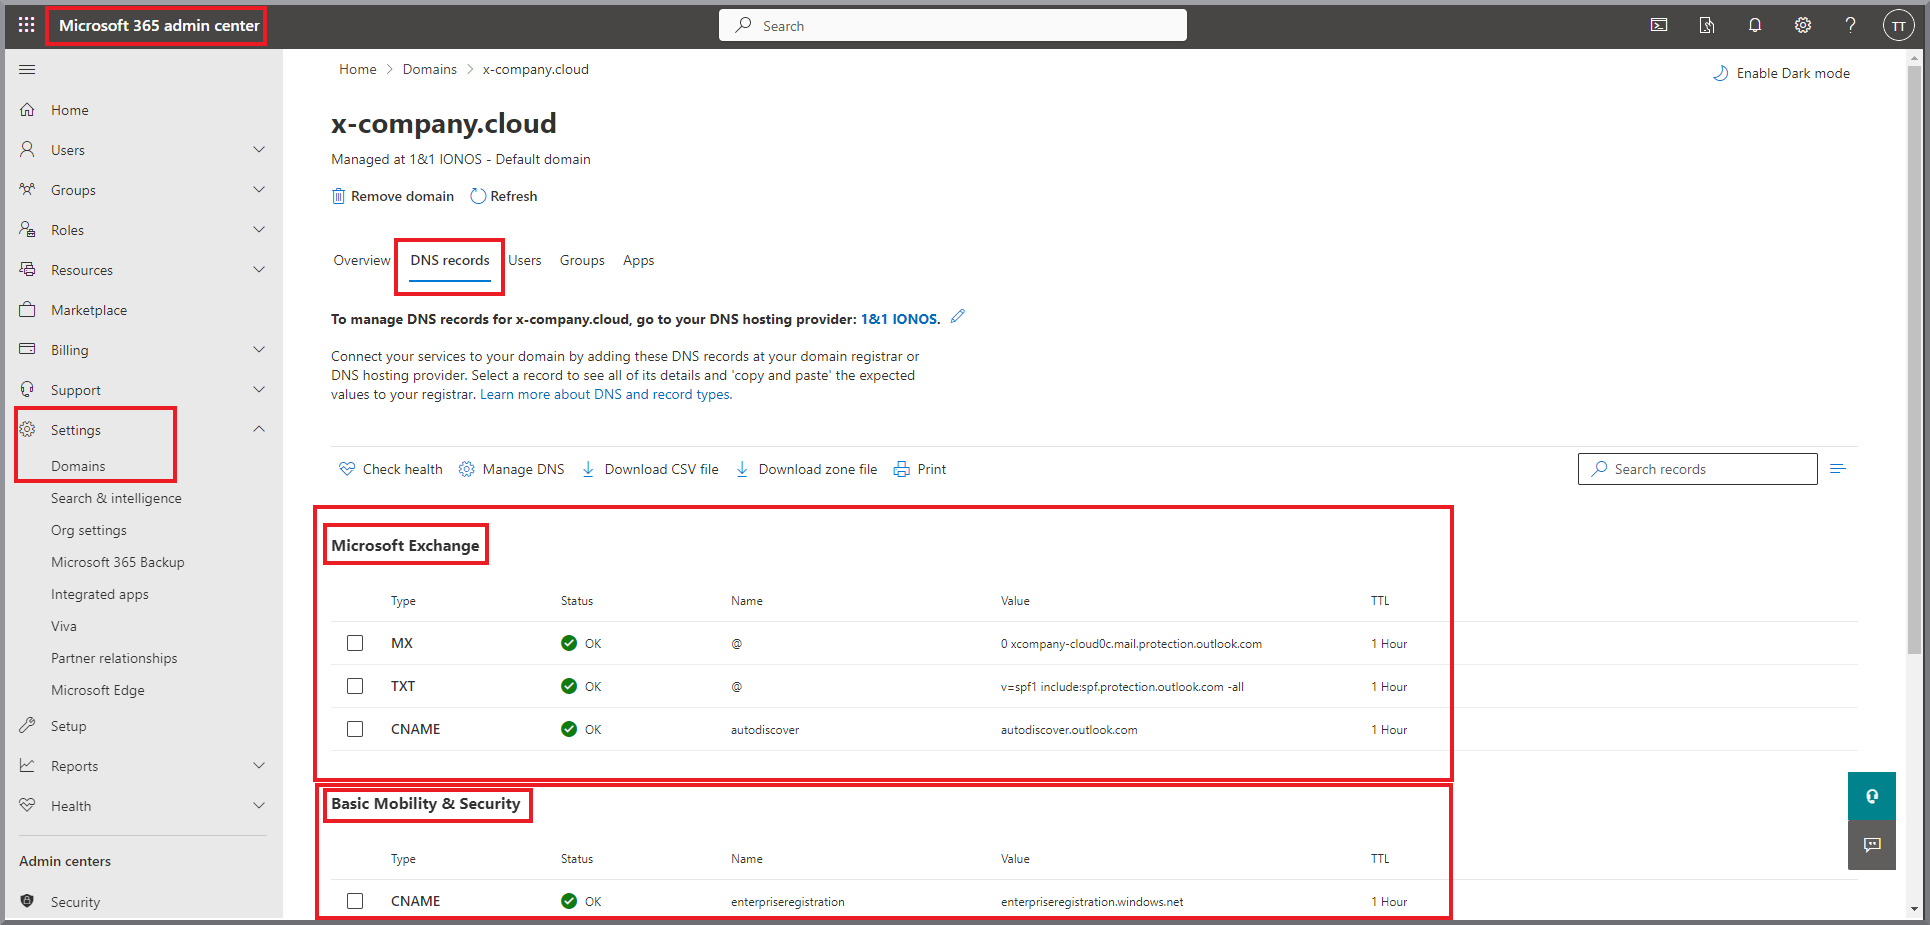
|
Entering the necessary DNS entries using IONOS as an example
1. |
The customer logs back into his account. Screenshot IONOS example
|
2. |
The customer then searches for the location where the DNS entries can be edited for the domain. Screenshot
|
3. |
The customer clicks on Add record. Screenshot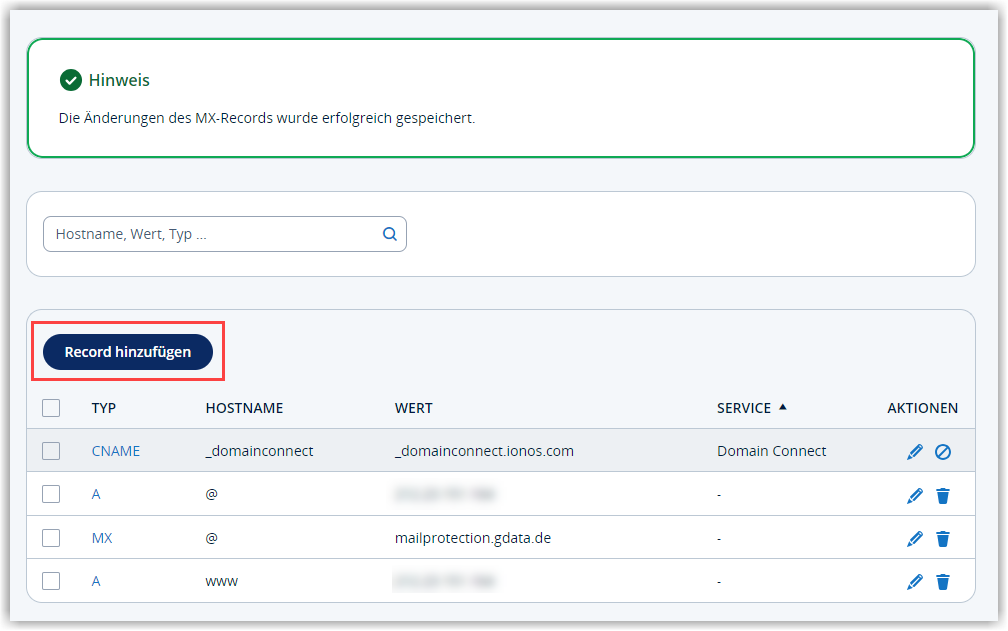
|
4. |
The customer selects the type of record he wants to create. This information can be found in the first column of the DNS overview page at Microsoft. Screenshot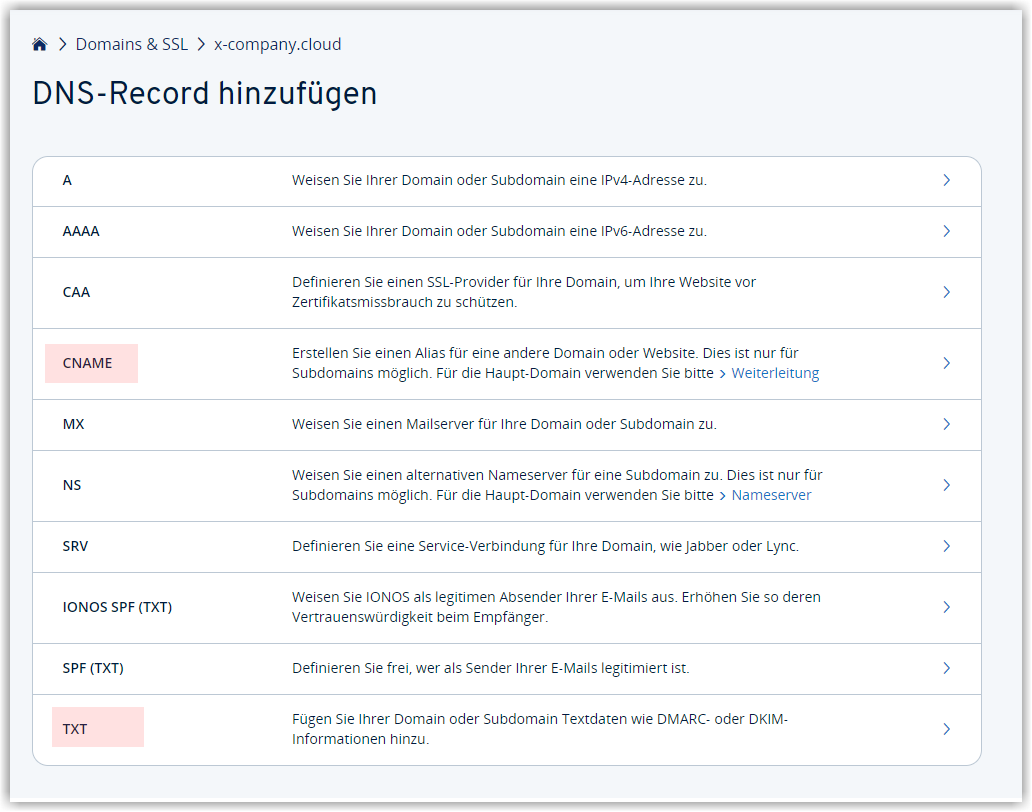
|
5. |
The customer enters the information from the DNS overview page at Microsoft: Name, value and TTL. Screenshot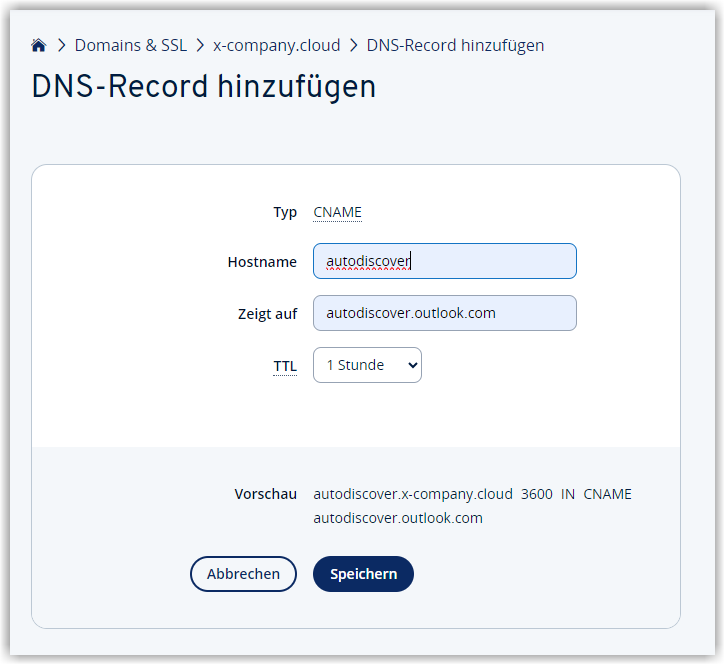
|
6. |
The entries are saved by clicking Save. |
7. |
Points 4-6 are repeated for all necessary DNS entries. Screenshot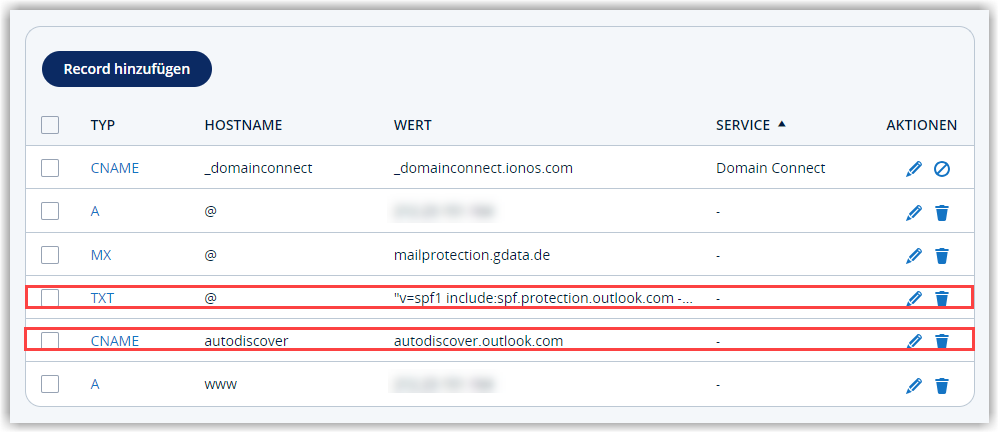
|
The relevant DNS entries should be displayed on the DNS overview page at Microsoft with the status Ok.