G DATA Phishing Simulation
Installing the G DATA phishing report button in Outlook via Exchange Online
1. |
Open G DATA Awareness Manager and select the Campaign target tab. Download the installation package (manifest file) for the phishing report button and save it to a directory of your choice. Show screenshot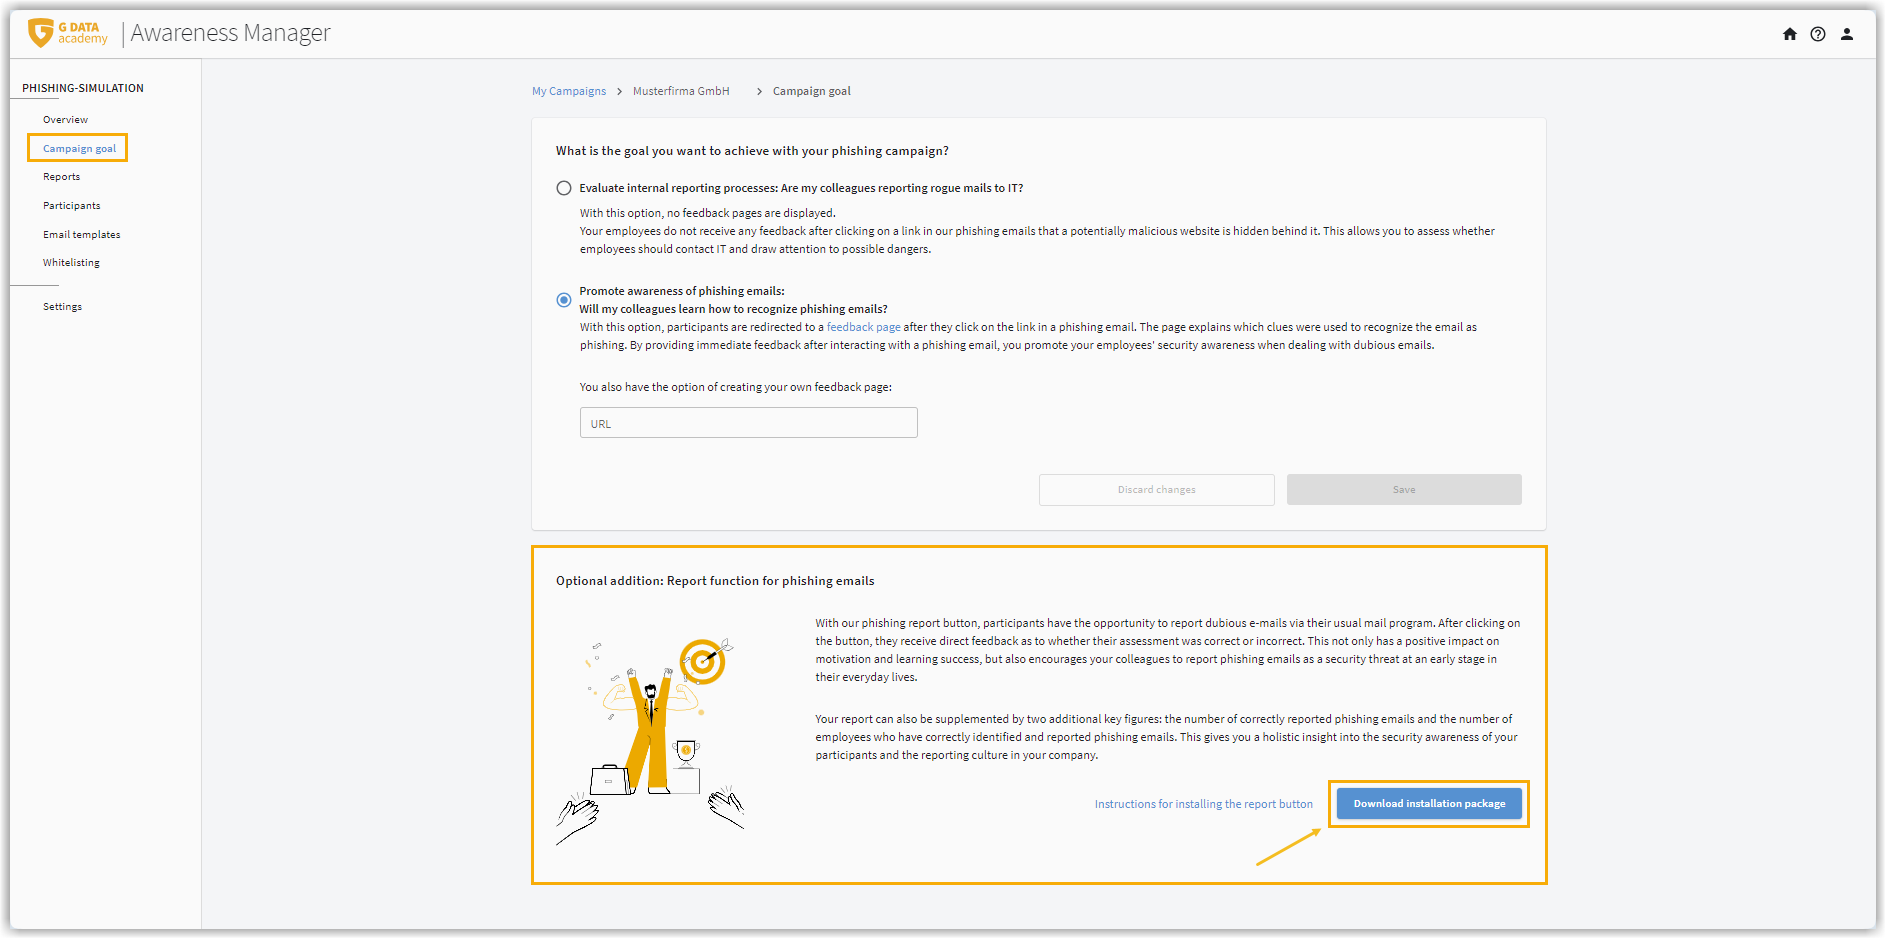
|
||
2. |
Extract the .zip file and open the manifest.xml file in an editor. In the file, search for the placeholder yourforwarding@email.com (it is present twice in this file).
Show screenshot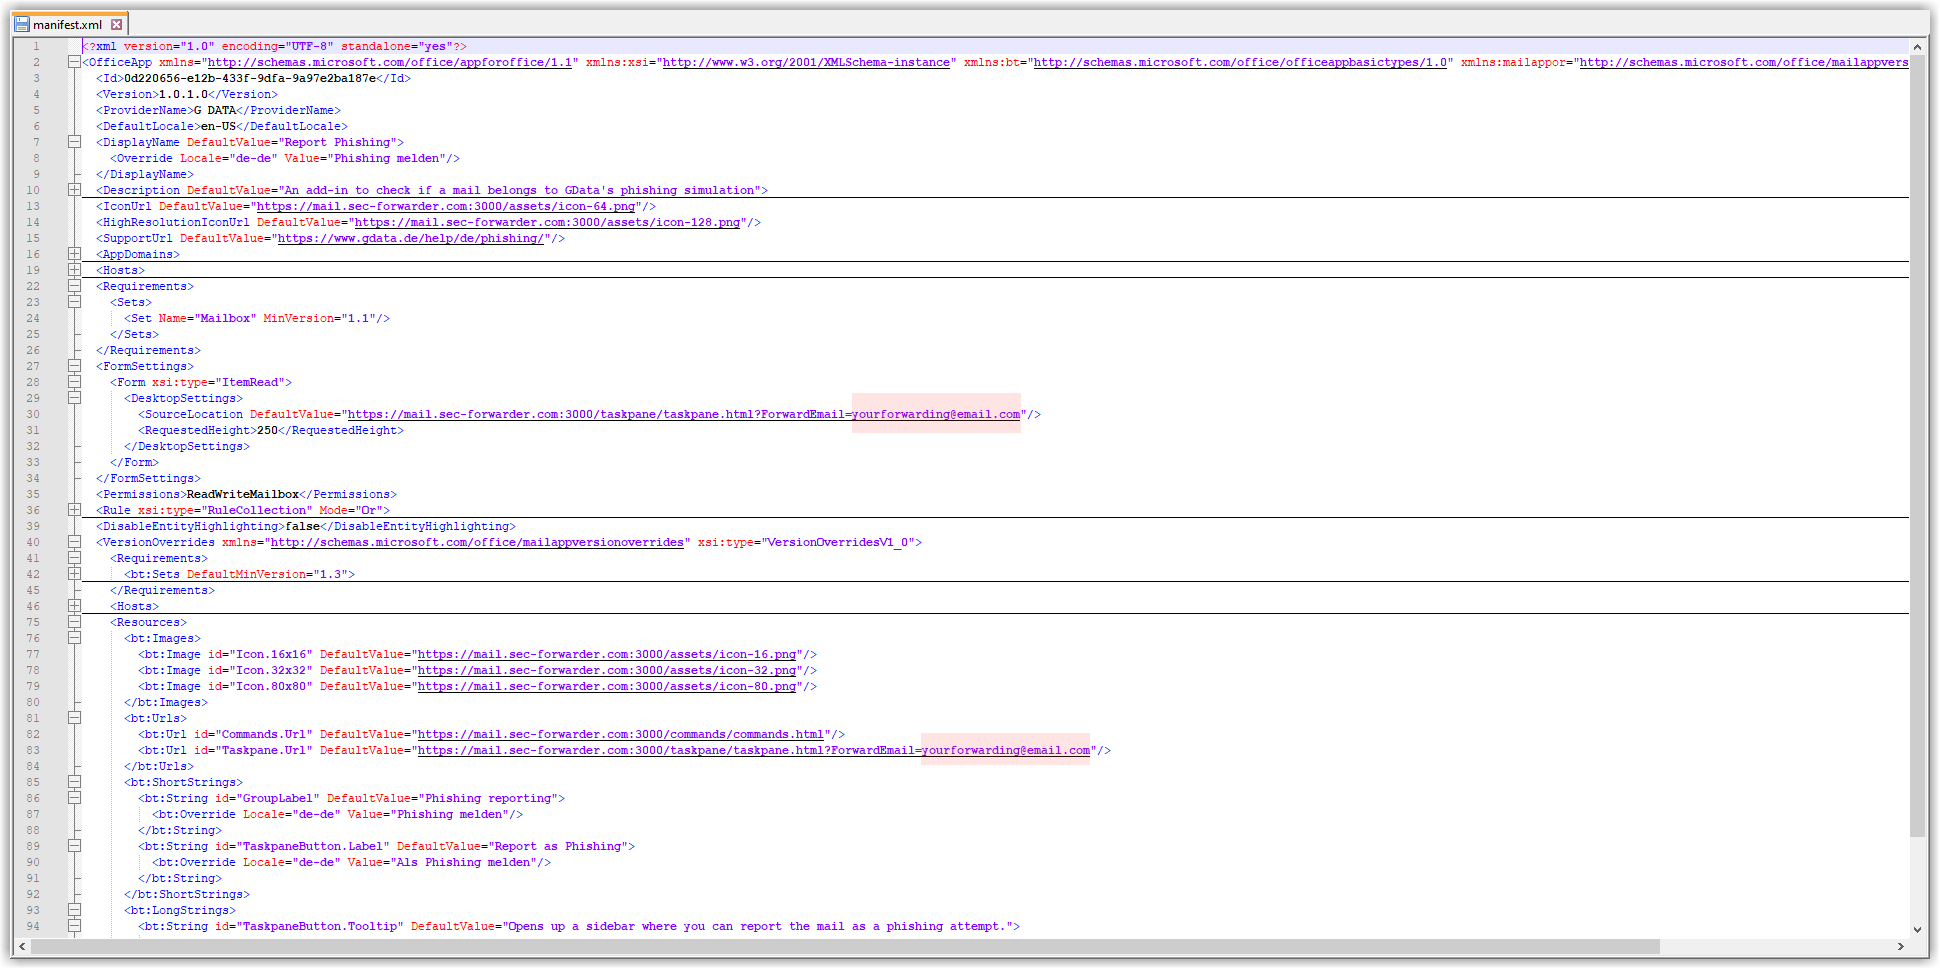
|
||
3. |
Open the Microsoft 365 admin center. |
||
4. |
In the left-hand menu, click Settings and Integrated apps. Show screenshot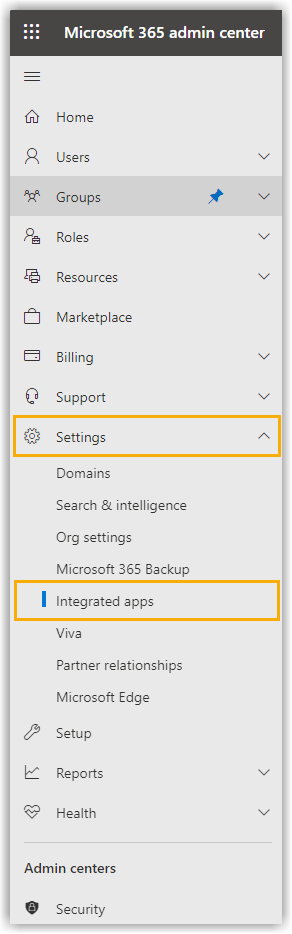
|
||
5. |
Click Upload custom apps. Show screenshot
|
||
6. |
In the Upload apps to be deployed window,
Click Next. Show screenshot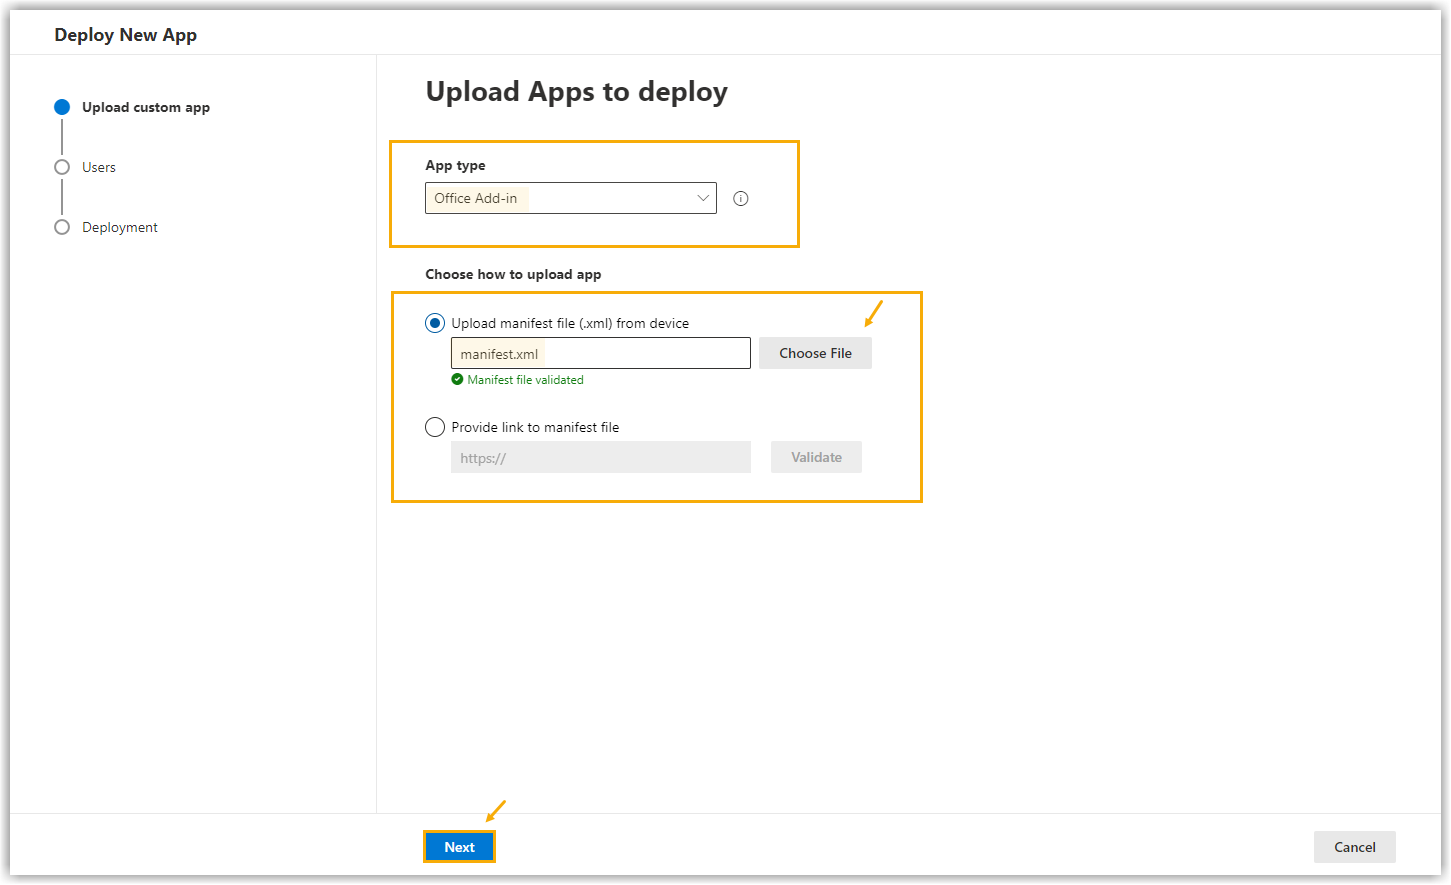
|
||
7. |
In the Add users window, Select the mailboxes of the participants who will take part in the phishing simulation campaign. You can choose between Entire organization or Specific users/groups. If you do not select the entire organization, mark the app as Not valid for all mailboxes by enabling the toggle switch 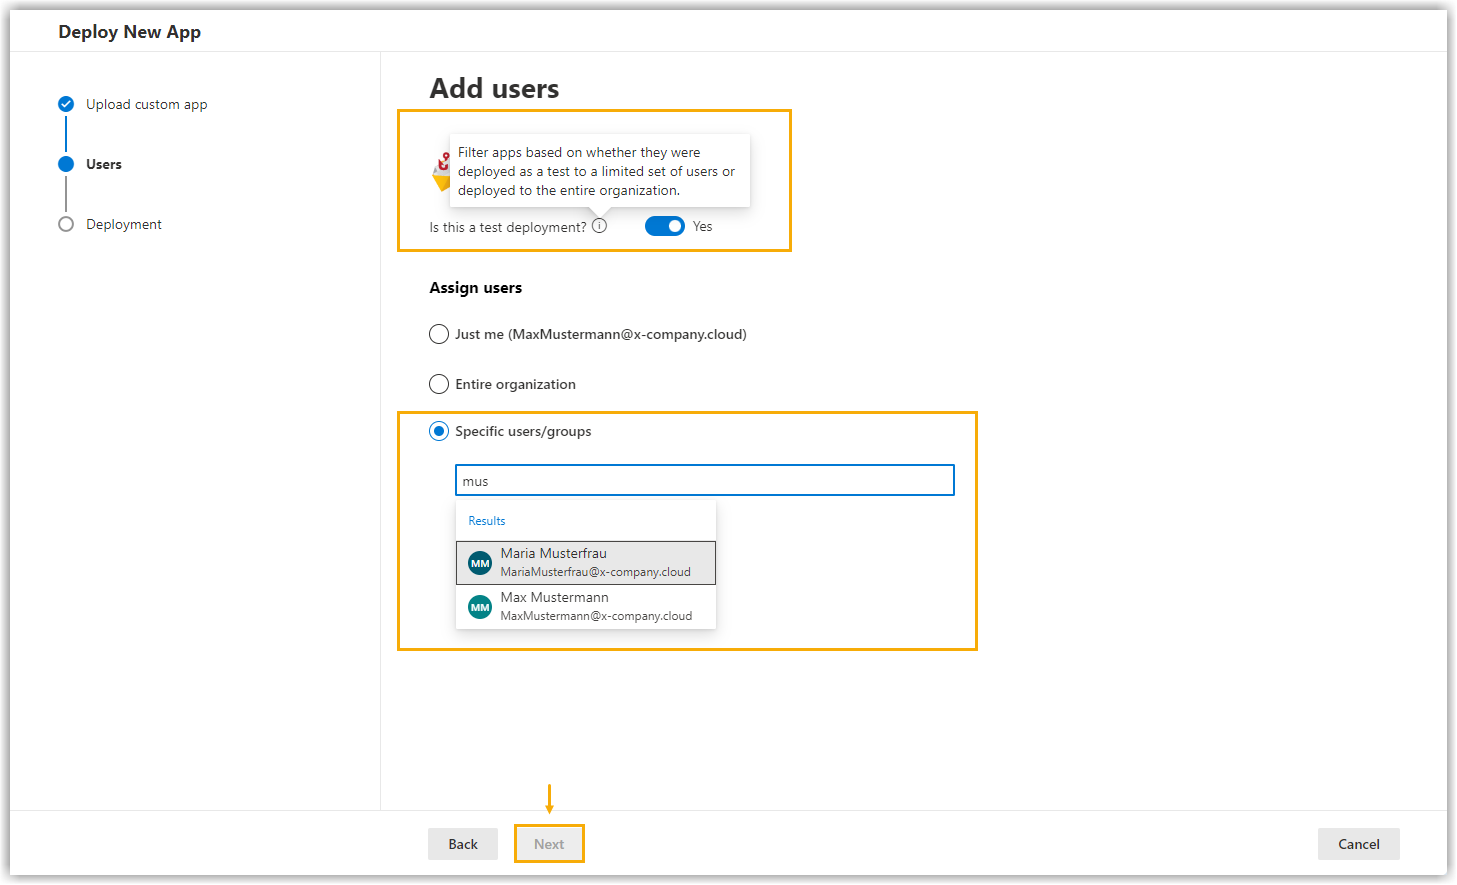
Click Next. |
||
8. |
In the Accept permission requests window, you will be shown the permissions required for the app. Click Next.
Show screenshot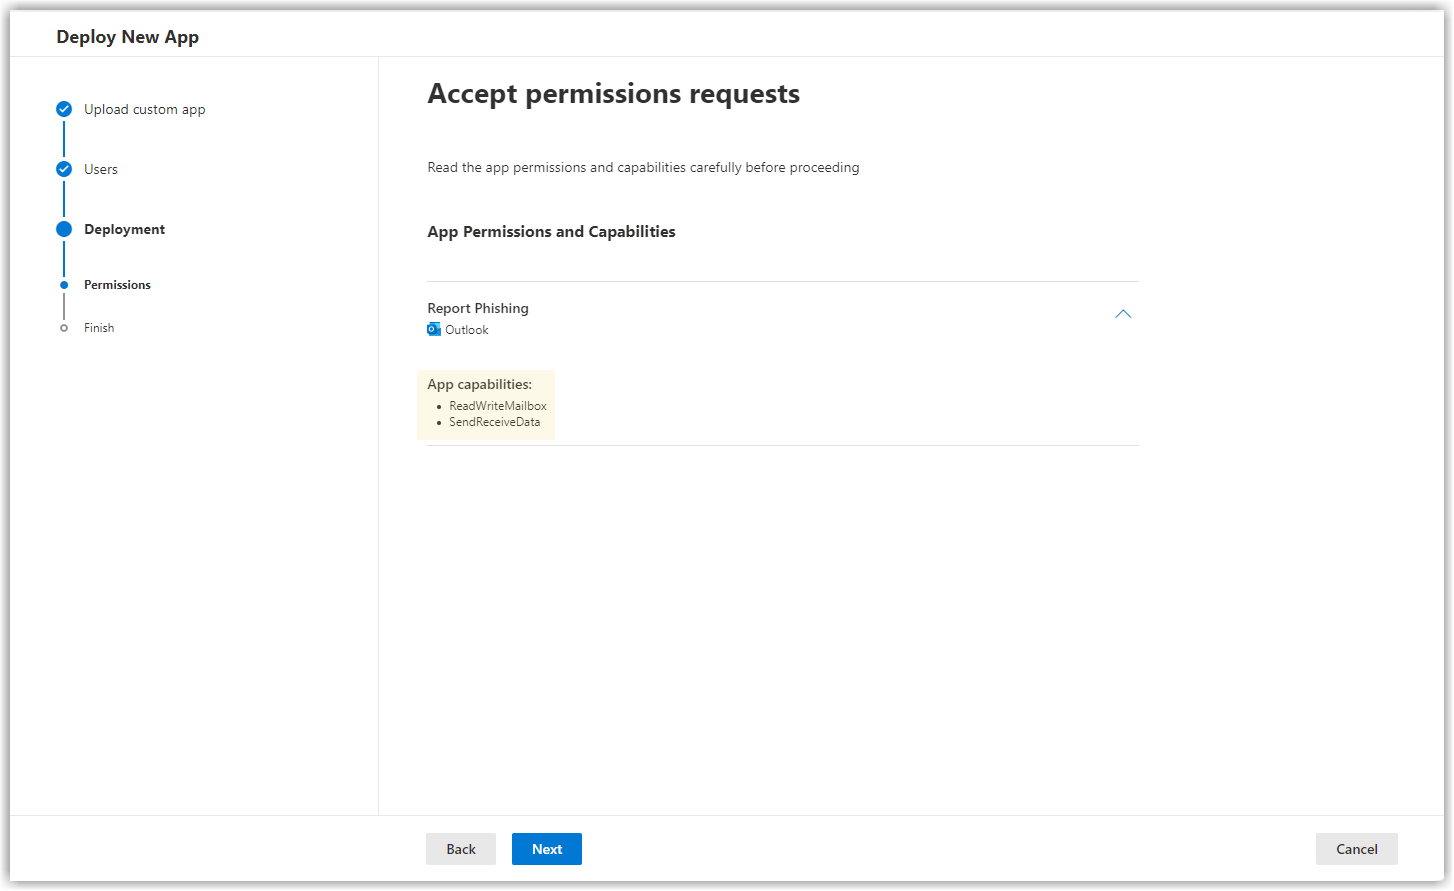
|
||
9. |
In the Review and finish deployment window, review your entries and click Finish deployment. Show screenshot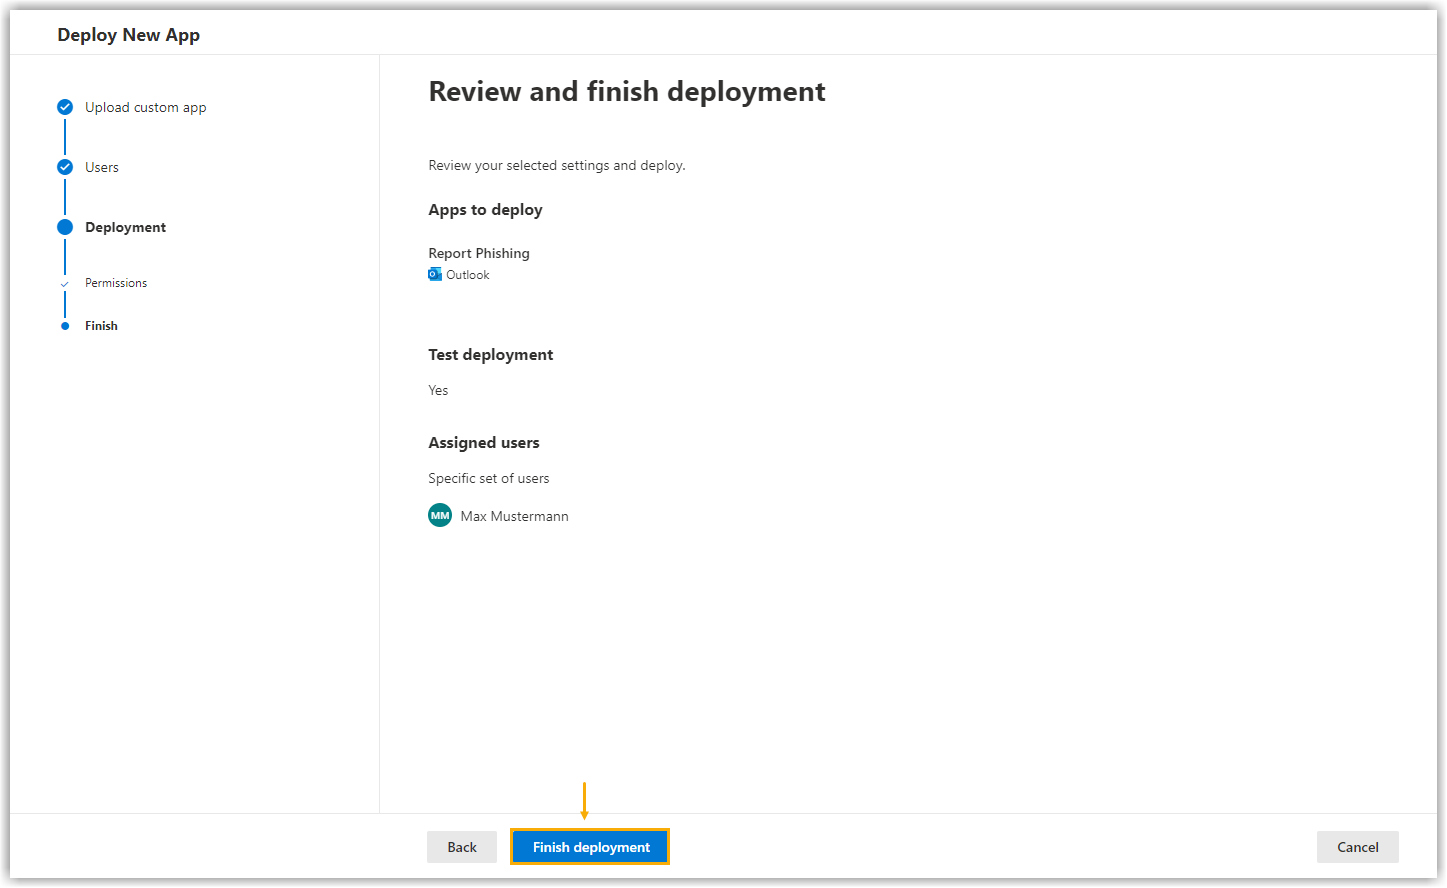
|
||
10. |
Complete the process by clicking Done. Wait until the phishing report button appears in Outlook. According to Microsoft, this can take several hours (see screenshot). Show screenshot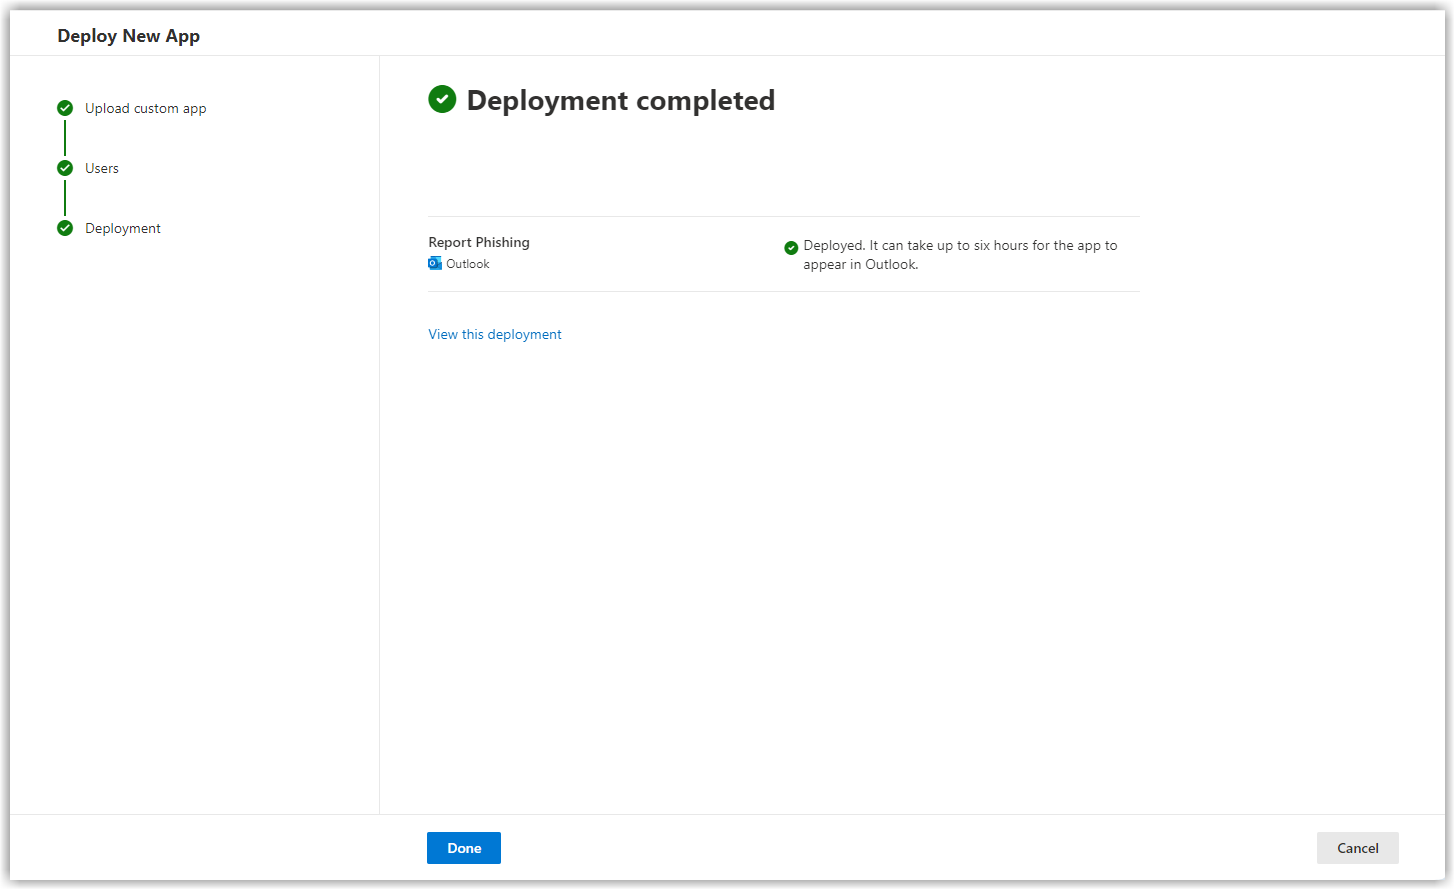
|