G DATA Phishing Simulation
Whitelisting
| Please note: Whitelisting is the sole responsibility of the customer. If problems arise with your campaign that are caused exclusively by the customer’s network and its security measures, G DATA cannot guarantee that the campaign will run smoothly. To allow you to test your whitelisting before the actual campaign begins, G DATA offers various testing options. By submitting the data, you confirm that the whitelisting has been performed correctly. |
The phishing scenarios used in G DATA Phishing Simulations are modeled on real attacks. It is therefore possible that protection technologies, in particular from the area of anti-spam technologies, recognize the simulated attacks.
What requirements must the customer meet?
To ensure that the simulated phishing emails reach your subscribers, it is necessary to whitelist the phishing domains used in these protection technologies. Furthermore, in our phishing scenarios, we use websites that try to persuade their employees to disclose sensitive data such as login details or telephone numbers. In this case, whitelisting in deployed web filters may be required.
To ensure that your G DATA Phishing Simulation runs smoothly and provides meaningful measurements, it is important that
-
the emails we send reach the participants' inboxes,
-
the attachments have not been deleted,
-
the automatic download of images in the participants' e-mail client is switched off,
-
the links contained are not blocked and the participant reaches our servers by clicking on them,
-
the links and attachments are not opened by any malicious code analysis software as part of sandbox testing procedures.
This type of check opens links and attachments within a protected sandbox environment before the data is forwarded to the recipient. Our servers cannot distinguish whether the click was made by such software or by the recipient. This would falsify the evaluation of your phishing simulation.
| The IPs and domains we use, which must be activated accordingly in your company, can be found in the Awareness Manager under the TAB Whitelisting. |
Help for whitelisting
There is a wide range of web filters, mail servers, proxy servers, firewalls etc. on the IT market. It is therefore not possible for us to provide whitelisting guides for all products.
We have put together a selection of guides for you below.
For all other products, please contact the manufacturer support of the product you are using or your service partner who has set up the product for you.
Microsoft Exchange Online and Microsoft Defender standard setup for a phishing simulation
You can easily set up the necessary whitelisting in the Microsoft Defender Portal with the standard configuration of your Exchange Online.
By creating a phishing simulation campaign in Microsoft Defender, you can specify our sender domains and our sender IPs for incoming e-mails. Microsoft then controls further whitelisting with a rule running in the background.
|
Microsoft offers a convenient way of bypassing its protection mechanisms for phishing campaigns if the emails are received via the Microsoft Standard Connector. This connector is "invisible" and is used by Microsoft to receive e-mails if no other connector has been created to control the message flow differently. This can be the case, for example, when using third-party spam and virus protection, or if you operate an Exchange Online in hybrid mode with an On Premise Exchange. If you have set up such connectors, you must ensure that
If you have adjusted the message flow through your connectors, continue to the next section of this article. |
Microsoft Exchange Online und Microsoft Defender alternative setup for a phishing simulation
| When using third-party software in conjunction with Exchange Online, please note that advanced filtering must be activated. |
As an alternative way to set up a phishing simulation campaign in Microsoft Exchange Online, if you have set up an individual message flow for your business, you can whitelist the IPs of your G DATA campaign within the protection mechanisms yourself:
-
Our IP addresses must be added to your IP whitelist.
This is necessary so that the connection filter in Microsoft Exchange recognizes our IPs. During connection filtering the IP address of the sending mail server is compared with the values in the whitelist. If the IP is on the whitelist, the e-mail is forwarded to your subscribers' mailboxes without additional processing by other antispam agents. -
The by G DATA utilized IP addresses must be whitelisted in the Microsoft Junk Filterso that the e-mails are not sorted out and moved to the participants' spam folders.
-
There have to be redirections for attachments and links, if they were sent from our domains.
Exchange Online Protection (EOP)
Exchange Online Protection (EOP) is both a component of Microsoft 365 Defender and a standalone product for the cloud protection of on-premises Exchange servers.
The following instructions correspond to the procedure for Exchange Online (Office 365) and Microsoft 365 Defender:
-
Our IP addresses must be added to your IP whitelist.
This is necessary so that the connection filter in Microsoft Exchange recognizes our IPs. During connection filtering the IP address of the sending mail server is compared with the values in the whitelist. If the IP is on the whitelist, the e-mail is forwarded to your subscribers' mailboxes without additional processing by other antispam agents. -
There have to be redirections for attachments and links, if they were sent from our domains.
Domain whitelisting (Firewall)
To obtain realistic results in a phishing simulation, a number of domains must be accessible. You can view which domains these are in the Awareness Manager under the “Perform Whitelisting” tab (“Step 1: Configure Security Technologies”).
Show screenshot
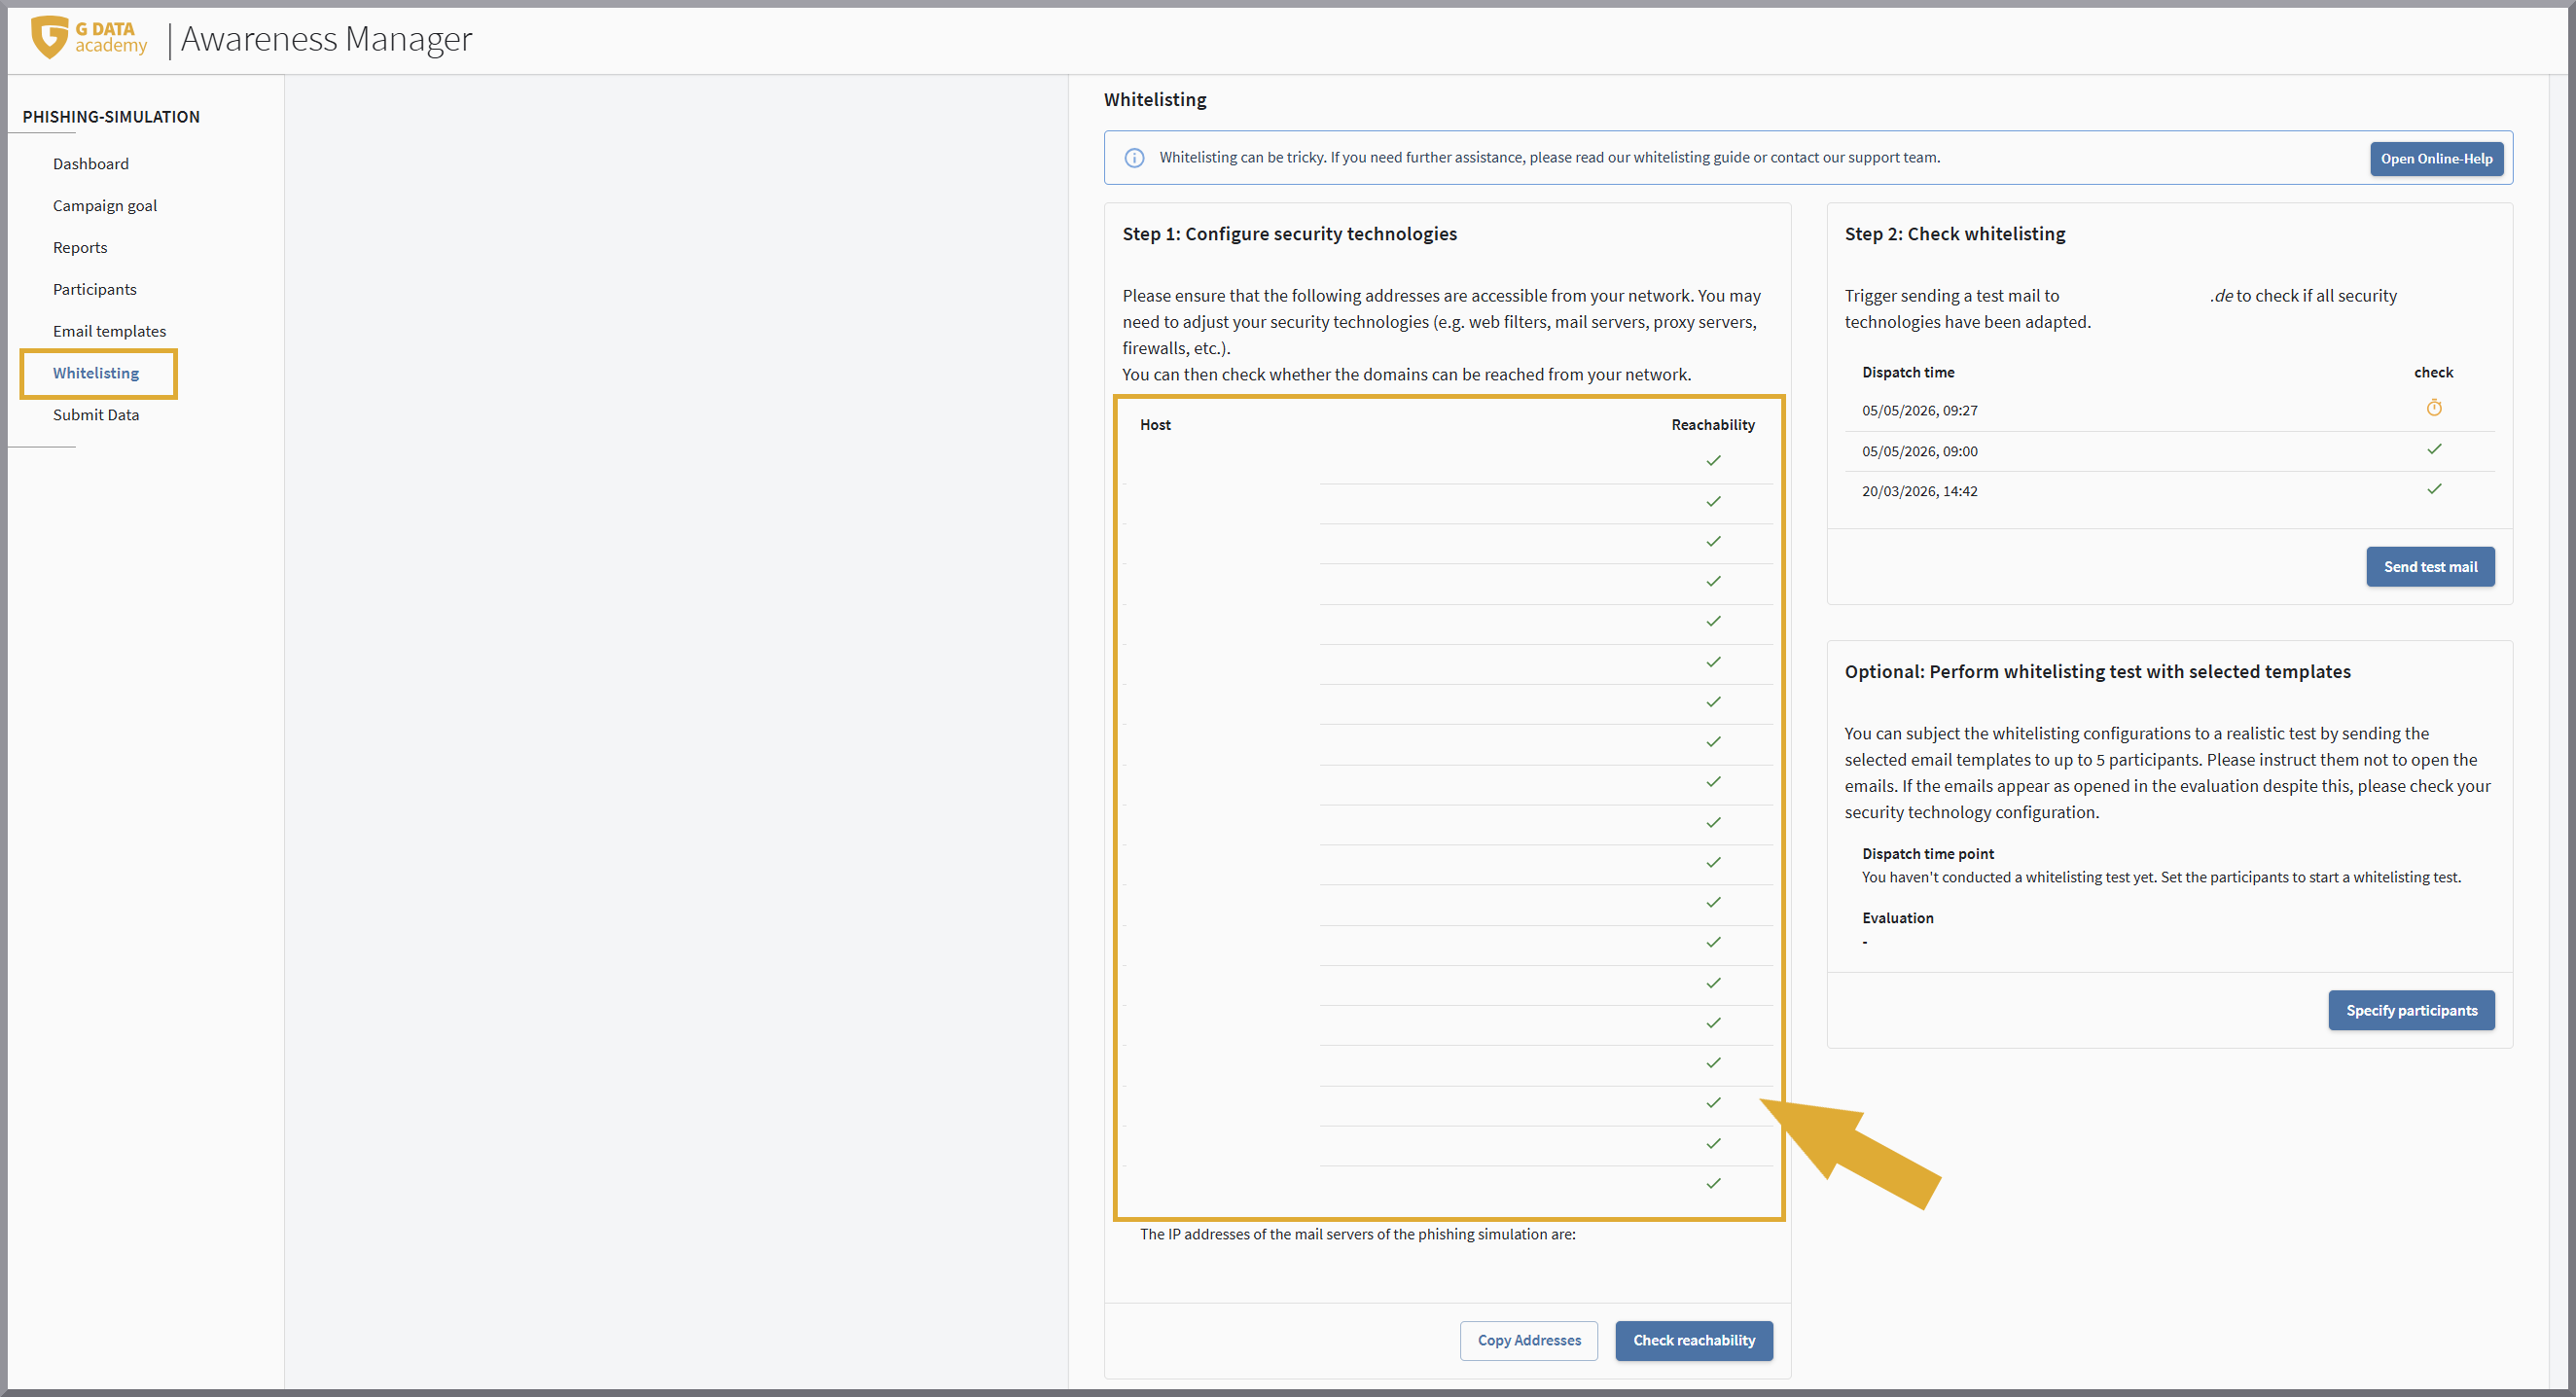
All domains listed here must be accessible and must not be blacklisted or blocked by the firewall used. The reason for this is that otherwise not all clicks in the e-mails sent can be evaluated.
| Due to the large number of firewall products available and the fact that it is not possible to determine which one is used, it is not possible to offer a 1-to-1 guide at this point. |
Test whitelisting
| Please note that if your company has multiple locations with their own infrastructure, tests must be conducted for all locations. |
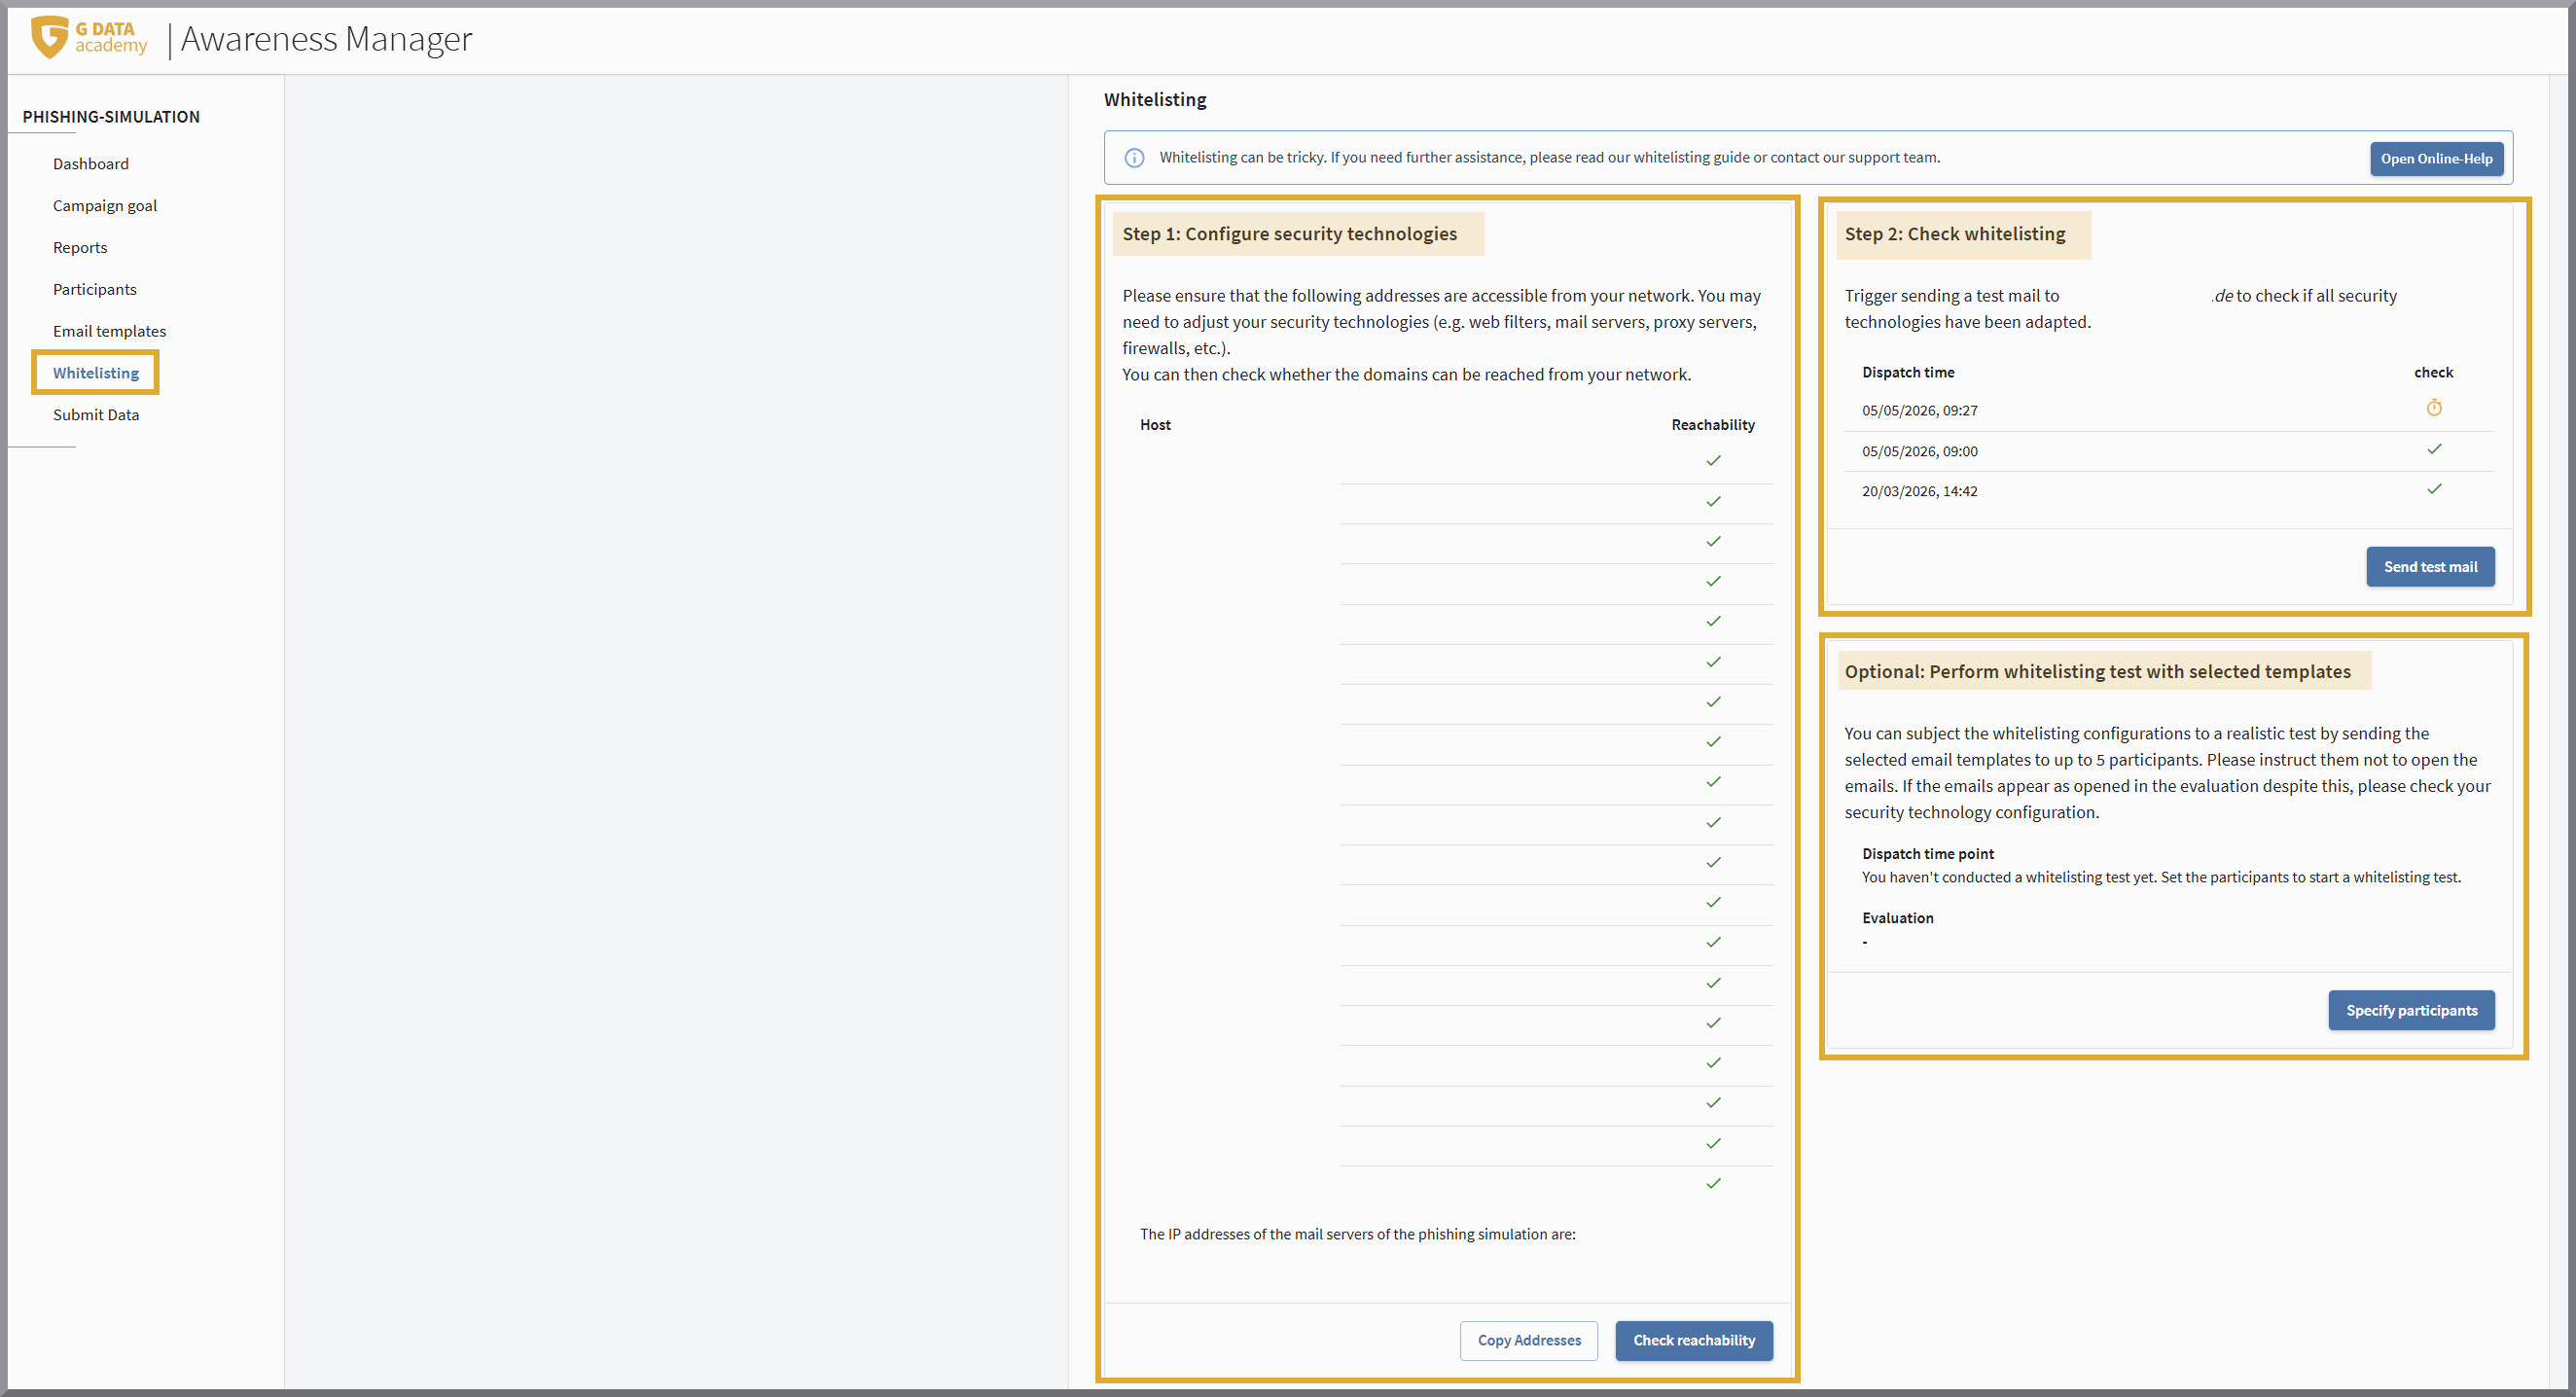
On this page, you will find three verification functions that you can use after whitelisting to check whether the above requirements have been met.
Step 1: Configure security technologies
Use the Check Availability button to test whether all the domains we use are accessible. Accessible domains are marked with a green checkmark.
Step 2: Check whitelisting
-
You can use the Send Test Email button to check whether our emails are arriving in a participant’s inbox and whether the attachment is still included.
| Both verification steps must be successfully completed before you can launch the campaign. |
Test run
So far, a single mailbox has been checked.
Once steps 1 and 2 of the verification process have been completed, the whitelisting should be set up correctly. Before the actual campaign is launched, you now have the option to test email delivery by running a test. To do this, enter five email addresses you want to use to test the campaign. If you have different locations or different security measures in place, be sure to select the addresses so that all scenarios are covered.
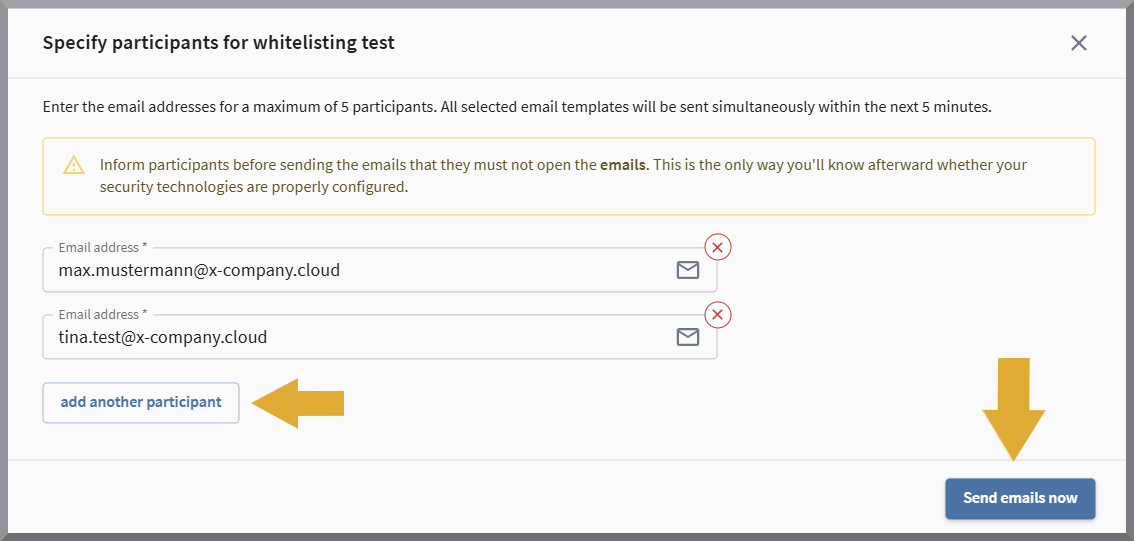
| Before sending the emails, inform the participants that they must not open them. This is the only way to determine afterward whether your security technologies are configured correctly. |
You can repeat the test run as many times as you like.
Once the message has been successfully delivered, a notification will appear in G DATA Awareness Manager.
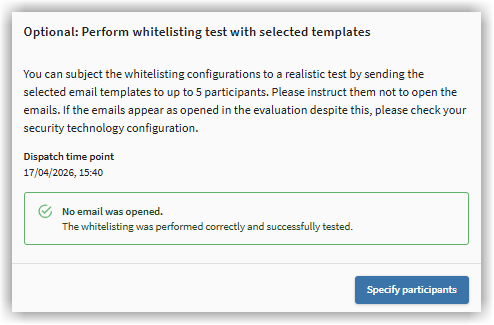
If all items on the dashboard are green, the campaign is ready for data submission and launch.