G DATA Business Solutions: Switch to an XDR product using the Migration Wizard
The Migration Wizard makes it easy to switch from G DATA Business Solutions to one of our future-proof XDR products. Once all prerequisites have been met, you can easily launch the wizard from within the G DATA Administrator.
Prerequisites
The basic requirement is to link the G DATA Business Solutions license you are using with an XDR-enabled license. If you do not yet have such a license but are interested in switching to one of our XDR solutions, please contact our sales team.
In addition, all systems to be migrated must be updated to at least version 15.9. Only once the G DATA Management Server has been updated to version 15.9 (and the license has been updated accordingly) will the XDR/MXDR option be visible in "Login Data and Settings". The actual migration cannot begin until the endpoints have the G DATA Security Client in version 15.9.
If these requirements are met, the migration will be available in G DATA Administrator. A new settings option will appear under ManagementServer - Access data and settings (→ see screenshot).
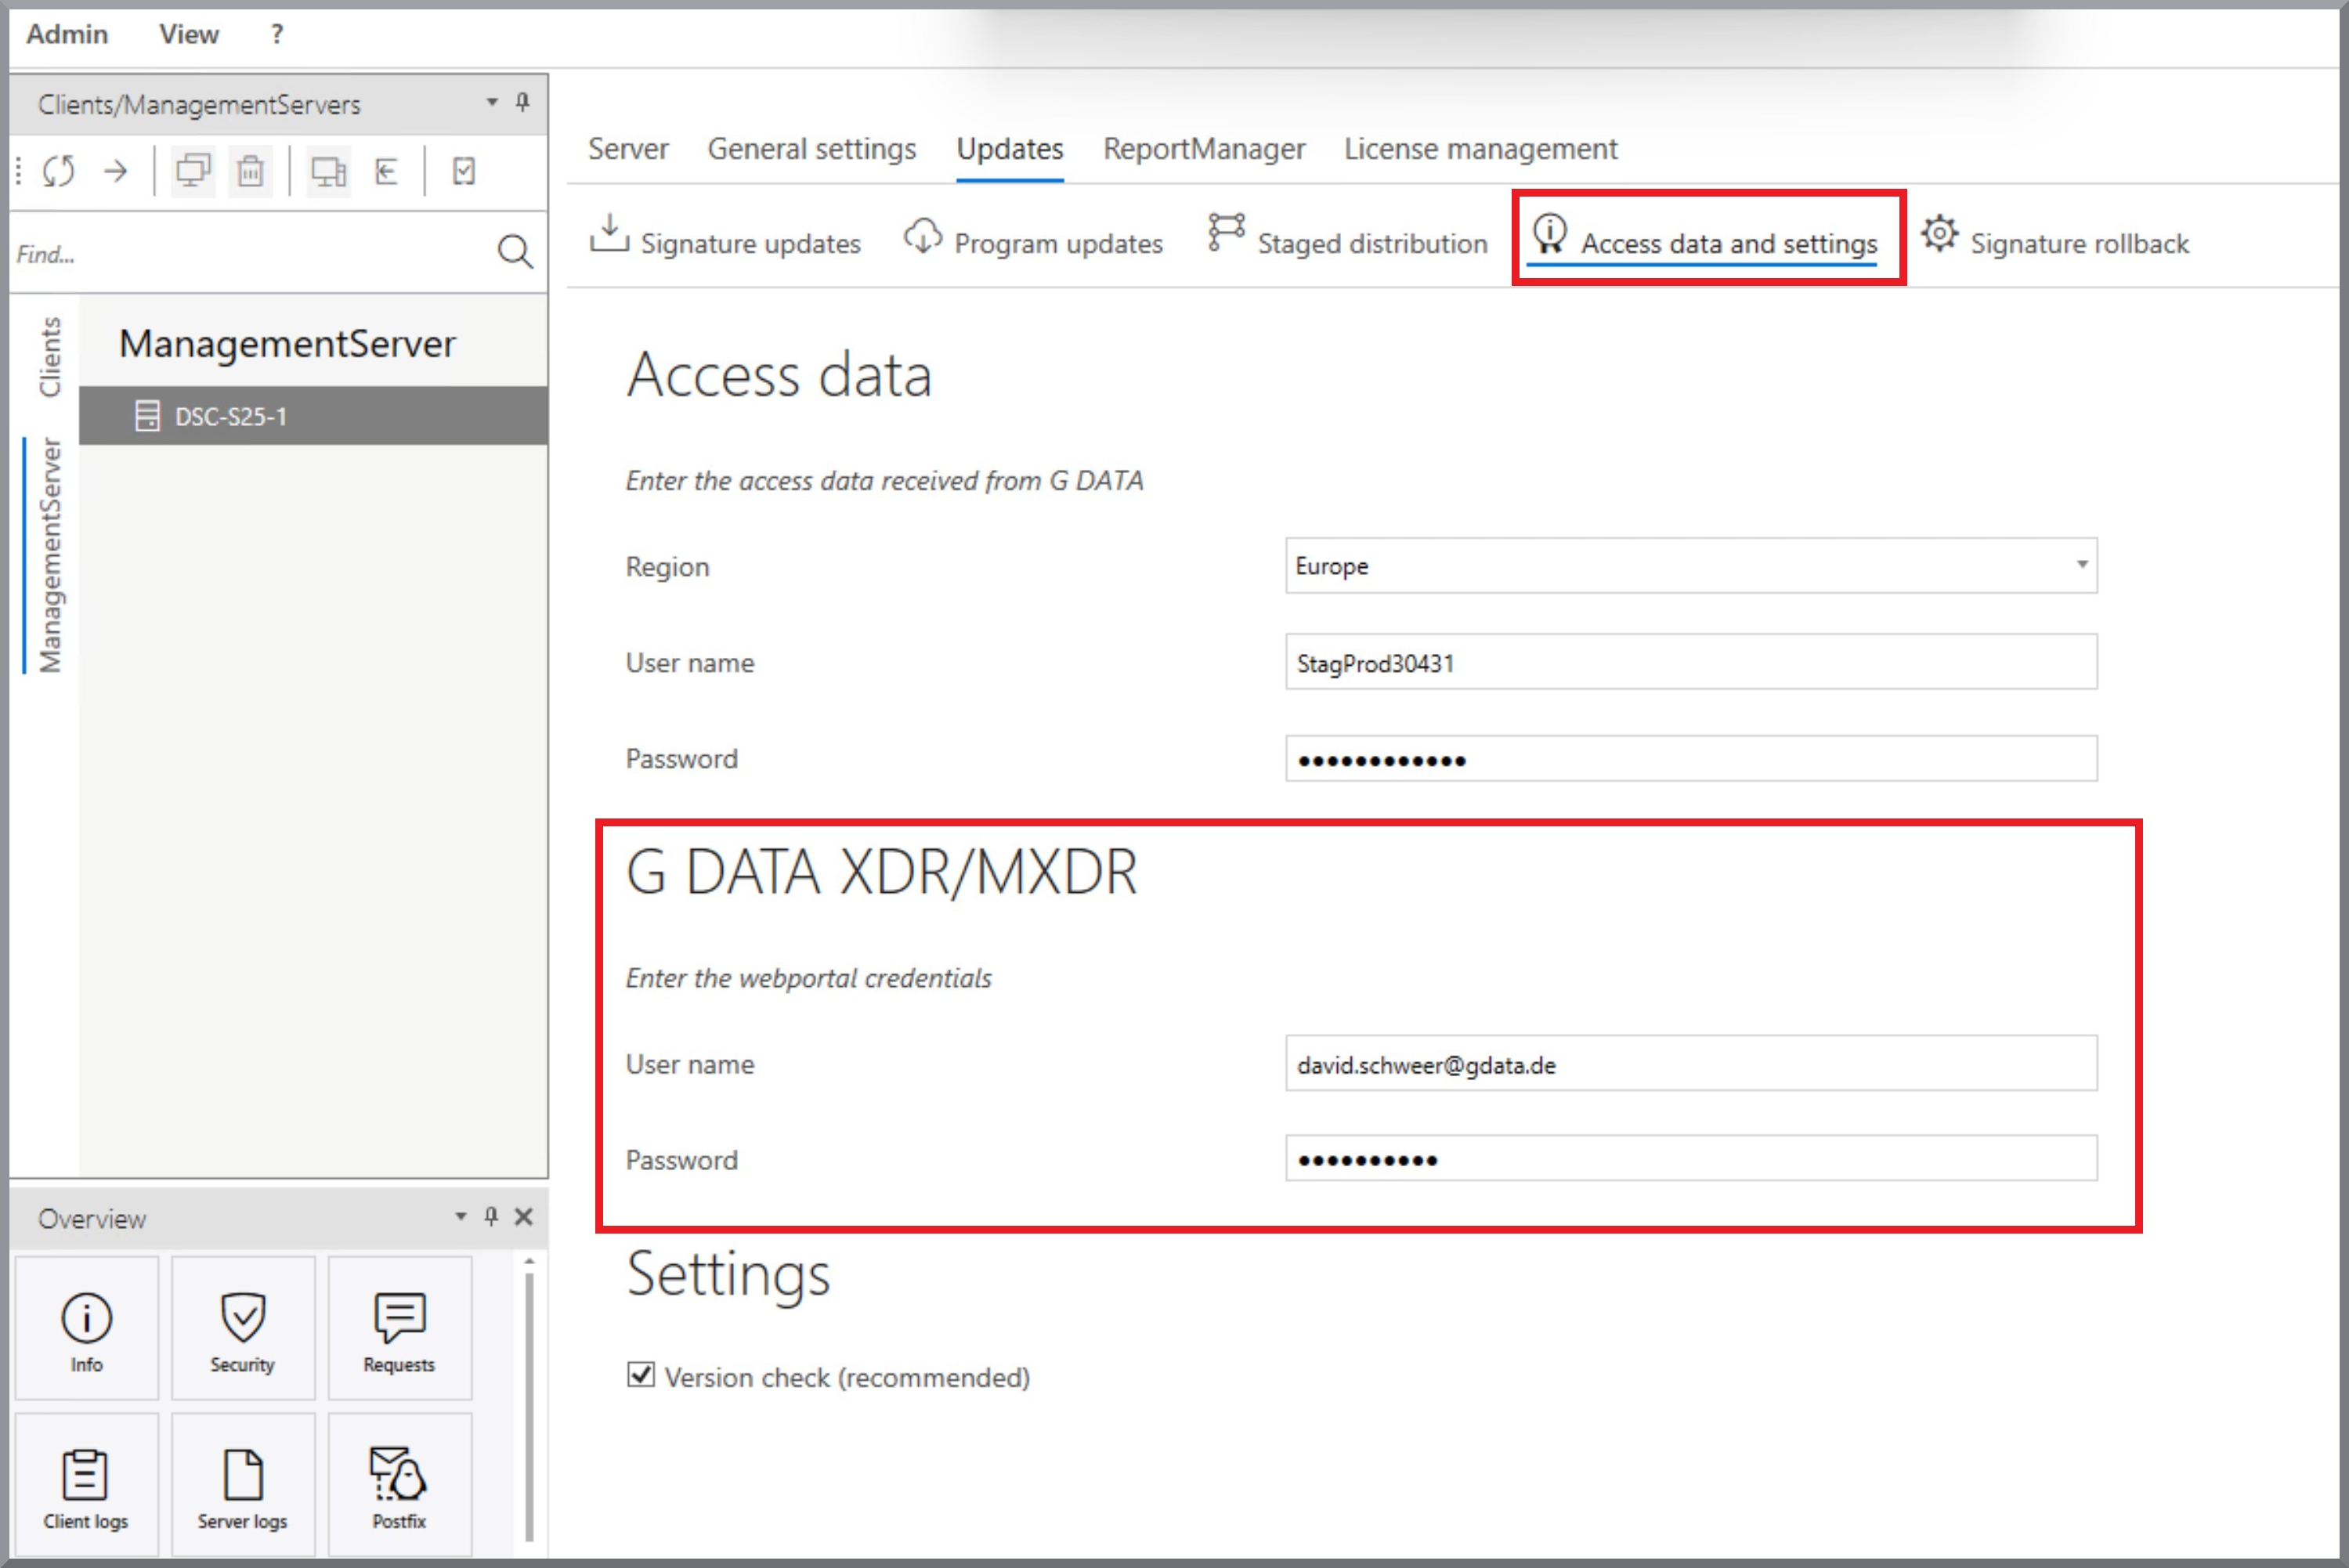
| You must have login credentials for G DATA Web Portal. You will receive these as part of the license replacement process. |
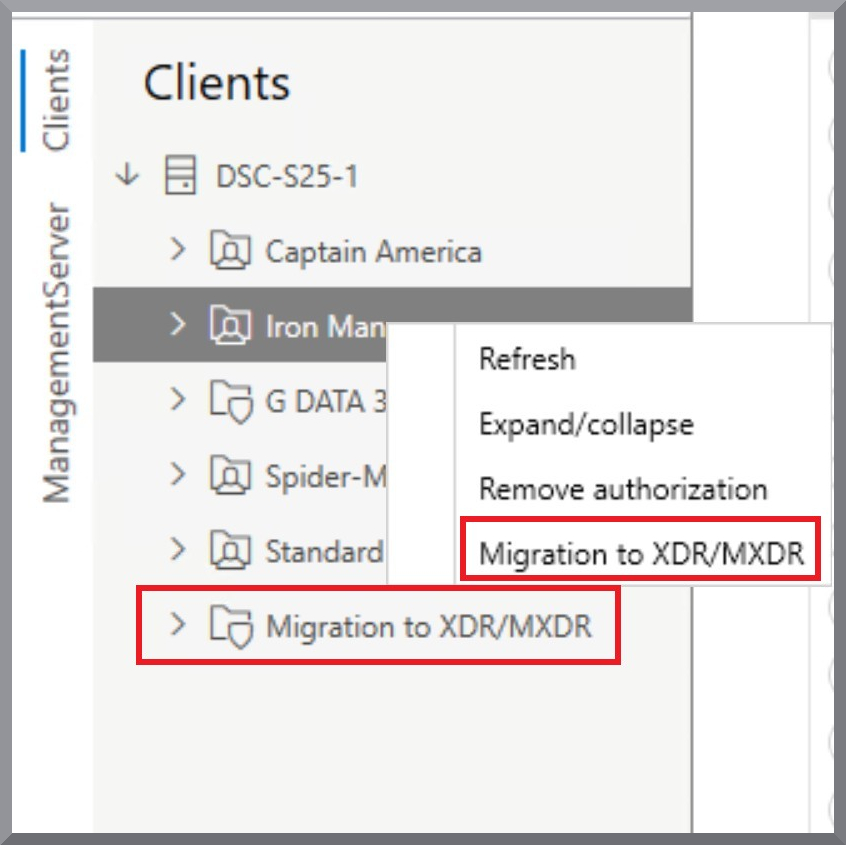
You can then start the migration via the context menu in the client overview. There is also a new entry here: → "Migration to XDR/MXDR".
| Migration is currently available only for Windows systems! |
Migration process
You can start the migration in two ways: either by opening the context menu on a tenant and selecting the Migration to XDR/MXDR, or by selecting the entry with the same name at the tenant level in the client overview of G DATA Administrator.
The Migration Wizard will now open and guide you through the individual steps of the migration.
| The Migration Wizard requires a connection to the G DATA Web Portal. To avoid having to authenticate every time, we recommend entering your login credentials under “Login Credentials and Settings” (see screenshot under Prerequisites). |
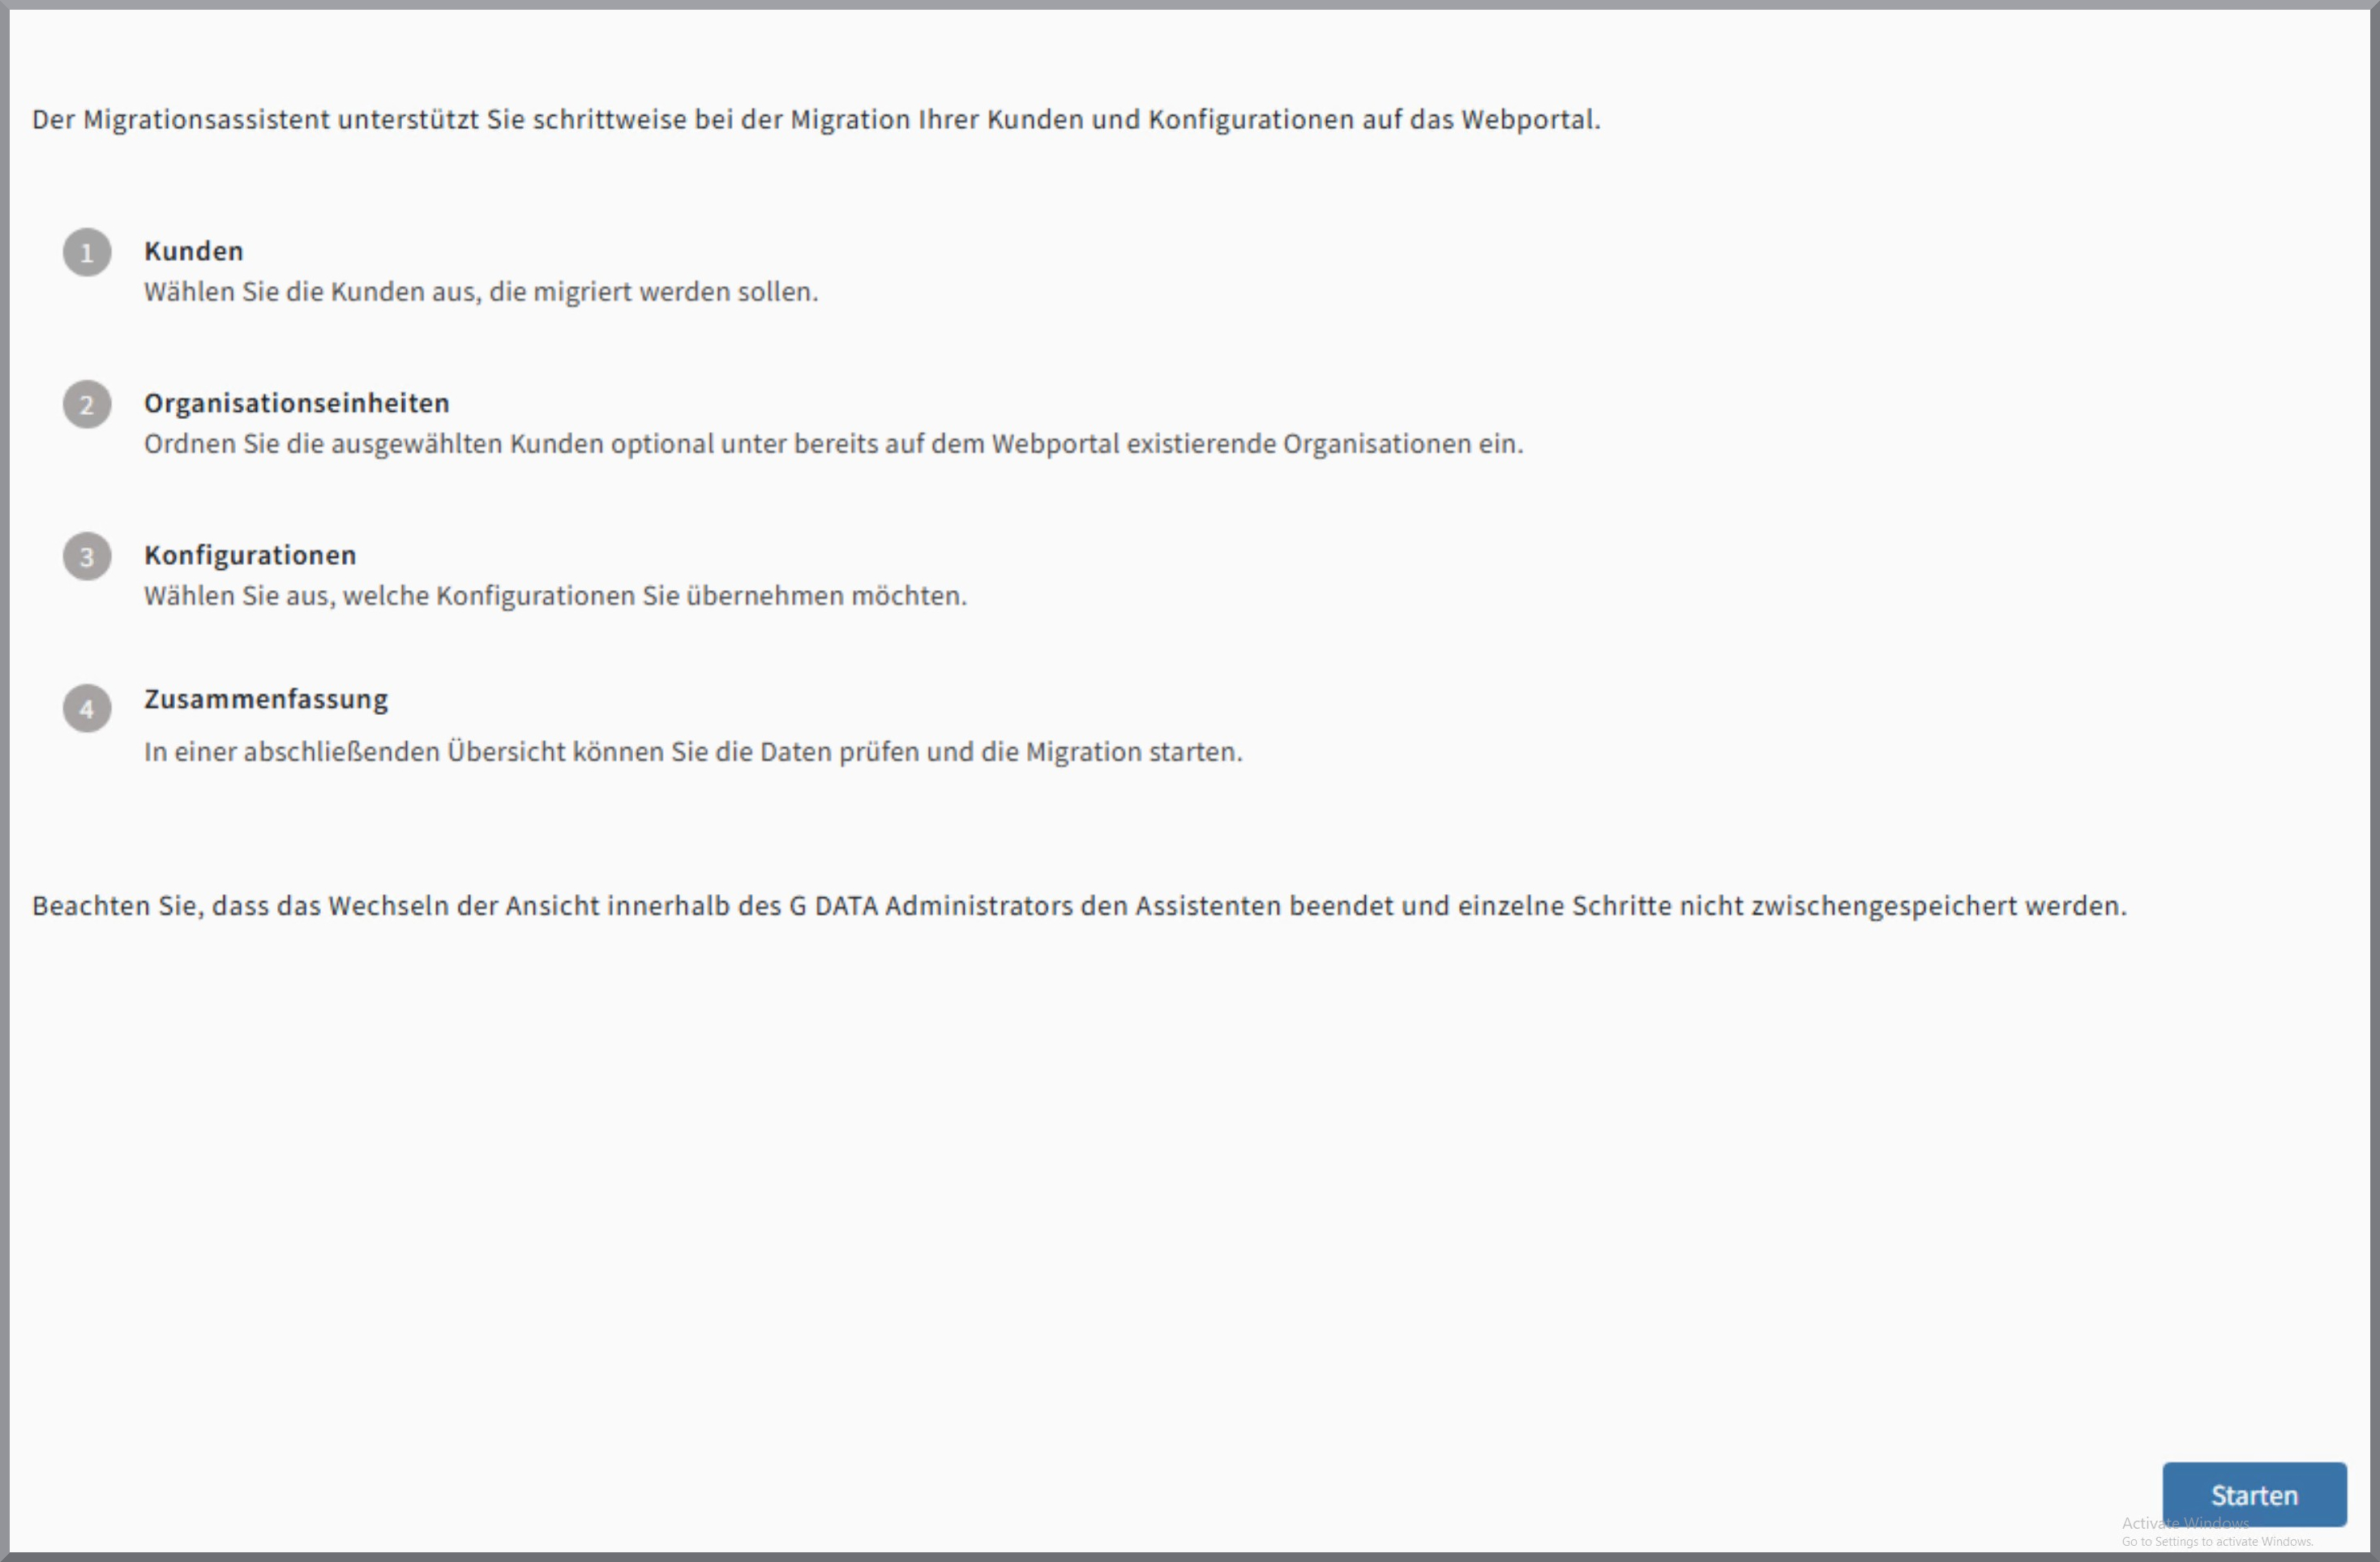
There are four steps involved in the migration process. First, select the tenants to be migrated and, optionally, assign them to existing organization units. Next, select the configuration to be migrated. The process concludes with a summary where you can perform a final review of the migration data.
Selection of tenants
First, select the tenants you want to migrate and choose the appropriate product, XDR or MXDR. All customers and endpoints that are authorized for migration are listed in this overview.
| Tenants that have already been migrated are no longer available in the selection, even though they continue to be displayed in the G DATA Administrator. Additionally, migration is only possible for endpoints supported by the G DATA Agent. You can find the system requirements for the G DATA Agent here. |
Please note that migration is only possible at the tenant level, not at lower levels. An exception to this are customers/endpoints located in folders under the "Standard" tenant. Here, all tenants located in the "Windows, Linux, Mac" folder can also be migrated.
| If you opened the wizard from a tenant’s context menu, that tenant is already selected. |
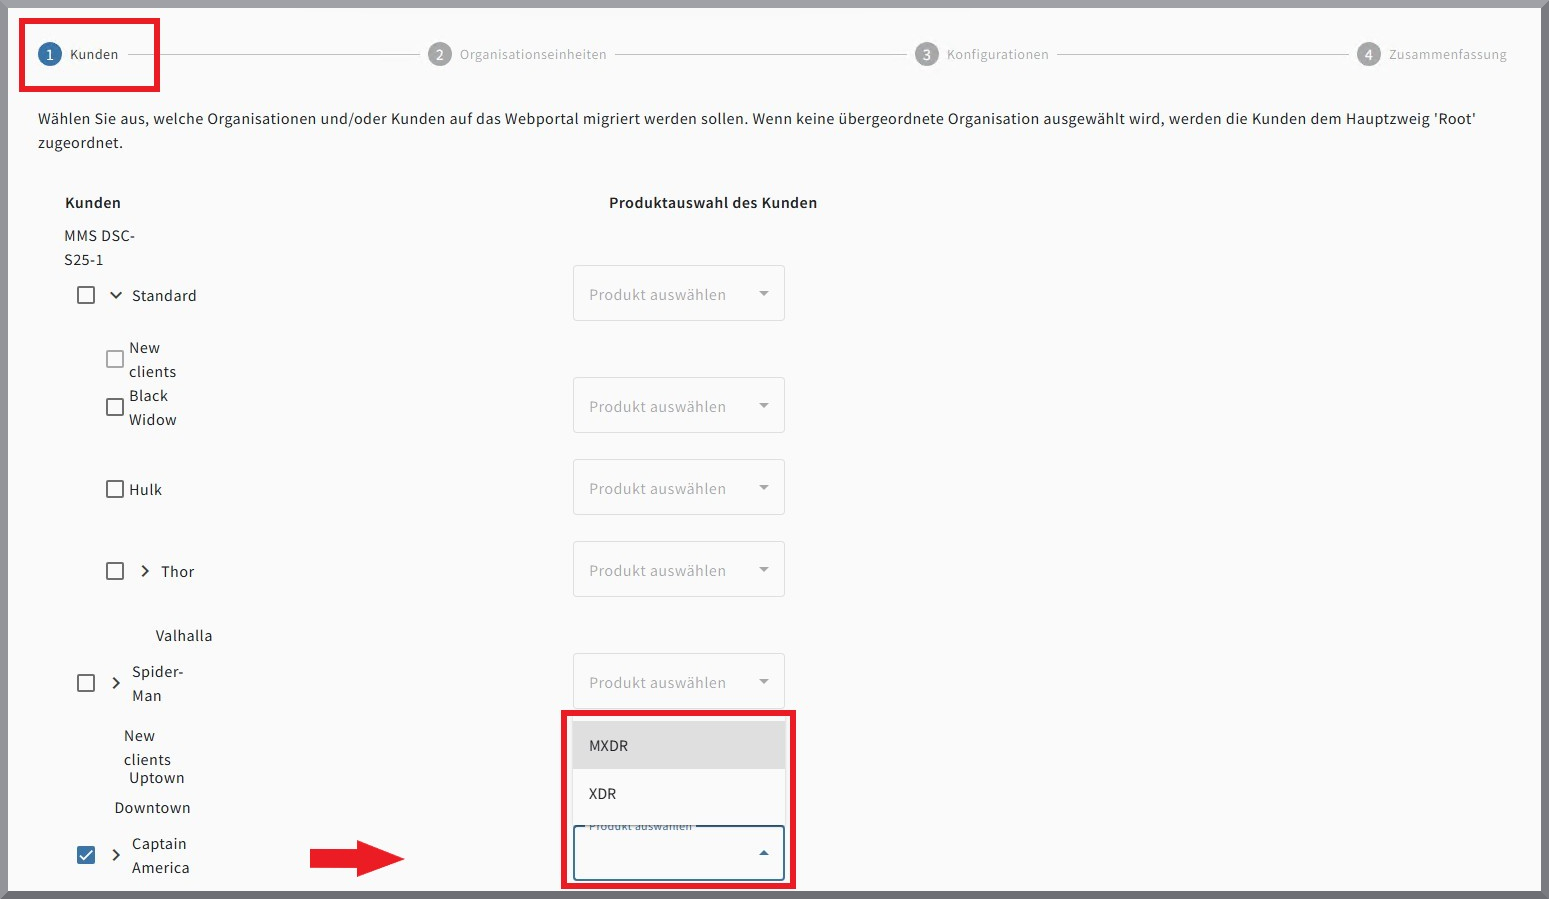
| Make sure you select the correct product for the specific tenant! |
Assignment to existing organization units
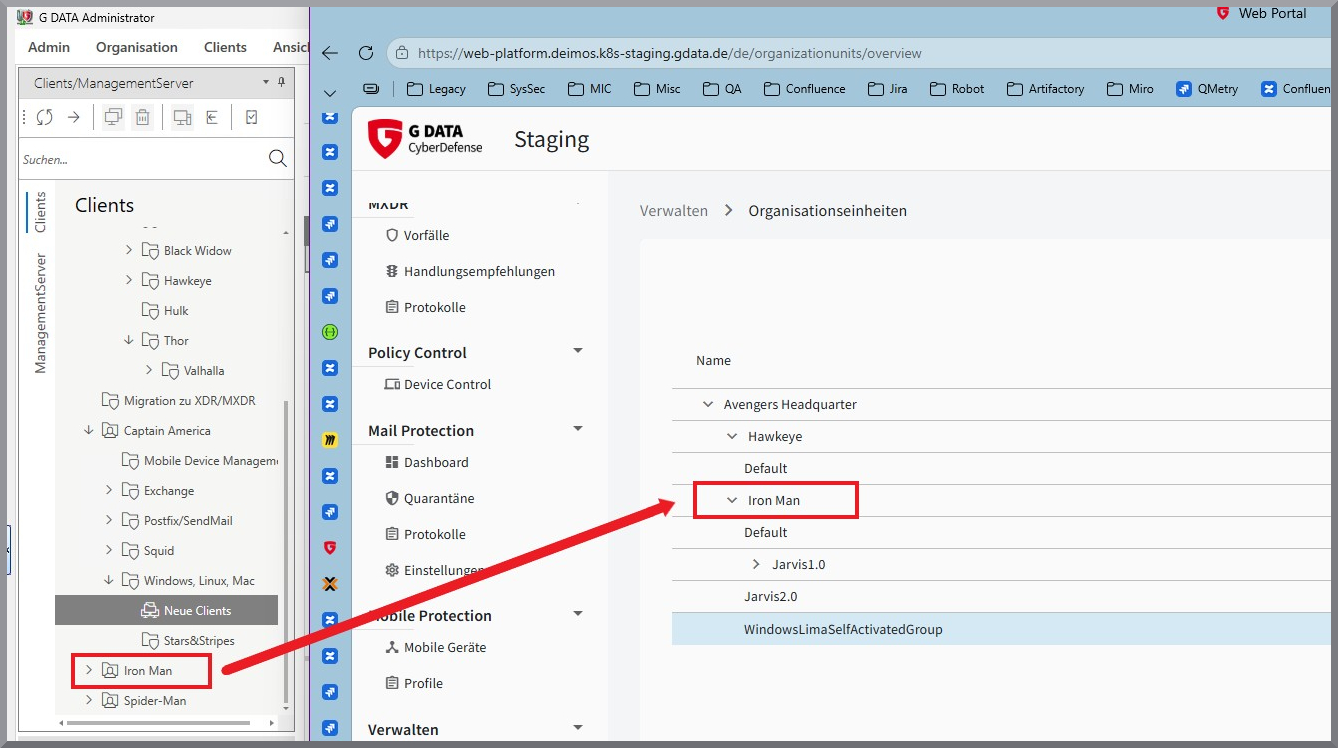
After selecting the tenants to be migrated, you can assign them to an organization unit (OU) under which they should be organized in the G DATA Web Portal. Here, you can assign the tenant to any OU that you have already created in the Web Portal.
During the migration process, a new OU with the tenant’s name is created under the selected OU.
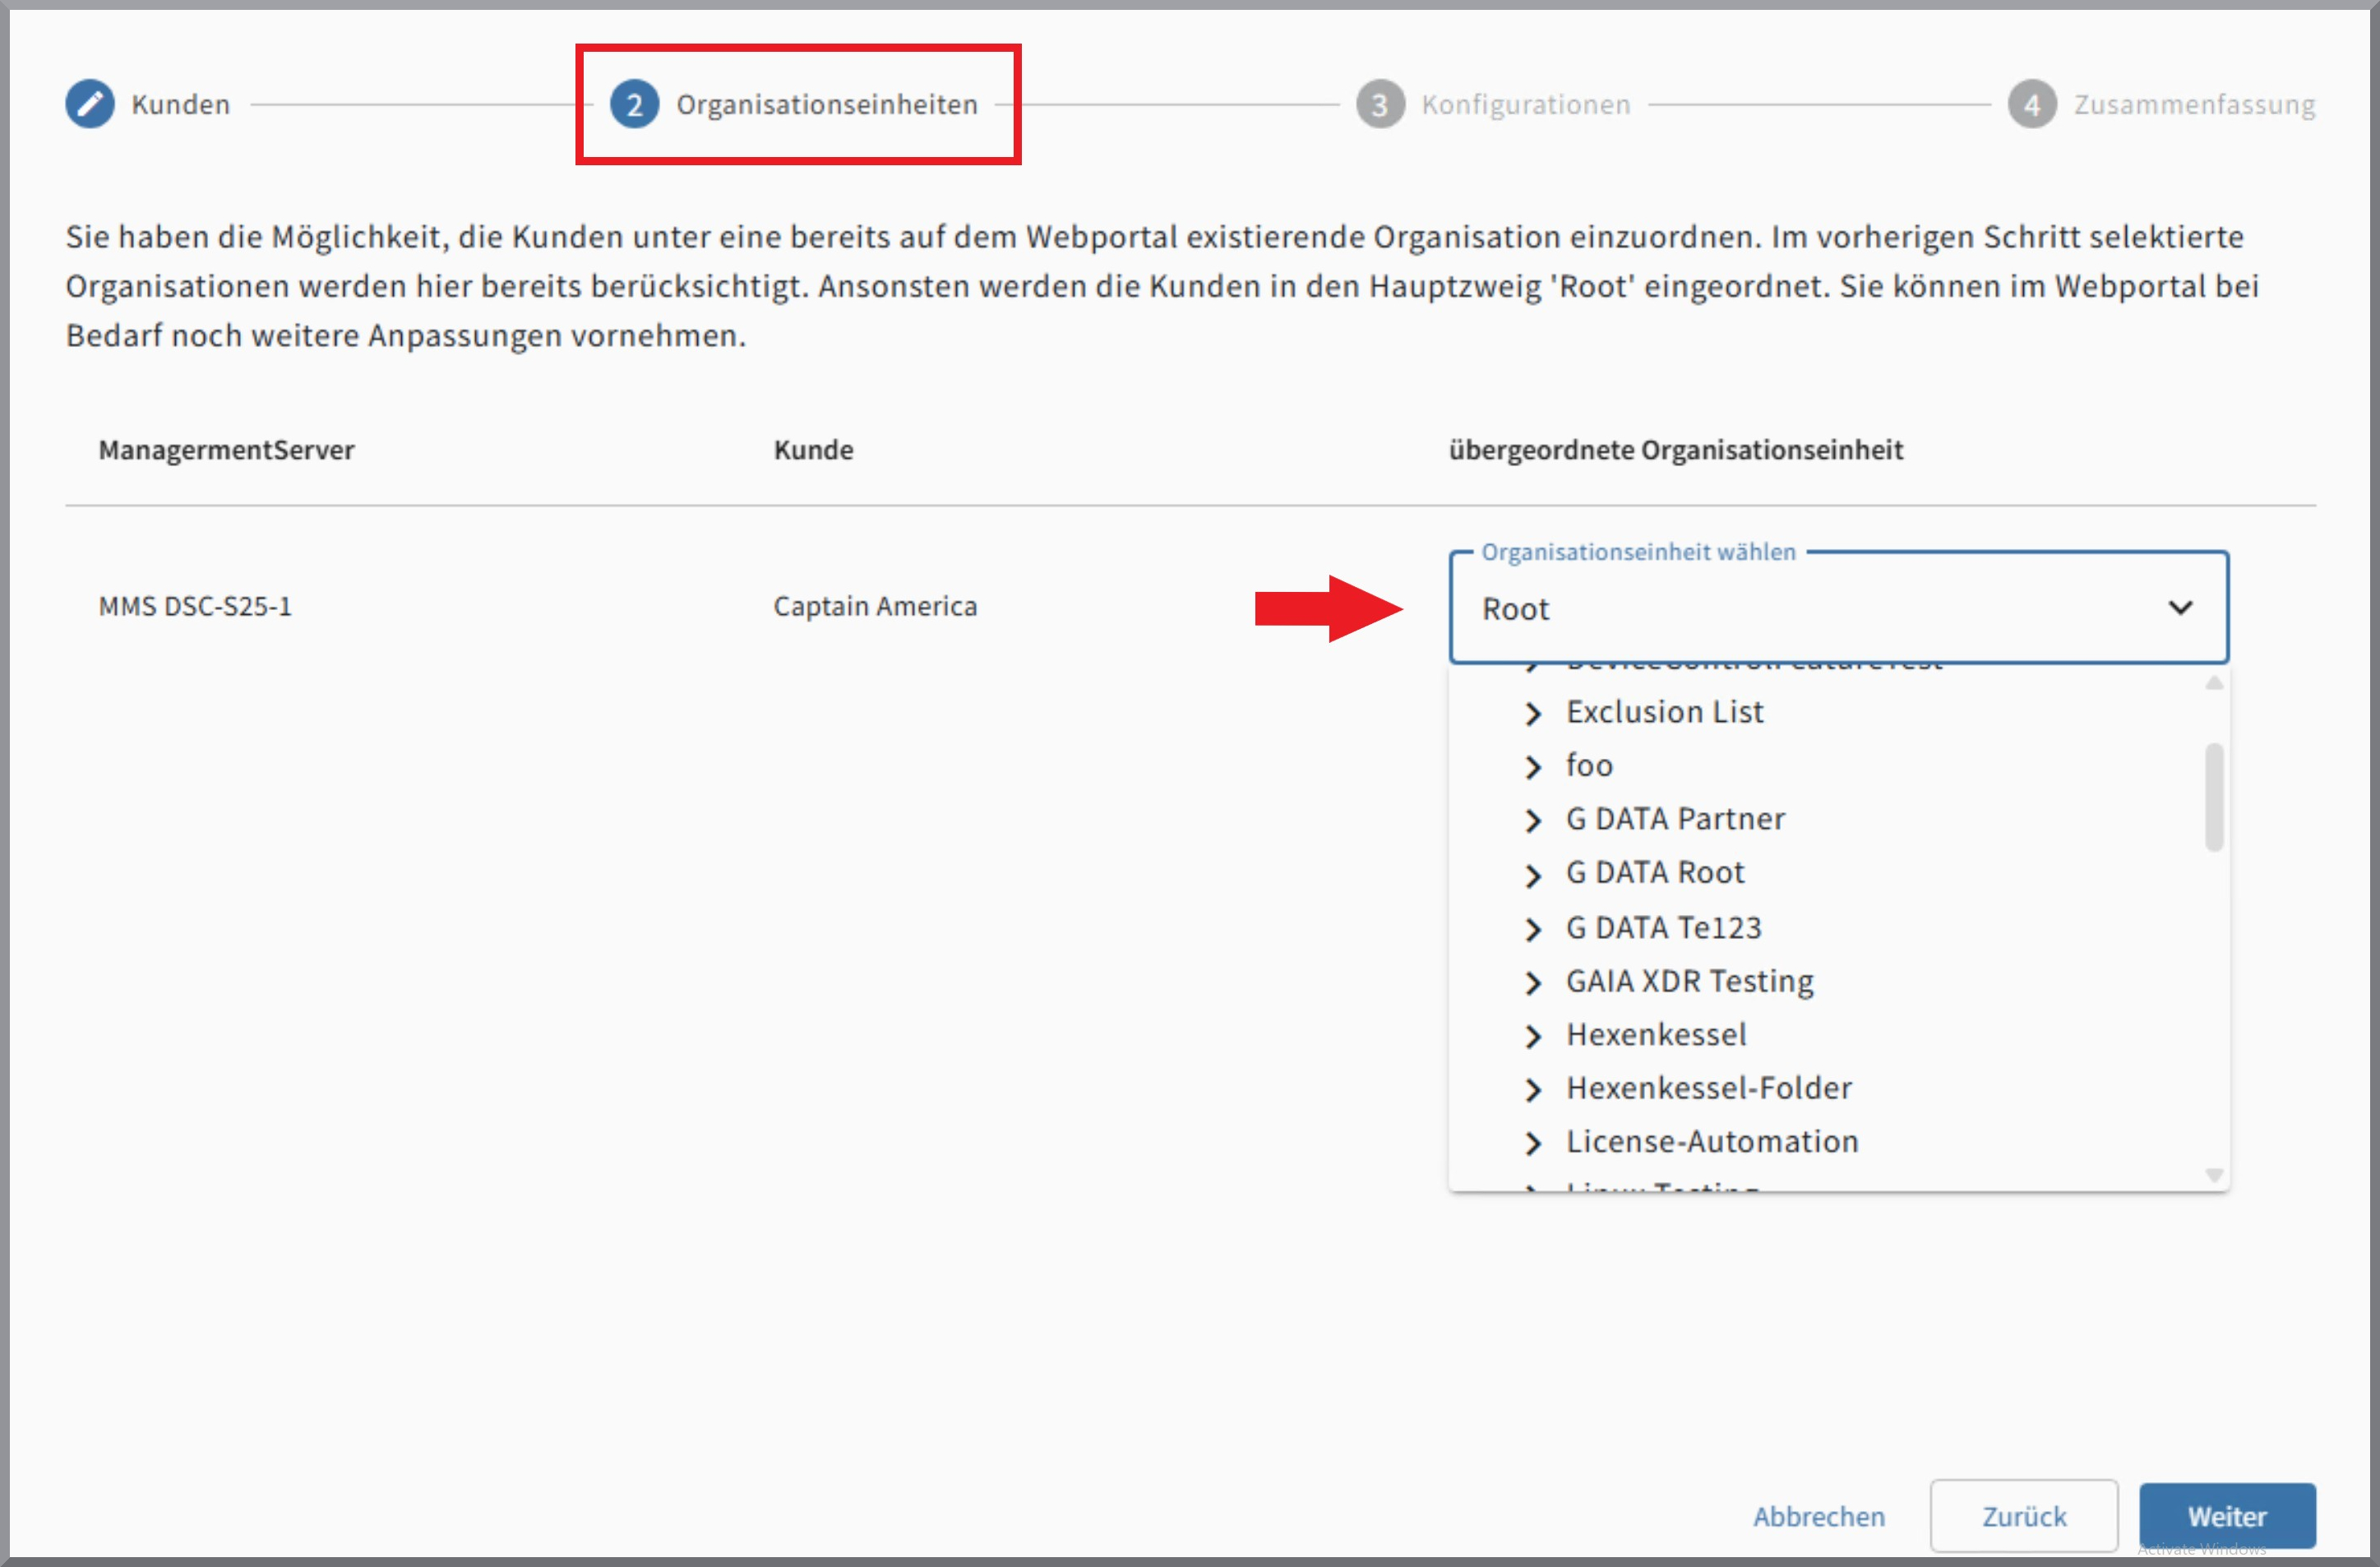
This step is optional. If you do not take any action here, all required OUs will be created automatically. You can always reassign them as needed in the Web Portal.
Configuration
If desired, certain configurations can be imported from G DATA Management Server, including any created monitor exceptions and the DeviceControl settings. "Exceptions" at this point refers to the exceptions for BEAST/Monitor.
IMPORTANT: Make sure that if you want to apply the exceptions, they are up to date and reflect the desired state!
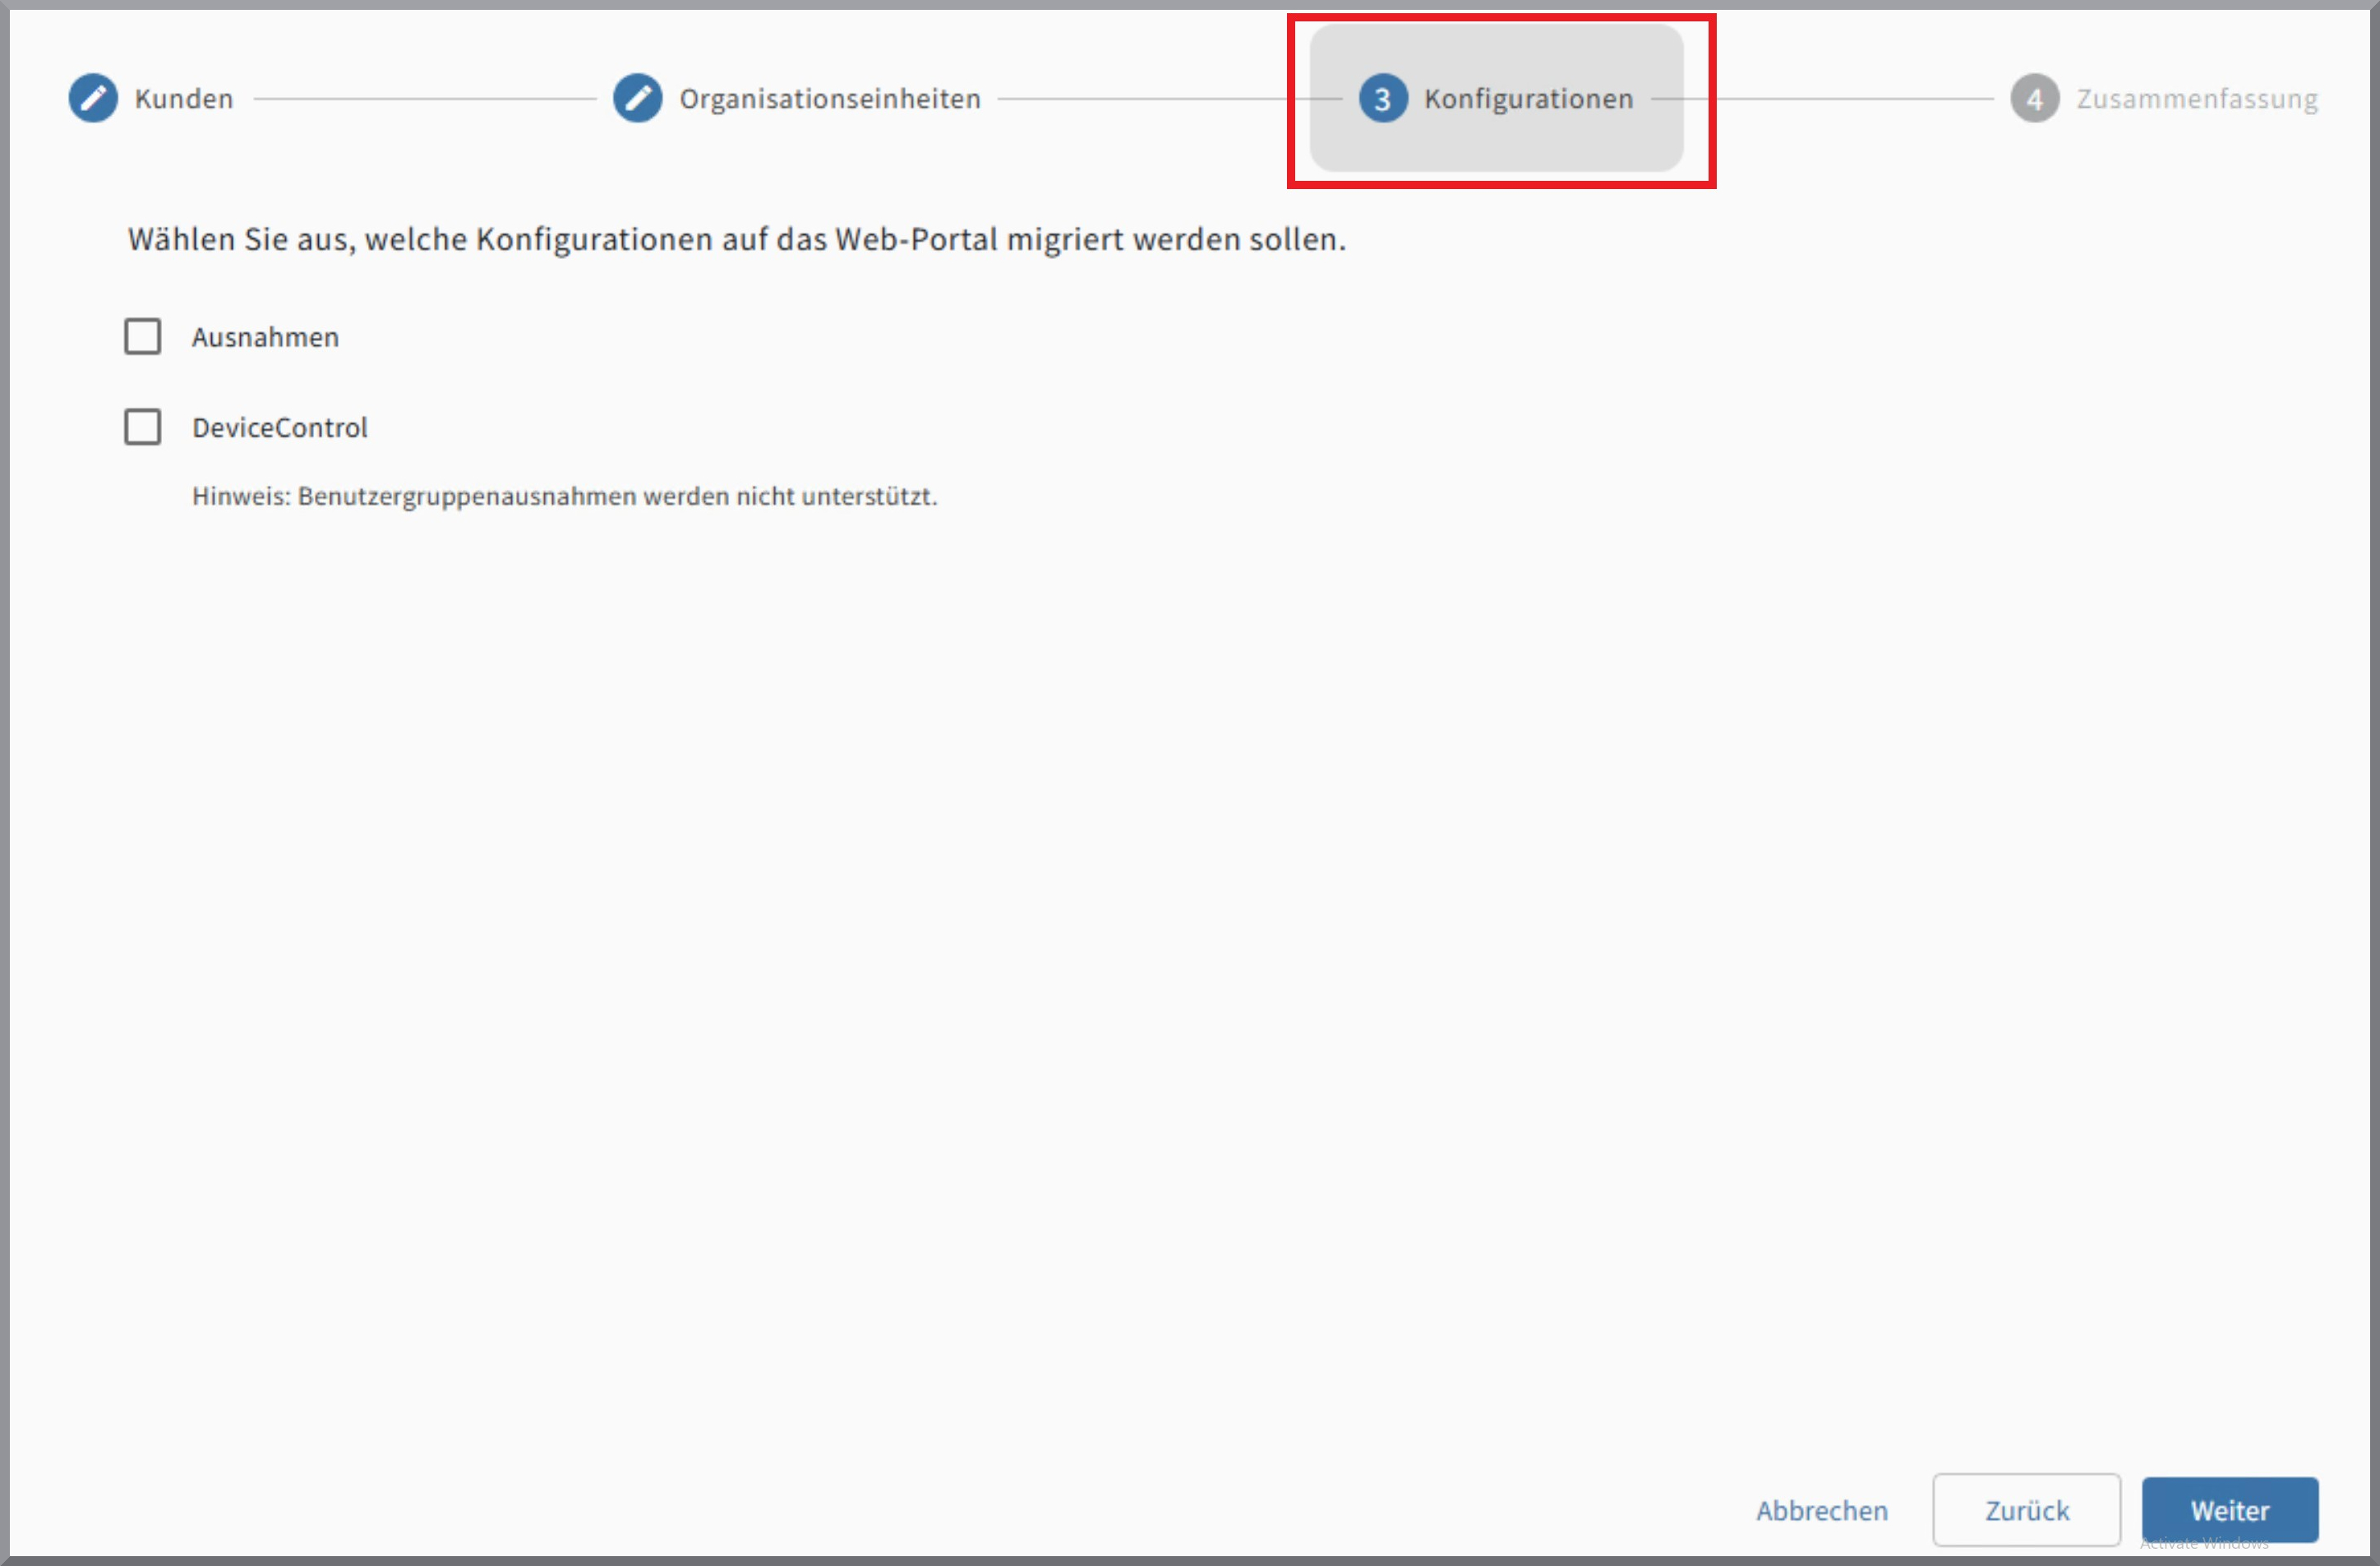
| Please note that exceptions at the user group level are not supported, as they cannot be mapped 1-to-1 in the Web Portal. |
| Taking over the configuration for DeviceControl only makes sense if you also have DeviceControl in G DATA Web Portal. If this is the case, the changes made here will be applied, and DeviceControl will be enabled on the devices. |
The configuration is the same for all tenants in the current migration process. If you want to set up different configurations for different tenants, migrate them separately.
Summary
At the end of the Migration Wizard, the data to be used for the migration is displayed once again. Here, you can see all the tenants to be migrated, the hierarchy of the organization units into which they are structured, and the assigned product.
Please check that everything has been entered correctly!

Once everything has been verified, click Start Migration to begin the actual migration of the selected tenants and clients. This process may take some time. A new browser window will open, displaying the customer management interface in G DATA Web Portal
In the background, the G DATA Security Client is automatically uninstalled and the new G DATA Agent is installed on the migrated endpoints.
| The migration process takes some time. This also means that it will take some time before the migrated tenants appear in the G DATA Web Portal and are fully available. |